2007 HYUNDAI TUCSON ESP
[x] Cancel search: ESPPage 2 of 306
A010A02A-AAT
WARRANTIES FOR YOUR HYUNDAI VEHICLE
Please consult your Owner's Handbook & Warranty Information booklet for your vehicle's specific
warranty coverage.A020A01A-AAT
RESPONSIBILITY FOR MAINTENANCE
The maintenance requirements for your new Hyundai are found in Section 5. As the owner, it is your responsibility
to see that all maintenance operations specified by the manufacturer are carried out at the appropriate intervals.
When the vehicle is used in severe driving conditions, more frequent maintenance is required for some operations.
Maintenance requirements for severe operating conditions are also included in Section 5.
Page 6 of 306
F4
A110A01A-AAT
VEHICLE DATA COLLECTION AND EVENT DATA RECORDERS
Your Hyundai vehicle is equipped with many high technology, electronically controlled systems that
help to ensure your vehicle operates properly and provides the performance that you expect. These
systems utilize computers to monitor the operation of various systems and components and help to
control their operation. These computerized system operations are wide-ranging and involve
components to reduce emissions, to continuously evaluate the readiness of the airbag and seat belt
pretensioner systems, to determine when the airbag and seat belt pre-tensioner systems should be
deployed and then to activate the deployment, and if equipped, to operate anti-lock braking, traction
control and electrical stability control to assist the driver to control the vehicle in difficult driving
situations. These systems electronically store information that is useful to service technicians when
they need to diagnose and repair these systems. Additional information is stored only when a crash
occurs that results in the deployment of the airbags or seat belt pre-tensioners. This type of data storage
is done by devices called event data recorders(EDR).
After a crash event, the airbag and seat belt pre-tensioner computer system, known as the Supplemental
Restraint System Control Module (SRSCM) or Airbag Control Unit (ACU), may record some information
about the condition of the vehicle and how it was being operated. This information consists of data
related to seat belt usage and if there was diagnostic information in the airbag or seat belt systems
at the time that a crash occurred, and if the ACU sensed that a crash of sufficient severity occurred to
require seat belt pre-tensioner or airbag deployment.
To retrieve this information, special equipment is needed and access to the vehicle or the device that
stores the data is required. Hyundai will not access information about a crash event or share it with
others except:
o in response to an official request of police or similar government office, or
o with the consent of the vehicle owner or, if the vehicle is leased, with the consent of the lessee, or
o as part of Hyundai’s defense of litigation, or
o as required by law.
Page 16 of 306
1FEATURES OF YOUR HYUNDAI4
B030C01E-1
DOOR LOCKS!
B040A01A-AAT B030C01JM-AAT
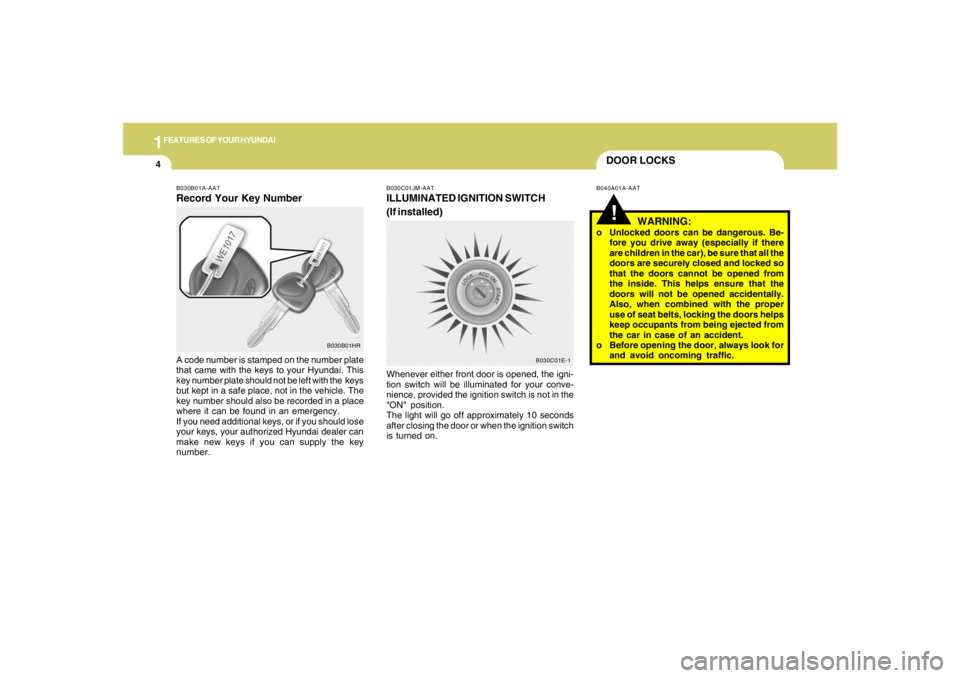
ILLUMINATED IGNITION SWITCH
(If installed)Whenever either front door is opened, the igni-
tion switch will be illuminated for your conve-
nience, provided the ignition switch is not in the
"ON" position.
The light will go off approximately 10 seconds
after closing the door or when the ignition switch
is turned on.
WARNING:
o Unlocked doors can be dangerous. Be-
fore you drive away (especially if there
are children in the car), be sure that all the
doors are securely closed and locked so
that the doors cannot be opened from
the inside. This helps ensure that the
doors will not be opened accidentally.
Also, when combined with the proper
use of seat belts, locking the doors helps
keep occupants from being ejected from
the car in case of an accident.
o Before opening the door, always look for
and avoid oncoming traffic.
B030B01A-AATRecord Your Key NumberA code number is stamped on the number plate
that came with the keys to your Hyundai. This
key number plate should not be left with the keys
but kept in a safe place, not in the vehicle. The
key number should also be recorded in a place
where it can be found in an emergency.
If you need additional keys, or if you should lose
your keys, your authorized Hyundai dealer can
make new keys if you can supply the key
number.
B030B01HR
Page 20 of 306
1FEATURES OF YOUR HYUNDAI8
B070B01JM
UNLOCK LOCK
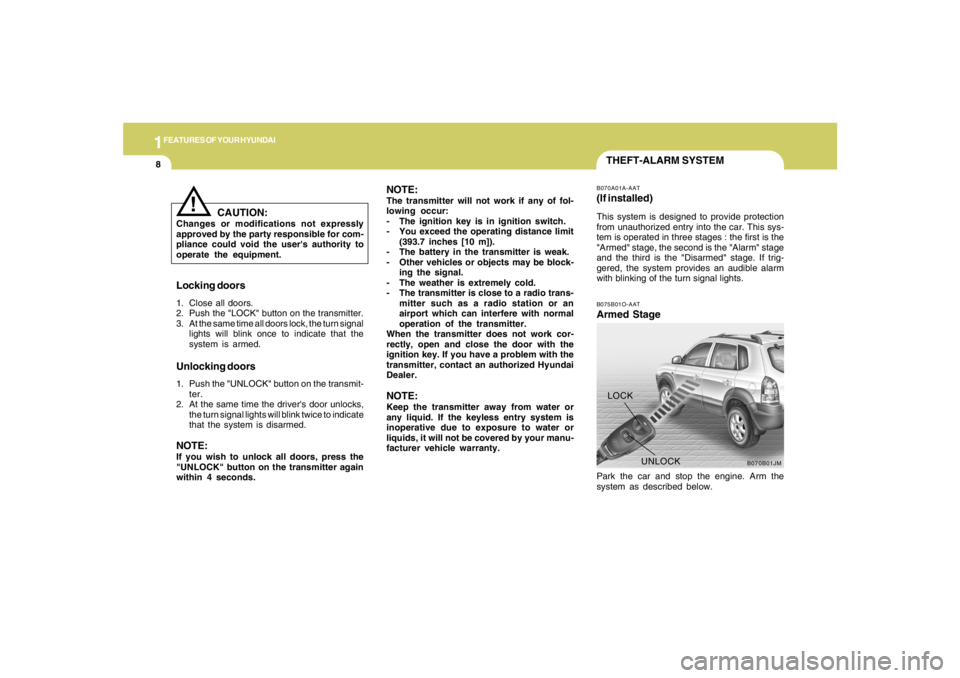
THEFT-ALARM SYSTEMB075B01O-AATArmed StagePark the car and stop the engine. Arm the
system as described below.B070A01A-AAT(If installed)This system is designed to provide protection
from unauthorized entry into the car. This sys-
tem is operated in three stages : the first is the
"Armed" stage, the second is the "Alarm" stage
and the third is the "Disarmed" stage. If trig-
gered, the system provides an audible alarm
with blinking of the turn signal lights.
Locking doors1. Close all doors.
2. Push the "LOCK" button on the transmitter.
3. At the same time all doors lock, the turn signal
lights will blink once to indicate that the
system is armed.Unlocking doors1. Push the "UNLOCK" button on the transmit-
ter.
2. At the same time the driver's door unlocks,
the turn signal lights will blink twice to indicate
that the system is disarmed.NOTE:If you wish to unlock all doors, press the
"UNLOCK" button on the transmitter again
within 4 seconds.
CAUTION:
Changes or modifications not expressly
approved by the party responsible for com-
pliance could void the user's authority to
operate the equipment.
!
NOTE:The transmitter will not work if any of fol-
lowing occur:
- The ignition key is in ignition switch.
- You exceed the operating distance limit
(393.7 inches [10 m]).
- The battery in the transmitter is weak.
- Other vehicles or objects may be block-
ing the signal.
- The weather is extremely cold.
- The transmitter is close to a radio trans-
mitter such as a radio station or an
airport which can interfere with normal
operation of the transmitter.
When the transmitter does not work cor-
rectly, open and close the door with the
ignition key. If you have a problem with the
transmitter, contact an authorized Hyundai
Dealer.NOTE:Keep the transmitter away from water or
any liquid. If the keyless entry system is
inoperative due to exposure to water or
liquids, it will not be covered by your manu-
facturer vehicle warranty.
Page 38 of 306
1FEATURES OF YOUR HYUNDAI26
B230C07O-AATInstalling a Child Restraint Seat with the
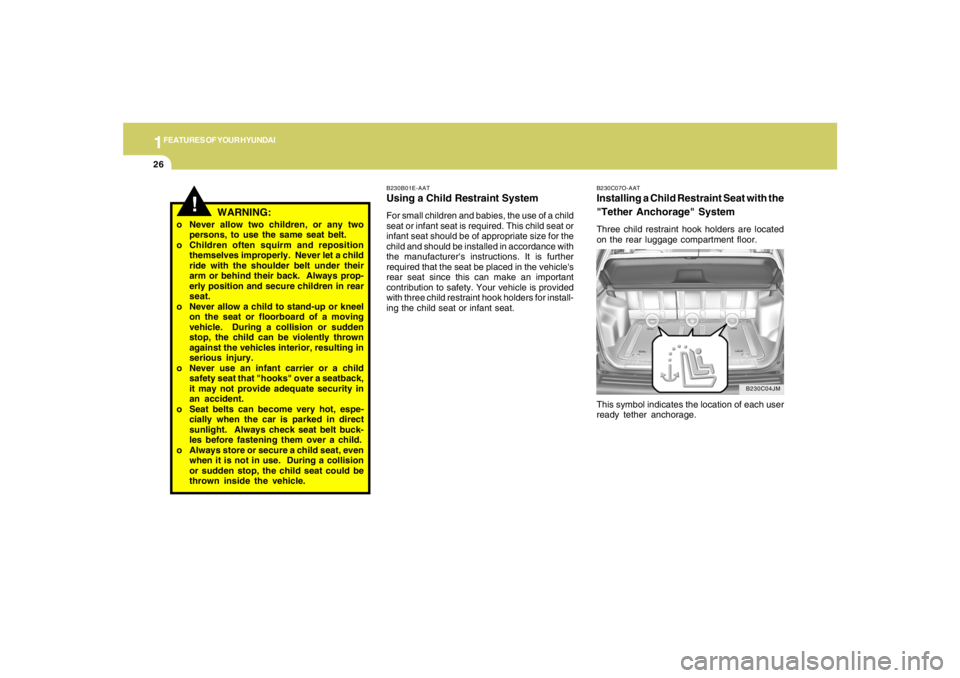
"Tether Anchorage" SystemThree child restraint hook holders are located
on the rear luggage compartment floor.
This symbol indicates the location of each user
ready tether anchorage.
B230C04JM B230B01E-AAT
Using a Child Restraint SystemFor small children and babies, the use of a child
seat or infant seat is required. This child seat or
infant seat should be of appropriate size for the
child and should be installed in accordance with
the manufacturer's instructions. It is further
required that the seat be placed in the vehicle's
rear seat since this can make an important
contribution to safety. Your vehicle is provided
with three child restraint hook holders for install-
ing the child seat or infant seat.
!
o Never allow two children, or any two
persons, to use the same seat belt.
o Children often squirm and reposition
themselves improperly. Never let a child
ride with the shoulder belt under their
arm or behind their back. Always prop-
erly position and secure children in rear
seat.
o Never allow a child to stand-up or kneel
on the seat or floorboard of a moving
vehicle. During a collision or sudden
stop, the child can be violently thrown
against the vehicles interior, resulting in
serious injury.
o Never use an infant carrier or a child
safety seat that "hooks" over a seatback,
it may not provide adequate security in
an accident.
o Seat belts can become very hot, espe-
cially when the car is parked in direct
sunlight. Always check seat belt buck-
les before fastening them over a child.
o Always store or secure a child seat, even
when it is not in use. During a collision
or sudden stop, the child seat could be
thrown inside the vehicle.
WARNING:
Page 84 of 306

1FEATURES OF YOUR HYUNDAI72
HJM2104
!
WARNING:
Be careful when judging the size or dis-
tance of any object seen in the passenger
side rear view mirror. It is a convex mirror
with a curved surface. Any objects seen in
this mirror are closer than they appear.
CAUTION:
o Do not operate the switch continuously
for an unnecessary length of time.
o Scraping ice from the mirror face could
cause permanent damage. To remove
any ice, use a sponge, soft cloth or
approved de-icer.
!
B510D01Y-AATOUTSIDE REARVIEW MIRROR HEATER
(If installed)The outside rearview mirror heater is actuated
in connection with the rear window defroster. To
heat the outside rearview mirror glass, push in
the switch for the rear window defroster. The
rearview mirror glass will be heated for defrost-
ing or defogging and will give you improved rear
vision in inclement weather conditions. Push the
switch again to turn the heater off. The outside
rearview mirror heater automatically turns itself
off after 15 minutes. The outside rearview mirrors can be adjusted
to your preferred rear vision, both directly be-
hind the vehicle, and to the rear of the left and
right sides.
The remote control outside rearview mirror
switch controls the adjustments for both right
and left outside mirrors.
To adjust the position of either mirror:1. Move the selecting switch to the right or left
to activate the adjustable mechanism for the
corresponding door mirror.
2. Adjust mirror angle by depressing the appro-
priate perimeter switch as illustrated.B510B01Y-AATElectric Type (If installed)
HJM2073
Page 120 of 306
1FEATURES OF YOUR HYUNDAI
108
K260B01JM-GAT1. POWER ON-OFF Control KnobThe radio unit may be operated when the ignition
key is in the "ACC" or "ON" position. Press the
knob to switch the power on. The LCD shows
the radio frequency in the radio mode or the CD
track indicator in the CD mode. To switch the
power off, press the knob again.VOLUME ControlRotate the knob clockwise to increase the
volume and turn the knob counterclockwise to
reduce the volume.MODE ControlAfter pressing the MODE select button, rotate
the knob clockwise or counter- clockwise for
the desired tone quality.2. TUNE (Manual) Select ButtonPress the ( ) side or ( ) side to increase or to
decrease the frequency. Press either button
and hold down to continuously scroll. Release
button once the desired station is reached.
SEEK Operation (Automatic Channel
Selection)Press the TUNE select button for 1 sec or more.
Releasing it will automatically tune to the next
available station with a beep sound.
When the ( ) side is pressed longer than 1
second, releasing will automatically tune to the
next higher frequency and when the ( ) side is
pressed longer than 1 second, releasing will
automatically tune to the next lower frequency.3. PRESET STATION SELECT
ButtonSix (6) stations for AM, FM1 or FM2 respec-
tively can be preset in the electronic memory
circuit on this unit.HOW TO PRESET STATIONSSix AM and twelve FM stations may be pro-
grammed into the memory of the radio. Then, by
simply pressing the band select button and/or
one of the six station select buttons, you may
recall any of these stations instantly. To pro-
gram the stations, follow these steps:o Press band selector to set the band for AM,
FM1 or FM2.
o Select the desired station to be stored by
seek, scan or manual tuning.
o Determine the preset station select button
you wish to use to access that station.
o Press the station select button for more than
two seconds. A select button indicator will
show in the display indicating which select
button you have depressed. The frequency
display will flash after it has been stored into
the memory.
You should then release the button, and
proceed to program the next desired station.
A total of 18 stations can be programmed by
selecting one AM and two FM stations per
button.
o When completed, any preset station may be
recalled by selecting AM, FM1 or FM2 band
and the appropriate station button.
4.MODE Select ButtonPressing the MODE button changes the BASS,
TREBLE, FADER, BALANCE mode.
The mode selected is shown on the display.
After selecting the each mode, rotate the vol-
ume control knob clockwise or counterclock-
wise.
Page 126 of 306
1FEATURES OF YOUR HYUNDAI
114
!
HMP280B01TB-GAT1. POWER ON-OFF Controlo The radio unit may be operated when the
ignition key is in the "ACC" or "ON" position.
Press the button to switch the power on. The
display shows the radio frequency in the
radio mode, the tape direction indicator in the
tape mode or CD
ˆMP3 track in either the
CD
ˆMP3 mode or CD AUTO CHANGER
mode. To switch the power off, press the
button again.
o Push the FM
ˆAM, TAPE or CD
ˆMP3 to turn
on that function without pushing Power
ON
ˆOFF control knob.
VOLUME ControlRotate the knob clockwise to increase the
volume and turn the knob counterclockwise to
reduce the volume.2. BAND SelectorPressing the band selector FM
ˆAM changes
the AM, FM1 and FM2 bands. The mode se-
lected is shown on the display.
3. TUNE (Manual) Select KnobPush the TUNE select knob (JOY STICK)
upwards or downwards to increase or de-
crease the frequency. Release the knob when
the station is selected.SEEK Operation
(Automatic Channel Selection)Push the TUNE select knob (JOY STICK) to the
right or left, the frequency will be automatically
tuned to the next higher or lower available
station.
4. SCANWhen the scan button is pressed, the frequency
will increase and the receivable stations will be
tuned in one after another, receiving each sta-
tion for 5 seconds. To stop scanning, press the
scan button again.5. Best Station Memory (BSM)When the BSM button is pressed the six chan-
nels from the highest field intensity are selected
next and stored in memory. The stations se-
lected are stored in the sequence frequency
from the first preset key.6. PRESET STATION Select ButtonsSix (6) stations for AM, FM and FM2 respec-
tively can be preset in the electronic memory
circuit.HOW TO PRESET STATIONSSix AM and twelve FM stations may be pro-
grammed into the memory of the radio. Then, by
simply pressing the band select button and/or
one of the six station select buttons, you may
recall any of these stations instantly. To pro-
gram the stations, follow these steps:
WARNING:
Don't operate the button and joy stick switch
while driving. It can cause death or serious
injury in case of an accident.