Page 65 of 291
1
FEATURES OF YOUR HYUNDAI
51
!WARNING:
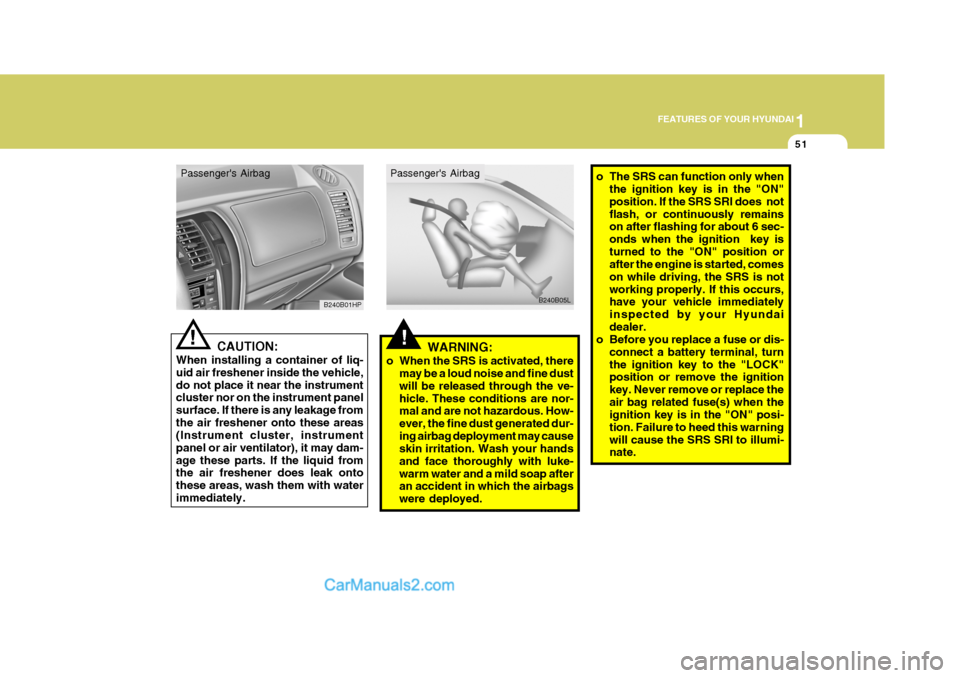
o When the SRS is activated, there may be a loud noise and fine dust will be released through the ve-hicle. These conditions are nor- mal and are not hazardous. How- ever, the fine dust generated dur-ing airbag deployment may cause skin irritation. Wash your hands and face thoroughly with luke-warm water and a mild soap after an accident in which the airbags were deployed. o The SRS can function only when
the ignition key is in the "ON"position. If the SRS SRI does notflash, or continuously remains on after flashing for about 6 sec- onds when the ignition key isturned to the "ON" position or after the engine is started, comes on while driving, the SRS is notworking properly. If this occurs, have your vehicle immediately inspected by your Hyundaidealer.
o Before you replace a fuse or dis-
connect a battery terminal, turnthe ignition key to the "LOCK" position or remove the ignition key. Never remove or replace theair bag related fuse(s) when the ignition key is in the "ON" posi- tion. Failure to heed this warningwill cause the SRS SRI to illumi- nate.! CAUTION:
When installing a container of liq- uid air freshener inside the vehicle,do not place it near the instrument cluster nor on the instrument panel surface. If there is any leakage fromthe air freshener onto these areas (Instrument cluster, instrument panel or air ventilator), it may dam-age these parts. If the liquid from the air freshener does leak onto these areas, wash them with waterimmediately. B240B01HP
B240B05L
Passenger's Airbag Passenger's Airbag
Page 87 of 291
1
FEATURES OF YOUR HYUNDAI
73MULTI-FUNCTION LIGHT SWITCH
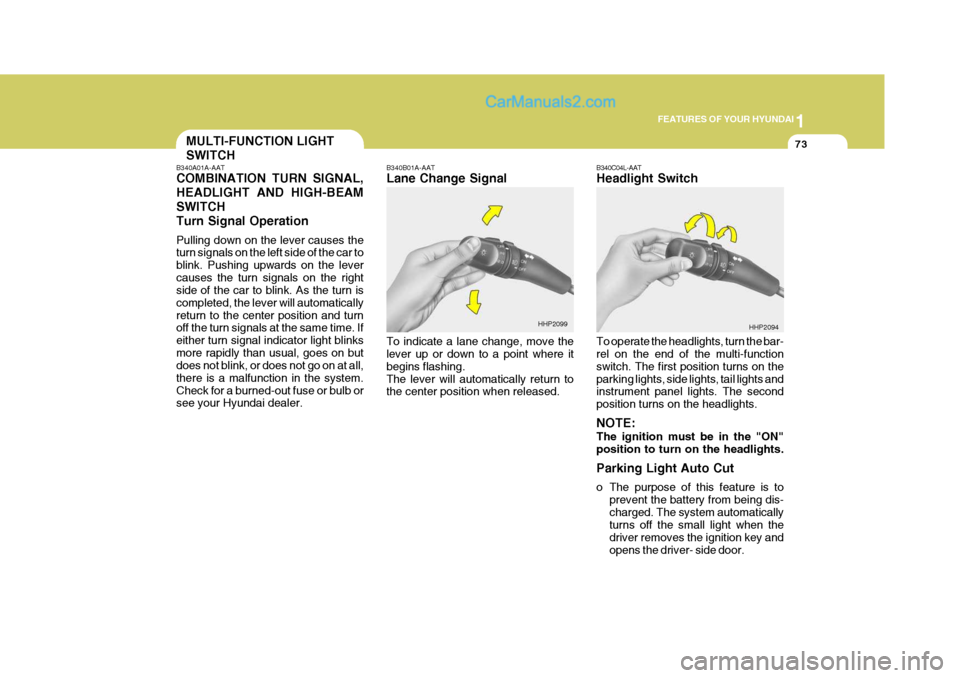
B340A01A-AAT COMBINATION TURN SIGNAL, HEADLIGHT AND HIGH-BEAMSWITCHTurn Signal Operation Pulling down on the lever causes the turn signals on the left side of the car to blink. Pushing upwards on the levercauses the turn signals on the right side of the car to blink. As the turn is completed, the lever will automaticallyreturn to the center position and turn off the turn signals at the same time. If either turn signal indicator light blinksmore rapidly than usual, goes on but does not blink, or does not go on at all, there is a malfunction in the system.Check for a burned-out fuse or bulb or see your Hyundai dealer. B340B01A-AAT Lane Change Signal To indicate a lane change, move the lever up or down to a point where it begins flashing.The lever will automatically return to the center position when released.
B340C04L-AAT Headlight Switch To operate the headlights, turn the bar- rel on the end of the multi-function switch. The first position turns on theparking lights, side lights, tail lights and instrument panel lights. The second position turns on the headlights. NOTE: The ignition must be in the "ON" position to turn on the headlights. Parking Light Auto Cut
o The purpose of this feature is to
prevent the battery from being dis- charged. The system automatically turns off the small light when the driver removes the ignition key andopens the driver- side door.
HHP2099
HHP2094
Page 224 of 291
Engine Compartment .................................................... 6-2
General Checks ........................................................... 6-5
Maintenance Precautions ............................................. 6-6
Checking the Engine Oil .............................................. 6-6
Checking and Changing the Engine Coolant..............6-10
Changing the Air Cleaner Filte r ...................................6-13
Checking the Transmission Oil (Manual)................... 6-16
Checking the Transmission Fluid (Automatic)............6-17
Checking the Brakes .................................................. 6-20
Checking the Clutch Fluid ........................................... 6-21
Air Conditioning Care .................................................. 6-22
Changing the Climate Control Air Filter .. ....................6-23
Checking and Replacing Fuses ..................................6-24
Checking The Battery ................................................. 6-27
Checking The Electric Cooling Fans ..........................6-29
Power Steering Fluid Level ......................................... 6-29
Fuel Filter ..................................................................... 6-30
Replacement of Headlight Bulbs ................................. 6-34
Headlight Aiming Adjustment ...................................... 6-35
Bulb Wattages ............................................................. 6-38
Fuse Panel D escription ............................................... 6-39
DO-IT-YOURSELF MAINTENANCE
6
6
Page 249 of 291
6 DO-IT-YOURSELF MAINTENANCE
26
4. Replace the blown fuse by pressing
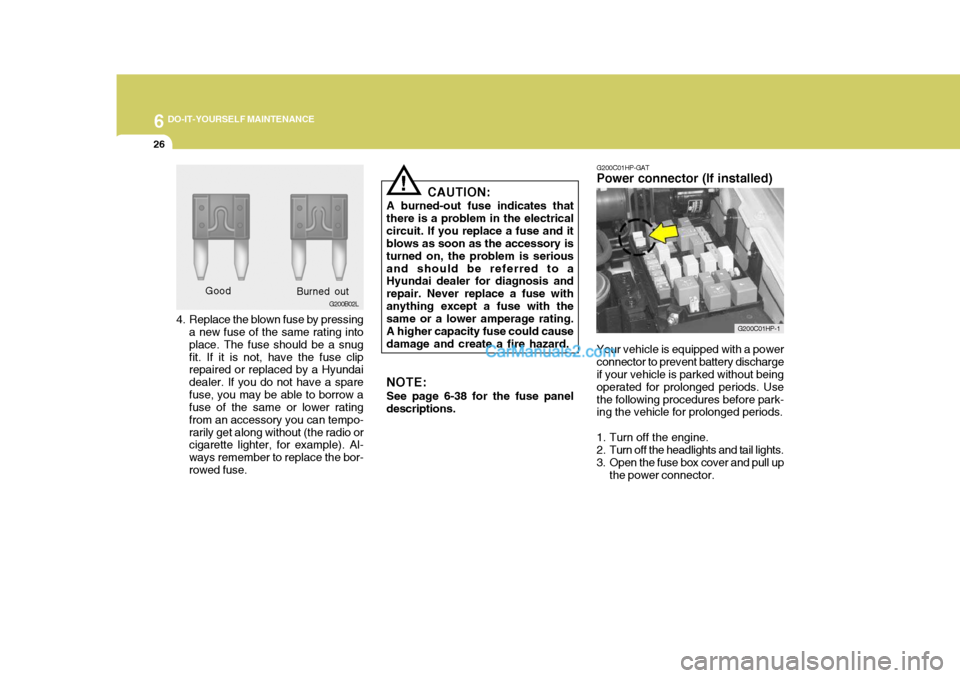
a new fuse of the same rating into place. The fuse should be a snugfit. If it is not, have the fuse clip repaired or replaced by a Hyundai dealer. If you do not have a sparefuse, you may be able to borrow a fuse of the same or lower rating from an accessory you can tempo-rarily get along without (the radio or cigarette lighter, for example). Al- ways remember to replace the bor-rowed fuse. Good
G200B02L
Burned out CAUTION:
A burned-out fuse indicates thatthere is a problem in the electricalcircuit. If you replace a fuse and it blows as soon as the accessory is turned on, the problem is seriousand should be referred to a Hyundai dealer for diagnosis and repair. Never replace a fuse withanything except a fuse with the same or a lower amperage rating. A higher capacity fuse could causedamage and create a fire hazard. NOTE: See page 6-38 for the fuse panel descriptions.
! G200C01HP-GAT
Power connector (If installed)
Your vehicle is equipped with a power connector to prevent battery discharge if your vehicle is parked without being operated for prolonged periods. Usethe following procedures before park- ing the vehicle for prolonged periods.
1. Turn off the engine.
2. Turn off the headlights and tail lights.
3. Open the fuse box cover and pull up the power connector.
G200C01HP-1
Page 250 of 291
6
DO-IT-YOURSELF MAINTENANCE
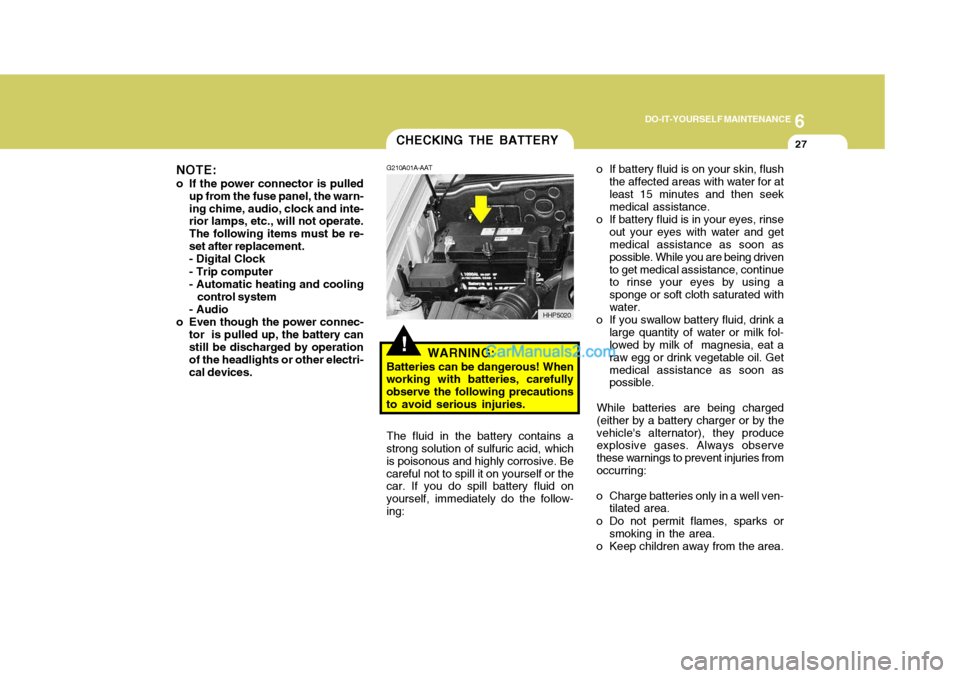
27CHECKING THE BATTERY
!
G210A01A-AAT
WARNING:
Batteries can be dangerous! When
working with batteries, carefully observe the following precautionsto avoid serious injuries. o If battery fluid is on your skin, flush
the affected areas with water for atleast 15 minutes and then seek medical assistance.
o If battery fluid is in your eyes, rinse out your eyes with water and getmedical assistance as soon as possible. While you are being drivento get medical assistance, continue to rinse your eyes by using a sponge or soft cloth saturated withwater.
o If you swallow battery fluid, drink a large quantity of water or milk fol- lowed by milk of magnesia, eat a raw egg or drink vegetable oil. Getmedical assistance as soon as possible.
While batteries are being charged (either by a battery charger or by thevehicle's alternator), they produce explosive gases. Always observe these warnings to prevent injuries fromoccurring:
o Charge batteries only in a well ven- tilated area.
o Do not permit flames, sparks or smoking in the area.
o Keep children away from the area.
The fluid in the battery contains a
strong solution of sulfuric acid, whichis poisonous and highly corrosive. Becareful not to spill it on yourself or the car. If you do spill battery fluid on yourself, immediately do the follow-ing: HHP5020
NOTE:
o If the power connector is pulled up from the fuse panel, the warn-ing chime, audio, clock and inte- rior lamps, etc., will not operate. The following items must be re-set after replacement.- Digital Clock - Trip computer
- Automatic heating and cooling
control system
- Audio
o Even though the power connec- tor is pulled up, the battery can still be discharged by operation of the headlights or other electri-cal devices.
Page 262 of 291
6
DO-IT-YOURSELF MAINTENANCE
39
NO.1
NO. 2
NO. 3
NO.4
NO.5
NO. 6
NO. 7
NO. 8
NO. 9
NO. 10
NO. 11
NO. 12
DESCRIPTION
G200C01HP-GAT
Engine Compartment (#1)
G200C01HP
Note: Not all fuse panel descriptions in this manual may be applicable to your vehicle. It is accurate at the time of printing. When you inspect the fuse box on your vehicle, refer to the fuse box label. AMPERAGES(A)
100A
120A (DIESEL)
140A (GASOLINE)
50A 30A- -
20A 10A 15A -
10A10A CIRCUIT PROTECTED
Glow Relay (COVEC-F/EGR), Air Heater Relay (2.9 CRDi)
Engine Compartment Fuse & Relay Box #2,Generator
Inner Panel Fuse Box (Fuse 1,2,3,4,5),
Engine Compartment Fuse & Relay Box #1 (Fuse 8,9),
Fuel Heater Control Module (COVEC-F/EGR)
Generator, Ignition Switch--
Engine Control Relay (Diesel Engine), Main Control Relay(Gasoline Engine)
Horn Relay
Front Fog Lamp Relay-ECM (Diesel Engine), EGR Control ModuleECM (2.9 CRDi)
FUSIBLE LINK
FUSE
FUSE PANEL DESCRIP- TION
Gasoline Engine Diesel Engine
Page 263 of 291
6 DO-IT-YOURSELF MAINTENANCE
40
Note: Not all fuse panel descriptions in this manual may be applicable to your vehicle. It is accurate at the time of printing. When you inspect the fuse box on your vehicle, refer to the fuse box label.
G200D01HP-GAT Engine Compartment (#2)
G200C02HP
Page 265 of 291
6 DO-IT-YOURSELF MAINTENANCE
42
AMPERAGES(A)50A 30A 40A 40A 30A 40A 20A-
20A 10A 15A
NO. 1
NO. 2
NO. 3
NO. 4
NO. 5
NO. 6
NO. 7
NO. 8
NO. 9
DESCRIPTION
CIRCUIT PROTECTED
Power Connector(A,B), Engine Compartment Fuse and Relay Box #2
(Fuse 28,29), Inner Panel Fuse Box(Fuse 6,7,8, 9)
Start Relay, Ignition Switch
Condenser Fan Relay,
Engine Compartment Fuse and Relay Box #2(Fuse 14,15)ABS Control Module
Power Window Relay
Tail Lamp Relay,
Engine Compartment Fuse and Relay Box #2(Fuse 11,12)ABS Control Module-
Fuel Pump Relay, ECM, Ignition Failure Sensor
A/CON, TCM, ETACM, Data Link Connector, Siren,
Immobilizer Control Module
Interior Lamp, Map Lamp, Audio, Instrument Cluster,
Front Door Edge warning Lamp
FUSIBLE LINK
NO. 30
NO. 31