Page 125 of 355
1
FEATURES OF YOUR HYUNDAI
113
!
WARNING:
OCM052014
REMOTE FUEL-FILLER LID
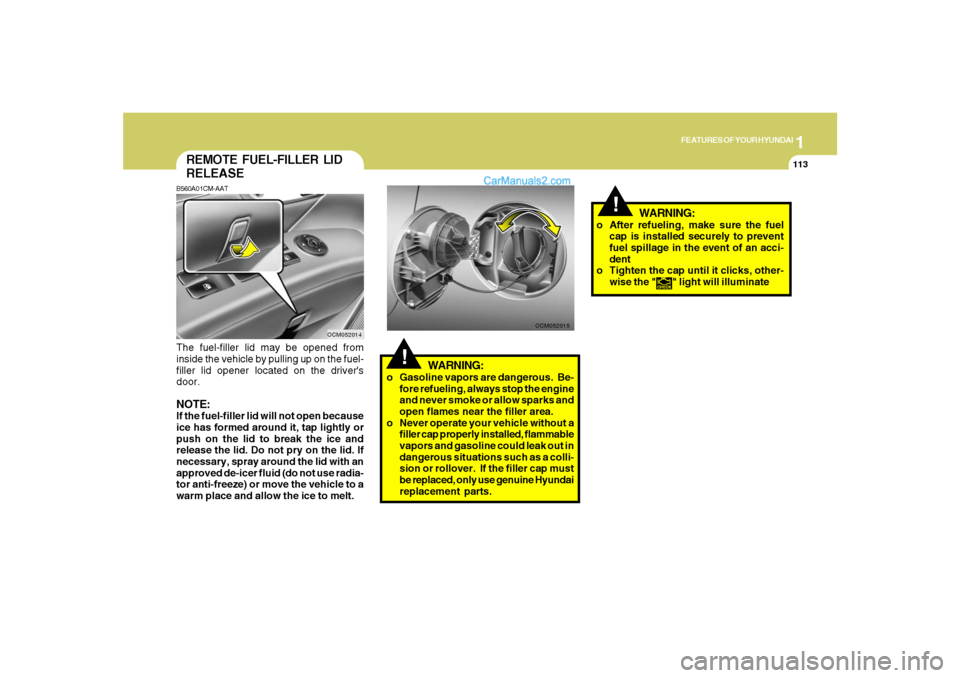
RELEASEB560A01CM-AATThe fuel-filler lid may be opened from
inside the vehicle by pulling up on the fuel-
filler lid opener located on the driver's
door.NOTE:If the fuel-filler lid will not open because
ice has formed around it, tap lightly or
push on the lid to break the ice and
release the lid. Do not pry on the lid. If
necessary, spray around the lid with an
approved de-icer fluid (do not use radia-
tor anti-freeze) or move the vehicle to a
warm place and allow the ice to melt.
OCM052015
!
WARNING:
o Gasoline vapors are dangerous. Be-
fore refueling, always stop the engine
and never smoke or allow sparks and
open flames near the filler area.
o Never operate your vehicle without a
filler cap properly installed, flammable
vapors and gasoline could leak out in
dangerous situations such as a colli-
sion or rollover. If the filler cap must
be replaced, only use genuine Hyundai
replacement parts.o After refueling, make sure the fuel
cap is installed securely to prevent
fuel spillage in the event of an acci-
dent
o Tighten the cap until it clicks, other-
wise the "
" light will illuminate
Page 126 of 355
1FEATURES OF YOUR HYUNDAI
114
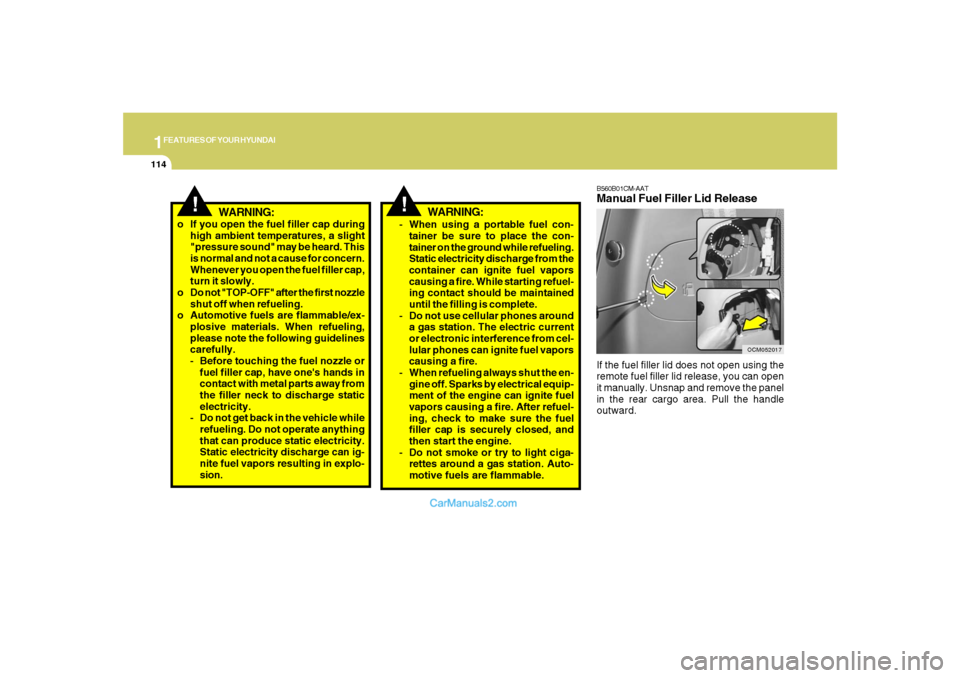
B560B01CM-AATManual Fuel Filler Lid ReleaseIf the fuel filler lid does not open using the
remote fuel filler lid release, you can open
it manually. Unsnap and remove the panel
in the rear cargo area. Pull the handle
outward.
OCM052017
!
WARNING:
o If you open the fuel filler cap during
high ambient temperatures, a slight
"pressure sound" may be heard. This
is normal and not a cause for concern.
Whenever you open the fuel filler cap,
turn it slowly.
o Do not "TOP-OFF" after the first nozzle
shut off when refueling.
o Automotive fuels are flammable/ex-
plosive materials. When refueling,
please note the following guidelines
carefully.
- Before touching the fuel nozzle or
fuel filler cap, have one's hands in
contact with metal parts away from
the filler neck to discharge static
electricity.
- Do not get back in the vehicle while
refueling. Do not operate anything
that can produce static electricity.
Static electricity discharge can ig-
nite fuel vapors resulting in explo-
sion.
- When using a portable fuel con-
tainer be sure to place the con-
tainer on the ground while refueling.
Static electricity discharge from the
container can ignite fuel vapors
causing a fire. While starting refuel-
ing contact should be maintained
until the filling is complete.
- Do not use cellular phones around
a gas station. The electric current
or electronic interference from cel-
lular phones can ignite fuel vapors
causing a fire.
- When refueling always shut the en-
gine off. Sparks by electrical equip-
ment of the engine can ignite fuel
vapors causing a fire. After refuel-
ing, check to make sure the fuel
filler cap is securely closed, and
then start the engine.
- Do not smoke or try to light ciga-
rettes around a gas station. Auto-
motive fuels are flammable.
WARNING:
!
Page 129 of 355
1
FEATURES OF YOUR HYUNDAI
117
!
WARNING:
o Do not place the sun visor in such a
manner that it obscures visibility of
the roadway, traffic or other objects.
o Do not move the sun visor out to cover
the side window if there is an item
attended to it such as a garage door
remote control, pens, air fresheners
or the like. These objects could cause
injury if the curtain air bag is deployed.
B580B01B-GATIlluminated Vanity Mirror
(If installed)Opening the lid of the vanity mirror will
automatically turn on the mirror light.
OCM052126
B580C01O
B585BA01JM-AATSun Visor ExtenderYour vehicle is equipped with sun visor
extenders that may be used when the visor
is in the side glass position.
Page 131 of 355
1
FEATURES OF YOUR HYUNDAI
119
FRONT DOOR EDGE
LIGHTB620A02S-AATA light comes on when the front door is
opened.
OCM051027L
!
CAUTION:
After adjusting the steering wheel, try
moving it up and down to make sure it is
locked in position.
!
WARNING:
Do not attempt to adjust the steering
wheel while driving as this may result in
loss of control of the vehicle and serious
injury or death.
OCM052052
HORNB610A01L-GATPress the pad on the steering wheel to
sound the horn.
Page 132 of 355
1FEATURES OF YOUR HYUNDAI
120
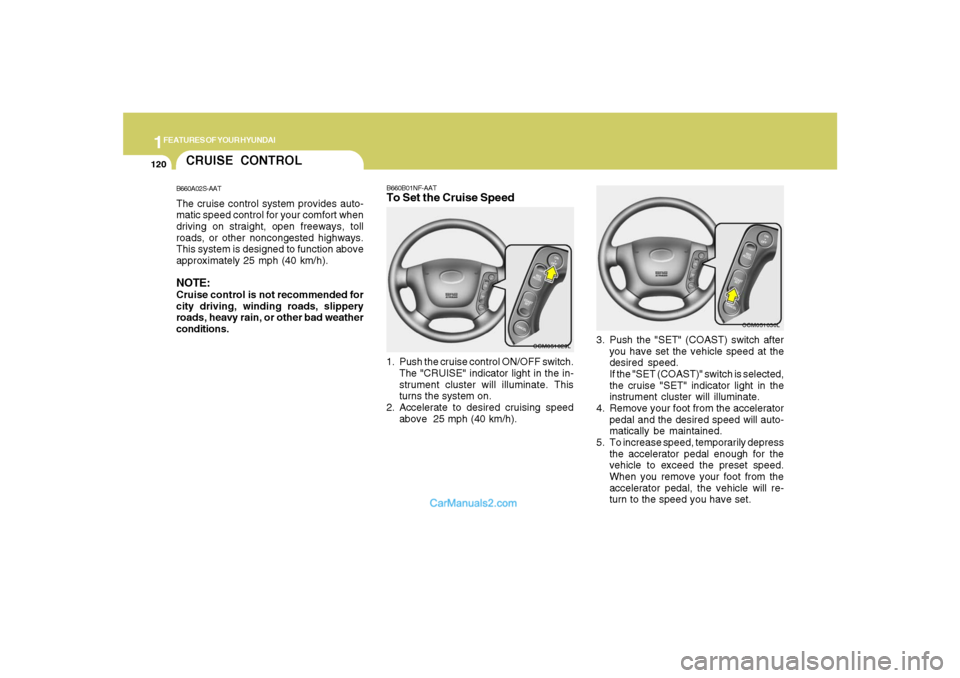
B660B01NF-AATTo Set the Cruise Speed1. Push the cruise control ON/OFF switch.
The "CRUISE" indicator light in the in-
strument cluster will illuminate. This
turns the system on.
2. Accelerate to desired cruising speed
above 25 mph (40 km/h).
OCM051029L
OCM051030L
3. Push the "SET" (COAST) switch after
you have set the vehicle speed at the
desired speed.
If the "SET (COAST)" switch is selected,
the cruise "SET" indicator light in the
instrument cluster will illuminate.
4. Remove your foot from the accelerator
pedal and the desired speed will auto-
matically be maintained.
5. To increase speed, temporarily depress
the accelerator pedal enough for the
vehicle to exceed the preset speed.
When you remove your foot from the
accelerator pedal, the vehicle will re-
turn to the speed you have set.
CRUISE CONTROLB660A02S-AATThe cruise control system provides auto-
matic speed control for your comfort when
driving on straight, open freeways, toll
roads, or other noncongested highways.
This system is designed to function above
approximately 25 mph (40 km/h).NOTE:Cruise control is not recommended for
city driving, winding roads, slippery
roads, heavy rain, or other bad weather
conditions.
Page 134 of 355
1FEATURES OF YOUR HYUNDAI
122
!
WARNING:
o Keep the cruise control ON/OFF switch
off when not using the cruise control
to avoid inadvertently setting a speed.
o Use the cruise control system only
when traveling on open highways in
good weather.
o Do not use the cruise control when it
may not be safe to keep the car at a
constant speed, for instance, driving
in heavy or varying traffic, or on slip-
pery (rainy, icy or snow-covered) or
winding roads or over 6% up-hill or
down-hill roads.
o Pay particular attention to the driving
conditions whenever using the cruise
control system.
o During cruise-speed driving of a
manual transaxle vehicle, do not shift
into neutral without depressing the
clutch pedal, since the engine will be
overrevved. If this happens, depress
the clutch pedal or release the cruise
control ON/OFF switch.
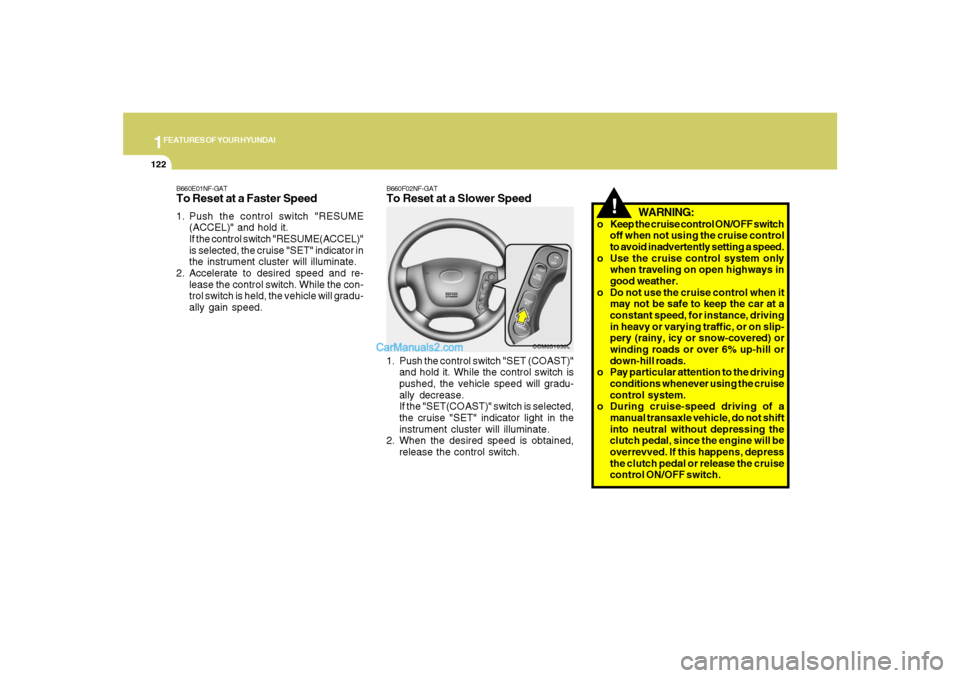
B660F02NF-GATTo Reset at a Slower Speed1. Push the control switch "SET (COAST)"
and hold it. While the control switch is
pushed, the vehicle speed will gradu-
ally decrease.
If the "SET(COAST)" switch is selected,
the cruise "SET" indicator light in the
instrument cluster will illuminate.
2. When the desired speed is obtained,
release the control switch.
OCM051030L
B660E01NF-GATTo Reset at a Faster Speed1. Push the control switch "RESUME
(ACCEL)" and hold it.
If the control switch "RESUME(ACCEL)"
is selected, the cruise "SET" indicator in
the instrument cluster will illuminate.
2. Accelerate to desired speed and re-
lease the control switch. While the con-
trol switch is held, the vehicle will gradu-
ally gain speed.
Page 138 of 355
1FEATURES OF YOUR HYUNDAI
126
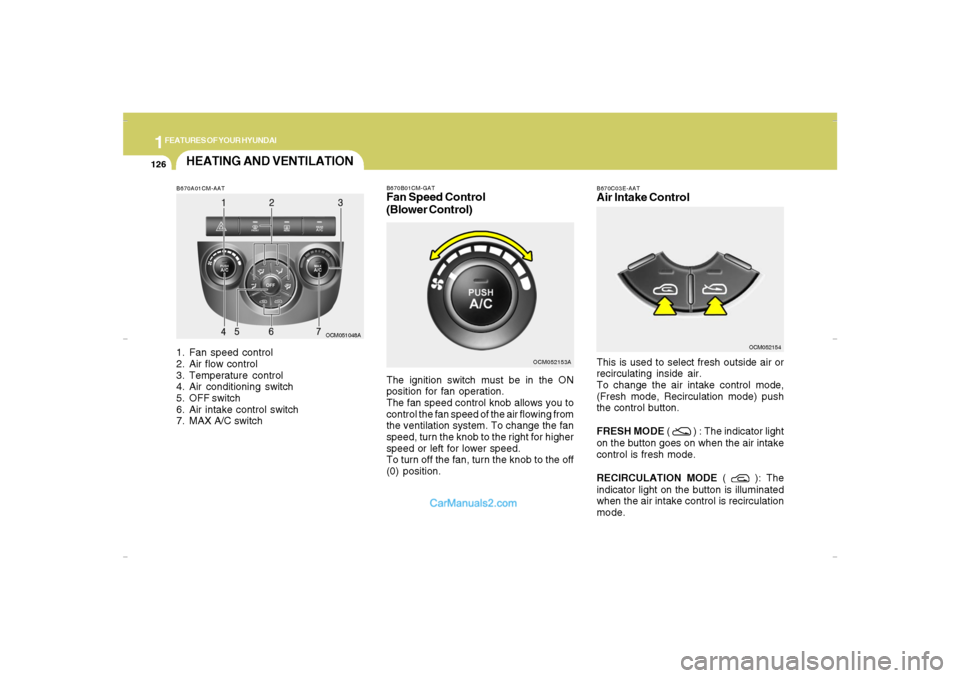
B670A01CM-AAT1. Fan speed control
2. Air flow control
3. Temperature control
4. Air conditioning switch
5. OFF switch
6. Air intake control switch
7. MAX A/C switch
OCM051048A
HEATING AND VENTILATION
B670C03E-AATAir Intake ControlThis is used to select fresh outside air or
recirculating inside air.
To change the air intake control mode,
(Fresh mode, Recirculation mode) push
the control button.
FRESH MODE (
) : The indicator light
on the button goes on when the air intake
control is fresh mode.
RECIRCULATION MODE (
): The
indicator light on the button is illuminated
when the air intake control is recirculation
mode.OCM052154
OCM052153A B670B01CM-GAT
Fan Speed Control
(Blower Control)The ignition switch must be in the ON
position for fan operation.
The fan speed control knob allows you to
control the fan speed of the air flowing from
the ventilation system. To change the fan
speed, turn the knob to the right for higher
speed or left for lower speed.
To turn off the fan, turn the knob to the off
(0) position.
Cmhma-1b.p653/20/2006, 4:59 PM 126
Page 144 of 355
1FEATURES OF YOUR HYUNDAI
132
B740C01S-AATDehumidified HeatingFor dehumidified heating:
o Turn on the fan control switch.
o Turn on the air conditioning switch. The
air conditioning indicator light should
come on at the same time.
o Set the air intake control to the "Fresh"
mode (
).
o Set the air flow control to the "Face" (
).
o Adjust the fan control to the desired
speed.
o For more rapid action, set the fan at one
of the higher speeds.
o Adjust the temperature control to pro-
vide the desired amount of warmth.
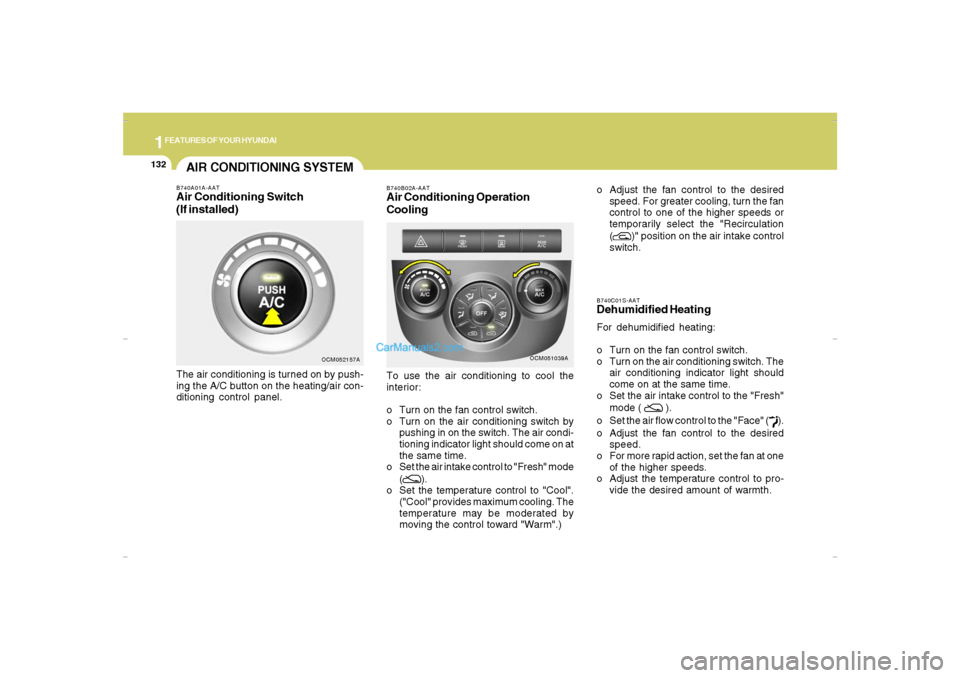
AIR CONDITIONING SYSTEMB740A01A-AATAir Conditioning Switch
(If installed)The air conditioning is turned on by push-
ing the A/C button on the heating/air con-
ditioning control panel.
OCM052157A
OCM051039A B740B02A-AAT
Air Conditioning Operation
CoolingTo use the air conditioning to cool the
interior:
o Turn on the fan control switch.
o Turn on the air conditioning switch by
pushing in on the switch. The air condi-
tioning indicator light should come on at
the same time.
o Set the air intake control to "Fresh" mode
(
).
o Set the temperature control to "Cool".
("Cool" provides maximum cooling. The
temperature may be moderated by
moving the control toward "Warm".)o Adjust the fan control to the desired
speed. For greater cooling, turn the fan
control to one of the higher speeds or
temporarily select the "Recirculation
(
)" position on the air intake control
switch.
Cmhma-1b.p653/20/2006, 4:59 PM 132