Page 102 of 355

1FEATURES OF YOUR HYUNDAI90
!
Auto ReverseIf an object is detected while the sunroof is
closing automatically, it will reverse direc-
tion, and then stop.
Auto reverse function does not work if a
small obstacle is blocked between the
sliding glass and the sunroof sash. You
should always check that all passengers
and objects are away from the sunroof
before closing it.
WARNING:
Be careful that someone’s head, hands
and body are not trapped by a closing
sunroof.Manual slide closePress the CLOSE button on the overhead
console for less than 0.5 second.
Auto slide openTo use the auto slide feature, momentarily
(more than 1 second) press the OPEN
button on the overhead console. The
sunroof will slide all the way open. To stop
the sunroof sliding at any point, press any
sunroof control button.Manual slide openPress the OPEN button on the overhead
console for less than 0.5 second.Auto slide closeTo close the sunroof, press the CLOSE
button on the overhead console for more
than 1 second.
The sunroof will slide all the way close. To
stop at the desired point, press any sunroof
control button.
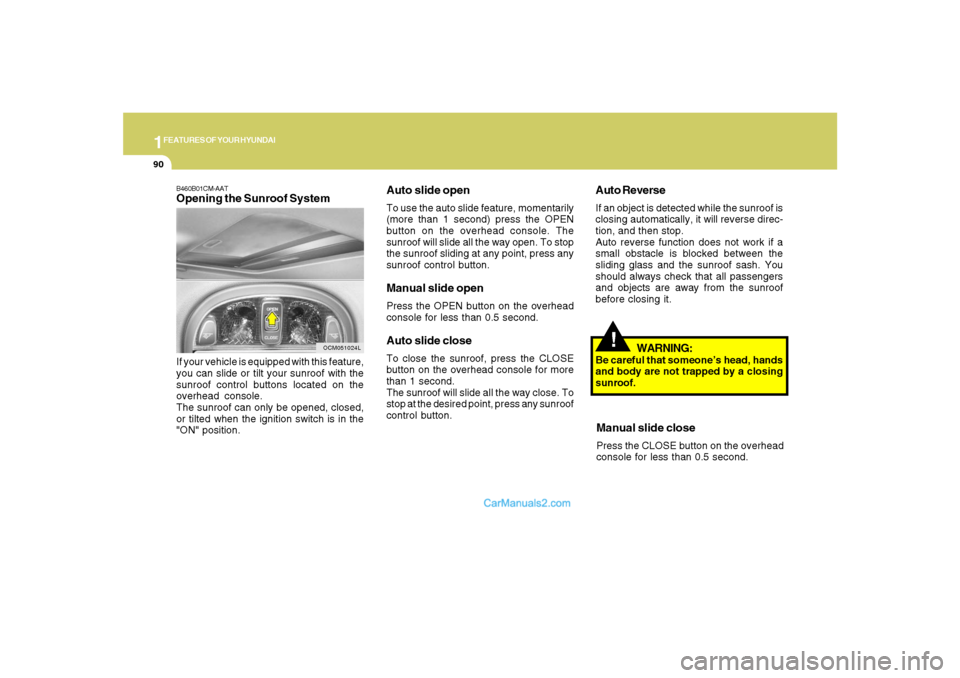
B460B01CM-AATOpening the Sunroof SystemIf your vehicle is equipped with this feature,
you can slide or tilt your sunroof with the
sunroof control buttons located on the
overhead console.
The sunroof can only be opened, closed,
or tilted when the ignition switch is in the
"ON" position.
OCM051024L
Page 105 of 355
1
FEATURES OF YOUR HYUNDAI
93
INTERIOR LIGHTB480B01Y-AATMap LightPush in the map light switch to turn the light
on or off. This light produces a spot beam
for convenient use as a map light at night
or as a personal light for the driver and the
passenger.
OCM052077A
o ONIn the "ON" position, the light stays on at all
times.
!
B490A01CM-AATInterior LightThe interior courtesy light has two buttons.
The two buttons are:o DOORThe courtesy light turns on when a door is
opened or when a door is unlocked by the
transmitter (if installed). The interior light
goes out slowly after 30 seconds after the
door is closed. However if the ignition
switch is ON or all vehicle doors are locked
when the door is closed, interior light will
turn off even within 30 seconds.
OCM052079L
CAUTION:
Do not leave this button pressed for an
extended period of time when the ve-
hicle is not running.
Page 138 of 355

1FEATURES OF YOUR HYUNDAI
126
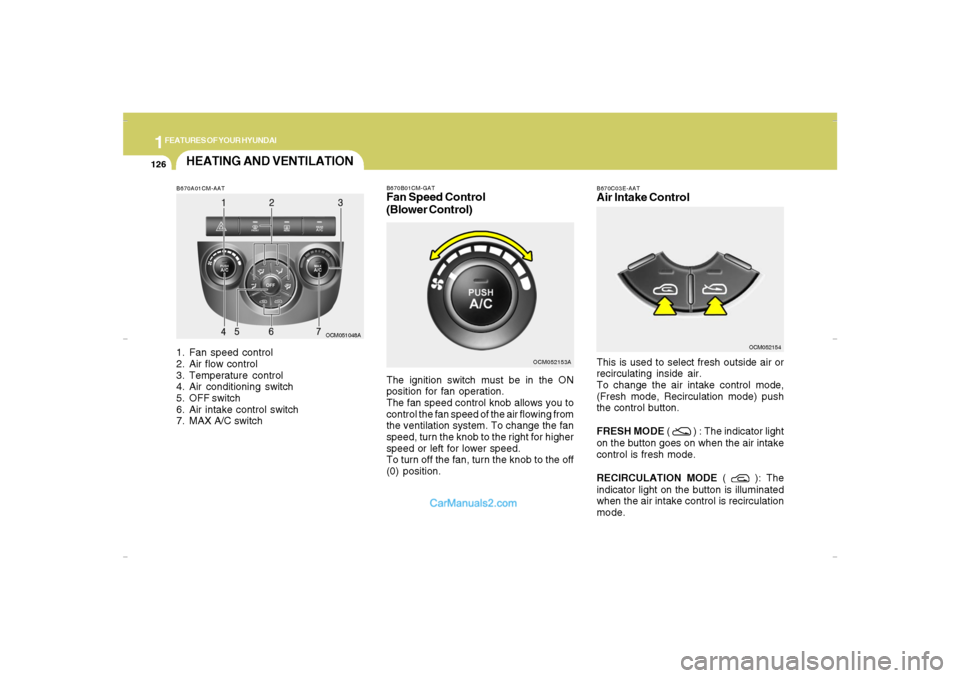
B670A01CM-AAT1. Fan speed control
2. Air flow control
3. Temperature control
4. Air conditioning switch
5. OFF switch
6. Air intake control switch
7. MAX A/C switch
OCM051048A
HEATING AND VENTILATION
B670C03E-AATAir Intake ControlThis is used to select fresh outside air or
recirculating inside air.
To change the air intake control mode,
(Fresh mode, Recirculation mode) push
the control button.
FRESH MODE (
) : The indicator light
on the button goes on when the air intake
control is fresh mode.
RECIRCULATION MODE (
): The
indicator light on the button is illuminated
when the air intake control is recirculation
mode.OCM052154
OCM052153A B670B01CM-GAT
Fan Speed Control
(Blower Control)The ignition switch must be in the ON
position for fan operation.
The fan speed control knob allows you to
control the fan speed of the air flowing from
the ventilation system. To change the fan
speed, turn the knob to the right for higher
speed or left for lower speed.
To turn off the fan, turn the knob to the off
(0) position.
Cmhma-1b.p653/20/2006, 4:59 PM 126
Page 141 of 355
1
FEATURES OF YOUR HYUNDAI
129
FEATURES OF YOUR HYUNDAI
129129129129
OCM052111
Defrost-Level
Air is discharged through the windshield
defroster nozzle, side defroster nozzle and
side ventilator.
If the "Defrost" mode is selected, "Fresh"
mode will be activated to improve wind-
shield defrosting.
OCM052105A
MAX A/C-Level
Air is discharged through the face level
vents.
If the "MAX A/C" mode is selected, the
"FACE" mode and "Recirculation" mode
will be activated.
* The A/C or the air intake control switch
returns to its former setting.
A/C
ON
ON or OFF *
OFF
ON or OFF *
ON or OFF *
ON or OFF *Air Intake
Control Switch
or
OFFNOTE:o The air intake control switch will
change to "
" mode when the
ignition switch is turned "ON" with the
MAX A/C mode selected.
o When you change to another mode
from MAX A/C, the A/C and the air
intake control switch are set to the
following chart.
MAX A/C
OFF ( )
2nd row seat ventilator
Cmhma-1b.p653/20/2006, 4:59 PM 129
Page 191 of 355
1
FEATURES OF YOUR HYUNDAI
179
FEATURES OF YOUR HYUNDAI
179179179179
Components
Your RSE consists of several components:
The LCD display, where video is viewed,
is attached to the ceiling in the rear of the
vehicle.The RSE Control Panel, which includes a
digital display and the RSE control but-
tons, is located in the armrest console
between the front seats.
The DVD Player, where a CD, DVD or
other disc is inserted, is located below the
RSE control panel in the first row seat
armrest console.
Note:The RSE requires a few seconds of set
warm-up time after the ignition switch is
turned ON or to Accessory mode.
Your RSE system is already set up and
ready for use, and can be turned on by
pushing the POWER/VOLUME knob on
the RSE control panel or the ON/OFF but-
ton on the remote controller. The vehicle's
ignition must be turned ON or in Accessory
power mode. The RSE system can also be
turned OFF by the Audio Unit.
RSE-CM02A
RSE-CM003
Page 196 of 355
1FEATURES OF YOUR HYUNDAI
184
Battery Discharge Warning
To prevent inadvertent vehicle battery dis-
charge when the ignition switch is turned
to the ignition ON or ACC (Accessory)
position, a battery drain warning message
will flash on the RSE LCD display.
RSE-CM05A
Page 199 of 355

1
FEATURES OF YOUR HYUNDAI
187
FEATURES OF YOUR HYUNDAI
187187187187
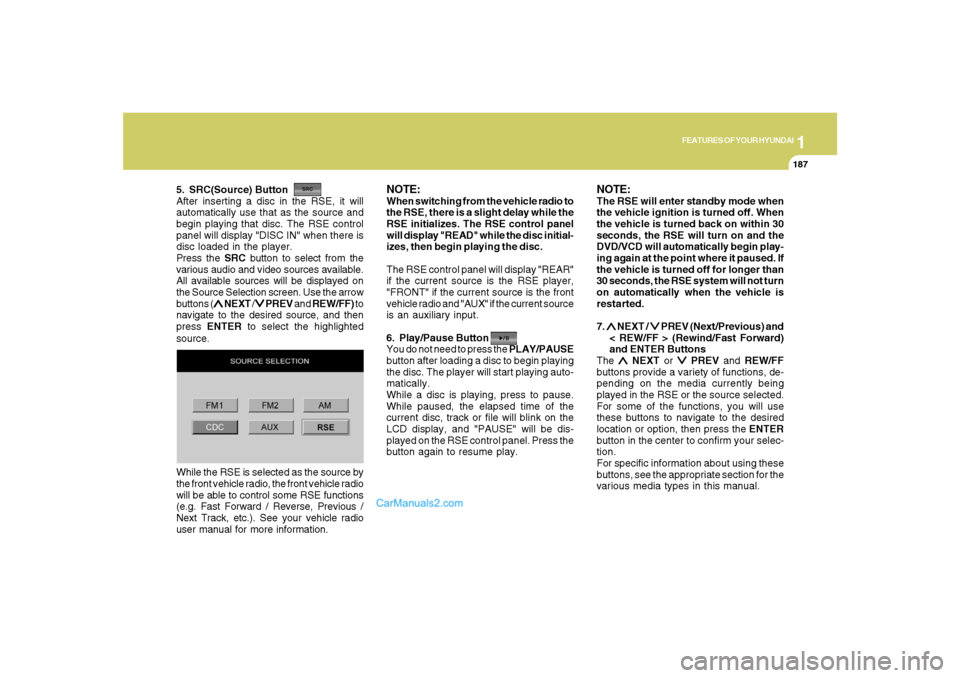
5. SRC(Source) Button
After inserting a disc in the RSE, it will
automatically use that as the source and
begin playing that disc. The RSE control
panel will display "DISC IN" when there is
disc loaded in the player.
Press the SRC button to select from the
various audio and video sources available.
All available sources will be displayed on
the Source Selection screen. Use the arrow
buttons (
∧ ∧∧ ∧
∧ NEXT /
∨ ∨∨ ∨
∨ PREV and REW/FF) to
navigate to the desired source, and then
press ENTER to select the highlighted
source.
NOTE:When switching from the vehicle radio to
the RSE, there is a slight delay while the
RSE initializes. The RSE control panel
will display "READ" while the disc initial-
izes, then begin playing the disc.
The RSE control panel will display "REAR"
if the current source is the RSE player,
"FRONT" if the current source is the front
vehicle radio and "AUX" if the current source
is an auxiliary input.
6. Play/Pause Button
You do not need to press the PLAY/PAUSE
button after loading a disc to begin playing
the disc. The player will start playing auto-
matically.
While a disc is playing, press to pause.
While paused, the elapsed time of the
current disc, track or file will blink on the
LCD display, and "PAUSE" will be dis-
played on the RSE control panel. Press the
button again to resume play.
NOTE:The RSE will enter standby mode when
the vehicle ignition is turned off. When
the vehicle is turned back on within 30
seconds, the RSE will turn on and the
DVD/VCD will automatically begin play-
ing again at the point where it paused. If
the vehicle is turned off for longer than
30 seconds, the RSE system will not turn
on automatically when the vehicle is
restarted.
7. ∧ ∧∧ ∧
∧ NEXT /
∨ ∨∨ ∨
∨ PREV (Next/Previous) and
< REW/FF > (Rewind/Fast Forward)
and ENTER Buttons
The
∧ ∧∧ ∧
∧ NEXT or
∨ ∨∨ ∨
∨ PREV and REW/FF
buttons provide a variety of functions, de-
pending on the media currently being
played in the RSE or the source selected.
For some of the functions, you will use
these buttons to navigate to the desired
location or option, then press the ENTER
button in the center to confirm your selec-
tion.
For specific information about using these
buttons, see the appropriate section for the
various media types in this manual. While the RSE is selected as the source by
the front vehicle radio, the front vehicle radio
will be able to control some RSE functions
(e.g. Fast Forward / Reverse, Previous /
Next Track, etc.). See your vehicle radio
user manual for more information.
Page 215 of 355

2
DRIVING YOUR HYUNDAI
4
!
BEFORE STARTING THE
ENGINEC020A03A-AATBefore you start the engine, you should
always:
1. Look around the vehicle to be sure
there are no flat tires, puddles of oil,
water or other indications of possible
trouble.
2. After entering the car, check to be sure
the parking brake is engaged.
3. Check that all windows, and lights are
clean.
4. Check that the interior and exterior mir-
rors are clean and in position.
5. Check your seat, seatback and head-
rest to be sure they are in their proper
positions.
6. Lock all the doors.
7. Fasten your seat belt and be sure that all
other occupants have fastened theirs.
8. Turn off all lights and accessories that
are not needed.
9. When you turn the ignition switch to
"ON", check that all appropriate warn-
ing lights are operating and that you
have sufficient fuel.
10. Check the operation of warning lights
and all bulbs when key is in the "ON"
position.
!
WARNING:
Your vehicle is equipped with tires de-
signed to provide for safe ride and han-
dling capability.
Do not use a size and type of tire and
wheel that is different from the one that
is originally installed on your vehicle. It
can affect the safety and performance
of your vehicle, which could lead to han-
dling failure or rollover and serious in-
jury.
When replacing the tires, be sure to equip
all four tires with the tire and wheel of the
same size, type, tread, brand and load-
carrying capacity.
WARNING:
o All passengers must be properly
belted whenever the vehicle is mov-
ing. Refer to pages: 1-27 through 1-
33 for more information on their proper
use.
o Always check the surrounding areas
near your vehicle for people, espe-
cially children, before putting a car
into 'drive.'
o Always wear appropriate shoes when
operating your vehicle. Unsuitable
shoes (high heels, ski boots, etc.) may
interfere with your ability to use the
brake and accelerator pedal, and the
clutch (if installed).