2007 Hyundai H-1 (Grand Starex) parking brake
[x] Cancel search: parking brakePage 197 of 284

4
CORROSION PREVENTION AND APPEARANCE CARE
21
4
IN CASE OF EMERGENCY
21BLEEDING THE FUEL SYSTEM
CAUTION:
If overheating should occur when towing, (temperature gauge reads near red zone), taking the followingaction may reduce or eliminate the problem.
1. Turn off the air conditioner.
2. Reduce highway speed.
3. Select a lower gear when going uphill.
4. While in stop and go traffic, place
the gear selection in park or neu-tral and idle the engine at a higher speed.
! E090A01P-GAT (Diesel Motor) The fuel system should be bled to remove air as described in the illustra- tion if the fuel supply is exhaustedduring travel, when the fuel filter is replaced, or if the vehicle is not used for a long time.
1. Loosen the air plug at the top of the
fuel filter. E090A01P
13.Avoid holding the brake pedal down
too long or too frequently. This could cause the brakes to overheat, re- sulting in reduced braking efficiency.
14.When going down a hill, shift into a
lower gear and use the engine brak-ing effect. When ascending a long grade, downshift the transmissionto a lower gear and reduce speed to reduce chances of engine over- loading and/or overheating.
15.If you have to stop while going uphill, do not hold the vehicle inplace by pressing on the accelera-tor. This can cause the automatic transmission to overheat. Use the parking brake or footbrake.
NOTE: When towing, check transmission fluid more frequently.
Page 201 of 284

4
CORROSION PREVENTION AND APPEARANCE CARE
25
4
IN CASE OF EMERGENCY
25IF THE ENGINE OVERHEATS
CAUTION:
o Do not allow the jumper cable clips to touch one another.
o Do not connect the jumper cable
to the negative terminal of the flat battery. The battery generates explosive gas, and a spark caused whenthe jumper cable is disconnected from the negative terminal could ignite this gas and cause an ex-plosion.
o Be careful that the jumper cable
becomes not caught in the cool-ing fan, etc.
! D030A02TB-AAT If your temperature gauge indicates overheating, you experience a loss of power, or hear loud pinging or knock- ing and the engine is probably too hot.If this happens to you, you should:
1. Pull off the road and stop as soon as
it is safe to do so.
2. Place the gear selector lever in "P"
(automatic transmission), or neutral (manual transmission) and set the parking brake. If the air conditioning is on, turn it off.
3. If engine coolant is running out un- der the car or steam is coming outfrom the hood, stop the engine. Donot open the hood until the engine coolant has stopped running or the steaming has stopped. If there is novisible loss of engine coolant and no steam, leave the engine running and check to be sure the enginecooling fan is operating. If the fan is not running, turn the engine off.
the other end to the engine block of the vehicle with the flat batteryat the point farthest from the battery.
8. Start engine as described "Starting the engine" in section 3.
9. After the engine is started, discon- nect the cables in the reverse order.
1. Both batteries must be 12V. The
capacity (Ah) of the battery supply- ing current should not be signifi- cantly below that of the discharged battery.
2. Use only heavy-duty jumper cables.
3. A discharged battery can freeze. A
frozen battery must be thawed out before connecting the jumper cables.
4. There should be no contact be-
tween the two vehicles; otherwisecurrent may flow when the positive terminal is connected.
5. The discharged battery must be correctly connected to the vehicleelectrical system.
6. Run the engine of the vehicle sup- plying current.
7. Connect the jumper cables as fol-
lows:
(1) Connect one end of one jumper cable to the positive terminal of the flat battery, and the other end to the positive terminal of the booster battery.
(2) Connect one end of the other jumper cable to the negative ter-minal of the booster battery, and
Page 240 of 284

6VEHICLE MAINTENANCE REQUIREMENTS
14
G080N01P-GAT
o Brake Hoses and Lines
Visually check for proper installation,
chafing, cracks, deterioration and any leakage. Replace any deteriorated or damaged parts immediately.
G080O01P-GAT
o Brake Fluid
Check brake fluid level in the brake
fluid reservoir. The level should be between "MIN" and "MAX" marks on the side of the reservoir. Use onlyhydraulic brake fluid conforming SAE J1703.
G080P01P-GAT
o Rear Brake Drums and
Linings
Check for scoring, burning, leaking
fluid, broken parts, and excessive wear. G080Q01P-GAT
o Brake Pads, Calipers and
Rotors
Check the pads for excessive wear, discs for run out and wear, and cali- pers for fluid leakage. G080R01P-GAT
o Parking Brake
Inspect the parking brake system such as parking brake lever, cables, and so on. For detailed service procedures,refer to the Shop Manual.
G080S01P-GAT
o Exhaust Pipe Connections,
Muffler and Suspension Bolts
Check the exhaust pipe, muffler, and
suspension connections for loosenessor damage.
G080L01P-GAT
o Manual Transmission Oil Check manual transmission oil ac- cording to the maintenance schedule. NOTE: If the oil level is low, check for possible leaks before adding oil. Do not overfill. G080M04P-GAT
o Automatic Transmission Fluid The fluid level should be in the "HOT" range of the dipstick, after engine and transmission are at normal operatingtemperature. Check the Automatic Transmission Fluid level with the en- gine running and the transmission inneutral, with the parking brake properly applied. Use MOBIL DEXRON-II, DIA- MOND ATF SP-I or JWS 3309 whenadding or changing fluid.
Page 245 of 284

Engine Compartment ................................................... 8-2
General Checks ........................................................... 8-6
Checking the Engine Oil .............................................. 8-7 Checking the Engine Coolant..................................... 8-10
Checking the Battery .................................................. 8-13
Air Conditioning Care .................................................. 8-15
Changing the Climate Control Air Filter .. ....................8-16
Checking the Brake Fluid ............................................ 8-17
Checking the Clutch Fluid ........................................... 8-18
Checking the Automatic Transmission Fluid ..............8-18
Filling the Washer Reservoir....................................... 8-20
Windshield Wiper Blades ............................................ 8-21
Tail Gate Window Washer Flui d .................................8-23
Checking the Freeplay ................................................ 8-23
Checking Drive Belts .................................................. 8-24
Parking Brake Lever Stroke ....................................... 8-25
Tire .............................................................................. 8-25
8
DO-IT YOURSELF MAINTENANCE
8
Page 250 of 284

8DO-IT YOURSELF MAINTENANCE
6GENERAL CHECKS
I020A03P-GAT Engine Compartment The following should be checked regu- larly:
o Engine oil level and condition
o Transmission fluid level and condi- tion
o Brake fluid level
o Clutch fluid level
o Engine coolant level
o Windshield washer fluid level
o Accessory drive belt condition
o Coolant hose condition
o Fluid leaks
(on or below components)
o Power steering fluid level and con-
dition
o Battery condition
o Air filter condition I030A03P-GAT Vehicle Exterior The following should be checked monthly:
o Overall appearance and condition
o Wheel condition and wheel nut tight-
ness
o Air cleaner filter condition
o Exhaust system condition
o Light condition and operation
o Windshield glass condition
o Wiper blade condition
o Paint condition and corrosion
o Fluid leaks
o Door and hood lock condition
o Tire pressure and condition
(including spare) I040A01P-GAT Vehicle Interior The following should be checked each time when the vehicle is driven:
o Light operation
o Windshield wiper operation
o Horn operation
o Defroster, heater operation
(and air conditioning, if equipped)
o Steering operation and condition
o Mirror condition and operation
o Turn signal operation
o Accelerator pedal operation
o Brake operation, including parking brake
o Manual transmission operation, in-
cluding clutch operation
o Automatic transmission operation,
including "Park" mechanism opera-tion
o Seat control condition and opera-
tion
o Seat belt condition and operation
o Sunvisor operation
Page 256 of 284

8DO-IT YOURSELF MAINTENANCE
12
!
4. Turn the radiator cap counterclock-
wise without pressing down on it, until it stops. This relieves any pres- sure remaining in the cooling sys- tem. And remove the radiator capby pushing down and turning coun- terclockwise. Now fill the radiator with clean dem- ineralized or distilled water. Con- tinue to add clean demineralized or distilled water in small quantitiesuntil the fluid level stays up in the radiator neck.
5. Start the engine, top off the radia- tor with water and then add engine coolant to the reservoir until thelevel is between "L" and "F".
6. Replace the radiator and reservoir caps and check to be sure thedrain cocks are fully closed and not leaking. WARNING:
The cooling fan is controlled by
engine coolant temperature andmay sometimes operate even when the engine is not running. Useextreme caution when working near the blades of the cooling fan so that you are not injured by a rotat-ing fan blade. As the engine cool- ant temperature decreases, the fan will automatically shut off. This isa normal condition.
G050D02P-AAT To Change the Coolant The coolant should be changed at those intervals specified in the ve- hicle maintenance schedule in Sec- tion 6.
!
CAUTION:
Engine coolant can damage the finish of your car. If you spill en-gine coolant on the car, wash it off thoroughly with clean water.
1. Park the car on level ground, set the parking brake and remove the radia- tor cap when cool.
2. Be sure your drain receptacle is in
place. Open the drain cock on theradiator. Allow all the engine cool- ant to drain from the cooling sys- tem, then securely close the draincock.
3. Check Section 9 for the capacity of the cooling system in your car.Then, following the manufacturer's directions on the engine coolant container, add the appropriatequantity of coolant to the radiator.
Page 263 of 284

8
DO-IT YOURSELF MAINTENANCE
19
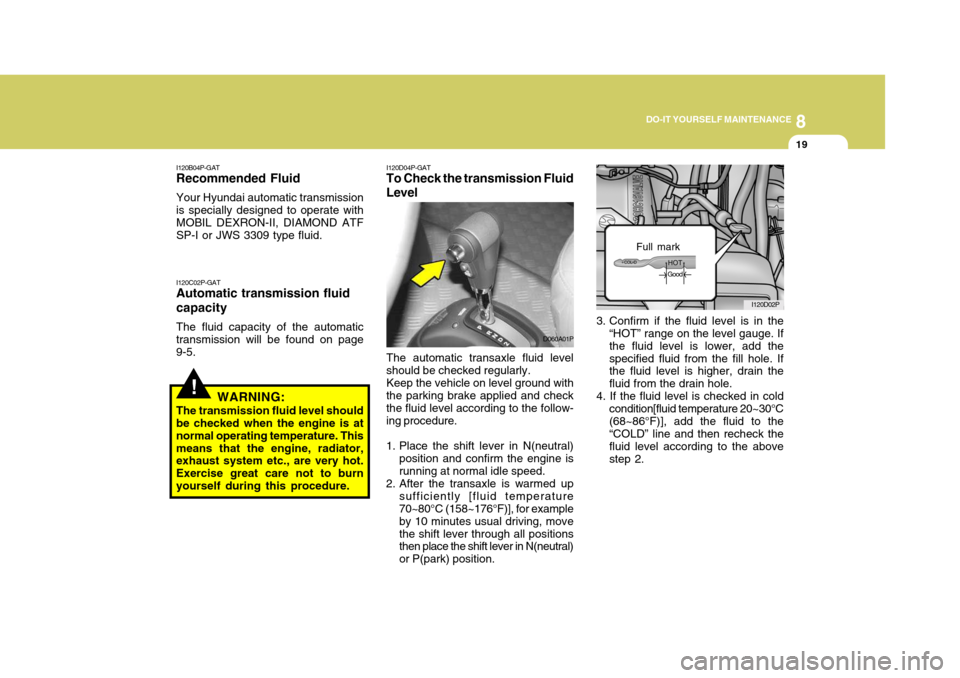
3. Confirm if the fluid level is in the
“HOT” range on the level gauge. If the fluid level is lower, add thespecified fluid from the fill hole. If the fluid level is higher, drain the fluid from the drain hole.
4. If the fluid level is checked in cold condition[fluid temperature 20~30°C(68~86°F)], add the fluid to the “COLD” line and then recheck the fluid level according to the abovestep 2. Full mark
I120D04P-GAT
To Check the transmission Fluid Level
The automatic transaxle fluid level
should be checked regularly.
Keep the vehicle on level ground with
the parking brake applied and check the fluid level according to the follow- ing procedure.
1. Place the shift lever in N(neutral) position and confirm the engine is running at normal idle speed.
2. After the transaxle is warmed up sufficiently [fluid temperature70~80°C (158~176°F)], for example by 10 minutes usual driving, movethe shift lever through all positions then place the shift lever in N(neutral) or P(park) position. D060A01P
I120D02P
!
I120B04P-GAT Recommended Fluid Your Hyundai automatic transmission is specially designed to operate with MOBIL DEXRON-II, DIAMOND ATF SP-I or JWS 3309 type fluid. I120C02P-GAT Automatic transmission fluid capacity The fluid capacity of the automatic transmission will be found on page9-5.
WARNING:
The transmission fluid level should be checked when the engine is at normal operating temperature. Thismeans that the engine, radiator, exhaust system etc., are very hot. Exercise great care not to burnyourself during this procedure.
Good
Page 269 of 284

8
DO-IT YOURSELF MAINTENANCE
25
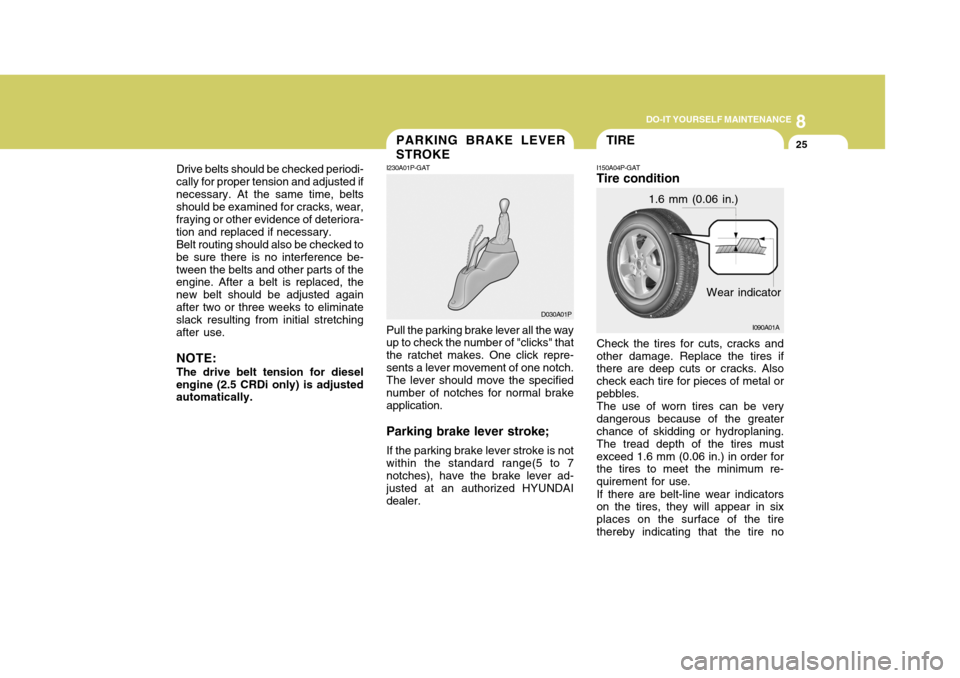
Pull the parking brake lever all the way up to check the number of "clicks" that the ratchet makes. One click repre-sents a lever movement of one notch. The lever should move the specified number of notches for normal brakeapplication. Parking brake lever stroke; If the parking brake lever stroke is not within the standard range(5 to 7notches), have the brake lever ad- justed at an authorized HYUNDAI dealer. D030A01P
TIRE
I150A04P-GAT Tire condition Check the tires for cuts, cracks and other damage. Replace the tires if there are deep cuts or cracks. Also check each tire for pieces of metal orpebbles.The use of worn tires can be verydangerous because of the greater chance of skidding or hydroplaning. The tread depth of the tires mustexceed 1.6 mm (0.06 in.) in order for the tires to meet the minimum re- quirement for use. If there are belt-line wear indicators on the tires, they will appear in six places on the surface of the tirethereby indicating that the tire no 1.6 mm (0.06 in.)
I090A01A
Wear indicator
Drive belts should be checked periodi-
cally for proper tension and adjusted ifnecessary. At the same time, belts should be examined for cracks, wear, fraying or other evidence of deteriora-tion and replaced if necessary. Belt routing should also be checked to
be sure there is no interference be-tween the belts and other parts of the engine. After a belt is replaced, the new belt should be adjusted againafter two or three weeks to eliminate slack resulting from initial stretching after use.
NOTE: The drive belt tension for diesel
engine (2.5 CRDi only) is adjusted automatically.PARKING BRAKE LEVER STROKE
I230A01P-GAT