2007 Hyundai H-1 (Grand Starex) key
[x] Cancel search: keyPage 87 of 284
2 INSTRUMENTS AND CONTROLS
20
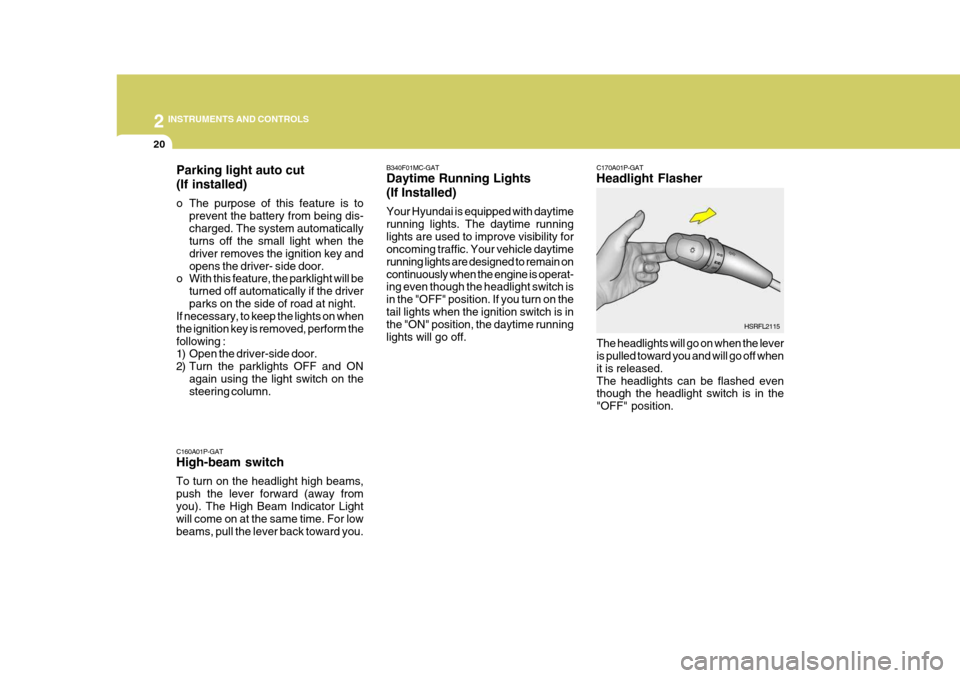
C160A01P-GAT High-beam switch To turn on the headlight high beams, push the lever forward (away fromyou). The High Beam Indicator Light will come on at the same time. For low beams, pull the lever back toward you. C170A01P-GAT Headlight Flasher
The headlights will go on when the lever is pulled toward you and will go off when it is released.The headlights can be flashed even though the headlight switch is in the "OFF" position.
B340F01MC-GAT Daytime Running Lights (If Installed) Your Hyundai is equipped with daytime running lights. The daytime runninglights are used to improve visibility for oncoming traffic. Your vehicle daytime running lights are designed to remain oncontinuously when the engine is operat- ing even though the headlight switch is in the "OFF" position. If you turn on thetail lights when the ignition switch is in the "ON" position, the daytime running lights will go off.
HSRFL2115
Parking light auto cut (If installed)
o The purpose of this feature is to
prevent the battery from being dis- charged. The system automatically turns off the small light when the driver removes the ignition key andopens the driver- side door.
o With this feature, the parklight will be
turned off automatically if the driverparks on the side of road at night.
If necessary, to keep the lights on whenthe ignition key is removed, perform thefollowing :
1) Open the driver-side door.
2) Turn the parklights OFF and ON
again using the light switch on the steering column.
Page 93 of 284

2 INSTRUMENTS AND CONTROLS
26FRONT/REAR WINDOW DEFROSTER SWITCHHAZARD WARNING SYS- TEM
B370A01A-AAT The hazard warning system should be used whenever you find it necessary to stop the car in a hazardous location.When you must make such an emer- gency stop, always pull off the road as far as possible.The hazard warning lights are turned on by pushing in the hazard switch. This causes all turn signal lights toblink. The hazard warning lights will operate even though the key is not in the ignition.To turn the hazard warning lights off, push the switch a second time. B380A02P-AAT (Minibus/Van)(If installed)
C260A01P B380A01P
The front/rear window defroster is actu- ated in connection with the front window defroster. The window defroster is turned on by pushing in the switch. To turn thedefroster off, pushing in the switch a second time. The front/rear window defroster automatically turns itself offafter about 20 minutes. To restart the defroster cycle, push in the switch again after it has turned itself off. CAUTION:
Do not clean the inner side of thefront/rear window glass with an abra- sive type of glass cleaner or use a scraper to remove the foreign depos-its from the inner surface of the glass as this may cause damage to the defroster elements.
!
NOTE: The engine must be running for the front/rear window defroster to oper- ate.
Page 94 of 284
2
INSTRUMENTS AND CONTROLS
27POWER OUTLET
!
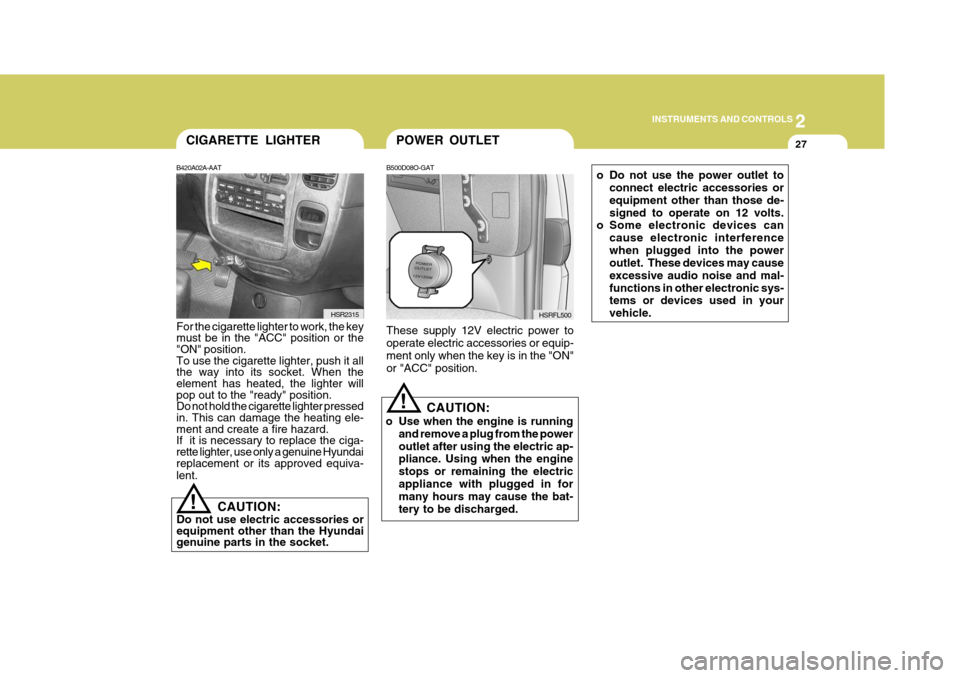
B500D08O-GAT These supply 12V electric power to operate electric accessories or equip- ment only when the key is in the "ON"or "ACC" position.
CAUTION:
o Use when the engine is running and remove a plug from the poweroutlet after using the electric ap- pliance. Using when the engine stops or remaining the electricappliance with plugged in for many hours may cause the bat- tery to be discharged. HSRFL500
B420A02A-AAT For the cigarette lighter to work, the key must be in the "ACC" position or the"ON" position. To use the cigarette lighter, push it all the way into its socket. When theelement has heated, the lighter will pop out to the "ready" position. Do not hold the cigarette lighter pressedin. This can damage the heating ele- ment and create a fire hazard. If it is necessary to replace the ciga-rette lighter, use only a genuine Hyundai replacement or its approved equiva- lent.
HSR2315
CIGARETTE LIGHTER
!
CAUTION:
Do not use electric accessories or equipment other than the Hyundaigenuine parts in the socket. o Do not use the power outlet to
connect electric accessories or equipment other than those de-signed to operate on 12 volts.
o Some electronic devices can
cause electronic interferencewhen plugged into the power outlet. These devices may cause excessive audio noise and mal-functions in other electronic sys- tems or devices used in your vehicle.
Page 96 of 284
2
INSTRUMENTS AND CONTROLS
29
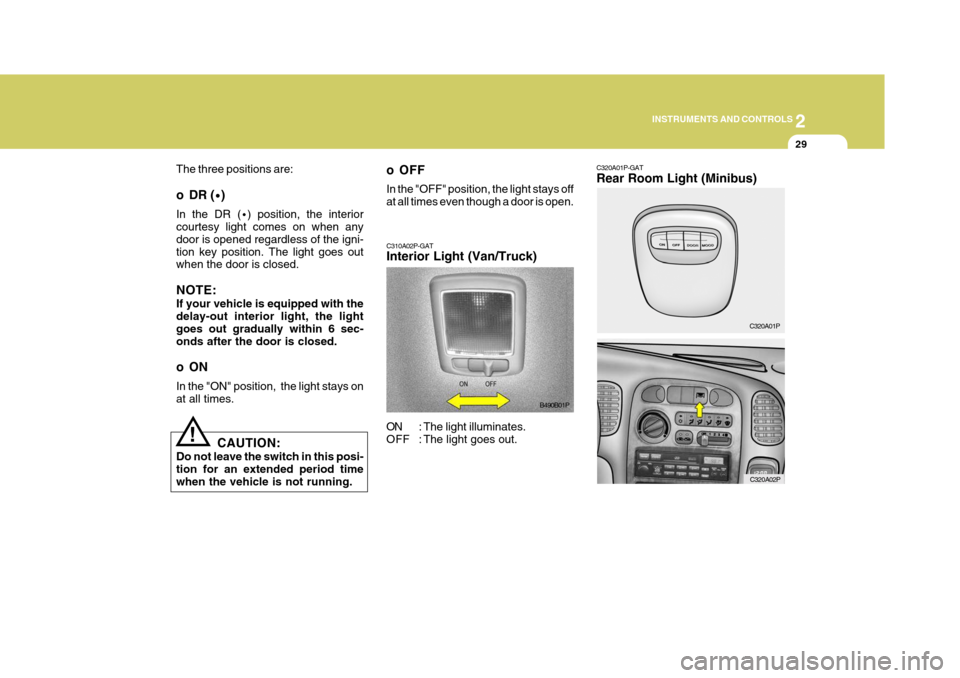
C320A01P-GAT Rear Room Light (Minibus)
C320A01P
C320A02P
The three positions are:
o DR (
·)
In the DR ( ·) position, the interior
courtesy light comes on when any door is opened regardless of the igni-tion key position. The light goes out when the door is closed. NOTE: If your vehicle is equipped with the delay-out interior light, the light goes out gradually within 6 sec-onds after the door is closed.
oON In the "ON" position, the light stays on at all times.
CAUTION:
Do not leave the switch in this posi- tion for an extended period time when the vehicle is not running. o OFF In the "OFF" position, the light stays off at all times even though a door is open.
!
C310A02P-GAT Interior Light (Van/Truck)
ON : The light illuminates.
OFF : The light goes out.
B490B01P
Page 97 of 284
2 INSTRUMENTS AND CONTROLS
30
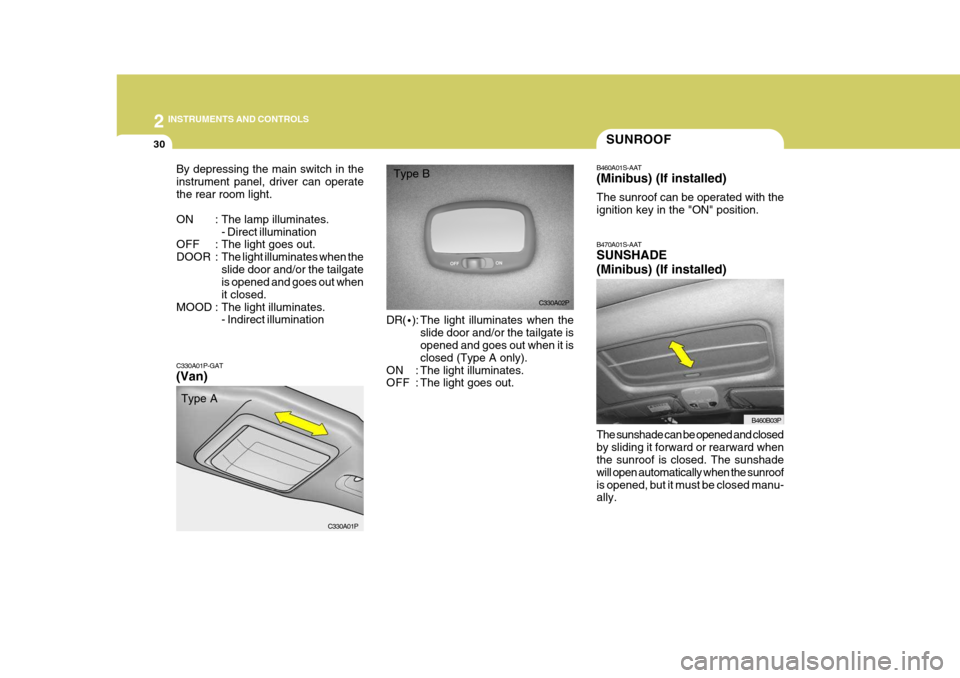
C330A01P-GAT (Van) DR(
·): The light illuminates when the
slide door and/or the tailgate is opened and goes out when it is closed (Type A only).
ON : The light illuminates.
OFF : The light goes out.
By depressing the main switch in the instrument panel, driver can operatethe rear room light.
ON : The lamp illuminates.
- Direct illumination
OFF : The light goes out.
DOOR : The light illuminates when theslide door and/or the tailgate is opened and goes out when it closed.
MOOD : The light illuminates. - Indirect illumination
C330A01P
SUNROOF
B470A01S-AAT SUNSHADE (Minibus) (If installed) The sunshade can be opened and closed by sliding it forward or rearward when the sunroof is closed. The sunshade will open automatically when the sunroofis opened, but it must be closed manu- ally.
B460A01S-AAT (Minibus) (If installed) The sunroof can be operated with the ignition key in the "ON" position.
B460B03P
B460B03P
C330A02P
Type A Type B
Page 114 of 284
2
INSTRUMENTS AND CONTROLS
47
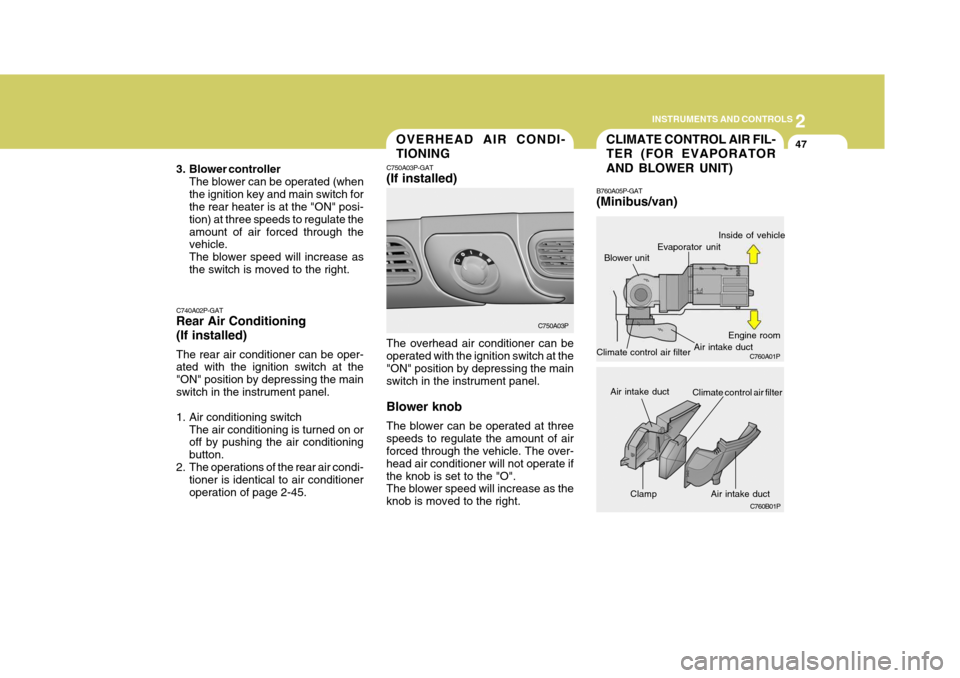
Clamp
CLIMATE CONTROL AIR FIL- TER (FOR EVAPORATOR AND BLOWER UNIT)
B760A05P-GAT (Minibus/van)
Blower unitOVERHEAD AIR CONDI- TIONING
C750A03P-GAT (If installed) The overhead air conditioner can be operated with the ignition switch at the "ON" position by depressing the mainswitch in the instrument panel. Blower knob The blower can be operated at three speeds to regulate the amount of air forced through the vehicle. The over- head air conditioner will not operate ifthe knob is set to the "O". The blower speed will increase as the knob is moved to the right.
C740A02P-GAT Rear Air Conditioning (If installed) The rear air conditioner can be oper- ated with the ignition switch at the "ON" position by depressing the mainswitch in the instrument panel.
1. Air conditioning switch
The air conditioning is turned on or off by pushing the air conditioning button.
2. The operations of the rear air condi- tioner is identical to air conditioneroperation of page 2-45. C750A03P
C760A01P
C760B01P
Evaporator unit Air intake ductInside of vehicle
Engine room
Air intake duct
Air intake duct
Climate control air filter
Climate control air filter
3. Blower controller
The blower can be operated (when the ignition key and main switch for the rear heater is at the "ON" posi- tion) at three speeds to regulate theamount of air forced through the vehicle. The blower speed will increase asthe switch is moved to the right.
Page 119 of 284
2 INSTRUMENTS AND CONTROLS
52
H240B03O-GAT
1. POWER ON-OFF Control Knob The radio unit may be operated when the ignition key is in the "ACC" or "ON"position. Press the knob to switch the power on. The LCD shows the radio frequency in the radio mode or thetape direction indicator in the tape mode. To switch the power off, press the knob again. VOLUME Control Rotate the knob clockwise to increase the volume and turn the knob counter- clockwise to reduce the volume. 2. BASS Control Knob Press to pop the knob out and turn to the left or right for the desired bass tone. BAL (Balance Control) Knob Pull the bass control knob further out. Turn the control knob clockwise to emphasize right speaker sound (left speaker sound will be attenuated).When the control knob is turned coun- terclockwise, left speaker sound will beemphasized (right speaker sound willbe attenuated). 3. TREB (Treble Control) Knob Press to pop the knob out and turn to the left or right for the desired treble tone. FAD (Fader Control) Knob Pull the treble control knob further out. Turn the control knob counterclock-wise to emphasize front speaker sound (rear speaker sound will be attenu- ated).When the control knob is turned clock- wise, rear speaker sound will be em- phasized (front speaker sound will beattenuated). 4. TUNE (Manual) Select Button Press the ( ) side or ( ) side to increase or to decrease the frequency. Press either button and hold down to continu- ously scroll. Release button once thedesired station is reached.
SEEK Operation (Automatic Channel Selection) Press the TUNE select button 0.5 sec or more. Releasing it will automaticallytune to the next available station with a beep sound. When the ( ) side is pressed longerthan 0.5 second, releasing will auto- matically tune to the next higher fre- quency and when the ( ) side ispressed longer than 0.5 second and releasing will automatically tune to the next lower frequency. 5. BAND Selector Pressing the button changes the AM, FM1 and FM2 bands. The modeselected is displayed on LCD.
6. PRESET station select button Six (6) stations for AM, FM1 and FM2 respectively can be preset in the elec- tronic memory circuit on this unit.
FM/AM
Page 124 of 284
2
INSTRUMENTS AND CONTROLS
57
H260B03E-AAT
1. POWER ON-OFF Control Knob
The radio unit may be operated when the ignition key is in the "ACC" or "ON"position. Press the knob to switch the power on. The LCD shows the radio frequency in the radio mode or the CDtrack indicator in either the CD mode. To switch the power off, press the knob again. VOLUME Control Rotate the knob clockwise to increase the volume and turn the knob counter-clockwise to reduce the volume. BALANCE Control Pull and turn the control knob clock- wise to emphasize right speaker sound (left speaker sound will be attenuated).When the control knob is turned coun- terclockwise, left speaker sound will be emphasized (right speaker soundwill be attenuated). 2. FAD (Fader Control) Knob Turn the control knob counterclock- wise to emphasize front speaker sound(rear speaker sound will be attenu- ated). When the control knob is turned clockwise, rear speaker sound will beemphasized (front speaker sound will be attenuated).
3. BASS Control Knob Press to pop the knob out and turn to the left or right for the desired basstone. TREB (Treble Control) Knob Pull the bass control knob further out. Turn to the left or right for the desired treble tone.
4. SCAN Button When the scan button is pressed, the frequency will increase and the receiv-able stations will be tuned in one after another, receiving each station for 5 seconds. To stop scanning, press thescan button again.5. TUNE (Manual) Select Button Press the ( ) side or ( ) side to increase or to decrease the frequency.Press either button and hold down to continuously scroll. Release button once the desired station is reached. SEEK Operation (Automatic Channel Selection) Press the TUNE select button for 0.5 sec or more. Releasing it will automati-cally tune to the next available station with a beep sound. When the ( ) side is pressed longerthan 0.5 second, releasing will auto- matically tune to the next higher fre- quency and when the ( ) side ispressed longer than 0.5 second, re- leasing will automatically tune the next lower frequency. 6. BAND Selector Pressing the button changes the AM, FM1 and FM2 bands. The mode selected is displayed on LCD.
FM/AM