Page 331 of 463

FEATURES OF YOUR HYUNDAI 1- 65
!
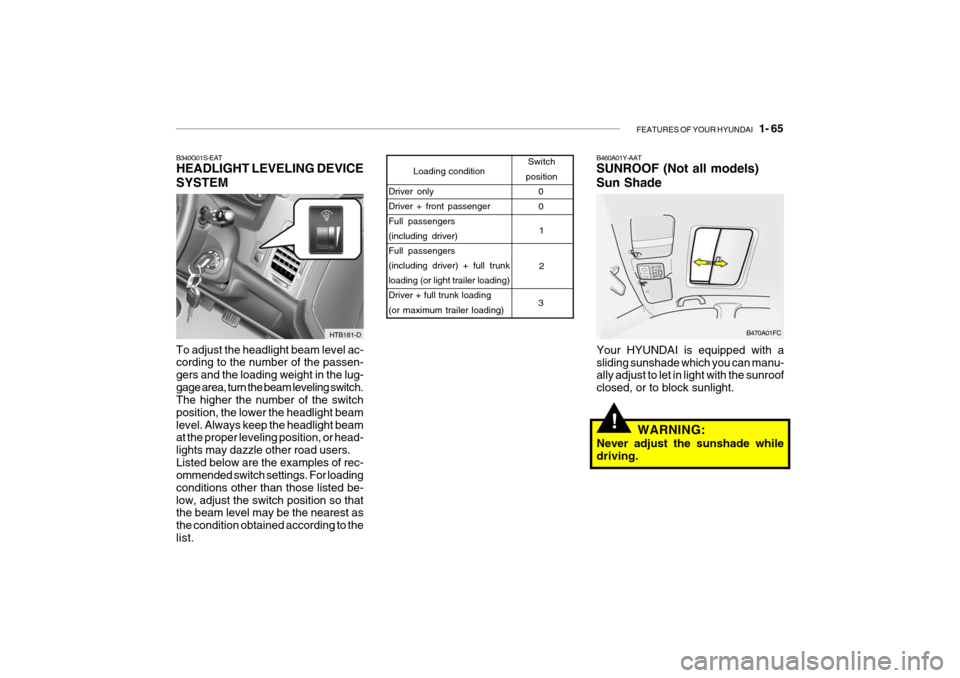
B460A01Y-AAT SUNROOF (Not all models) Sun Shade
Your HYUNDAI is equipped with a sliding sunshade which you can manu- ally adjust to let in light with the sunroof closed, or to block sunlight.
Loading condition Switch
position
Driver only Driver + front passenger Full passengers (including driver)Full passengers (including driver) + full trunk loading (or light trailer loading)Driver + full trunk loading (or maximum trailer loading) 0
1 2
3 0
B470A01FC
WARNING:
Never adjust the sunshade while driving.
B340G01S-EAT HEADLIGHT LEVELING DEVICE SYSTEM To adjust the headlight beam level ac- cording to the number of the passen- gers and the loading weight in the lug-gage area, turn the beam leveling switch. The higher the number of the switch position, the lower the headlight beamlevel. Always keep the headlight beam at the proper leveling position, or head- lights may dazzle other road users.Listed below are the examples of rec- ommended switch settings. For loading conditions other than those listed be-low, adjust the switch position so that the beam level may be the nearest as the condition obtained according to thelist.
HTB181-D
Page 338 of 463

1- 72 FEATURES OF YOUR HYUNDAI
!
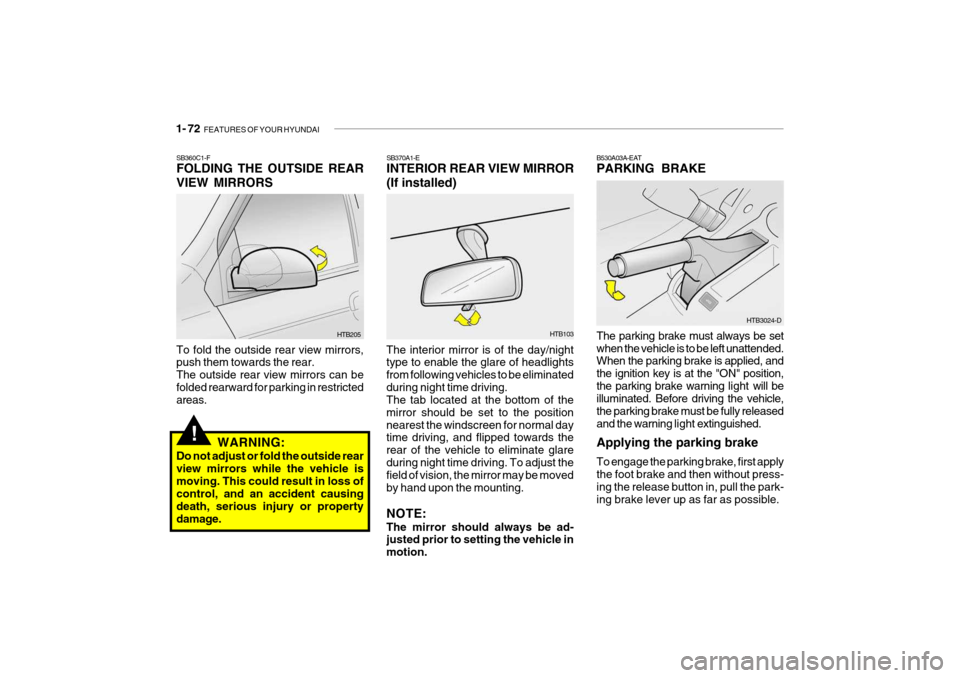
SB370A1-E INTERIOR REAR VIEW MIRROR (If installed)
The interior mirror is of the day/night type to enable the glare of headlights from following vehicles to be eliminatedduring night time driving. The tab located at the bottom of the mirror should be set to the positionnearest the windscreen for normal day time driving, and flipped towards the rear of the vehicle to eliminate glareduring night time driving. To adjust the field of vision, the mirror may be moved by hand upon the mounting. NOTE: The mirror should always be ad- justed prior to setting the vehicle in motion. HTB103SB360C1-F FOLDING THE OUTSIDE REAR VIEW MIRRORS To fold the outside rear view mirrors, push them towards the rear. The outside rear view mirrors can befolded rearward for parking in restricted areas.
HTB205
WARNING:
Do not adjust or fold the outside rear view mirrors while the vehicle ismoving. This could result in loss of control, and an accident causing death, serious injury or propertydamage. B530A03A-EAT PARKING BRAKE The parking brake must always be set when the vehicle is to be left unattended. When the parking brake is applied, and the ignition key is at the "ON" position,the parking brake warning
light will be
illuminated. Before driving the vehicle,the parking brake must be fully releasedand the warning light extinguished.
Applying the parking brake To engage the parking brake, first apply the foot brake and then without press- ing the release button in, pull the park- ing brake lever up as far as possible.
HTB3024-D
Page 435 of 463

6- 24 DO-IT-YOURSELF MAINTENANCE
!
G290A01FC-EAT HEADLIGHT AIMING ADJUST- MENT Before performing aiming adjustment, make sure of the following.
1. Keep all tyres inflated to the correct
pressure.
2. Place the vehicle on level ground and press the front bumper and rear bumper down several times. Place the vehicle at a distance of 118 in.(3,000 mm) from the test wall.
3. See that the vehicle is unloaded
(except for full levels of coolant,engine oil and fuel, and spare tyre, jack, and tools).
4. Clean the head lights lens and turn on the headlight (low beam).
WARNING:
Be sure to carefully wipe away any water drained out in this manner, because the fuel mixed in the water might be ignited and result in a fire. Extracting air in the fuel filter If you drove until you have no fuel left or if you replaced the fuel filter, be sure to extract air in the fuel system as it makes you difficult to start the engine.
1) Remove the air extract nozzle cap on the fuel filter.
2) Pump up and down until the fuel flows out of the plug opening.
NOTE: Use cloths when you extract air so that the fuel is not sprayed around.Clean the fuel around the fuel filter or the injection pump before starting the engine to prevent fire. Finally,check each part if the fuel is leaking.
HTB287
G300A02TB-EAT REMOVAL OF WATER FROM THE FUEL FILTER(DIESEL ENGINE) If the fuel filter warning lamp illuminates during driving, it indicates that waterhas accumulated in the fuel filter. If this occurs, remove the water as described. NOTE: It is recommended that water accu- mulated in the fuel filter should be removed by an authorised Hyundai dealer.
Page 436 of 463

DO-IT-YOURSELF MAINTENANCE 6- 25
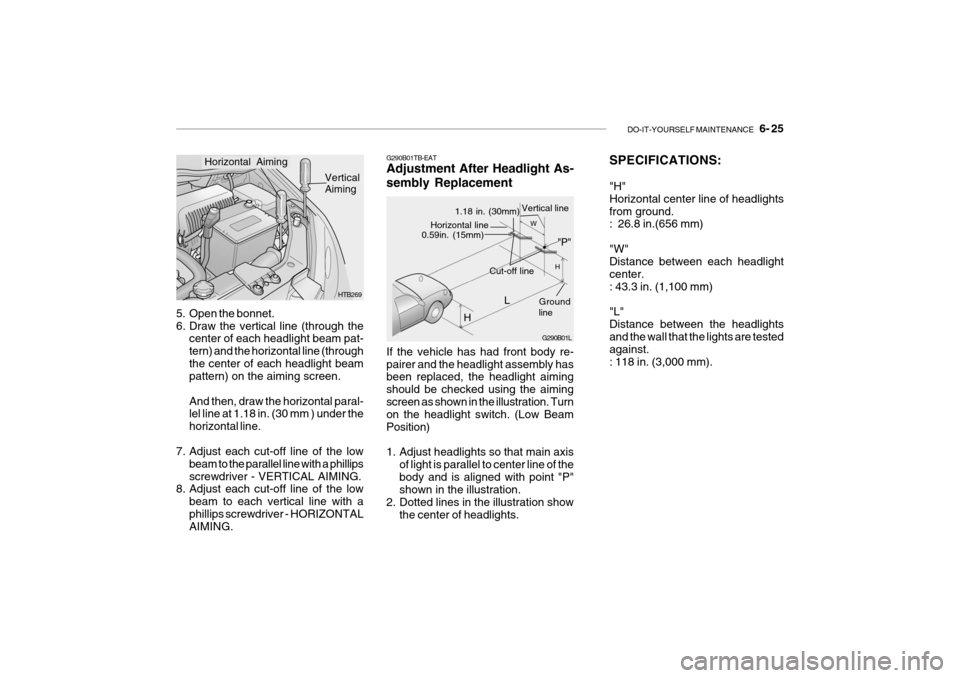
SPECIFICATIONS: "H" Horizontal center line of headlightsfrom ground. : 26.8 in.(656 mm) "W" Distance between each headlight center.: 43.3 in. (1,100 mm) "L" Distance between the headlights and the wall that the lights are tested against.: 118 in. (3,000 mm).
If the vehicle has had front body re-pairer and the headlight assembly has been replaced, the headlight aiming should be checked using the aimingscreen as shown in the illustration. Turn on the headlight switch. (Low Beam Position)
1. Adjust headlights so that main axis
of light is parallel to center line of the body and is aligned with point "P" shown in the illustration.
2. Dotted lines in the illustration show
the center of headlights.
G290B01TB-EAT Adjustment After Headlight As- sembly Replacement
G290B01L
L
W
H
H Cut-off line
Ground line
"P"
Horizontal line0.59in. (15mm)
1.18 in. (30mm) Vertical line
5. Open the bonnet.
6. Draw the vertical line (through the
center of each headlight beam pat-tern) and the horizontal line (throughthe center of each headlight beam pattern) on the aiming screen. And then, draw the horizontal paral- lel line at 1.18 in. (30 mm ) under the horizontal line.
7. Adjust each cut-off line of the low beam to the parallel line with a phillipsscrewdriver - VERTICAL AIMING.
8. Adjust each cut-off line of the low
beam to each vertical line with aphillips screwdriver - HORIZONTAL AIMING. HTB269
Horizontal Aiming
Vertical Aiming
Page 437 of 463
6- 26 DO-IT-YOURSELF MAINTENANCE
HTB5009
HTB5011HTB5010
Replacement instructions:
1. Allow the bulb to cool. Wear eye
protection.
2. Always grasp the bulb by its plastic base, avoid touching the glass.
3. Disconnect the power cord from the bulb base in the back of the head-light.
4. Remove the dust cover. 5. Push the bulb spring for removing
the headlight bulb.
G270A01TB-EAT REPLACING LIGHT BULBS Headlight Bulb In the event of bulb failure being expe- rienced, ensure that the relative lighting circuit is turned off prior to attempting toreplace the bulb. The illustrations on the following page will assist in locating and removing the various bulbs. En-sure that the replacement bulb has the same cap configuration and wattage as the original.
!
CAUTION:
Keep the lamps out of contact with petroleum product, such as oil, gaso- line, etc.
Page 438 of 463

DO-IT-YOURSELF MAINTENANCE 6- 27
G270B01TB-GAT Front Turn Signal light / Position Light
1. Disconnect the power cord from the
bulb.
2. Replace to the new bulb. HTB285G270C01TB-GAT Luggage Compartment Light
HTB282
1. Remove the cover with a (-) driver.
2. Disconnect the power cord.
3. Replace to the new bulb. HTB283
!
6. Remove the protective cap from the
replacement bulb and install the new bulb by matching the plastic basewith the headlight hole. Install the dust cover after retightening the bulb spring and reconnect the power cord.
7. Use the protective cap and carton to dispose of the old bulb.
8. Check for proper headlight aim.
WARNING
The halogen bulb contains gas un-der pressure and if impacted couldshatter, resulting in flying fragments. Always wear eye protection when servicing the bulb. Protect the bulbagainst abrasions or scratches and against liquids when lighted. Turn on the bulb only when installed in aheadlight. Replace the headlight if damaged or cracked. Keep the bulb out of the reach of children and dis-pose of the used bulb with care.
Page 442 of 463
DO-IT-YOURSELF MAINTENANCE 6- 31
G200C02TB-GAT FUSE PANEL DESCRIPTION Engine Compartment
PROTECTED COMPONENTS
Ignition Switch Ignition Switch, Start Relay
Fuel pump, Alternator, ECM
Radiator FanHeadlight, Defogger RelayABSC/lighterAuto Fuel Cut Switch ABS ABS
Blower, Blower Motor
Power WindowElectronic power steeringECMECMA/CON, Fuel PumpInjectorA/ConditionerHornAlternator
FUSE RATING
30A30A30A30A50A10A25A15A10A20A40A30A30A50A10A20A10A15A10A10A
100A
DESCRIPTION
IGN 2IGN 1ECURAD
BATT ABS
C/LIGHTER F/PUMPECU-BABS1ABS2BLW
P/WDW EPS
ECU-1ECU-2 SNSR INJ
A/CON HORN BATT
Note: Not all fuse panel descriptions in this manual may be applicable to your vehicle. It is accurate at the time of printing. When you inspect the fuse box on your vehicle, refer to the fuse box label.
Gasoline Engine
G200C01TB
Page 443 of 463
6- 32 DO-IT-YOURSELF MAINTENANCE
G250C01TB-GAT FUSE PANEL DESCRIPTION Engine Compartment
PROTECTED COMPONENTS
Ignition Switch Ignition Switch, Start Relay
Fuel pump, Alternator, ECMFFHS
Radiator FanHeadlight, Defogger RelayABSC/lighterAuto Fuel Cut Switch ABS ABS
Blower, Blower Motor
Power WindowElectronic power steeringECMECMA/CON, Fuel PumpInjectorA/ConditionerHornAlternator
FUSE RATING
30A30A30A30A30A50A10A25A15A10A20A40A30A30A50A10A20A10A15A10A10A
100A
DESCRIPTION
IGN 2IGN 1ECU
FFHS RAD
BATT ABS
C/LIGHTER F/PUMPECU-BABS1ABS2BLW
P/WDW EPS
ECU-1ECU-2 SNSR INJ
A/CON HORN BATT
Note: Not all fuse panel descriptions in this manual may be applicable to your vehicle. It is accurate at the time of printing. When you inspect the fuse box on your vehicle, refer to the fuse box label.
Diesel Engine
G200C01TB-2