Page 80 of 282
1FEATURES OF YOUR HYUNDAI
68
B310B01MC-GAT ODOMETER/TRIP ODOMETER (Without Trip Computer)1. Odometer The odometer records the total driving distance in kilometers or miles, and is useful for keeping a record for mainte-nance intervals. It is normal for a new vehicle to have the odometer indicating less than 50km. NOTE: Any alteration of the odometer may void your warranty coverage.
B310B01MC 2. Trip Odometer
Pushing in the TRIP switch for less than 1 second when the ignition switch is in "ON" position changes the display as follows;
B310B02MC
OMC025054
B310B03MC
Trip odometer records the distance of 2 trips in kilometers or miles. TRIP A: First distance you have trav-
eled from your origination point to a first destination. Type A
Type B
Type A
Type B
Page 82 of 282
1FEATURES OF YOUR HYUNDAI
70
OUTSIDE TEMPERATURETRIPMETER
AVERAGE FUEL CONSUMPTION DISTANCE TO EMPTY
TRIP Switch
Pushing in the TRIP switch for less than 1 second when the ignition switch is in "ON" position changes the displayas follows;
1. Outside Temperature(°C or °F)
This mode indicates the outside tem-
perature between -40°C (-40°F) and
80°C (176°F) . B400B02MC
Odometer
Outside Temperature
2. Tripmeter (km or miles)
o This mode indicates the total dis-
tance travelled since the last tripmeter reset. Total distance is also reset tozero if the battery is disconnected.
o Pressing the TRIP switch for more
than 1 second when the tripmeter isbeing displayed clears the tripmeter to zero.
o The meter's working range is from 0 to 999.9 kms (999.9 miles). B400B03MC
Odometer Tripmeter
OMC025054
Page 84 of 282

1FEATURES OF YOUR HYUNDAI
72
B340A01A-AAT Combination Turn Signal, Head- light And High-beam SwitchTurn Signal Operation Pulling down on the lever causes the turn signals on the left side of the car to blink. Pushing upwards on the levercauses the turn signals on the right side of the car to blink. As the turn is com- pleted, the lever will automatically re-turn to the center position and turn off the turn signals at the same time. If either turn signal indicator light blinksmore rapidly than usual, goes on but does not blink, or does not go on at all, there is a malfunction in the system.Check for a burned-out fuse or bulb or see your Hyundai dealer. B340B01A-AAT Lane Change Signal To indicate a lane change, move the lever up or down to a point where it begins flashing.The lever will automatically return to the center position when released.
B340B01MC
B340C04FC-GAT Headlight Switch
To operate the headlights, turn the bar- rel on the end of the multi-function switch. The first position turns on theparking lights, sidelights, tail lights and instrument panel lights. The second position turns on the headlights. NOTE: The ignition must be in the "ON" position to turn on the headlights. Parking Light Auto Cut
o The purpose of this feature is to prevent the battery from being dis- charged.B340C02MC
MULTI-FUNCTION LIGHT SWITCH
Page 85 of 282

1
FEATURES OF YOUR HYUNDAI
73
B340E01A-AAT Headlight Flasher
To flash the headlights, pull the switch lever toward you, then release it. The headlights can be flashed even thoughthe headlight switch is in the "OFF" position.
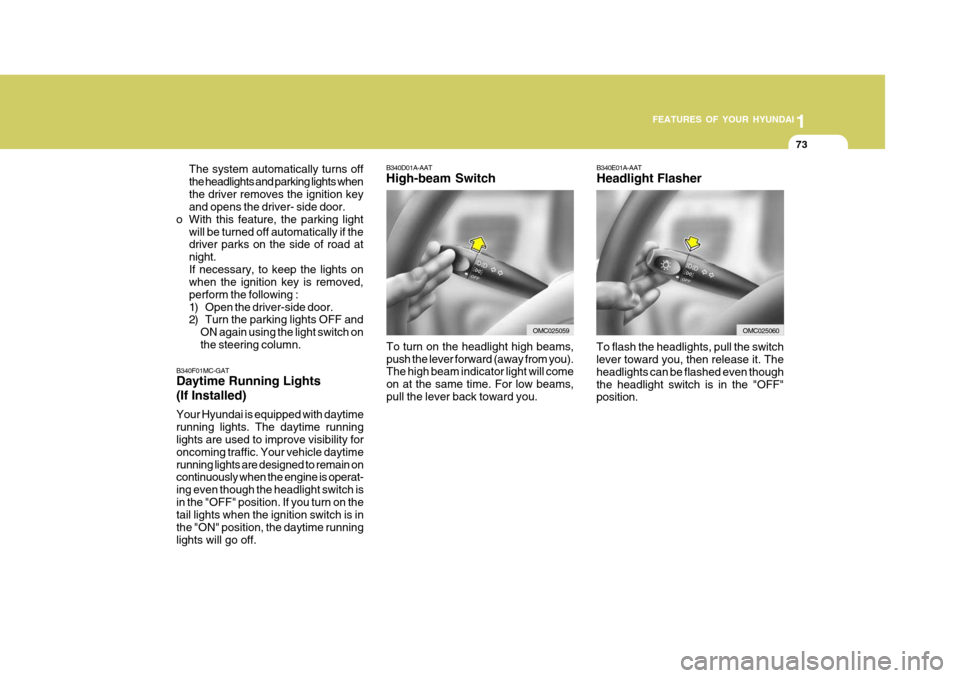
B340D01A-AAT High-beam Switch
B340F01MC-GAT Daytime Running Lights (If Installed) Your Hyundai is equipped with daytime running lights. The daytime running lights are used to improve visibility for oncoming traffic. Your vehicle daytimerunning lights are designed to remain on continuously when the engine is operat- ing even though the headlight switch isin the "OFF" position. If you turn on the tail lights when the ignition switch is in the "ON" position, the daytime runninglights will go off. The system automatically turns offthe headlights and parking lights whenthe driver removes the ignition key and opens the driver- side door.
o With this feature, the parking light
will be turned off automatically if thedriver parks on the side of road at night.If necessary, to keep the lights on when the ignition key is removed, perform the following :
1) Open the driver-side door.
2) Turn the parking lights OFF andON again using the light switch on the steering column.
OMC025060
To turn on the headlight high beams, push the lever forward (away from you). The high beam indicator light will come on at the same time. For low beams,pull the lever back toward you.OMC025059
Page 93 of 282

1
FEATURES OF YOUR HYUNDAI
81
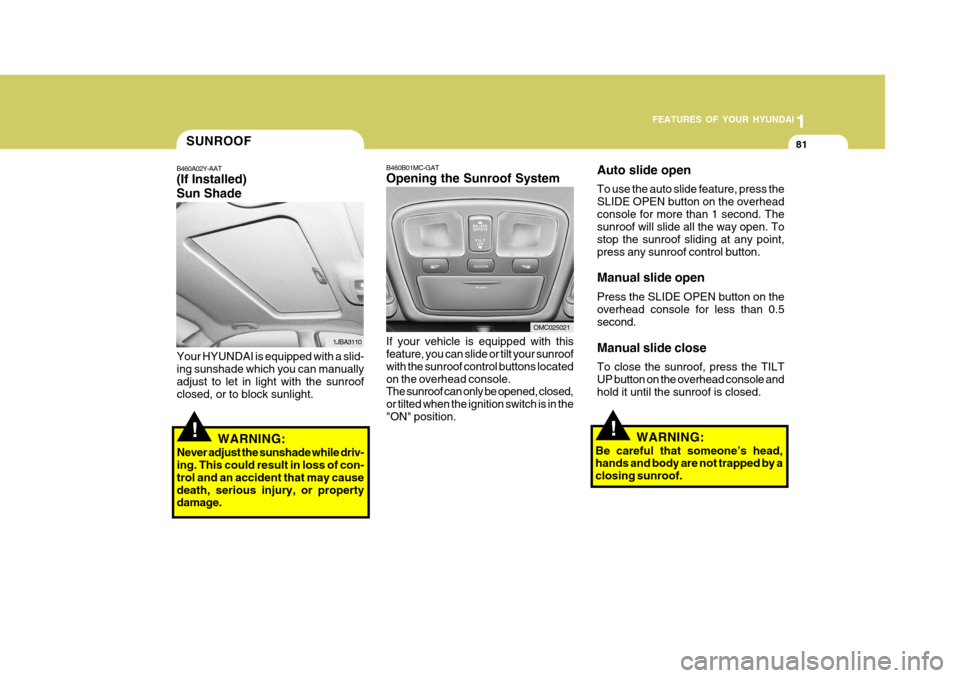
B460B01MC-GAT Opening the Sunroof System If your vehicle is equipped with this feature, you can slide or tilt your sunroof with the sunroof control buttons locatedon the overhead console. The sunroof can only be opened, closed, or tilted when the ignition switch is in the"ON" position.
!
SUNROOF
B460A02Y-AAT (If Installed) Sun Shade
1JBA3110
Your HYUNDAI is equipped with a slid- ing sunshade which you can manually adjust to let in light with the sunroofclosed, or to block sunlight.
WARNING:
Never adjust the sunshade while driv- ing. This could result in loss of con- trol and an accident that may causedeath, serious injury, or property damage.
OMC025021
!
Auto slide open To use the auto slide feature, press the SLIDE OPEN button on the overheadconsole for more than 1 second. The sunroof will slide all the way open. To stop the sunroof sliding at any point,press any sunroof control button. Manual slide open Press the SLIDE OPEN button on the overhead console for less than 0.5 second. Manual slide close To close the sunroof, press the TILT UP button on the overhead console andhold it until the sunroof is closed.
WARNING:
Be careful that someone’s head, hands and body are not trapped by a closing sunroof.
Page 96 of 282

1FEATURES OF YOUR HYUNDAI
84
The interior courtesy light switch has three positions. The three positions are: o "DOOR" In the "DOOR" position, the interior courtesy light comes on when any dooris opened regardless of the ignition key position. The light goes out gradually after 30 seconds if the door is closed.However if the ignition switch is ON or all doors are locked, interior light will turn off even within 30 seconds.
B490A01MC-AAT Interior Light
B490A03MC
INTERIOR LIGHT
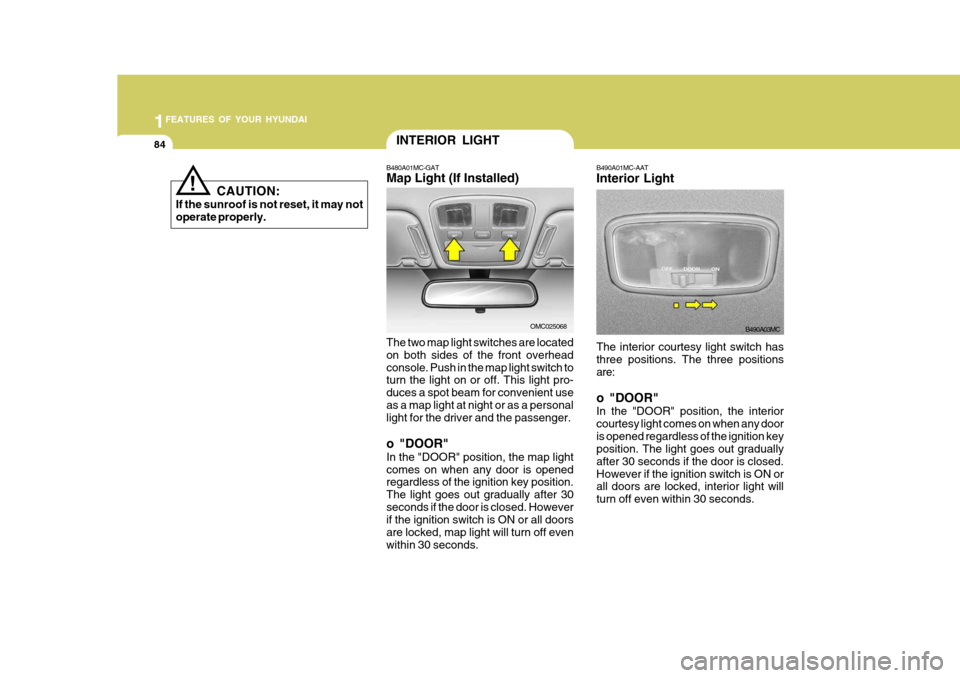
B480A01MC-GAT Map Light (If Installed) The two map light switches are located on both sides of the front overheadconsole. Push in the map light switch to turn the light on or off. This light pro- duces a spot beam for convenient useas a map light at night or as a personal light for the driver and the passenger. o "DOOR" In the "DOOR" position, the map light comes on when any door is opened regardless of the ignition key position. The light goes out gradually after 30seconds if the door is closed. However if the ignition switch is ON or all doors are locked, map light will turn off evenwithin 30 seconds.
OMC025068
! CAUTION:
If the sunroof is not reset, it may not operate properly.
Page 115 of 282
1
FEATURES OF YOUR HYUNDAI
103
1
FEATURES OF YOUR HYUNDAI
103
1
FEATURES OF YOUR HYUNDAI
103
Defrost-Level
Air is discharged through the wind- shield defroster nozzle, side defrosternozzle, side ventilator. If the "Defrost" mode is selected, the A/ C will turn on automatically and "Fresh"mode will be activated to improve wind- shield defrosting.
B670D06MC
MAX A/C-Level (If Installed)
Air is discharged through the face level vents. If the "MAX A/C" mode is selected, theA/C will turn on automatically and "Re- circulation" mode will be activated. B670D07MC
* The A/C or the air intake controlswitch returns to its former setting.
A/C
ON
ON or OFF * ON or OFF *
ONON Air Intake
Control Switch
or *
NOTE:
o The air intake control switch will change to "
" mode when the
ignition switch is turned "ON" with the MAX A/C mode selected.
o When you change to another mode
from MAX A/C, the A/C and the airintake control switch are set as shown in the following chart.
Page 131 of 282

1
FEATURES OF YOUR HYUNDAI
119
1
FEATURES OF YOUR HYUNDAI
119
1
FEATURES OF YOUR HYUNDAI
119
1
FEATURES OF YOUR HYUNDAI
119
M420B01MC-GAT 1. POWER ON-OFF Control Knob The radio unit may be operated when the ignition key is in the “ACC” or “ON”position. Press the knob to switch the power on. The LCD shows the radio frequency in the radio mode or the tapedirection indicator in the tape mode. To switch the power off, press the knob again. VOLUME Control Rotate the knob clockwise to increase the volume and turn the knob counter- clockwise to reduce the volume. 2. BAND Select Button Pressing the button changes the AM(MW, LW), FM1 and FM2 bands. 3. TUNE/MODE Select Knob Rotate the knob clockwise to increase the frequency and turn the knob coun- terclockwise to reduce the frequency. Mode Select Knob Pressing the MODE knob changes the BASS, MIDDLE, TREBLE, FADER andBALANCE mode. The mode selected is shown on the display.After selecting the each mode, rotate the mode select knob clockwise or counterclockwise. BASS Control To increase the BASS, rotate the knob clockwise, while to decrease the BASS, rotate the knob counterclockwise. MIDDLE Control To increase the MIDDLE, rotate the knob clockwise, while to decrease the MID, rotate the knob counterclockwise. TREBLE Control To increase the TREBLE, rotate the knob clockwise, while to decrease the TREBLE, rotate the knob counterclock- wise.FADER Control Rotate the control knob clockwise to emphasize rear speaker sound (frontspeaker sound will be attenuated). When the control knob is turned counterclock- wise, front speaker sound will be em-phasized (rear speaker sound will be attenuated). BALANCE Control Rotate the knob clockwise to empha- size right speaker sound (left speakersound will be attenuated). When the control knob is turned counterclock- wise, left speaker sound will be empha-sized (right speaker sound will be at- tenuated).
4. AUTO SEEK Select Button
(Automatic Channel Selection)
Press the AUTO SEEK select button. When the side is pressed, the unitwill automatically tune to the next higher frequency and when the side is pressed, it will automatically tune to thenext lower frequency.
FM/AM