2007 Hyundai Accent run flat
[x] Cancel search: run flatPage 63 of 282
1
FEATURES OF YOUR HYUNDAI
51
o The built in coat hooks should
only be used for light weight cloth- ing, ensure that pockets are free ofany heavy or sharp objects. When using coat hooks, do not hang clothes on coat hangers.
o The space between the occupant and the curtain airbag must neverbe occupied by children, passen-gers or pets. Occupants should never lean out or have any parts of their body protruding from thewindow while the engine is run- ning.
o Do not move the sun visor out to cover the side window if there isan item attached to it such as garage door remote control, pens,air fresheners or the like. These objects may cause injury if the Curtain Airbag is deployed.
o Where sun blinds are fitted to the rear doors, these must not ob-struct or impair the airbag in anyway.
!WARNING:
o Before installing child restraints , always refer to “Child Restraint System” to ensure correct instal- lation and occupant protection is maximized.
o Make sure that the occupant does not have any body parts (head,arms & legs) protruding outsidethe restraining system. If an inflat- ing airbag was to strike an infant child on the head, it may causeserious injury.
o Ensure the opening for the Cur-
tain Airbag System remains unob-structed at all times, so that the airbags can inflate properly if needed.
Important Safety Notes for Cur- tain Airbag Systems Following is a number of safety points concerning this system which shouldalways be observed to ensure risk of injury is reduced in an accident.
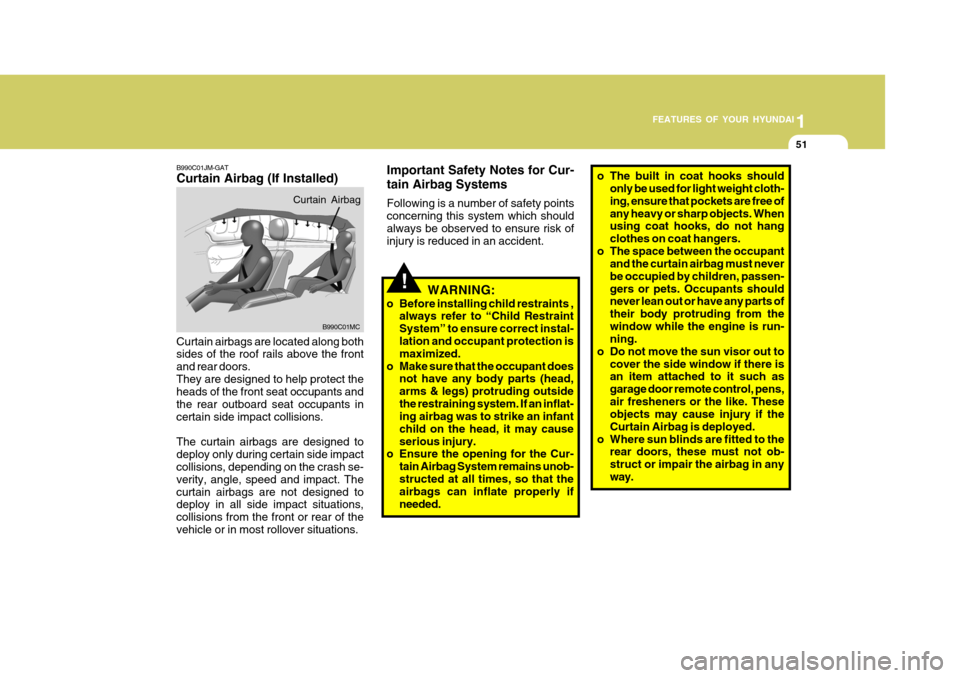
B990C01JM-GAT Curtain Airbag (If Installed)
Curtain airbags are located along both sides of the roof rails above the front and rear doors.They are designed to help protect the heads of the front seat occupants and the rear outboard seat occupants incertain side impact collisions. The curtain airbags are designed to deploy only during certain side impact collisions, depending on the crash se- verity, angle, speed and impact. Thecurtain airbags are not designed to deploy in all side impact situations, collisions from the front or rear of thevehicle or in most rollover situations. B990C01MC
Curtain Airbag
Page 166 of 282

2
DRIVING YOUR HYUNDAI
3
2
DRIVING YOUR HYUNDAI
3
!
BEFORE STARTING THE EN- GINE
C020A02O-GAT Before you start the engine, you should always:
1. Look around the vehicle to be sure
there are no flat tires, puddles of oil, water or other indications of pos- sible trouble.
2. After entering the car, check to be sure the parking brake is engaged.
3. Check that all windows, and lights are clean.
4. Check that the interior and exterior
mirrors are clean and in position.
5. Check your seat, seatback and headrest to be sure they are in theirproper positions.
6. Lock all the doors.
7. Fasten your seat belt and be sure
that all other occupants have fas- tened theirs.
8. Turn off all lights and accessories
that are not needed.
9. When you turn the ignition switch to "ON", check that all appropriatewarning lights are operating andthat you have sufficient fuel.
10.Check the operation of warning
lights and all bulbs when key is inthe "ON" position. WARNING:
(Diesel Engine)
To ensure that sufficient vacuum exists within the brake system dur-ing cold weather start-up condi- tions, it is necessary to run the engine at idle for several secondsafter starting the engine.TO START THE ENGINE
C030A01A-GAT COMBINATION IGNITION SWITCH
o If your Hyundai is equipped with a manual transaxle, place the shift lever in neutral and depress the clutch pedal fully.
o If your Hyundai has an automatic
transaxle, place the shift lever in "P"(park).
o To start the engine, insert the igni- tion key and turn it to the "START"position. Release it as soon as the engine starts. Do not hold the key inthe "START" position for more than 15 seconds.
NOTE: For safety, the engine will not start if the shift lever is not in "P" or "N" position (Automatic transaxle).
!WARNING:
Always wear appropriate shoes when operating your vehicle. Unsuitable shoes (high heels, skiboots, etc.) may interfere with your ability to use the brake and accelera- tor pedal, and the clutch (if installed).
Page 182 of 282

2
DRIVING YOUR HYUNDAI
19
2
DRIVING YOUR HYUNDAI
19
o Don't "lug" or "over-rev" the engine. Lugging is driving too slowly in too high a gear resulting in the engine bucking. If this happens, shift to a lower gear. Over-revving is racingthe engine beyond its safe limit. This can be avoided by shifting at the recommended speeds.
o Use your air conditioning sparingly. The air conditioning system is oper-ated by engine power so your fueleconomy is reduced when you use it.
more frequent maintenance is re- quired (see Section 5 for details).
o Keep your car clean. For maximum service, your Hyundai should bekept clean and free of corrosivematerials. It is especially important that mud, dirt, ice, etc. not be al- lowed to accumulate on the under-side of the car. This extra weight can result in increased fuel con- sumption and also contribute to cor-rosion.
o Travel lightly. Don't carry unneces-
sary weight in your car. Weight re-duces fuel economy.
o Don't let the engine idle longer than
necessary. If you are waiting (andnot in traffic), turn off your engine and restart only when you're ready to go.
o Remember, your Hyundai does not require extended warm-up. As soonas the engine is running smoothly,you can drive away. In very cold weather, however, give your engine a slightly longer warm-up period.
o Don't "ride" the brake or clutch pedal.
This can increase fuel consumptionand also increase wear on these components. In addition, driving with your foot resting on the brake pedalmay cause the brakes to overheat, which reduces their effectiveness and may lead to more serious con-sequences.
o Take care of your tires. Keep them
inflated to the recommended pres-sure. Incorrect inflation, either too much or too little, results in unnec- essary tire wear. Check the tire pres-sures at least once a month.
o Be sure that the wheels are aligned
correctly. Improper alignment canresult from hitting curbs or driving too fast over irregular surfaces. Poor alignment causes faster tire wearand may also result in other prob- lems as well as greater fuel con- sumption.
o Keep your car in good condition. For better fuel economy and reducedmaintenance costs, maintain yourcar in accordance with the mainte- nance schedule in Section 5. If you drive your car in severe conditions,
Page 194 of 282

3
WHAT TO DO IN AN EMERGENCY
5
!!
SPARE TIRE
WARNING (Diesel Only):
Never work on injection system with engine running or within 30 sec- onds after shutting off engine. High pressure pump, rail, injectors andhigh pressure pipes are subject to high pressure even after the engine stopped. The fuel jet produced byfuel leaks may cause serious in- jury, if it touch the body. People using pacemakers should not movethan 30cm closer to the ECU or wiring harness within the engine room while engine is running, sincethe high currents in the Common Rail system produce considerable magnetic fields. WARNING:
Do not remove the radiator cap whenthe engine is hot. This can allowcoolant to be blown out of the open- ing and cause serious burns.
6. If you cannot find the cause of the overheating, wait until the engine temperature has returned to nor-mal. Then, if the engine coolant has been lost, carefully add coolant to the reservoir (Page 6-11) to bring thefluid level in the reservoir up to the halfway mark.
7. Proceed with caution, keeping alert
for further signs of overheating. Ifoverheating happens again, call a Hyundai dealer for assistance.
!
5. If the water pump drive belt is broken
or coolant is leaking out, stop the engine immediately and call the near- est Hyundai dealer for assistance. D040A03A-GAT The following instructions for the FULL SIZE spare tire should be observed: Check inflation pressure as soon as practical after installing the spare tire, and adjust to the specified pressure. The tire pressure should be periodi-cally checked and maintained at the specified pressure while the tire is stored.
CAUTION:
Serious loss of engine coolant indi-cates there is a leak in the coolingsystem and this should be checked as soon as possible by a Hyundai dealer. Spare Tire Pressure
I030A02MC
4 DOOR
Page 196 of 282
3
WHAT TO DO IN AN EMERGENCY
7
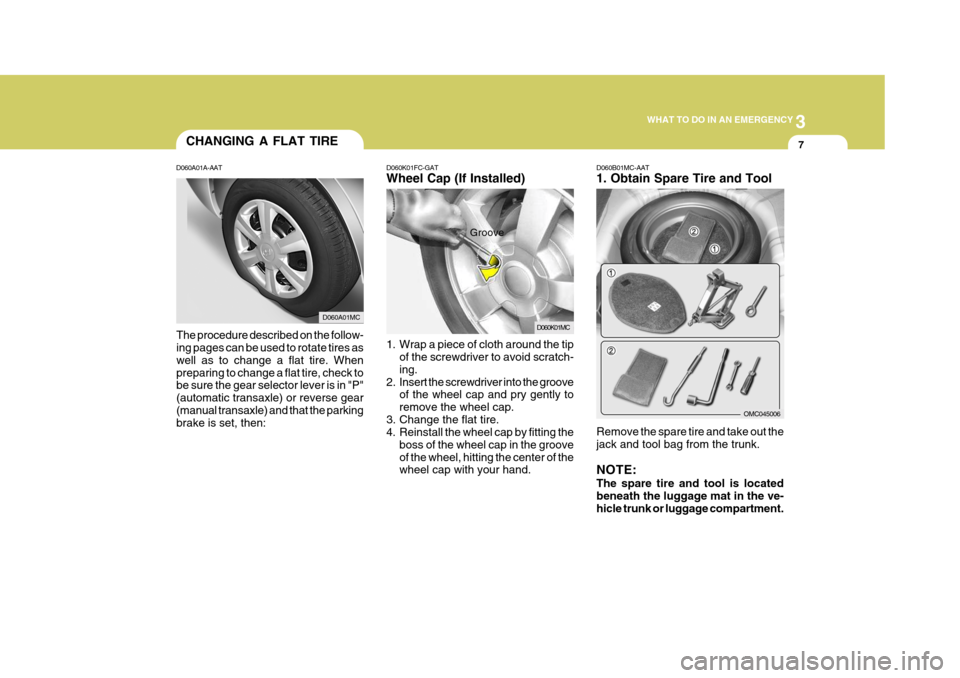
D060K01FC-GAT Wheel Cap (If Installed)
1. Wrap a piece of cloth around the tip
of the screwdriver to avoid scratch- ing.
2. Insert the screwdriver into the groove of the wheel cap and pry gently toremove the wheel cap.
3. Change the flat tire.
4. Reinstall the wheel cap by fitting the boss of the wheel cap in the groove of the wheel, hitting the center of the wheel cap with your hand.
D060A01A-AAT
The procedure described on the follow-ing pages can be used to rotate tires as well as to change a flat tire. Whenpreparing to change a flat tire, check to be sure the gear selector lever is in "P" (automatic transaxle) or reverse gear(manual transaxle) and that the parking brake is set, then: Groove
D060B01MC-AAT 1. Obtain Spare Tire and Tool Remove the spare tire and take out the jack and tool bag from the trunk. NOTE: The spare tire and tool is located beneath the luggage mat in the ve-hicle trunk or luggage compartment.
CHANGING A FLAT TIRE
D060K01MCD060A01MC
OMC045006
Page 200 of 282
3
WHAT TO DO IN AN EMERGENCY
11
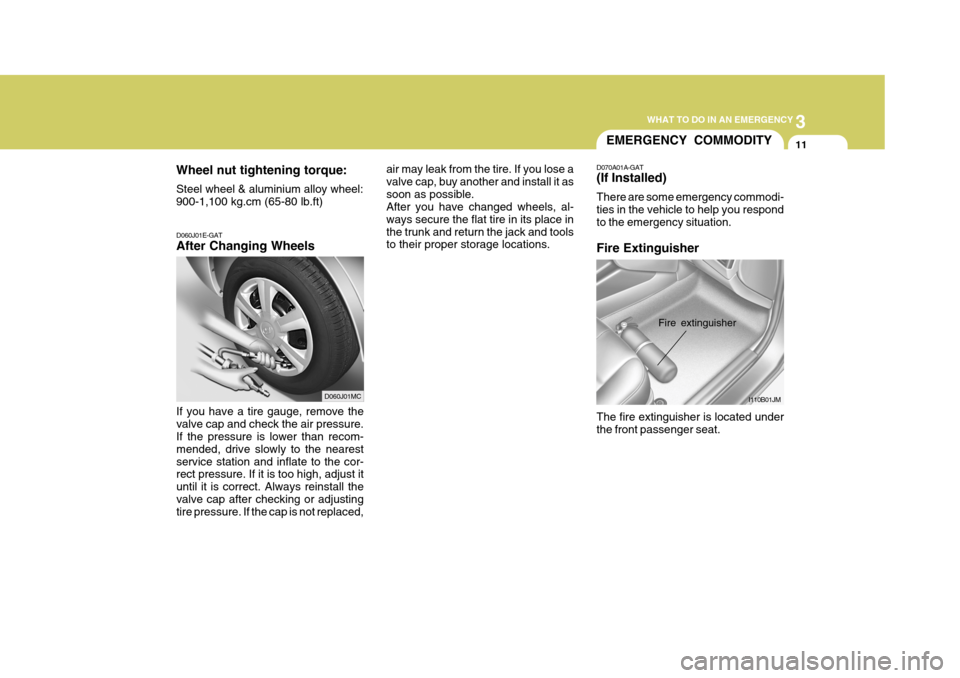
D060J01E-GAT After Changing Wheels If you have a tire gauge, remove the valve cap and check the air pressure. If the pressure is lower than recom- mended, drive slowly to the nearestservice station and inflate to the cor- rect pressure. If it is too high, adjust it until it is correct. Always reinstall thevalve cap after checking or adjusting tire pressure. If the cap is not replaced,
Wheel nut tightening torque: Steel wheel & aluminium alloy wheel: 900-1,100 kg.cm (65-80 lb.ft)
air may leak from the tire. If you lose avalve cap, buy another and install it assoon as possible. After you have changed wheels, al- ways secure the flat tire in its place inthe trunk and return the jack and tools to their proper storage locations.
D060J01MC
EMERGENCY COMMODITY
D070A01A-GAT (If Installed) There are some emergency commodi- ties in the vehicle to help you respond to the emergency situation. Fire Extinguisher The fire extinguisher is located under the front passenger seat. I110B01JM
Fire extinguisher
Page 201 of 282
3 WHAT TO DO IN AN EMERGENCY
12
If there is small fire and you know how to use the fire extinguisher, take thefollowing steps carefully.
1. Pull the pin at the top of the extin-guisher that keeps the handle from being accidentally pressed.
2. Aim the nozzle toward the base of
the fire.
3. Stand approximately 2.5 m (8 ft)
away from the fire and squeeze the handle to discharge the extinguisher. If you release the handle, the dis- charge will stop.
4. Sweep the nozzle back and forth at the base of the fire. After the fireappears to be out, watch it carefullysince it may re-ignite.
Triangle Reflector The triangle reflector is located in the trunk. Placed the triangle reflector on the road to warn oncoming vehicles during emer- gencies, such as when the vehicle is parked by the roadside due to anyproblems. First Aid Kit The first aid kit is located in the trunk. There are some items such as scis- sors, bandage and adhesive tape and etc. in the kit to give first aid to aninjured person. Tire Pressure Gauge (If Installed) You can easily check the tire pressure with a tire pressure gauge that is found in OVM tool bag. Tires normally lose some air in day-to-day use, and youmay have to add a few pounds of air periodically and it is not usually a sign of a leaking tire, but of normal wear.Always check tire pressure when the tires are cold because tire pressure increases with temperature. To check the tire pressure, take the following steps;
1. Unscrew the inflation valve cap that
is located on the rim of the tire.
2. Press and hold the gauge against the tire valve. Some air will escape asyou begin and more will escape if youdon't press the gauge in firmly.
3. A firm non-leaking push will activate
the gauge.
4. Read the tire pressure on the gauge to know whether the tire pressure islow or high.
5. Adjust the tire pressures to the speci- fied pressure. See page 3-5.
6. Reinstall the inflation valve cap.
Page 254 of 282
6
DO-IT-YOURSELF MAINTENANCE
31
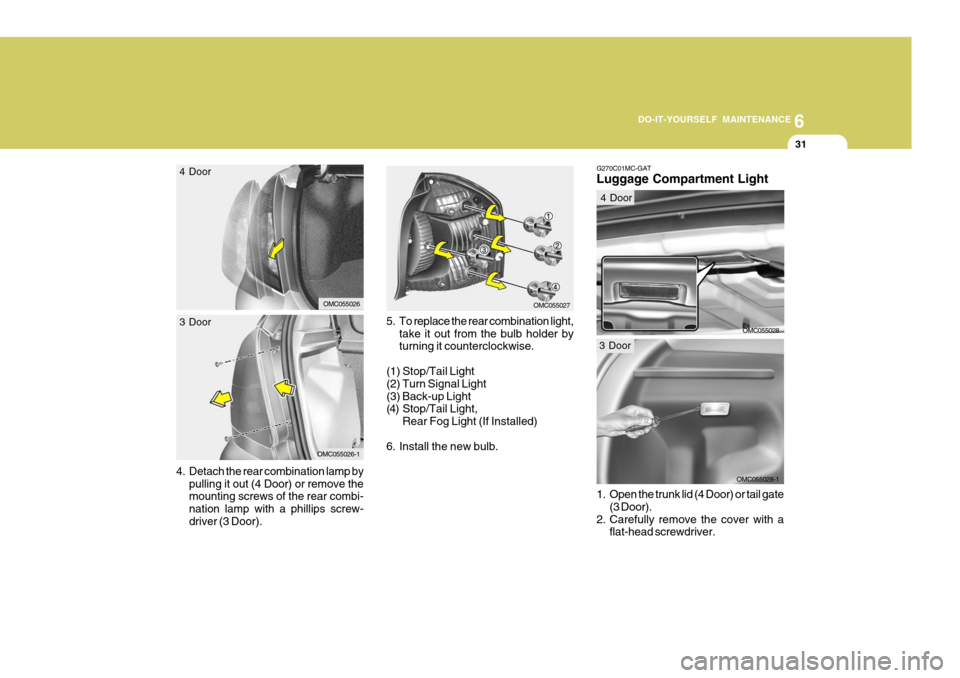
5. To replace the rear combination light, take it out from the bulb holder by turning it counterclockwise.
(1) Stop/Tail Light (2) Turn Signal Light(3) Back-up Light
(4) Stop/Tail Light, Rear Fog Light (If Installed)
6. Install the new bulb.
4.
Detach the rear combination lamp by pulling it out (4 Door) or remove the mounting screws of the rear combi- nation lamp with a phillips screw-driver (3 Door).
OMC055027OMC055026
4 Door
OMC055026-1
3 Door
OMC055028-1
G270C01MC-GAT Luggage Compartment Light
OMC055028
1. Open the trunk lid (4 Door) or tail gate (3 Door).
2. Carefully remove the cover with a flat-head screwdriver.
4 Door
3 Door