2007 HUMMER H2 four wheel drive
[x] Cancel search: four wheel drivePage 222 of 570

Driver Information Center (DIC)
The Driver Information Center (DIC) display is
located on the instrument panel cluster, below the
speedometer. The DIC buttons are located on
the steering wheel. The DIC can display
information such as the trip odometer, fuel
economy, customization features and
warning/status messages.
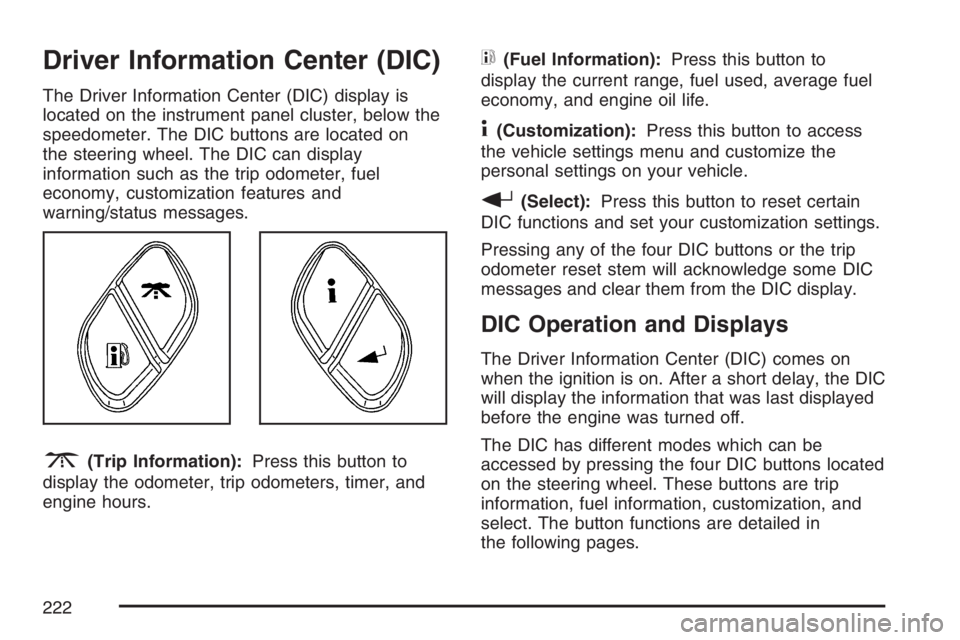
3(Trip Information):Press this button to
display the odometer, trip odometers, timer, and
engine hours.
t(Fuel Information):Press this button to
display the current range, fuel used, average fuel
economy, and engine oil life.
4(Customization):Press this button to access
the vehicle settings menu and customize the
personal settings on your vehicle.
r(Select):Press this button to reset certain
DIC functions and set your customization settings.
Pressing any of the four DIC buttons or the trip
odometer reset stem will acknowledge some DIC
messages and clear them from the DIC display.
DIC Operation and Displays
The Driver Information Center (DIC) comes on
when the ignition is on. After a short delay, the DIC
will display the information that was last displayed
before the engine was turned off.
The DIC has different modes which can be
accessed by pressing the four DIC buttons located
on the steering wheel. These buttons are trip
information, fuel information, customization, and
select. The button functions are detailed in
the following pages.
222
Page 231 of 570

SERVICE 4WD (Full-Time
Four-Wheel Drive)
This message displays if a problem occurs with
the Full-Time Four-Wheel Drive system.
If this message appears, stop as soon as possible
and turn off the vehicle. Restart the vehicle and
check for the message on the DIC display. If
the message is still displayed, or appears again
when you begin driving, there is a problem with the
Full-Time Four-Wheel Drive system. See your
dealer for service. Press any of the DIC buttons,
or the trip stem, to acknowledge this message and
clear it from the DIC display.
SERVICE AIR BAG
This message displays if there is a problem with
the airbag system. Have your dealer inspect
the system for problems. Press any of the DIC
buttons, or the trip stem, to acknowledge this
message and clear it from the DIC display. See
Airbag Readiness Light on page 207and
Airbag System on page 77for more information.
SERVICE AIR SUSPENSION
This message displays if a problem occurs with
the suspension system. If this message appears,
stop as soon as possible and turn off the
vehicle. Restart the vehicle and check for the
message on the DIC display. If the message is still
displayed, or appears again when you begin
driving, there is a problem with the air suspension
system. See your dealer for service.
SERVICE BRAKE SYSTEM
This message displays if a problem occurs with
the brake system. If this message appears, stop as
soon as possible and turn off the vehicle. Restart
the vehicle and check for the message on the
DIC display. If the message is still displayed, or
appears again when you begin driving, there
is a problem with the brake system. See your
dealer for service. Press any of the DIC buttons,
or the trip stem, to acknowledge this message and
clear it from the DIC display.
231
Page 311 of 570

Locking Rear Axle
The locking rear axle can give your vehicle
additional traction from the rear wheels when
traveling in off-road situations such as mud, snow,
sand, steep hills and uneven terrain.
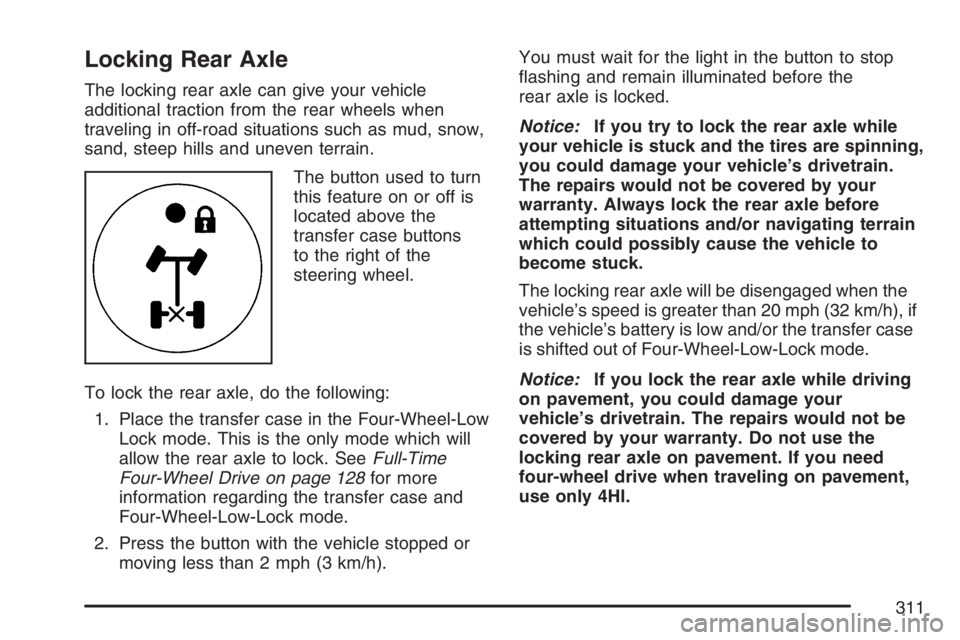
The button used to turn
this feature on or off is
located above the
transfer case buttons
to the right of the
steering wheel.
To lock the rear axle, do the following:
1. Place the transfer case in the Four-Wheel-Low
Lock mode. This is the only mode which will
allow the rear axle to lock. SeeFull-Time
Four-Wheel Drive on page 128for more
information regarding the transfer case and
Four-Wheel-Low-Lock mode.
2. Press the button with the vehicle stopped or
moving less than 2 mph (3 km/h).You must wait for the light in the button to stop
�ashing and remain illuminated before the
rear axle is locked.
Notice:If you try to lock the rear axle while
your vehicle is stuck and the tires are spinning,
you could damage your vehicle’s drivetrain.
The repairs would not be covered by your
warranty. Always lock the rear axle before
attempting situations and/or navigating terrain
which could possibly cause the vehicle to
become stuck.
The locking rear axle will be disengaged when the
vehicle’s speed is greater than 20 mph (32 km/h), if
the vehicle’s battery is low and/or the transfer case
is shifted out of Four-Wheel-Low-Lock mode.
Notice:If you lock the rear axle while driving
on pavement, you could damage your
vehicle’s drivetrain. The repairs would not be
covered by your warranty. Do not use the
locking rear axle on pavement. If you need
four-wheel drive when traveling on pavement,
use only 4HI.
311
Page 318 of 570

Before You Go Off-Roading
There are some things to do before you go out.
For example, be sure to have all necessary
maintenance and service work done. Check to
make sure all underbody shields are properly
attached. Remove any removable side steps.
SeeAssist Steps on page 338. Make sure any
equipment you may need — �rst aid kit, cell phone,
�ashlight, etc. — is securely stored in the vehicle.
Be sure you read all the information about your
four-wheel-drive vehicle in this manual. Is there
enough fuel? Is the spare tire fully in�ated? Are the
�uid levels up where they should be? What are the
local laws that apply to off-roading where you will be
driving? If you do not know, you should check with
law enforcement people in the area. Will you be on
someone’s private land? If so, be sure to get the
necessary permission.
Loading Your Vehicle for Off-Road
Driving
{CAUTION:
Cargo on the load �oor piled higher
than the seatbacks can be thrown
forward during a sudden stop. You or
your passengers could be injured.
Keep cargo below the top of the
seatbacks.
Unsecured cargo on the load �oor can
be tossed about when driving over
rough terrain. You or your passengers
can be struck by �ying objects.
Secure the cargo properly.
Heavy loads on the roof raise the
vehicle’s center of gravity, making it
more likely to roll over. You can be
seriously or fatally injured if the
vehicle rolls over. Put heavy loads
inside the cargo area, not on the roof.
Keep cargo in the cargo area as far
forward and low as possible.
318
Page 370 of 570

Dinghy Towing
Use the following procedure to tow your vehicle:
1. Shift the transmission to PARK (P).
2. Turn the engine off, but leave the ignition in
ACCESSORY.
3. Firmly set the parking brake.
4. Securely attach the vehicle being towed to the
tow vehicle.
{CAUTION:
Shifting a full-time four-wheel-drive
vehicle’s transfer case into NEUTRAL can
cause your vehicle to roll even if the
transmission is in PARK (P). You or others
could be injured. Make sure the parking
brake is �rmly set before you shift the
transfer case to NEUTRAL.
5. Shift the transfer case to NEUTRAL (N).
SeeFull-Time Four-Wheel Drive on
page 128for the proper procedure to select
the NEUTRAL position for your vehicle.6. Release the parking brake only after the
vehicle being towed is �rmly attached to
the towing vehicle. You can use your vehicle’s
front mounted receiver with the proper
accessories to tow it. See “Front Mounted
Receiver” underIf Your Vehicle is Stuck
in Sand, Mud, Ice, or Snow on page 357.
7. Turn the ignition to ACCESSORY.
8. Disconnect the battery if you are going to tow
for long distances or long periods of time.
When towing your vehicle for extended periods of
time, start your vehicle as often as possible to
prevent battery drain. This should only be
done when the tow vehicle is parked.
Dolly Towing
Your vehicle cannot be dolly towed. If you must
tow your vehicle behind another, use the
dinghy towing procedure listed previously.
Notice:Dolly towing your vehicle will damage
drivetrain components. Do not dolly tow
your vehicle.
370
Page 389 of 570

Service........................................................ 392
Accessories and Modi�cations................... 392
California Proposition 65 Warning.............. 393
Doing Your Own Service Work.................. 393
Adding Equipment to the Outside of
Your Vehicle.......................................... 394
Fuel............................................................. 394
Gasoline Octane........................................ 394
Gasoline Speci�cations.............................. 394
California Fuel........................................... 395
Additives................................................... 395
Fuels in Foreign Countries........................ 396
Filling the Tank......................................... 397
Filling a Portable Fuel Container............... 399
Checking Things Under the Hood.............. 400
Hood Release........................................... 400
Engine Compartment Overview.................. 402
Engine Oil................................................. 404
Engine Oil Life System.............................. 407
Engine Air Cleaner/Filter............................ 409
Automatic Transmission Fluid.................... 412
Engine Coolant.......................................... 415Coolant Surge Tank Pressure Cap............ 418
Engine Overheating................................... 418
Overheated Engine Protection
Operating Mode..................................... 420
Cooling System......................................... 420
Power Steering Fluid ................................. 425
Windshield Washer Fluid........................... 426
Brakes...................................................... 427
Battery...................................................... 431
Jump Starting............................................ 432
Rear Axle.................................................... 437
Four-Wheel Drive........................................ 438
Front Axle................................................... 440
Bulb Replacement....................................... 441
Halogen Bulbs........................................... 441
Headlamps................................................ 441
Front Turn Signal and Parking Lamps.......... 442
Daytime Running Lamps (DRL)................. 443
Roof Marker Lamps................................... 443
Taillamps, Turn Signal, Stoplamps and
Back-up Lamps...................................... 444
Replacement Bulbs................................... 446
Section 5 Service and Appearance Care
389
Page 429 of 570

Notice:
Using the wrong �uid can badly damage
brake system parts. For example, just a
few drops of mineral-based oil, such
as engine oil, in the brake system can
damage brake system parts so badly that
they will have to be replaced. Do not
let someone put in the wrong kind of �uid.
If you spill brake �uid on your vehicle’s
painted surfaces, the paint �nish can be
damaged. Be careful not to spill brake �uid
on your vehicle. If you do, wash it off
immediately. SeeWashing Your Vehicle
on page 495.
Brake Wear
Your vehicle has four-wheel disc brakes.
Disc brake pads have built-in wear indicators that
make a high-pitched warning sound when the
brake pads are worn and new pads are needed.
The sound may come and go or be heard all
the time your vehicle is moving, except when you
are pushing on the brake pedal �rmly.
{CAUTION:
The brake wear warning sound means
that soon the brakes will not work well.
That could lead to an accident. When you
hear the brake wear warning sound, have
your vehicle serviced.
Notice:Continuing to drive with worn-out
brake pads could result in costly brake repair.
429
Page 438 of 570

How to Check Lubricant
To get an accurate reading, the vehicle should be
on a level surface.
When the differential is cold, the proper level is
from 5/8 inch to 1-5/8 inch (15 mm to 40 mm)
below the bottom of the �ller plug hole, located on
the rear axle. Add only enough �uid to reach
the proper level.
What to Use
Refer to the Maintenance Schedule to determine
what kind of lubricant to use. SeeRecommended
Fluids and Lubricants on page 528.
Four-Wheel Drive
Transfer Case
It is not necessary to regularly check transfer case
�uid unless you suspect there is a leak or you
hear an unusual noise. A �uid loss could indicate
a problem. Have it inspected and repaired.
Refer to the Maintenance Schedule to determine
how often to change the lubricant. See
Scheduled Maintenance on page 517.
438