Page 63 of 331
Instrument Panel
Instru me ntsand Cont ro ls
U.S. models
59
IMMOBILIZER SYSTEM
INDICATOR
WASHER LEVEL
INDICATOR
MALFUNCTION INDICATOR
LAMP LOW OIL PRESSURE
INDICATOR VSA ACTIVATION INDICATOR
VTM-4 INDICATOR
HIGH BEAM INDICATOR
A/T TEMPERATURE INDICATOR
LIGHTS ON INDICATOR
TPMS INDICATOR
CHARGING SYSTEM
INDICATOR
PARKING BRAKE AND
BRAKE SYSTEM
INDICATOR SIDE
AIRBAG OFF
INDICATOR
LOW FUEL INDICATOR
CRUISE CONTROL INDICATOR
BACK WINDOW OPEN
INDICATOR LOW
TIRE PRESSURE
INDICATOR MAINTENANCE
MINDER
INDICATOR
ANTI-LOCK BRAKE SYSTEM
INDICATOR
VEHICLE
STABILITY
ASSIST (VSA) SYSTEM
INDICATOR
SUPPLEMENTAL
RESTRAINT
SYSTEM
INDICATOR
SEAT BELT
REMINDER
INDICATOR
BED LIGHTS ON INDICATOR
IN-BED
TRUNK OPEN
INDICATOR (P.67)
(P.66)
(P.66)
(P.66)
(P.68)
(P.69)
(P.62)
(P.63) (P.62)
(P.62)
(P.69) (P.67)
(P.68) (P.67)
(P.62) (P.63)
(P.65)
(P.62)
(P.61)
(P.65)
(P.65)
(P.63)
(P.69) (P.64)
(P.65)
DOOR AND TAILGATE
OPEN MONITOR
TIRE PRESSURE MONITOR
(P.68)
Page 64 of 331
Instrument Panel
Canadian models
60
IMMOBILIZER SYSTEM
INDICATOR
WASHER LEVEL
INDICATOR
MALFUNCTION INDICATOR
LAMP LOW OIL PRESSURE
INDICATOR
VSA
ACTIVATION INDICATOR
VTM-4 INDICATOR
HIGH BEAM INDICATOR
A/T TEMPERATURE INDICATOR
LIGHTS ON INDICATOR
TPMS INDICATOR
CHARGING SYSTEM
INDICATOR
PARKING BRAKE AND
BRAKE SYSTEM
INDICATOR SIDE
AIRBAG OFF
INDICATOR
LOW FUEL INDICATOR
CRUISE CONTROL INDICATOR
BACK WINDOW OPEN
INDICATOR LOW
TIRE PRESSURE
INDICATOR MAINTENANCE
MINDER
INDICATOR
ANTI-LOCK BRAKE SYSTEM
INDICATOR
VEHICLE
STABILITY
ASSIST (VSA) SYSTEM
INDICATOR
SUPPLEMENTAL
RESTRAINT
SYSTEM
INDICATOR
SEAT BELT
REMINDER
INDICATOR
DAY
TIME RUNNING LIGHTS
INDICATOR
BED LIGHTS ON INDICATOR
IN-BED
TRUNK OPEN
INDICATOR (P.67)
(P.66)
(P.66)
(P.65) (P.66)
(P.68) (P.69)
(P.62)
(P.63) (P.62)
(P.62)
(P.69) (P.64)
(P.69)
(P.67)
(P.68) (P.67)
(P.62) (P.63)
(P.65)
(P.62)
(P.61)
(P.65)
(P.65)
(P.63)
(P.65)
DOOR AND TAILGATE
OPEN MONITOR
TIRE PRESSURE MONITOR
(P.68)
Page 70 of 331

This indicator monitors the
temperature of the automatic
transmission f luid. It should come on
f or a f ew seconds when you turn the
ignition switch to the ON (II)
position. If it comes on while driving,
it means the transmission f luid
temperature is too high. Pull to the
side of the road when it is saf e, shif t
to Park, and let the engine idle until
the indicator goes out.This indicator normally comes on f or
a f ew seconds when you turn the
ignition switch to the ON (II)
position. If it comes on at any other
time, there is a problem in the 4WD
system. Take the vehicle to your
dealer to have it checked.
If the indicator blinks while driving,
the VTM-4 fluid temperature is too
high. Pull to the side of the road
when it is saf e, shif t to Park, and let
the engine idle until the indicator
goes out.
This indicator reminds you that the
exterior lights are on. It comes on
when you turn the headlight control
dial to either the or
position.
If you turn the ignition switch to
ACCESSORY (I) or LOCK (0)
without turning of f the headlight
control dial, this indicator remains on.
A reminder chime will also sound
when you open the driver’s door. Lights On Indicator A/T Temperature
IndicatorVTM-4 Indicator
Instrument Panel Indicators
66
Continuing to drive with the A/T
temperature indicator on may cause
serious damage to the transmission.
Continuing to drive with the VTM-4
indicator blinking may cause serious
damage to the system.
Page 73 of 331

This indicator reminds you that the
bed lights are on. With the shift lever
in the Park position, they come on
when you push the light switch on
the dashboard, swing open the
tailgate, or open the In-Bed Trunk. This
indicator reminds you that the
In-Bed Trunk is open. If you do not
close it, the indicator stays on for
about 3 minutes. See page for
more information. This
indicator reminds you that the
back window is not completely
closed when you turn the ignition
switch from the ON (II) position to
the ACCESSORY (I) or the LOCK
(0) posit ion. With the ignition switch
in the ACCESSORY (I) position, it
goes off after about 30 seconds. With
the ignition switch in the LOCK (0)
position, it goes off after about 3
minutes.
If
you turn the ignition switch to the
ACCESSORY (I) or LOCK (0)
position without turning off the bed
lights, this indicator will remain on,
andthengooffafter20minutes.See
page for more information. If you remove the ignition key, turn
off the lights, and open the driver’s
door without closing the back
window, you will hear five beeps and
see the indicator blink. If you do not
close the back window before the
beep er stops, the indicator stops
blinking but remains on. It will go off
af ter about 3 minutes. See page f or more inf ormation.
120
95
106Back Window Open
Indicator
Bed L ights On Indicator
In-Bed T runk Open
Indicator
Instrument Panel Indicators
Inst rument s and Cont rols
69
Page 81 of 331

�µIf you remove the key f rom the
ignition switch with the headlight
control dial on, but do not open the
door, the lights will turn of f af ter 10
minutes.
Turning the dial to
the ‘‘ ’’ position turns on the
parking lights, taillights, instrument
panel lights, and license plate lights.
Turning the dial to the ‘‘ ’’
position turns on the headlights. If
you leave the lights on and remove
the key from the ignition switch, you
will hear a reminder chime when you
open the driver’s door.
When the dial is in the ‘‘ ’’ or
‘‘ ’’ position, the lights on
indicator comes on as a reminder.
This indicator stays on if you leave
the lights on and turn the ignition
switch to the ACCESSORY (I) or
LOCK (0) position. The automatic lighting of f f eature
turns off the headlights, all other
exterior lights, and the instrument
panel lights within 15 seconds of
removing the key from the ignition
switch and closing the driver’s door. The lights will turn on again when
you unlock or open the driver’s door.
This feature activates if you leave
the headlight control dial in the
‘‘ ’’ or ‘‘ ’’ position, remove
the key, then open and close the
driver’s door. If you unlock the door, but do not
open it within 15 seconds, the lights
go of f . With the driver’s door open,
you will hear a lights-on reminder
chime.
Automatic Lighting Of f Feature
Headlights
Headlights
Inst rument s and Cont rols
77
Page 82 of 331

The dial on the instrument panel
controls the brightness of the
instrument panel lights and the
console compartment light. Turn the
dial to adjust the brightness.
With the headlight control dial of f ,
the high beam headlights and the
high beam indicator come on with
reduced brightness when you turn
the ignition switch to the ON (II)
position and release the parking
brake. They remain on until you turn
the ignition switch of f , even if you
set the parking brake.
The headlights revert to normal
operation when you turn them on
with the headlight control dial.
The instrument panel will illuminate
with reduced brightness when you
unlock and open the driver’s door.
The brightness will increase and go
to a normal level when you insert the
key in the ignition switch.If you do not insert the key in the
ignition switch af ter opening the
driver’s door, the illumination turns
of f about 30 seconds af ter you close
the door.
If you insert the key but do not turn
the ignition switch to the ON (II)
position, the illumination turns of f in
about 10 seconds.
The instrument panel brightness is
dimmedwhenyouturntheheadlight
controldialtothe‘‘ ’’or
‘‘ ’’ position to reduce glare at
night. To cancel it, turn the
instrument panel brightness control
dial upward f ully until you hear a
click.
Canadian models only
Instrument Panel Brightness
Daytime Running L ights
Headlights, Instrument Panel Brightness
78
INSTRUMENT PANEL
BRIGHTNESS CONTROL DIAL
Page 84 of 331
These keys contain electronic
circuits that are activated by the
immobilizer system. They will not
work to start the engine if the
circuits are damaged.
Protect the keys from direct
sunlight, high temperature, and
high humidity.
Donotdropthekeysorsetheavy
objects on them.
Keep the keys away from liquids.
If they get wet, dry them
immediately with a soft cloth.
The
master key fits all the locks on
your vehicle. The valet key works
only in the ignition and the driver’s
door lock. You can keep the glove
boxlockedwhenyouleaveyour
vehicle and the valet key at a parking
facility.
You can also keep the In-Bed Trunk
locked by using the main switch in
theglovebox(seepage ). Youshouldhavereceivedakey
number tag with your keys. You will
need this key number if you ever
have to get a lost key replaced. Use
only Honda-approved key blanks.
97
Keys
80
VALET KEY
(LIGHT GRAY)
MASTER KEY
WITH REMOTE
TRANSMITTER
KEY
NUMBER
TAG
Page 86 of 331
�µ�µ
�µ �µ
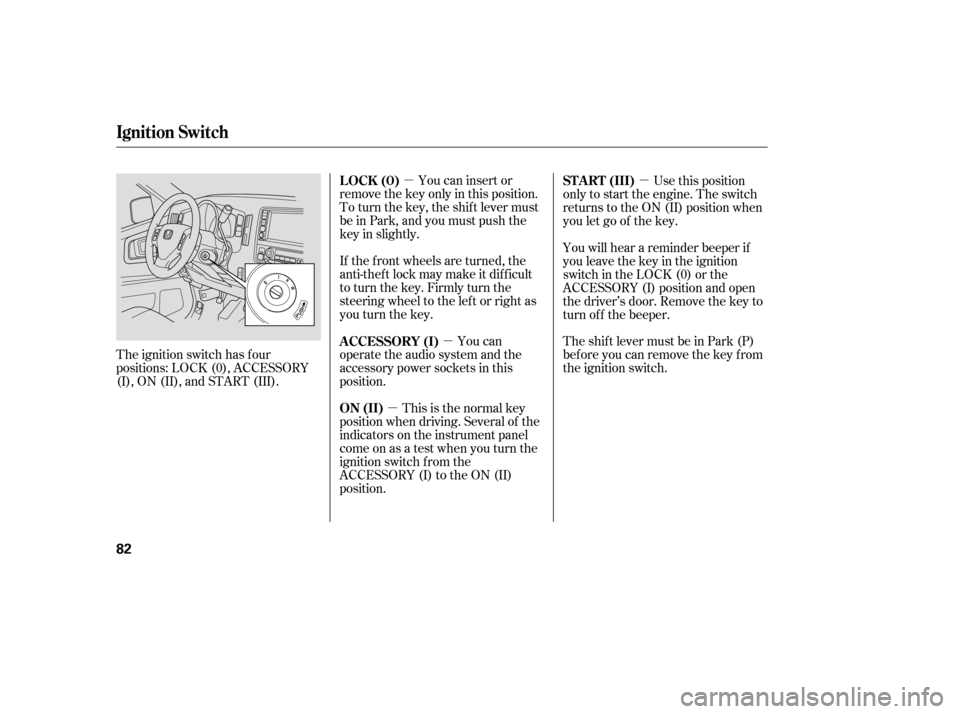
The ignition switch has f our
positions: LOCK (0), ACCESSORY
(I), ON (II), and START (III). You can insert or
remove the key only in this position.
To turn the key, the shift lever must
be in Park, and you must push the
key in slightly.
If the f ront wheels are turned, the
anti-theft lock may make it difficult
to turn the key. Firmly turn the
steering wheel to the lef t or right as
you turn the key.
You can
operate the audio system and the
accessory power sockets in this
position.
This is the normal key
position when driving. Several of the
indicators on the instrument panel
come on as a test when you turn the
ignition switch f rom the
ACCESSORY (I) to the ON (II)
position. Use this position
only to start the engine. The switch
returns to the ON (II) position when
you let go of the key.
You will hear a reminder beeper if
you leave the key in the ignition
switch in the LOCK (0) or the
ACCESSORY (I) position and open
the driver’s door. Remove the key to
turn of f the beeper.
TheshiftlevermustbeinPark(P)
bef ore you can remove the key f rom
the ignition switch.
LOCK (0)
A CCESSORY (I)
ON (II) ST A RT (III)
Ignition Switch
82


