Page 196 of 268

If the reserve tank is completely
empty, you should also check the
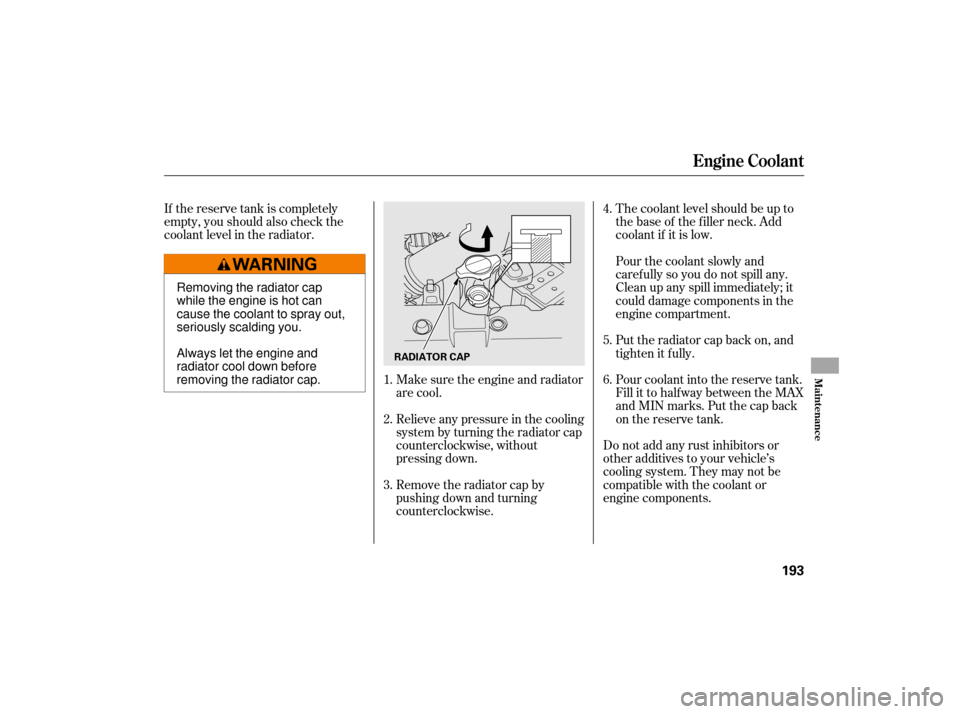
coolant level in the radiator.The coolant level should be up to
the base of the f iller neck. Add
coolant if it is low.
Do not add any rust inhibitors or
other additives to your vehicle’s
cooling system. They may not be
compatible with the coolant or
engine components. Pour coolant into the reserve tank.
Fill it to half way between the MAX
and MIN marks. Put the cap back
on the reserve tank. Pourthecoolantslowlyand
caref ully so you do not spill any.
Clean up any spill immediately; it
could damage components in the
engine compartment.
Make sure the engine and radiator
are cool.
Relieve any pressure in the cooling
system by turning the radiator cap
counterclockwise, without
pressing down.
Remove the radiator cap by
pushing down and turning
counterclockwise. Put the radiator cap back on, and
tighten it fully.
1.
2.
3. 4.
5.
6.
Engine Coolant
Maint enance
193
RADIATOR CAP
Removing the radiator cap
while the engine is hot can
cause the coolant to spray out,
seriously scalding you.
Always let the engine and
radiator cool down before
removing the radiator cap.
Page 205 of 268
Pull the bulb straight out of its
socket. Push the new bulb straight
into the socket until it bottoms.
Insert the socket back into the
light assembly. Turn it clockwise
to lock it in place.
Push the trunk lid trim back into
position.
Put the f asteners into the holes on
the trunk lid trim. Reinstall the
screws.Beforeusinganautomaticcarwash,
remove the radio antenna so it does
not get damaged. Remove the
antenna by unscrewing it. When you
reinstall the antenna, tighten it
securely.
Bef ore entering or parking in areas
with low ceiling height, remove the
antenna.
Turn on the lights to make sure
the new bulb is working.
Remove the socket by turning it
one-quarter turn counterclockwise.
2. 3.
4.
5.
6.
7.
Roof A ntenna
Lights, Roof Antenna
202
BULB
SOCKET
Page 222 of 268
Use the extension and the wheel
nut wrench as shown to raise the
vehicle until the f lat tire is of f the
ground.
Remove the wheel nuts, then
remove the f lat tire. Handle the
wheel nuts caref ully; they may be
hot from driving. Place the flat tire
on the ground with the outside
surface facing up.Bef ore mounting the spare tire,
wipeanydirtoff themounting
surface of the wheel and hub with
a clean cloth. Wipe the hub
carefully;itmaybehotfrom
driving.Put on the spare tire. Put the
wheel nuts back on f inger-tight,
then tighten them in a crisscross
pattern with the wheel nut wrench
until the wheel is f irmly against
the hub. Do not try to tighten the
wheel nuts f ully.
Lower the vehicle to the ground,
and remove the jack.
9.
10. 11.12.
13.
CONT INUED
Changing a Flat Tire
T aking Care of t he Unexpect ed
219
BRAKE HUB
WHEEL NUT WRENCH EXTENSION
Page 223 of 268
Tighten the wheel nuts securely in
the same crisscross pattern. Have
the wheel nut torque checked at
the nearest automotive service
f acility.
Tighten the wheel nuts to:Place the flat tire face down in the
spare tire well.
Remove the spacer cone f rom the
wing bolt, turn it over, and put it
back on the bolt.
Securetheflattirebyscrewing
the wing bolt back into its hole.Store the jack in the tool case.
Store the center cap in the trunk.
Make sure it does not get
scratched or damaged.
Lower the trunk f loor, then close
the trunk lid.
14. 15.
16.
17.18.
19.
20.
Changing a Flat Tire
220
SPACER CONE
WING BOLT
For normal
tire For spare
tire
80 lbf·ft (108 N·m , 11 kgf·m) Loose items can fly around the
interior in a crash and could
seriously injure the occupants.
Store the wheel, jack, and tools
securely before driving.
Page 232 of 268

If the indicator comes on repeatedly,
even though it may turn off as you
continue driving, have your vehicle
checked by your dealer as soon as
possible.
If
the indicator comes on
while driving, it means one
of the engine’s emissions
control systems may have a problem.
Even though you may feel no
difference in your vehicle’s
performance, it can reduce your fuel
economy and cause increased
emissions. Continued operation may
cause serious damage. If
the battery in your vehicle has
been disconnected or gone dead,
these codes are erased. It takes at
least three days of driving under
various conditions to set the codes
again.
To check if they are set, turn the
ignition switch to the ON (II)
position, without starting the engine.
The malfunction indicator lamp will
come on for 20 seconds. If it then
goes off, the readiness codes are set.
If it blinks five times, the readiness
codes are not set. If possible, do not
take your vehicle for a state
emissions test until the readiness
codes are set. Refer to
for more
info rmation (see page ).
Your
vehicle has certain ‘‘readiness
codes’’ that are part of the on-board
diagnostics for the emissions
systems. In some states, part of the
emissions testing is to make sure
these codes are set. If they are not
set, the test cannot be completed.
If
you have recently refueled your
vehicle, the indicator coming on
could be due to a loose or missing
fuel fill cap. You will also see a
‘‘CHECK FUEL CAP’’ message on
the information display. Tighten the
cap until it clicks at least once (see
page ). Tightening the cap will
not turn the indicator of f
immediately; it takes at least three
days of normal driving. 151
250State
Emissions T esting
Readiness Code
Malf unction Indicator L amp
T aking Care of t he Unexpect ed
229
If you keep driving with the
Malf unction Indicator Lamp on, you
can damage your vehicle’s emissions
controls and engine. Those repairs may
not be covered by your vehicle’s
warranties. This indicator may also
come on with the ‘‘D’’ indicator.