Page 10 of 268
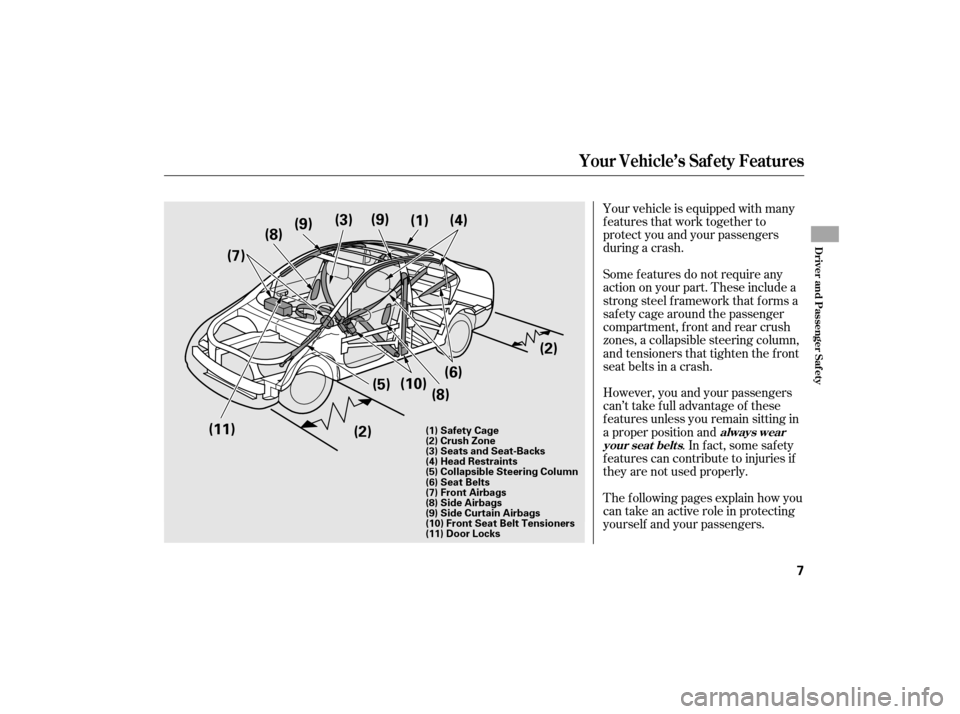
Your vehicle is equipped with many
features that work together to
protect you and your passengers
during a crash.
However, you and your passengers
can’t take full advantage of these
f eatures unless you remain sitting in
a proper position and. In fact, some safety
f eatures can contribute to injuries if
they are not used properly.
The f ollowing pages explain how you
cantakeanactiveroleinprotecting
yourself and your passengers. Some f eatures do not require any
action on your part. These include a
strong steel f ramework that f orms a
saf ety cage around the passenger
compartment, front and rear crush
zones, a collapsible steering column,
and tensioners that tighten the f ront
seat belts in a crash.
Your Vehicle’s Saf ety Features
always wear
your seat belts
Driver and Passenger Saf ety
7
(9)
(2)
(6) (4)
(3)
(1)
(8)
(7)
(5)
(2)
(11) (9)
(10) (8)
(8) Side Airbags
(9) Side Curtain Airbags
(10) Front Seat Belt Tensioners
(11) Door Locks (1) Safety Cage
(2) Crush Zone
(3) Seats and Seat-Backs
(4) Head Restraints
(5) Collapsible Steering Column
(6) Seat Belts
(7) Front Airbags
Page 22 of 268
CONTINUED
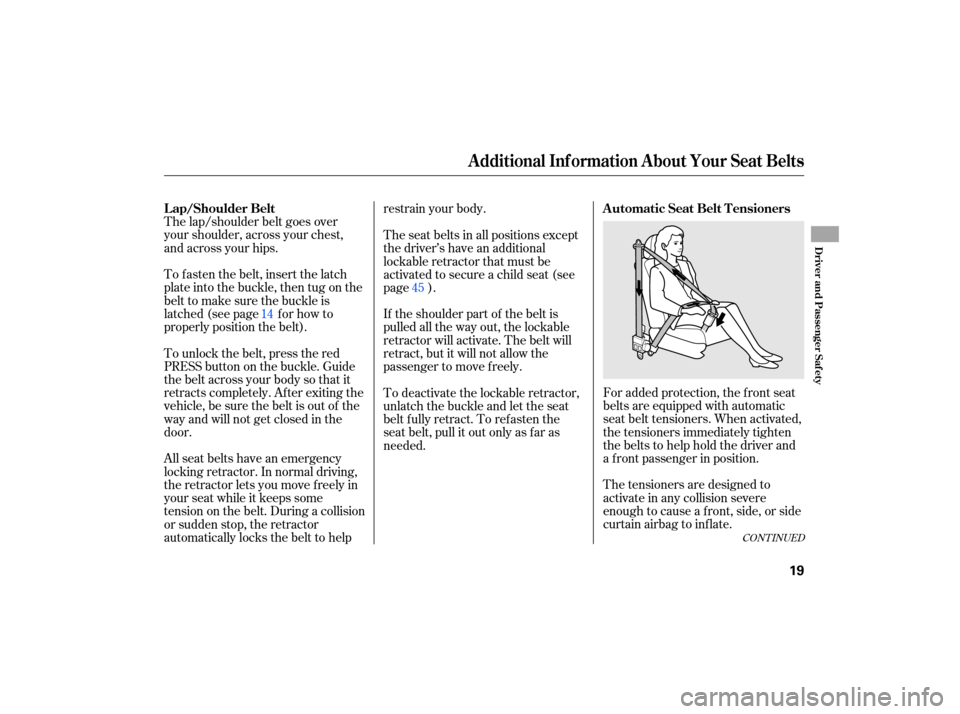
For added protection, the front seat
belts are equipped with automatic
seat belt tensioners. When activated,
the tensioners immediately tighten
the belts to help hold the driver and
a front passenger in position.
The tensioners are designed to
activate in any collision severe
enough to cause a front, side, or side
curtainairbagtoinflate.
The
lap/shoulder belt goes over
your shoulder, across your chest,
and across your hips.
To fasten the belt, insert the latch
plate into the buckle, then tug on the
belt to make sure the buckle is
latched (see page for how to
properly position the belt).
To unlock the belt, press the red
PRESSbuttononthebuckle.Guide
the belt across your body so that it
retracts completely. After exiting the
vehicle, be sure the belt is out of the
way and will not get closed in the
door.
All seat belts have an emerge ncy
locking retractor. In normal driving,
the retractor lets you move freely in
your seat while it keeps some
tension on the belt. During a collision
or sudden stop, the retractor
automati cally locks the belt to help restrain
your body.
If the shoulder part of the belt is
pulled all the way out, the lockable
retractor will activate. The belt will
retract, but it will not allow the
passenger to move freely.
To deactivate the lockable retractor,
unlatch the buckle and let the seat
belt fully retract. To refasten the
seat belt, pull it out only as far as
needed. The seat belts in all positions except
the driver’s have an additional
lockable retractor that must be
activated to secure a child seat (see
page ).
14 45
Additional Inf ormation About Your Seat Belts
A utomatic Seat Belt T ensioners
L ap/Shoulder Belt
Driver and Passenger Saf ety
19
Page 47 of 268
Other LATCH-compatible seats have
a flexible-type connector as shown
above.
Whatever type you have, follow
the child seat maker’s instructions
for adjusting or tightening the fit. Lift
the head restraint (see page
), then route the tether strap
through the legs of the head
restraint and over the seat-back,
making sure the strap is not
twisted. Attach the tether strap hook to the
tether anchor, then tighten the
strap as instructed by the child
seat maker.
Pushandpullthechildseat
f orward and f rom side-to-side to
verify that it is secure. If the tether strap is too long and
cannot be tightened f irmly, f ind a
route where the strap can be
tightened securely.
Tighten the strap according to the
seat maker’s instructions.
6. 5.
4. 7.
90 8.
Installing a Child Seat
44
Flexible type Front
ANCHOR
TETHER STRAP HOOK
Page 50 of 268
After properly securing the child
seat (see page ), lift the head
restraint, then route the tether
strap over the seat-back and
through the head restraint legs.
If the tether strap is too long and
cannot be tightened f irmly, f ind a
route where the strap can be
tightened securely. Lift the anchor cover, then attach
the tether strap hook to the
anchor, making sure the strap is
not twisted.
Tighten the strap according to the
seat maker’s instructions.
1. 2.
3.
45
Installing a Child Seat
Driver and Passenger Saf ety
47
Front
ANCHOR
ANCHOR Front
Outer Position Center Position
TETHER STRAP HOOK TETHER STRAP HOOK
Page 71 of 268
The information display in the
instrument panel shows you the
engine oil life and maintenance
service items when the ignition
switch is in the ON (II) position. This
information helps to keep you aware
of the periodic maintenance your
vehicle needs for continued trouble-
free driving. Refer to page for
more information.
Your
vehicle’s on board diagnostic
system will detect a loose or missing
fuel fill cap as an evaporative system
leak. The first time a leak is detected
a ‘‘CHECK FUEL CAP’’ message
appears on the information display.
Turn the engine off, and confi rm the
fuel fill cap is installed. If it is, loosen
it, then retighten it until it clicks at
least once. The message should go
off after several days of normal
driving once you tighten or replace
the fuel fill cap. To scroll to another
display, press the SEL/RESET
button. The ‘‘CHECK FUEL CAP’’
message will appear each time you
restart the engine until the system
turns the message off. If
the system still detects a leak in
the vehicle’s evaporative emissions
system, the malfunction indicator
lamp (MIL) comes on. If the fuel fill
cap was not already tightened, turn
the engine off, and check or
retighten the fuel fill cap until it
clicks at least once. The MIL should
go off after several days of normal
driving once the cap is tightened or
replaced. If the MIL does not go off,
have your vehicle inspected by a
dealer. For more information, see
page . 179
229
Gauges
Maintenance Minder
Check Fuel Cap Message
68
Page 155 of 268
If the hood latch handle moves
stiffly, or if you can open the hood
without lifting the handle, the
mechanism should be cleaned and
lubricated.
Put your fingers under the front
edge of the hood near the center.
Slide your hand to the left until
you feel the hood latch handle.
Push this handle up to release it.
Lift up the hood.
Push
the fuel fill door closed until
it latches.
Screw
the fuel fill cap back on
until it clicks at least once. If you
do not properly tighten the cap,
the malf unction indicator lamp
maycomeon(seepage ).You
will also see a ‘‘CHECK FUEL
CAP’’ message on the inf ormation
display.
Holding the grip, pull the support
rod out of its clip. Insert the end
into the designated hole in the
hood.
Park the vehicle, and set the
parking brake. Pull the hood
release handle located under the
lower lef t corner of the dashboard.
The hood will pop up slightly.
2. 1.
3.
5.
6.
229
Service Station Procedures
Opening and Closing the Hood
152
HOOD
RELEASE
HANDLE LATCH
Page 192 of 268
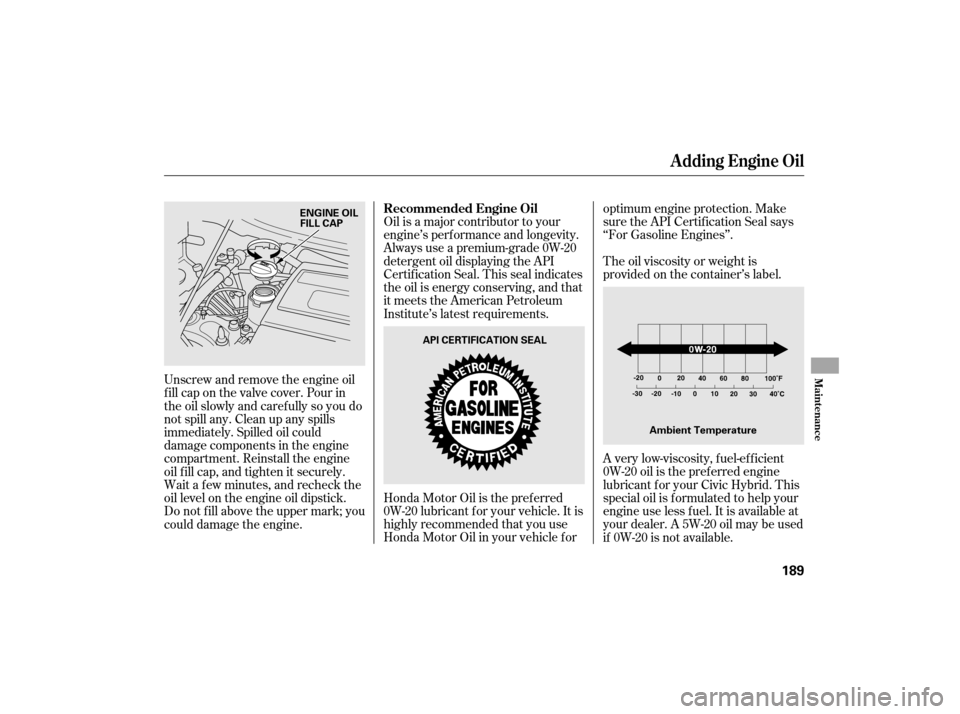
The oil viscosity or weight is
provided on the container’s label.
Oil is a major contributor to your
engine’s perf ormance and longevity.
Always use a premium-grade 0W-20
detergent oil displaying the API
Certif ication Seal. This seal indicates
the oil is energy conserving, and that
it meets the American Petroleum
Institute’s latest requirements.
Honda Motor Oil is the pref erred
0W-20 lubricant f or your vehicle. It is
highly recommended that you use
Honda Motor Oil in your vehicle f or optimum engine protection. Make
sure the API Certif ication Seal says
‘‘For Gasoline Engines’’.
A very low-viscosity, f uel-ef f icient
0W-20 oil is the pref erred engine
lubricant f or your Civic Hybrid. This
special oil is f ormulated to help your
engine use less fuel. It is available at
your dealer. A 5W-20 oil may be used
if 0W-20 is not available.
Unscrew and remove the engine oil
fill cap on the valve cover. Pour in
the oil slowly and caref ully so you do
not spill any. Clean up any spills
immediately. Spilled oil could
damage components in the engine
compartment. Reinstall the engine
oil f ill cap, and tighten it securely.
Wait a f ew minutes, and recheck the
oil level on the engine oil dipstick.
Do not f ill above the upper mark; you
could damage the engine. Recommended Engine Oil
A dding Engine Oil
Maint enance
189
API CERTIFICATION SEAL
ENGINE OIL
FILL CAP
Ambient Temperature
Page 194 of 268
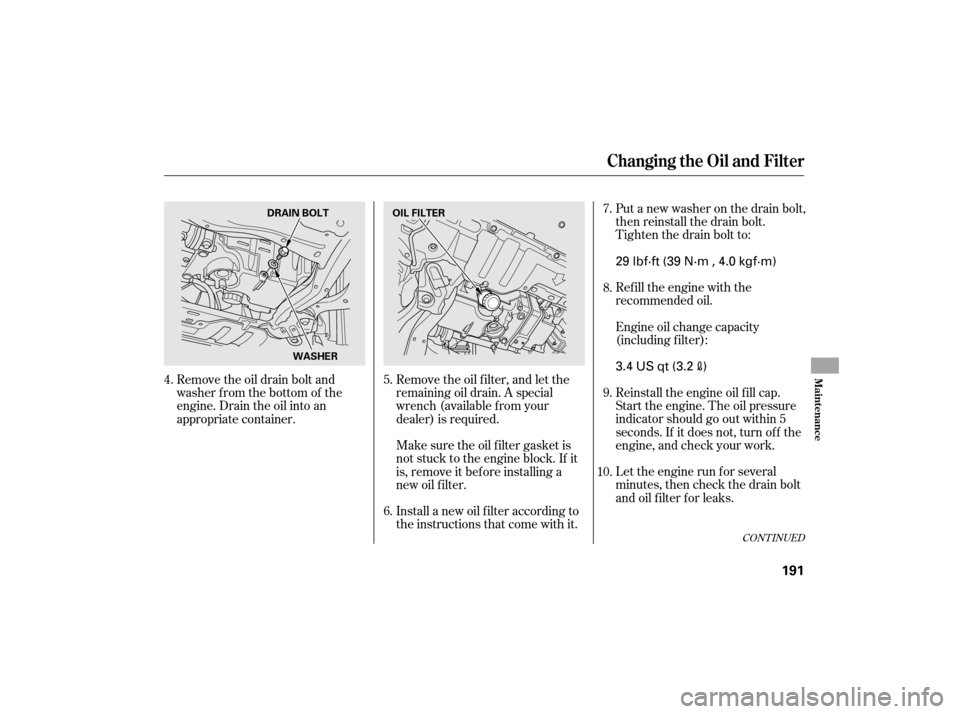
Refill the engine with the
recommended oil.
Engine oil change capacity
(including f ilter):
Let the engine run f or several
minutes, then check the drain bolt
and oil f ilter f or leaks. Put a new washer on the drain bolt,
then reinstall the drain bolt.
Tighten the drain bolt to:
Install a new oil f ilter according to
the instructions that come with it. Reinstall the engine oil f ill cap.
Start the engine. The oil pressure
indicator should go out within 5
seconds. If it does not, turn of f the
engine, and check your work.
Remove the oil drain bolt and
washer from the bottom of the
engine. Drain the oil into an
appropriate container.
Remove the oil f ilter, and let the
remaining oil drain. A special
wrench (available from your
dealer) is required.
Make sure the oil f ilter gasket is
not stuck to the engine block. If it
is, remove it bef ore installing a
new oil f ilter.7.
8.
9.
4. 5.
6.10.
CONT INUED
Changing the Oil and Filter
Maint enance
191
DRAIN BOLT
WASHER OIL FILTER
3.4 US qt (3.2)
29 lbf·ft (39 N·m , 4.0 kgf·m)