Page 222 of 311

�Ì�Ì
�Ì
Maintenance Minder
219
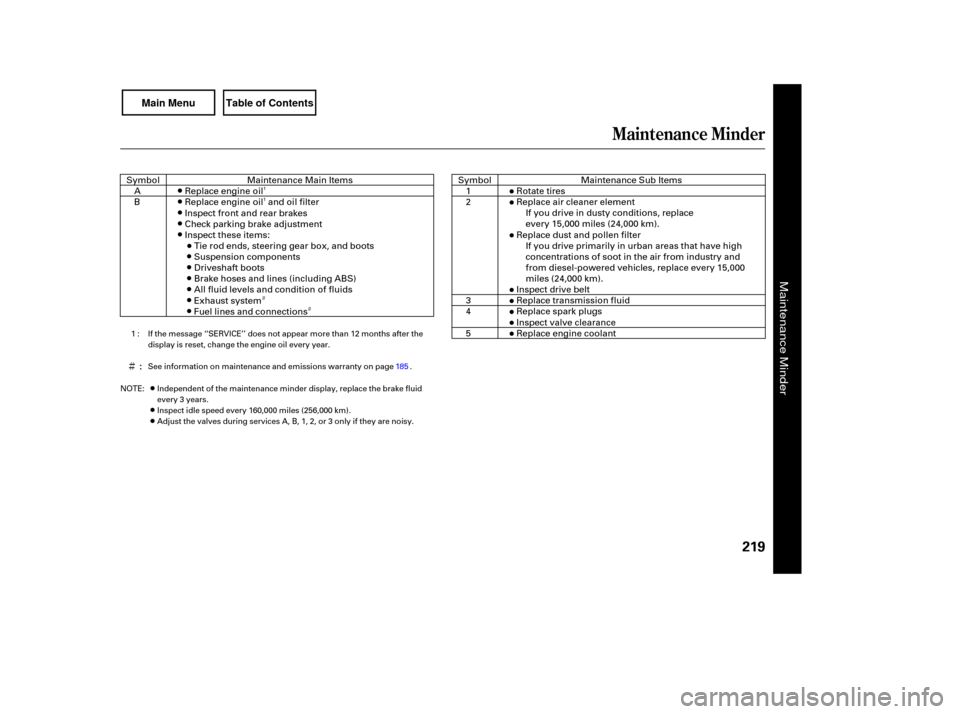
: See information on maintenance and emissions warranty on page .
Independent of the maintenance minder display, replace the brake fluid
every 3 years.
Inspect idle speed every 160,000 miles (256,000 km).
Adjust the valves during services A, B, 1, 2, or 3 only if they are noisy.
If the message ‘‘SERVICE’’ does not appear more than 12 months after the
display is reset, change the engine oil every year.
NOTE: 185
1:
Maintenance Main Items
Replace engine oil
Replace engine oil and oil filter
Inspect front and rear brakes
Check parking brake adjustment
Inspect these items: Tie rod ends, steering gear box, and boots
Suspension components
Driveshaft boots
Brake hoses and lines (including ABS)
All fluid levels and condition of fluids
Exhaust system
Fuel lines and connections Maintenance Sub Items
Rotate tires
Replace air cleaner element If you drive in dusty conditions, replace
every 15,000 miles (24,000 km).
Replace dust and pollen filter If you drive primarily in urban areas that have high
concentrations of soot in the air from industry and
from diesel-powered vehicles, replace every 15,000
miles (24,000 km).
Inspect drive belt
Replace transmission fluid
Replace spark plugs
Inspect valve clearance
Replace engine coolant
A
B
Symbol
Symbol
1
2
3
4
51
1
Maintenance Minder
Page 223 of 311
Maintenance Record
220
mi
mi
mi
mi
mi
mi
mimi
mi
mi
mi
mi
mi
mi
You or the servicing dealer can record all completed maintenance here. When maintenance is performed, record the mileage, circle the coded item(s)
completed, and write in any other non-coded items (such as brake fluid replacement) below the codes. Keep the receipts for all work done on your
vehicle. Maintenance can also be recorded in your Honda service history booklet.
Mileage
km
km
km
km
km
km
km Signature
Date
Mileage
km
km
km
km
km
km
km Signature
Date
Maintenance
Performed
AB12345
AB12345
AB12345
AB12345
AB12345
AB12345
AB12345 Maintenance
Performed
AB12345
AB12345
AB12345
AB12345
AB12345
AB12345
AB12345
Page 225 of 311
Fluid Locations
Except U.S. Si model
222
RADIATOR CAP
ENGINE OIL DIPSTICK
(Orange loop)
ENGINE OIL
FILL CAP
WASHER FLUID
(Blue cap) POWER STEERING
FLUID (Red cap) AUTOMATIC
TRANSMISSION
FLUID DIPSTICK
(Yellow loop)
ENGINE COOLANT
RESERVOIR CLUTCH FLUID
(Manual
Transmission only)
(Light gray cap)
BRAKE FLUID
(Black cap)
Page 226 of 311
Fluid Locations
Maint enance
U.S. Si model
223
RADIATOR CAP
ENGINE OIL
FILL CAP
WASHER FLUID
(Blue cap)
ENGINE COOLANT
RESERVOIR
BRAKE FLUID
(Black cap)
ENGINE OIL DIPSTICK
(Orange handle)
CLUTCH FLUID
(Light gray cap)
Page 237 of 311

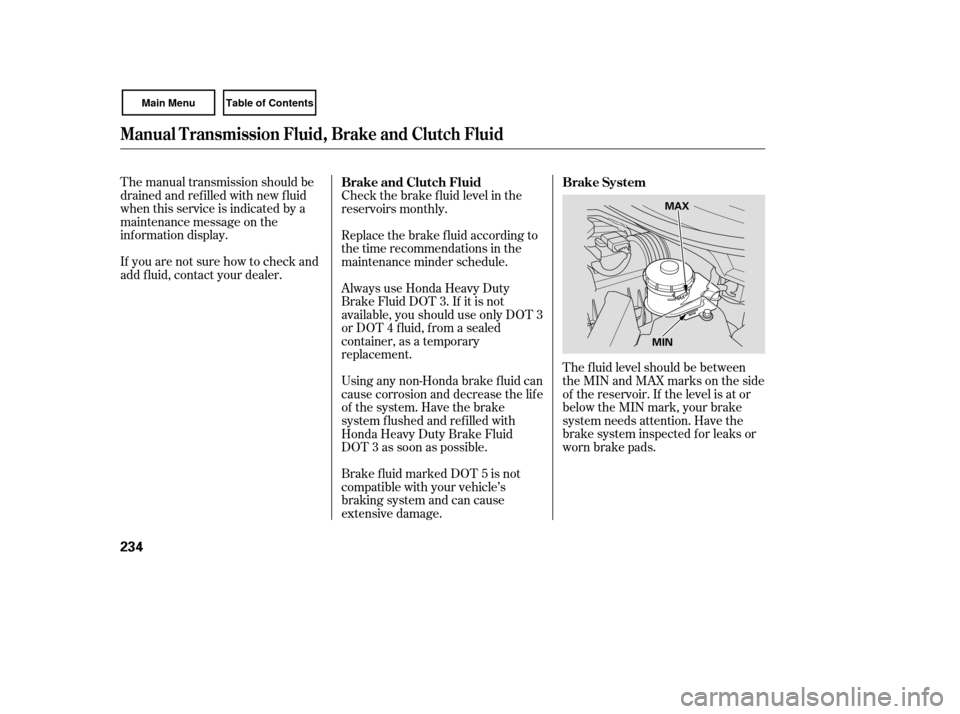
The f luid level should be between
theMINandMAXmarksontheside
of the reservoir. If the level is at or
below the MIN mark, your brake
system needs attention. Have the
brake system inspected f or leaks or
worn brake pads.
The manual transmission should be
drained and ref illed with new f luid
when this service is indicated by a
maintenance message on the
inf ormation display.
If you are not sure how to check and
add f luid, contact your dealer.
Brake f luid marked DOT 5 is not
compatible with your vehicle’s
braking system and can cause
extensive damage. Using any non-Honda brake f luid can
cause corrosion and decrease the lif e
of the system. Have the brake
system f lushed and ref illed with
Honda Heavy Duty Brake Fluid
DOT 3 as soon as possible. Always use Honda Heavy Duty
Brake Fluid DOT 3. If it is not
available, you should use only DOT 3
or DOT 4 f luid, f rom a sealed
container, as a temporary
replacement. Replace the brake f luid according to
thetimerecommendationsinthe
maintenance minder schedule. Check the brake f luid level in the
reservoirs monthly.Brake System
Brake and Clutch Fluid
Manual Transmission Fluid, Brake and Clutch Fluid
234
MAX
MIN
Page 238 of 311

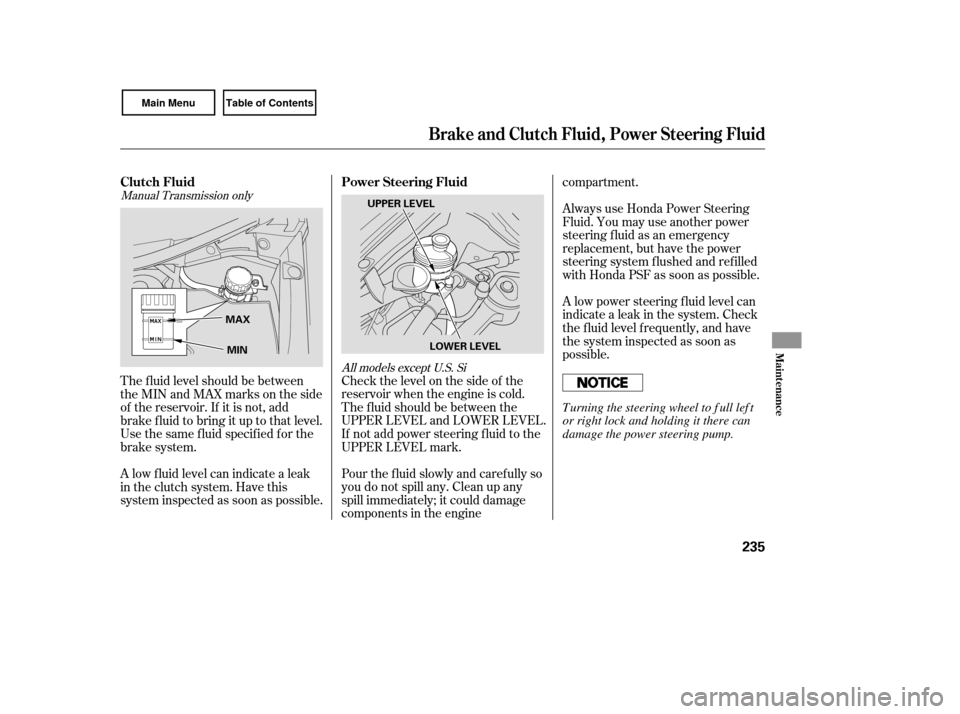
Check the level on the side of the
reservoir when the engine is cold.
The f luid should be between the
UPPER LEVEL and LOWER LEVEL.
If not add power steering f luid to the
UPPER LEVEL mark.
Pour the f luid slowly and caref ully so
you do not spill any. Clean up any
spill immediately; it could damage
components in the enginecompartment.
Always use Honda Power Steering
Fluid. You may use another power
steering f luid as an emergency
replacement, but have the power
steering system f lushed and ref illed
with Honda PSF as soon as possible.
A low power steering f luid level can
indicate a leak in the system. Check
the f luid level f requently, and have
the system inspected as soon as
possible.
The f luid level should be between
theMINandMAXmarksontheside
of the reservoir. If it is not, add
brake f luid to bring it up to that level.
Use the same fluid specified for the
brake system.
A low f luid level can indicate a leak
in the clutch system. Have this
system inspected as soon as possible.
Manual Transmission only
All models except U.S. Si
Brake and Clutch Fluid, Power Steering Fluid
Power Steering Fluid
Clutch Fluid
Maint enance
235
MAX
MIN LOWER LEVEL
UPPER LEVEL
Turning the steering wheel to f ull lef t
or right lock and holding it there can
damage the power steering pump.
Page 244 of 311
Remove the socket by turning it
one-quarter turn counterclockwise.Open the trunk, and remove the
socket f rom the light assembly by
turning it one-quarter turn counter-
clockwise.
Pull the bulb straight out of its
socket. Push the new bulb straight
into the socket until it bottoms.
Reinstall the socket. Turn it
clockwise until it locks. Make sure
the new bulb is working.
Pull the bulb straight out of its
socket. Push the new bulb straight
into the socket until it bottoms.
Insert the socket back into the
light assembly. Turn it clockwise
to lock it in place.
Test the lights to make sure the
new bulb is working.
Push the trunk lid trim back into
position.
Put the f asteners into the holes on
the trunk lid trim. Reinstall the
screws.
2. 1.
3.
4.
5.
6.
7.
8.
3.
On LX, EX and U.S. Si models
Lights
Replacing a High-mount Brake
Light Bulb
Maint enance
241
BULB
SOCKET
BULB
SOCKET
Page 254 of 311

When installing cables, f ollow the
manuf acturer’s instructions, and
mount them as tight as you can.
Make sure they are not contacting
the brake lines or suspension. Drive
slowly with them installed. If you
hear them coming into contact with
the body or chassis, stop and
investigate. Remove them as soon as
you begin driving on cleared roads. Because your vehicle has limited tire
clearance, mount only SAE Class ‘‘S’’
cable-type traction devices, with
rubber chain tensioners, on the f ront
tires. Use traction devices only when
required by driving conditions or
local laws. Make sure they are the
correct size f or your tires. Metal link-
type ‘‘chains’’ should not be used.Because your vehicle has limited tire
clearance, Honda strongly
recommends using the chains listed
below, made by Security Chain
Company (SCC).
U.S. Si model
T ire Chains
Tires
Maint enance
251
CH2311T Traction devices that are the wrong
size or improperly installed can
damage your vehicle’s brake lines,
suspension, body, and wheels. Stop
driving if they are hitting any part of
the vehicle.