2007 GMC ACADIA wiring
[x] Cancel search: wiringPage 91 of 554

Adding Equipment to Your
Airbag-Equipped Vehicle
Q:Is there anything I might add to the
exterior of the vehicle that could keep the
airbags from working properly?
A:Yes. If you add things that change your
vehicle’s frame, bumper system, height,
front end or side sheet metal, they may keep
the airbag system from working properly.
Also, the airbag system may not work properly
if you relocate any of the airbag sensors. If
you have any questions about this, you should
contact Customer Assistance before you
modify your vehicle. The phone numbers and
addresses for Customer Assistance are in
Step Two of the Customer Satisfaction
Procedure in this manual. See Customer
Satisfaction Procedure.
If your vehicle has rollover roof-rail airbags,
seeDifferent Size Tires and Wheels on
page 452for additional important information.
Q:Because I have a disability, I have to get
my vehicle modi�ed. How can I �nd out
whether this will affect my airbag system?
A:Changing or moving any parts of the
front seats, safety belts, the airbag sensing
and diagnostic module, steering wheel,
instrument panel, roof-rail airbag modules,
ceiling headliner, and pillar garnish trim, side
impact sensors, rollover sensor module,
or airbag wiring can affect the operation of the
airbag system. If you have questions, call
Customer Assistance. The phone numbers
and addresses for Customer Assistance are in
Step Two of the Customer Satisfaction
Procedure in this manual. SeeCustomer
Satisfaction Procedure on page 518.
Your dealer/retailer and the service manual have
information about the location of the airbag
sensors, sensing and diagnostic module and
airbag wiring.
91
Page 109 of 554

Liftgate
{CAUTION:
It can be dangerous to drive with the
liftgate open because carbon monoxide
(CO) gas can come into your vehicle. You
cannot see or smell CO. It can cause
unconsciousness and even death.
If you must drive with the liftgate open, or
if electrical wiring or other cable
connections must pass through the seal
between the body and the liftgate:
Make sure all other windows are shut.
Turn the fan on your heating or
cooling system to its highest speed
with the recirculation mode off. That
will force outside air into your vehicle.
SeeClimate Control System on
page 199.
CAUTION: (Continued)
CAUTION: (Continued)
If you have air outlets on or under
the instrument panel, open them all
the way.
If your vehicle has a power liftgate,
disable the power liftgate function.
SeePower Liftgate on page 110.
If your vehicle has a power liftgate, seePower
Liftgate on page 110.
To unlock the liftgate, use the power door lock
switch or press the door unlock button on
the Remote Keyless Entry (RKE) transmitter twice.
SeeRemote Keyless Entry (RKE) System
Operation on page 100.
To open the liftgate, press the touchpad on the
underside of the liftgate handle. The vehicle must
be in PARK (P) to open the liftgate. To close
the liftgate, use the pull cup or pull strap as an aid.
109
Page 110 of 554

The liftgate has an electric latch. If the battery is
disconnected or has low voltage, the liftgate
will not open. The liftgate will resume operation
when the battery is reconnected and charged.
If the battery is properly connected and has
adequate voltage, and the liftgate still will not
function, your vehicle should be taken to a
dealership for service.
Power Liftgate
Power Liftgate Operation
{CAUTION:
It can be dangerous to drive with the
liftgate open because carbon monoxide
(CO) gas can come into your vehicle. You
cannot see or smell CO. It can cause
unconsciousness and even death.
CAUTION: (Continued)
CAUTION: (Continued)
If you must drive with the liftgate open, or
if electrical wiring or other cable
connections must pass through the seal
between the body and the liftgate:
Make sure all other windows are shut.
Turn the fan on your heating or
cooling system to its highest speed
with the recirculation mode off. That
will force outside air into your vehicle.
SeeClimate Control System on
page 199.
If you have air outlets on or under
the instrument panel, open them all
the way.
If your vehicle has a power liftgate,
disable the power liftgate function.
SeePower Liftgate on page 110.
Your vehicle may have a power liftgate. The
vehicle must be in PARK (P) to use the power
feature.
110
Page 199 of 554

The indicator on the inner outlet face will come on
when 115 volt AC power is available. The AC
power is available when the ignition is turned to
ACCESSORY or ON, and electrical equipment
is plugged into the outlet. The AC power is
not available in the outlet when the ignition is
turned to OFF.
The power outlet is not designed for the following
electrical equipment and may not work properly
if these items are plugged into the power outlet:
Equipment with high initial peak wattage
such as: compressor-driven refrigerators
and electric power tools.
Other equipment requiring an extremely
stable power supply such as:
microcomputer-controlled electric blankets,
touch sensor lamps, etc.
SeeHigh Voltage Devices and Wiring on
page 489.
Climate Controls
Climate Control System
With this system you can control the heating,
cooling, defrost, defog, and ventilation of
the vehicle.
Manual Operation
9
(Fan):Turn the left knob clockwise or
counterclockwise to increase or decrease the fan
speed. Turn the knob all the way counterclockwise
to turn the front system off.
199
Page 217 of 554

Passenger Safety Belt
Reminder Light
Several seconds after the key is turned to ON or
START, a chime will sound for several seconds
to remind the front passenger to buckle their
safety belt. This would only occur if the passenger
airbag is enabled. SeePassenger Sensing
System on page 85for more information. The
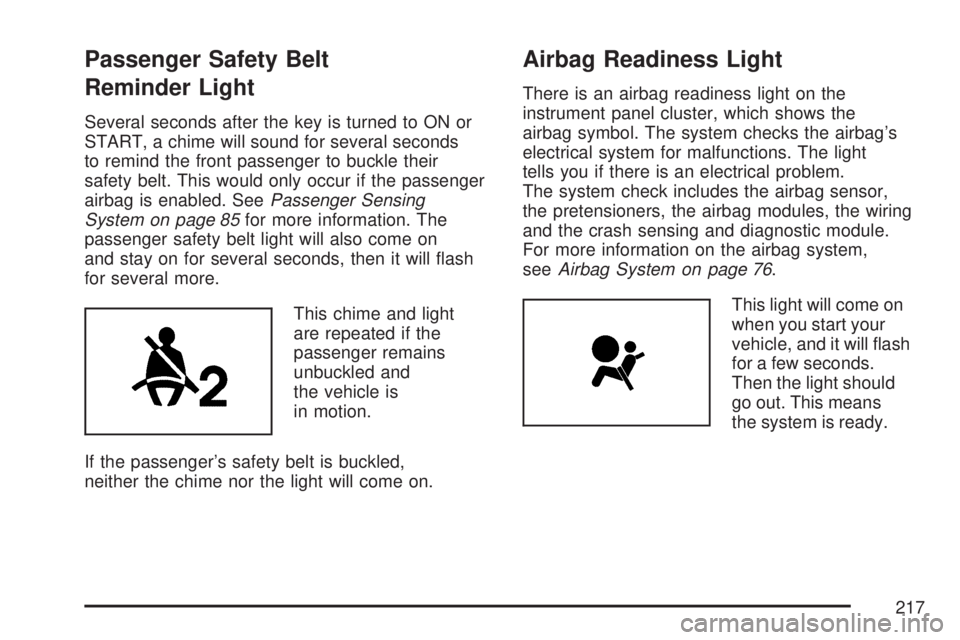
passenger safety belt light will also come on
and stay on for several seconds, then it will �ash
for several more.
This chime and light
are repeated if the
passenger remains
unbuckled and
the vehicle is
in motion.
If the passenger’s safety belt is buckled,
neither the chime nor the light will come on.
Airbag Readiness Light
There is an airbag readiness light on the
instrument panel cluster, which shows the
airbag symbol. The system checks the airbag’s
electrical system for malfunctions. The light
tells you if there is an electrical problem.
The system check includes the airbag sensor,
the pretensioners, the airbag modules, the wiring
and the crash sensing and diagnostic module.
For more information on the airbag system,
seeAirbag System on page 76.
This light will come on
when you start your
vehicle, and it will �ash
for a few seconds.
Then the light should
go out. This means
the system is ready.
217
Page 379 of 554

Passing
You’ll need more passing distance up ahead when
you’re towing a trailer. And, because you’re a
good deal longer, you’ll need to go much farther
beyond the passed vehicle before you can
return to your lane.
Backing Up
Hold the bottom of the steering wheel with
one hand. Then, to move the trailer to the left,
just move that hand to the left. To move the trailer
to the right, move your hand to the right. Always
back up slowly and, if possible, have someone
guide you.
Making Turns
Notice:Making very sharp turns while
trailering could cause the trailer to come in
contact with the vehicle. Your vehicle could
be damaged. Avoid making very sharp turns
while trailering.When you’re turning with a trailer, make wider
turns than normal. Do this so your trailer
won’t strike soft shoulders, curbs, road signs,
trees or other objects. Avoid jerky or sudden
maneuvers. Signal well in advance.
Turn Signals When Towing a Trailer
When you tow a trailer, your vehicle may need a
different turn signal �asher and/or extra wiring.
Check with your dealer/retailer. The arrows
on your instrument panel will �ash whenever you
signal a turn or lane change. Properly hooked
up, the trailer lamps will also �ash, telling other
drivers you’re about to turn, change lanes or stop.
When towing a trailer, the arrows on your
instrument panel will �ash for turns even if the
bulbs on the trailer are burned out. Thus, you may
think drivers behind you are seeing your signal
when they are not. It’s important to check
occasionally to be sure the trailer bulbs are
still working.
379
Page 382 of 554

Trailer Wiring Harness
Your vehicle is equipped with the following wiring
harness for towing a trailer.
Basic Trailer Wiring
The trailer wiring harness, with a seven-pin
connector, is located at the rear of the vehicle
and is tied to the vehicle’s frame. The harness
connector can be plugged into a seven-pin
universal heavy-duty trailer connector available
through your dealer/retailer.
The seven-wire harness contains the following
trailer circuits:
Yellow: Left Stop/Turn Signal
Dark Green: Right Stop/Turn Signal
Brown: Taillamps
White: Ground
Light Green: Back-up Lamps
Red: Battery Feed*
Dark Blue: Trailer Brake*
*The fuses for these two circuits are installed in
the underhood electrical center, but the wires
are not connected. They should be connected by
your dealer/retailer or a quali�ed service center.
If you are charging a remote (non-vehicle) battery,
press the tow/haul mode button located at the
end of the shift lever. This will boost the vehicle
system voltage and properly charge the battery.
If the trailer is too light for tow/haul mode, you can
turn on the headlamps (Non-HID only) as a
second way to boost the vehicle system and
charge the battery.
Engine Cooling When Trailer Towing
Your cooling system may temporarily overheat
during severe operating conditions. SeeEngine
Overheating on page 410.
382
Page 384 of 554

Buying New Tires...................................... 450
Different Size Tires and Wheels................ 452
Uniform Tire Quality Grading..................... 453
Wheel Alignment and Tire Balance............ 454
Wheel Replacement.................................. 454
Tire Chains............................................... 456
If a Tire Goes Flat.................................... 457
Changing a Flat Tire................................. 458
Removing the Spare Tire and Tools.......... 459
Removing the Flat Tire and Installing
the Spare Tire....................................... 463
Secondary Latch System........................... 468
Storing a Flat or Spare Tire and Tools...... 472
Compact Spare Tire.................................. 477
Appearance Care........................................ 478
Cleaning the Inside of Your Vehicle.......... 478
Fabric/Carpet............................................. 480
Leather...................................................... 481
Instrument Panel, Vinyl, and Other
Plastic Surfaces..................................... 481
Care of Safety Belts.................................. 482
Weatherstrips............................................ 482
Washing Your Vehicle............................... 482
Cleaning Exterior Lamps/Lenses................ 483Finish Care............................................... 483
Windshield, Backglass, and
Wiper Blades......................................... 484
Aluminum or Chrome-Plated Wheels
and Trim................................................ 484
Tires......................................................... 485
Sheet Metal Damage................................. 486
Finish Damage.......................................... 486
Underbody Maintenance............................ 486
Chemical Paint Spotting............................ 486
Vehicle Care/Appearance Materials............ 487
Vehicle Identi�cation.................................. 488
Vehicle Identi�cation Number (VIN)........... 488
Service Parts Identi�cation Label............... 488
Electrical System........................................ 489
High Voltage Devices and Wiring.............. 489
Add-On Electrical Equipment..................... 489
Windshield Wiper Fuses............................ 490
Power Windows and Other
Power Options....................................... 490
Fuses and Circuit Breakers....................... 490
Instrument Panel Fuse Block..................... 490
Underhood Fuse Block.............................. 493
Capacities and Speci�cations.................... 497
Section 5 Service and Appearance Care
384