2007 GMC ACADIA wheel size
[x] Cancel search: wheel sizePage 91 of 554

Adding Equipment to Your
Airbag-Equipped Vehicle
Q:Is there anything I might add to the
exterior of the vehicle that could keep the
airbags from working properly?
A:Yes. If you add things that change your
vehicle’s frame, bumper system, height,
front end or side sheet metal, they may keep
the airbag system from working properly.
Also, the airbag system may not work properly
if you relocate any of the airbag sensors. If
you have any questions about this, you should
contact Customer Assistance before you
modify your vehicle. The phone numbers and
addresses for Customer Assistance are in
Step Two of the Customer Satisfaction
Procedure in this manual. See Customer
Satisfaction Procedure.
If your vehicle has rollover roof-rail airbags,
seeDifferent Size Tires and Wheels on
page 452for additional important information.
Q:Because I have a disability, I have to get
my vehicle modi�ed. How can I �nd out
whether this will affect my airbag system?
A:Changing or moving any parts of the
front seats, safety belts, the airbag sensing
and diagnostic module, steering wheel,
instrument panel, roof-rail airbag modules,
ceiling headliner, and pillar garnish trim, side
impact sensors, rollover sensor module,
or airbag wiring can affect the operation of the
airbag system. If you have questions, call
Customer Assistance. The phone numbers
and addresses for Customer Assistance are in
Step Two of the Customer Satisfaction
Procedure in this manual. SeeCustomer
Satisfaction Procedure on page 518.
Your dealer/retailer and the service manual have
information about the location of the airbag
sensors, sensing and diagnostic module and
airbag wiring.
91
Page 244 of 554

DIC Warnings and Messages
Messages are displayed on the DIC to notify the
driver that the status of the vehicle has changed
and that some action may be needed by the driver
to correct the condition. Multiple messages may
appear one after another.
Some messages may not require immediate
action, but you can press any of the DIC buttons
on the instrument panel or the trip odometer
reset stem on the instrument panel cluster
to acknowledge that you received the messages
and to clear them from the display.
Some messages cannot be cleared from the DIC
display because they are more urgent. These
messages require action before they can be
cleared. You should take any messages that
appear on the display seriously and remember that
clearing the messages will only make the
messages disappear, not correct the problem.
The following are the possible messages that can
be displayed and some information about them.
ALL WHEEL DRIVE OFF
If your vehicle has the All-Wheel Drive (AWD)
system, this message displays when there
is a compact spare tire on the vehicle, when
the Anti-lock Brake System (ABS) warning light
comes on, or when the rear differential �uid
is overheating. This message turns off when the
differential �uid cools.
The AWD system is disabled until the compact
spare tire is replaced by a full-size tire. If the
warning message is still on after putting on the
full-size tire, you need to reset the warning
message. To reset the warning message, turn
the ignition off and then back on again after
30 seconds. If the message stays on, see your
dealer/retailer right away. SeeAll-Wheel Drive
(AWD) System on page 339for more information.
AUTOMATIC LIGHT CONTROL OFF
This message displays when the automatic
headlamps are turned off. This message clears
itself after 10 seconds.
244
Page 339 of 554

The traction control system may activate on
dry or rough roads or under conditions such as
heavy acceleration while turning or abrupt
upshifts/downshifts of the transmission.
When this happens, you may notice a reduction
in acceleration, or may hear a noise or vibration.
This is normal.
If your vehicle is in cruise control when the system
activates, the StabiliTrak
®light will �ash and the
cruise control will automatically disengage.
When road conditions allow you to use cruise
again, you may re-engage the cruise control.
SeeCruise Control on page 180.
StabiliTrak
®may also turn off automatically if it
determines that a problem exists with the system.
If the problem does not clear itself after restarting
the vehicle, you should see your dealer/retailer
for service.
All-Wheel Drive (AWD) System
If your vehicle has this feature, engine power is
sent to all four wheels when extra traction is
needed. This is like four-wheel drive, but there
is no separate lever or switch to engage or
disengage the front axle. It is fully automatic, and
adjusts itself as needed for road conditions.
When using a compact spare tire on your AWD
equipped vehicle, the AWD system automatically
detects the presence of the compact spare
and the AWD is disabled. To restore the AWD
operation and prevent excessive wear on
the clutch in your AWD system, replace the
compact spare with a full-size tire as soon as
possible. SeeCompact Spare Tire on page 477
for more information.
339
Page 369 of 554

6. Shift your transmission to NEUTRAL (N).
7. Release the parking brake.
Notice:If you tow your vehicle without
performing each of the steps listed under
“Dinghy Towing,” you could damage the
automatic transmission. Be sure to follow all
steps of the dinghy towing procedure prior
to and after towing your vehicle.
Notice:If you exceed 65 mph (105 km/h) while
towing your vehicle, it could be damaged.
Never exceed 65 mph (105 km/h) while towing
your vehicle.
Once you have reached your destination, do the
following:
1. Set the parking brake.
2. Turn the ignition key to OFF and remove the
key from the ignition.
3. Reinstall the IGN (Ignition) fuse.
Notice:Don’t tow a vehicle with the front
drive wheels on the ground if one of the front
tires is a compact spare tire. Towing with
two different tire sizes on the front of the
vehicle can cause severe damage to the
transmission.Dolly Towing (All-Wheel-Drive Vehicles)
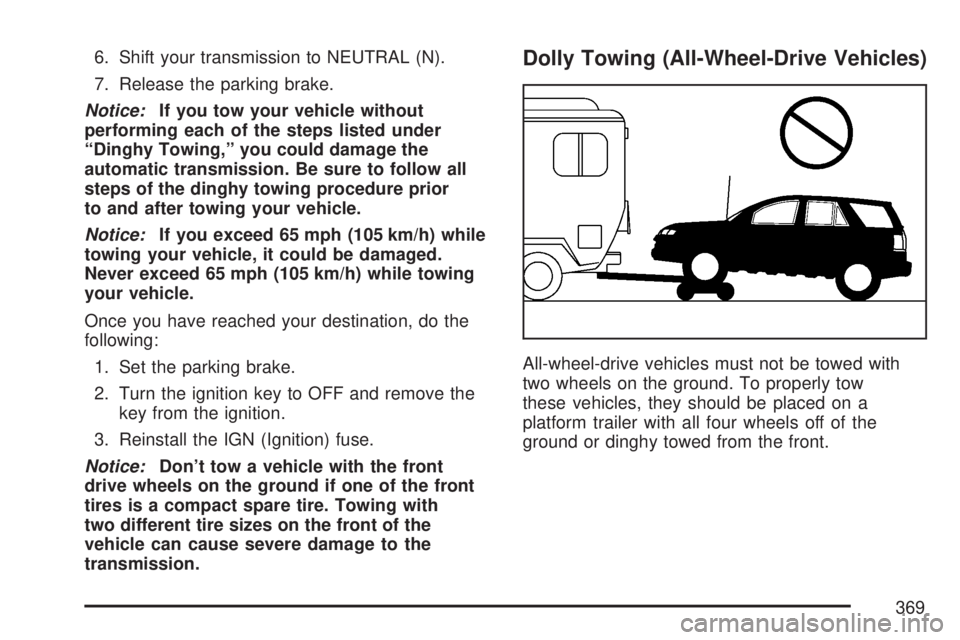
All-wheel-drive vehicles must not be towed with
two wheels on the ground. To properly tow
these vehicles, they should be placed on a
platform trailer with all four wheels off of the
ground or dinghy towed from the front.
369
Page 384 of 554

Buying New Tires...................................... 450
Different Size Tires and Wheels................ 452
Uniform Tire Quality Grading..................... 453
Wheel Alignment and Tire Balance............ 454
Wheel Replacement.................................. 454
Tire Chains............................................... 456
If a Tire Goes Flat.................................... 457
Changing a Flat Tire................................. 458
Removing the Spare Tire and Tools.......... 459
Removing the Flat Tire and Installing
the Spare Tire....................................... 463
Secondary Latch System........................... 468
Storing a Flat or Spare Tire and Tools...... 472
Compact Spare Tire.................................. 477
Appearance Care........................................ 478
Cleaning the Inside of Your Vehicle.......... 478
Fabric/Carpet............................................. 480
Leather...................................................... 481
Instrument Panel, Vinyl, and Other
Plastic Surfaces..................................... 481
Care of Safety Belts.................................. 482
Weatherstrips............................................ 482
Washing Your Vehicle............................... 482
Cleaning Exterior Lamps/Lenses................ 483Finish Care............................................... 483
Windshield, Backglass, and
Wiper Blades......................................... 484
Aluminum or Chrome-Plated Wheels
and Trim................................................ 484
Tires......................................................... 485
Sheet Metal Damage................................. 486
Finish Damage.......................................... 486
Underbody Maintenance............................ 486
Chemical Paint Spotting............................ 486
Vehicle Care/Appearance Materials............ 487
Vehicle Identi�cation.................................. 488
Vehicle Identi�cation Number (VIN)........... 488
Service Parts Identi�cation Label............... 488
Electrical System........................................ 489
High Voltage Devices and Wiring.............. 489
Add-On Electrical Equipment..................... 489
Windshield Wiper Fuses............................ 490
Power Windows and Other
Power Options....................................... 490
Fuses and Circuit Breakers....................... 490
Instrument Panel Fuse Block..................... 490
Underhood Fuse Block.............................. 493
Capacities and Speci�cations.................... 497
Section 5 Service and Appearance Care
384
Page 439 of 554

(B) Tire Width:The three-digit number indicates
the tire section width in millimeters from sidewall
to sidewall.
(C) Aspect Ratio:A two-digit number that
indicates the tire height-to-width measurements.
For example, if the tire size aspect ratio is 60,
as shown in item C of the illustration, it would
mean that the tire’s sidewall is 60 percent as high
as it is wide.
(D) Construction Code:A letter code is used to
indicate the type of ply construction in the tire.
The letter R means radial ply construction;
the letter D means diagonal or bias ply
construction; and the letter B means belted-bias
ply construction.
(E) Rim Diameter:Diameter of the wheel in
inches.
(F) Service Description:These characters
represent the load range and speed rating of the
tire. The load index represents the load carry
capacity a tire is certi�ed to carry. The load index
can range from 1 to 279. The speed rating is
the maximum speed a tire is certi�ed to carry a
load. Speed ratings range from A to Z.Tire Terminology and De�nitions
Air Pressure:The amount of air inside the tire
pressing outward on each square inch of the
tire. Air pressure is expressed in pounds
per square inch (psi) or kilopascal (kPa).
Accessory Weight:This means the combined
weight of optional accessories. Some examples of
optional accessories are, automatic transmission,
power steering, power brakes, power windows,
power seats, and air conditioning.
Aspect Ratio:The relationship of a tire’s height
to its width.
Belt:A rubber coated layer of cords that is
located between the plies and the tread. Cords
may be made from steel or other reinforcing
materials.
Bead:The tire bead contains steel wires wrapped
by steel cords that hold the tire onto the rim.
Bias Ply Tire:A pneumatic tire in which the plies
are laid at alternate angles less than 90 degrees
to the centerline of the tread.
439
Page 444 of 554

Tire Pressure Monitor System
The Tire Pressure Monitor System (TPMS) uses
radio and sensor technology to check tire pressure
levels. TPMS sensors are mounted onto each
tire and wheel assembly, except the spare
tire. TPMS sensors monitor the air pressure in
your vehicle’s tires and transmit tire pressure
readings to a receiver located in the vehicle.
The TPMS is designed to alert the driver, if a low
tire pressure condition exists. If your vehicle has the
Driver Information Center (DIC), the driver can also
check tire pressure levels using the DIC.
When a low tire pressure condition is detected,
the TPMS illuminates the low tire pressure warning
symbol located on the instrument panel cluster.
If your vehicle has the DIC feature, a message
to check the pressure in a speci�c tire also
appears on the DIC display. The low tire pressure
warning symbol on the instrument panel cluster
and the CHECK TIRE PRESSURE warning
message on the DIC display appears at each
ignition cycle until the tires are in�ated tothe correct in�ation pressure. For additional
information and details about the DIC operation
and displays seeDIC Operation and Displays
(With DIC Buttons) on page 233orDIC Operation
and Displays (Without DIC Buttons) on page 239
andDIC Warnings and Messages on page 244.
You may notice, during cooler weather conditions,
the tire pressure monitor light, located on the
instrument panel cluster, and the CHECK TIRE
PRESSURE message appears when the vehicle
is �rst started and then turn off as you start to drive
the vehicle. This could be an early indicator that
the tire pressures are getting low and need to
be in�ated to the proper pressure.
Each tire, including the spare (if provided), should
be checked monthly when cold and in�ated to
the in�ation pressure recommended by the vehicle
manufacturer on the vehicle placard or tire
in�ation pressure label. (If your vehicle has tires of
a different size than the size indicated on the
vehicle placard or tire in�ation pressure label,
you should determine the proper tire in�ation
pressure for those tires.)
444
Page 446 of 554

The Tire and Loading Information label (tire
information placard) shows the size of your
vehicle’s original tires and the correct in�ation
pressure for your vehicle’s tires when they are cold.
SeeInflation - Tire Pressure on page 442. For the
location of the tire and loading information label,
seeLoading Your Vehicle on page 361.
Your vehicle’s TPMS can alert you about a low
tire pressure condition but it does not replace
normal tire maintenance. SeeTire Inspection and
Rotation on page 448andTires on page 435.
Notice:Do not use a tire sealant if your
vehicle has Tire Pressure Monitors. The liquid
sealant can damage the tire pressure monitor
sensors.Resetting the TPMS Identi�cation Codes
Each TPMS sensor has a unique identi�cation
code. Any time you rotate your vehicle’s tires or
replace one or more of the TPMS sensors,
the identi�cation codes need to be matched to
the new tire/wheel position. The sensors are
matched to the tire/wheel positions in the following
order: driver side front tire, passenger side front
tire, passenger side rear tire, and driver side
rear tire using a TPMS diagnostic tool. See your
dealer/retailer for service.
The TPMS sensors can also be matched to each
tire/wheel position by increasing or decreasing
the tire’s air pressure. If increasing the tire’s
air pressure, do not exceed the maximum in�ation
pressure indicated on the tire’s sidewall.
To decrease air-pressure out of a tire you can use
the pointed end of the valve cap, a pencil-style
air pressure gage, or a key.
You have two minutes to match the �rst tire/wheel
position, and �ve minutes overall to match all
four tire/wheel positions. If it takes longer than
two minutes to match the �rst tire and wheel, or
more than �ve minutes to match all four tire and
wheel positions, the matching process stops and
you will need to start over.
446