Page 1115 of 1226
308-03125 Manual Transmission/Transaxle 308-03-25
REMOVAL
12. Disconnect the gearshift actuator electrical 1. Detach the gearshift cables and the selector
connector (colored grey). cable from the selector levers.
2. Turn the abutment sleeve clockwise and
detach the cables from the bracket.
13. ACAUTION:~~ brake fluid is spilt on the
paintwork, the affected area must be
All vehicles immediately washed down with cold water. 16. Remove the accessory drive belt cover.
Disconnect the clutch slave cylinder supply
line.
Remove the spring clip.
Vehicles without automated gearshift
14. Remove the gearshift cables cover.
I*' A~AuT10N:~rotect the ball joint seal
using a soft cloth to prevent damage.
Detach the lower arm from the wheel knuckle
15. Detach the gearshift cables from the on both
sides.
transaxle.
2006.0 Fiesta 1212006 GI 13290en
procarmanuals.com
Page 1121 of 1226
308-03-31 Manual TransmissionlTransaxle 308-03-31
REMOVAL
5. Remove the transaxle upper retaining bolts. Detach the wiring harness from the retaining
bracket.
6. Detach the power steering high-pressure line
retaining bracket from the transaxle. 10.
Disconnect the reversing lamp switch
electrical connector.
7. Remove the front wheels and tires.
11. Remove the gearshift cables cover.
For additional information, refer to: Wheel
and Tire (204-04 Wheels and Tires, Removal
I
and Installation).
8. Remove the wiring harness retaining bracket.
9. Remove the starter motor. 12.
Detach the gearshift cables from the
transaxle.
1. Detach the gearshift cables and the selector
cable from the selector levers.
- -
2006.0 Fiesta 1212006 G453416en
procarmanuals.com
Page 1142 of 1226
308-03-52 Manual Transmission/Transaxle 308-03-52
ASSEMBLY
Transaxle(l6 11 8 8)
Special Tool(s)
Installer, Wheel Hub Bearing
Conelseal
205-296 (1 5-085)
15085
I I Adapter for 303-060 I
21 02402
Mounting Stand
303-435 (2 1 -1 87)
Adapter for
303-060
303-060-02 (2 1 -024-02)
I I Installer, Halfshaft Seal
Special Tool(s)
Installer, lnput Shaft Bearing
308-041 (1 6-020)
I I Installer, Extension Housing I
1 press I
16031
I Dial indicator gauge I
Installer, lnput Shaft Snap
Ring
308-076 (1 6-03 1
)
I Magnetic stand for dial indicator gauge
Seneral Equipment
I Blanking plugs I
I M8 x 50 mm bolt I
Thread die
Materials
Name Specification
1 Sealant I ESEE-M4G1008-A I
1 Transmission Oil I WSD-M2C200-C I
I Oil Pan Sealer I WSK-M2G348-A5 I
I Silicon Sealer I WSE-M4G323-A4 I
High Temperature
Grease
1. Clean and check all parts carefully before
reassembly.
Apply clean transmission oil to all running
surfaces.
2006.0 Fiesta 1212006 G23119en
procarmanuals.com
Page 1144 of 1226

308-03-54 Manual Transmission/Transaxle 308-0344
ASSEMBLY
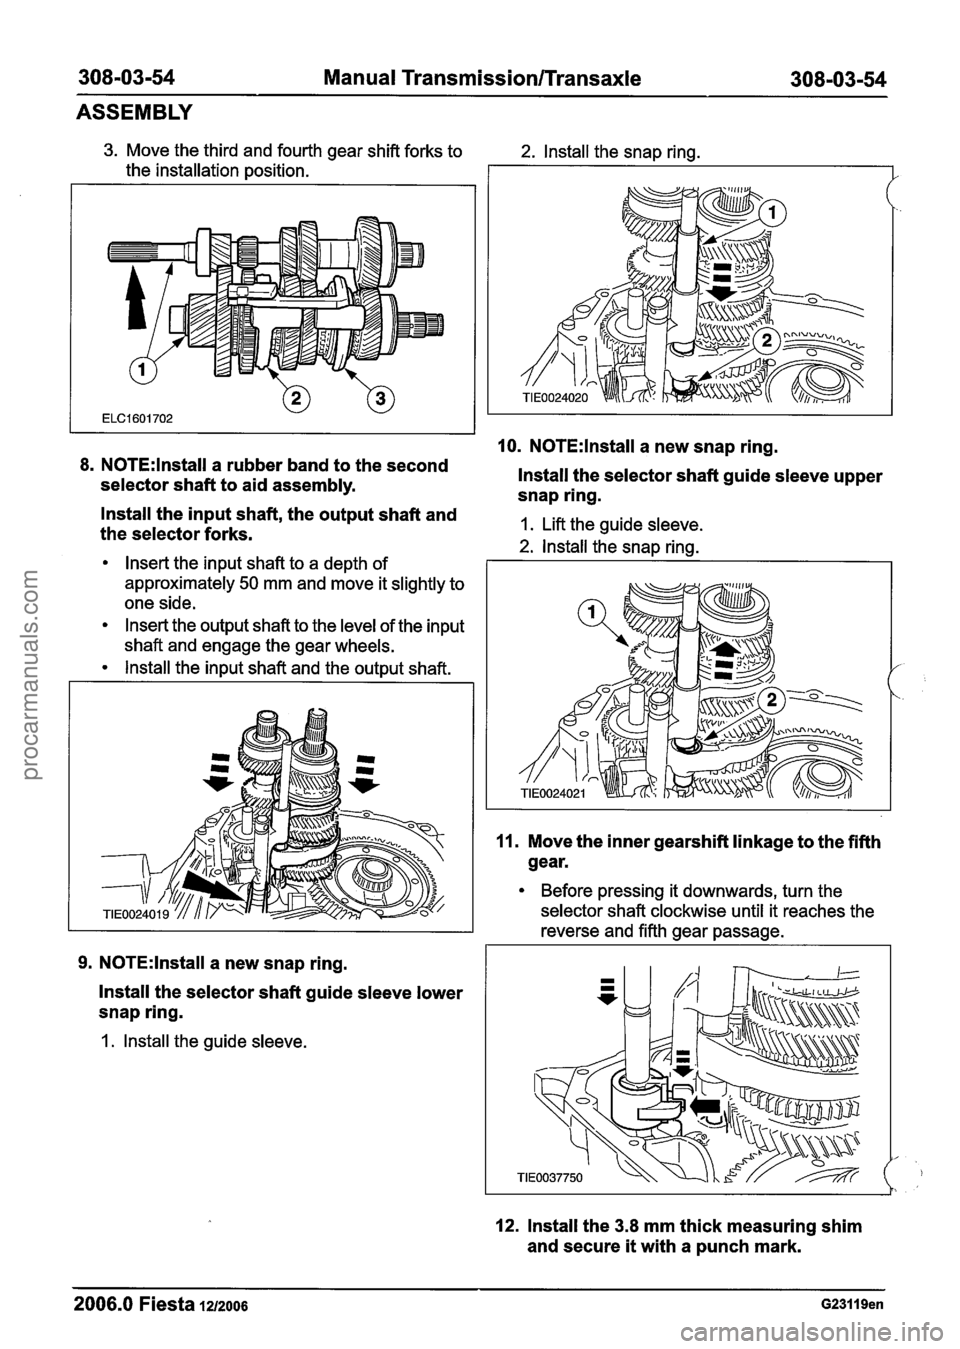
3. Move the third and fourth gear shift forks to
the installation position.
8. N0TE:lnstall a rubber band to the second
selector shaft to aid assembly.
2. lnstall the snap ring.
10. N0TE:lnstall a new snap ring.
lnstall the selector shaft guide sleeve upper
snap ring.
- lnstall the input shaft, the output shaft and
the selector forks. 1. Lift the guide sleeve.
2. lnstall the snap rina.
Insert the input shaft to a depth of I
approximately 50 mm and move it slightly to
one side.
Insert the output shaft to the level of the input
shaft and engage the gear wheels.
lnstall the input shaft and the output shaft.
9. N0TE:lnstall a new snap ring.
lnstall the selector shaft guide sleeve lower
snap ring.
1. lnstall the guide sleeve.
11. Move the inner gearshift linkage to the fifth
gear.
Before pressing it downwards, turn the
selector shaft clockwise until it reaches the
reverse and fifth gear passage.
12. lnstall the 3.8 mm thick measuring shim
and secure
it with a punch mark.
2006.0 Fiesta 1212006 G23119en
procarmanuals.com
Page 1155 of 1226
308-03-65 Manual Transmission/Transaxle 308-03-65
INSTALLATION
ADO not damage the halfshaft oil seal. 21. Install the engine support insulator.
/ / AMake sure the snap ring is correctly
seated.
N0TE:lnstall a new snap ring.
Attach the left-hand halfshaft to the
transaxle.
20m ACAUTION:M~~~ sure that the heat shield
is installed to prevent damage to the ball
joint.
N0TE:The lower arm pinch bolt must be installed ' ' from the rear of the wheel knuckle.
22. Install the accessory drive belt cover.
Attach the lower arm to the wheel knuckle
on both sides.
Vehicles without automated gearshift
23. Attach the gearshift cables to the bracket
and turn the abutment sleeves
counterclockwise.
2006.0 Fiesta 1212006 GI 13293en
procarmanuals.com
Page 1158 of 1226

308103168 Manual Transmission/Transaxle 308103168
INSTALLATION
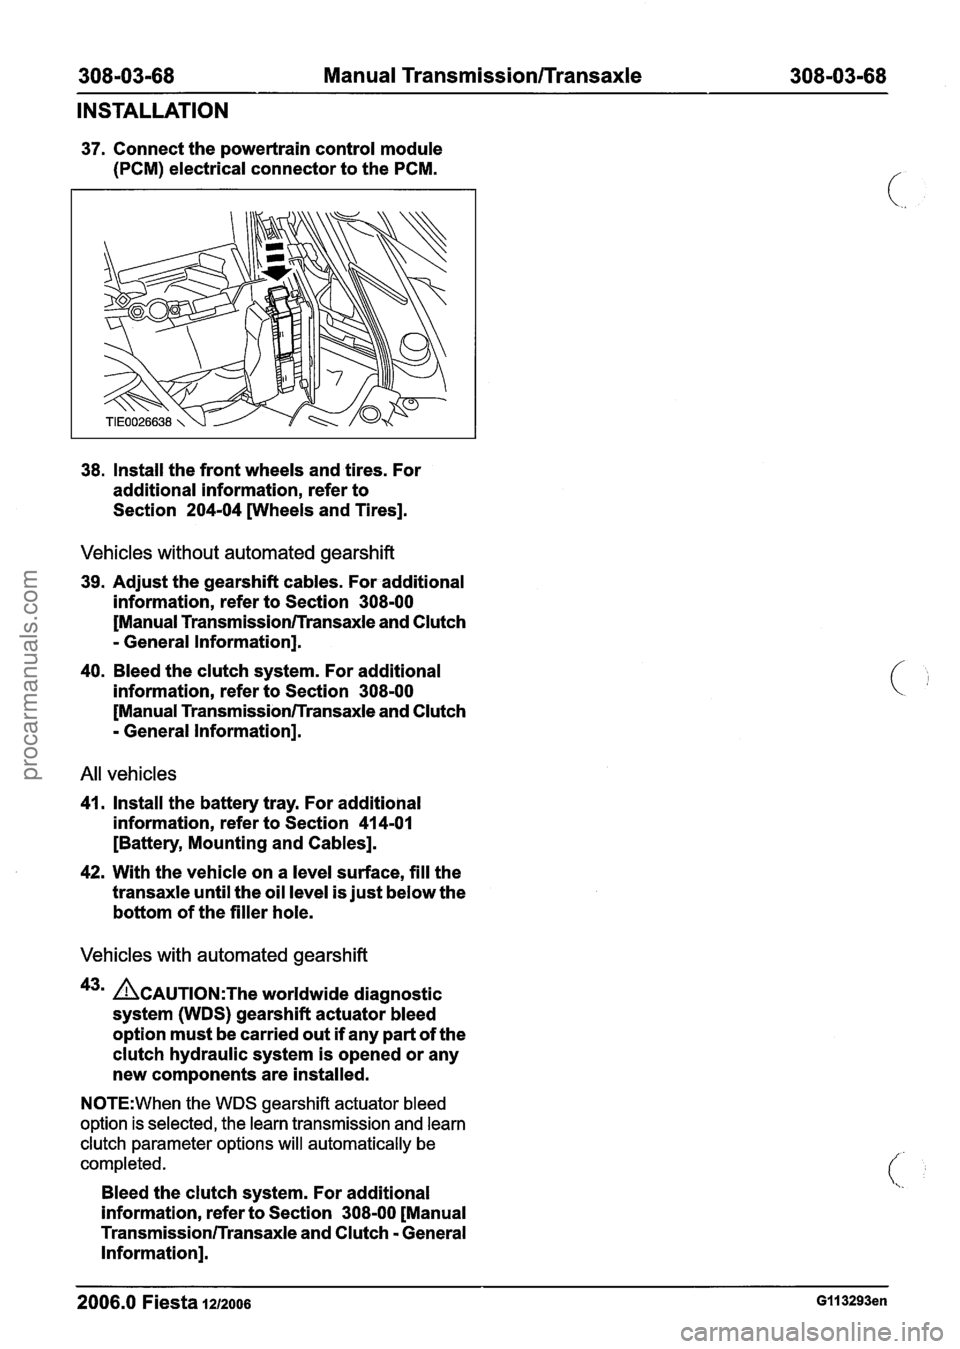
37. Connect the powertrain control module
(PCM) electrical connector to the PCM.
38. Install the front wheels and tires. For
additional information, refer to
Section
204-04 wheels and Tires].
Vehicles without automated gearshift
39. Adjust the gearshift cables. For additional
information, refer to Section
308-00
[Manual Transmission/Transaxle and Clutch
- General Information].
40. Bleed the clutch system. For additional
information, refer to Section
308m00
[Manual Transmission/Transaxle and Clutch
- General Information].
All vehicles
41. Install the battery tray. For additional
information, refer to Section
41 4-01
[Battery, Mounting and Cables].
42. With the vehicle on a level surface, fill the
transaxle until the oil level is just below the
bottom of the filler hole.
Vehicles with automated gearshift
43m ACAUTION:T~~ worldwide diagnostic
system (WDS) gearshift actuator bleed
option must be carried out
if any part of the
clutch hydraulic system is opened or any
new components are installed.
N0TE:When the WDS gearshift actuator bleed
option is selected, the learn transmission and learn
clutch parameter options will automatically be
completed.
Bleed the clutch system. For additional
information, refer to Section
308-00 [Manual
Transmission/Transaxle and Clutch - General
Information].
2006.0 Fiesta 1212006 GII 3293en
procarmanuals.com
Page 1163 of 1226
308-03-73 Manual Transmission/Transaxle 308-03-73
INSTALLATION
27. Attach the power steering high-pressure 30. Tighten the engine rear mount outer
/ line retaining bracket to the transaxle. retaining nuts. I
28. Install the transaxle upper retaining bolts. 31. Tighten the engine rear mount center
retaining nut.
29. Install the engine wiring harness bracket.
32. Install the battery tray support bracket.
33. Install the front wheels and tires.
For additional information, refer to: Wheel
and Tire
(204-04 Wheels and Tires,
Removal and Installation).
- -- -- --
2006.0 Fiesta 1212006 G453417en
procarmanuals.com
Page 1210 of 1226

31 0-01 -1 2 Fuel Tank and Lines 31 0-01-12
REMOVAL AND INSTALLATION
Fuel Tank Filler Pipe(23 572 0)
Removal
WARNINGS:
A Do not smoke or carry lighted tobacco or
open flame of any type when working on
or near any fuel related components.
Highly flammable vapours are always
present and can ignite. Failure to follow
these instructions may result in personal
injury.
A This procedure involves fuel handling. Be
prepared for fuel spillage at all times and
always observe fuel handling precautions.
Failure to follow these instructions may
result in personal injury.
I. Disconnect the battery ground cable. For
additional information, refer to
Section
41 4-01 [Battery, Mounting and
Cables].
2. Drain the fuel tank. For additional
information, refer to Section
31 0-00 [Fuel
System
- General Information].
3. Raise and support the vehicle. For additional
information, refer to Section
100-02 [Jacking
and Lifting].
4. Remove the left-hand rear fender splash
shield (road wheel shown removed for
clarity).
5. Remove the fuel tank filler pipe upper (.
retaining bolt.
'' &AUTION:W~~~ disconnecting the fuel
tank vent and fuel tank filler pipes, do not
use any sharp edge tools to lever off the
pipes. Failure to follow this instructions may
cause damage to the pipes.
N0TE:Make note of the positions of the retaining
clamps to make sure they are positioned in exactly
the same positions when installing.
Disconnect the fuel tank filler pipe and the
fuel tank vent pipe from the fuel tank.
Discard the retaining clamps.
2006.0 Fiesta 1212006 G210057en
procarmanuals.com