Page 201 of 266

200
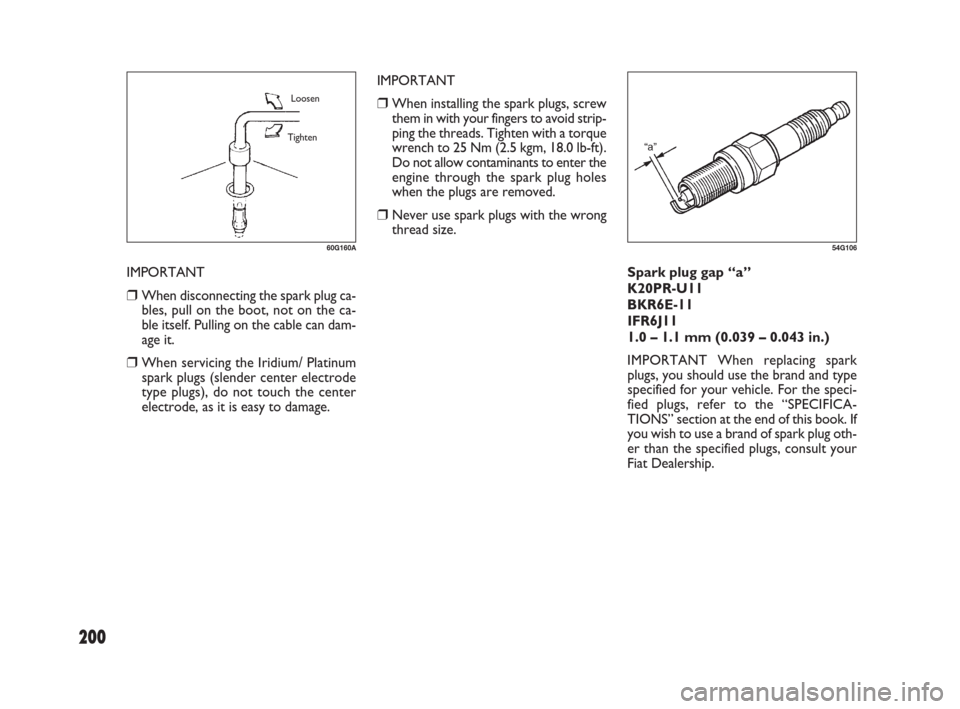
Spark plug gap “a”
K20PR-U11
BKR6E-11
IFR6J11
1.0 – 1.1 mm (0.039 – 0.043 in.)
IMPORTANT When replacing spark
plugs, you should use the brand and type
specified for your vehicle. For the speci-
fied plugs, refer to the “SPECIFICA-
TIONS” section at the end of this book. If
you wish to use a brand of spark plug oth-
er than the specified plugs, consult your
Fiat Dealership.
54G106
IMPORTANT
❒When installing the spark plugs, screw
them in with your fingers to avoid strip-
ping the threads. Tighten with a torque
wrench to 25 Nm (2.5 kgm, 18.0 lb-ft).
Do not allow contaminants to enter the
engine through the spark plug holes
when the plugs are removed.
❒Never use spark plugs with the wrong
thread size.
IMPORTANT
❒When disconnecting the spark plug ca-
bles, pull on the boot, not on the ca-
ble itself. Pulling on the cable can dam-
age it.
❒When servicing the Iridium/ Platinum
spark plugs (slender center electrode
type plugs), do not touch the center
electrode, as it is easy to damage.
60G160A
Loosen
Tighten
181-224 Fiat16 New GB 27-11-2007 11:30 Pagina 200
Page 202 of 266
201
NOTE If your engine is equipped with the
hightension cord type ignition wiring and
you experience some firing problem of
spark plugs, such as, hard engine- starting,
misfire etc., the cause may be located not
only on spark plugs but also on deterio-
rated ignition wirings (generally, used for
more than 80000 km or five years). If
spark plug replacement does not solve the
problem, have the ignition wiring and oth-
er ignition system inspected by your Fiat
Dealership.FUEL FILTER
(Diesel engine)
The fuel filter works as a water sedimen-
tor as well.
Drain water when the fuel filter warning
light comes on. To drain water:
❒Place a pan or ample rag under the fu-
el filter drain nozzle.
❒Loosen the drain knob (1). The water
will be drained.
❒Tighten the drain knob when the water
changes to the diesel fuel.
❒Tighten the drain knob.
(1)
79J147
181-224 Fiat16 New GB 27-11-2007 11:30 Pagina 201
Page 203 of 266

202
NOTE With disc brakes, the fluid level can
be expected to gradually fall as the brake
pads wear.
BRAKES
BRAKE FLUID
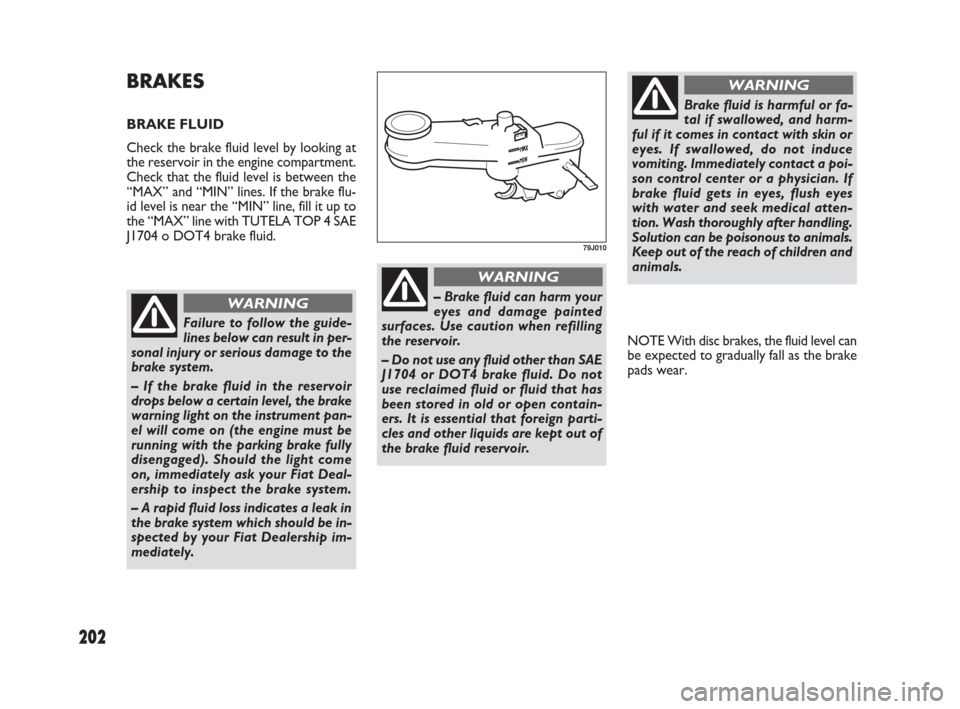
Check the brake fluid level by looking at
the reservoir in the engine compartment.
Check that the fluid level is between the
“MAX” and “MIN” lines. If the brake flu-
id level is near the “MIN” line, fill it up to
the “MAX” line with TUTELA TOP 4 SAE
J1704 o DOT4 brake fluid.
79J010
Failure to follow the guide-
lines below can result in per-
sonal injury or serious damage to the
brake system.
– If the brake fluid in the reservoir
drops below a certain level, the brake
warning light on the instrument pan-
el will come on (the engine must be
running with the parking brake fully
disengaged). Should the light come
on, immediately ask your Fiat Deal-
ership to inspect the brake system.
– A rapid fluid loss indicates a leak in
the brake system which should be in-
spected by your Fiat Dealership im-
mediately.
WARNING– Brake fluid can harm your
eyes and damage painted
surfaces. Use caution when refilling
the reservoir.
– Do not use any fluid other than SAE
J1704 or DOT4 brake fluid. Do not
use reclaimed fluid or fluid that has
been stored in old or open contain-
ers. It is essential that foreign parti-
cles and other liquids are kept out of
the brake fluid reservoir.
WARNING
Brake fluid is harmful or fa-
tal if swallowed, and harm-
ful if it comes in contact with skin or
eyes. If swallowed, do not induce
vomiting. Immediately contact a poi-
son control center or a physician. If
brake fluid gets in eyes, flush eyes
with water and seek medical atten-
tion. Wash thoroughly after handling.
Solution can be poisonous to animals.
Keep out of the reach of children and
animals.
WARNING
181-224 Fiat16 New GB 27-11-2007 11:30 Pagina 202
Page 204 of 266

203
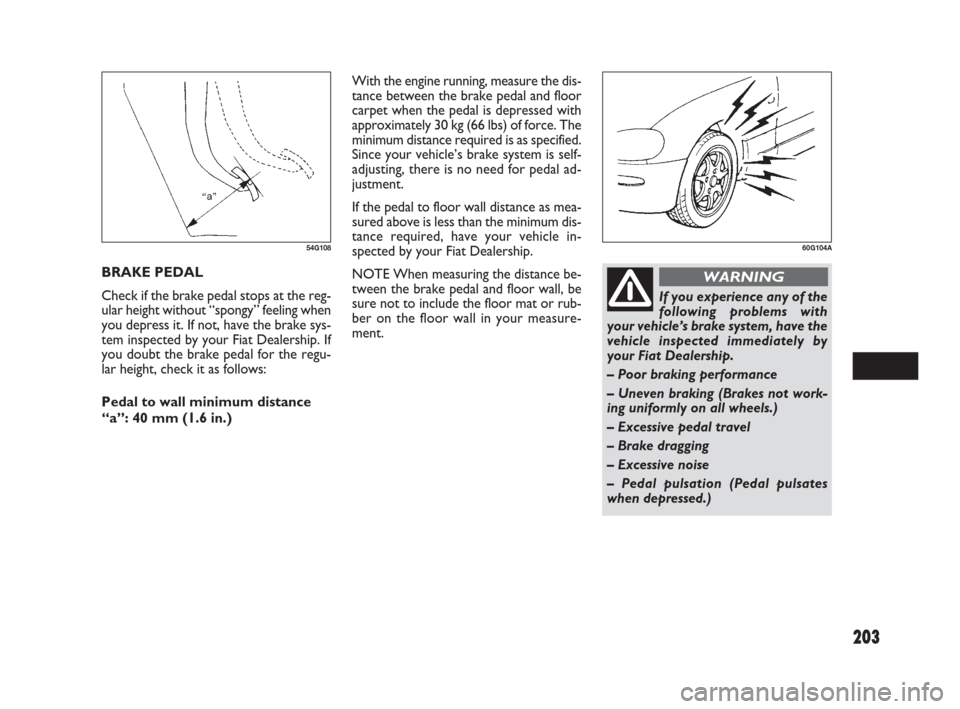
With the engine running, measure the dis-
tance between the brake pedal and floor
carpet when the pedal is depressed with
approximately 30 kg (66 lbs) of force. The
minimum distance required is as specified.
Since your vehicle’s brake system is self-
adjusting, there is no need for pedal ad-
justment.
If the pedal to floor wall distance as mea-
sured above is less than the minimum dis-
tance required, have your vehicle in-
spected by your Fiat Dealership.
NOTE When measuring the distance be-
tween the brake pedal and floor wall, be
sure not to include the floor mat or rub-
ber on the floor wall in your measure-
ment. BRAKE PEDAL
Check if the brake pedal stops at the reg-
ular height without “spongy” feeling when
you depress it. If not, have the brake sys-
tem inspected by your Fiat Dealership. If
you doubt the brake pedal for the regu-
lar height, check it as follows:
Pedal to wall minimum distance
“a”: 40 mm (1.6 in.)
54G10860G104A
If you experience any of the
following problems with
your vehicle’s brake system, have the
vehicle inspected immediately by
your Fiat Dealership.
– Poor braking performance
– Uneven braking (Brakes not work-
ing uniformly on all wheels.)
– Excessive pedal travel
– Brake dragging
– Excessive noise
– Pedal pulsation (Pedal pulsates
when depressed.)
WARNING
181-224 Fiat16 New GB 27-11-2007 11:30 Pagina 203
Page 212 of 266

211
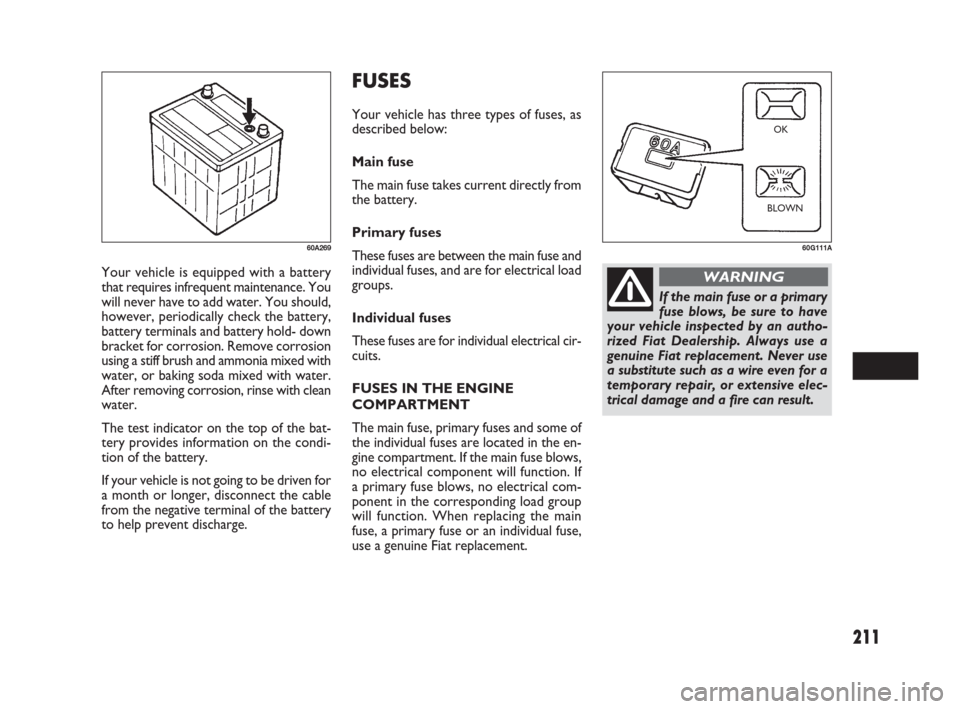
Your vehicle is equipped with a battery
that requires infrequent maintenance. You
will never have to add water. You should,
however, periodically check the battery,
battery terminals and battery hold- down
bracket for corrosion. Remove corrosion
using a stiff brush and ammonia mixed with
water, or baking soda mixed with water.
After removing corrosion, rinse with clean
water.
The test indicator on the top of the bat-
tery provides information on the condi-
tion of the battery.
If your vehicle is not going to be driven for
a month or longer, disconnect the cable
from the negative terminal of the battery
to help prevent discharge.
FUSES
Your vehicle has three types of fuses, as
described below:
Main fuse
The main fuse takes current directly from
the battery.
Primary fuses
These fuses are between the main fuse and
individual fuses, and are for electrical load
groups.
Individual fuses
These fuses are for individual electrical cir-
cuits.
FUSES IN THE ENGINE
COMPARTMENT
The main fuse, primary fuses and some of
the individual fuses are located in the en-
gine compartment. If the main fuse blows,
no electrical component will function. If
a primary fuse blows, no electrical com-
ponent in the corresponding load group
will function. When replacing the main
fuse, a primary fuse or an individual fuse,
use a genuine Fiat replacement.
60A26960G111A
OK
BLOWN
If the main fuse or a primary
fuse blows, be sure to have
your vehicle inspected by an autho-
rized Fiat Dealership. Always use a
genuine Fiat replacement. Never use
a substitute such as a wire even for a
temporary repair, or extensive elec-
trical damage and a fire can result.
WARNING
181-224 Fiat16 New GB 27-11-2007 11:30 Pagina 211
Page 213 of 266
212
(1) (2)
(3)
(4)
(5)
62J085
(28) (27) (26) (25) (6) (7) (9) (11)
(12) (13) (14) (15) (16) (17) (18) (19)
(24)
(8) (10)
(22) (21)
(23) (20)
79J092
80A
50A
50A
80A
80A
15A
15A
15A
60A
40A
30A
30A
FUSES IN THE ENGINE COMPARTMENT
Petrol engine
Main fuse / Primary fuse
(1)
(2)
(3)
(4)
(5)
(6)
(7)
(8)
(9)
(10)
(11)
(12)All electric load
Power window, Ignition Wiper, Starter
Tail light, Rear defogger, Door lock, Hazard/
Horn, Dome
Heater, Air compressor, Power steering
Radiator fan, Front fog light, Head light
Head light (Right) fuse
Head light (Left) fuse
Front fog light fuse
Power steering control module fuse
ABS control module fuse
Radiator fan fuse
ABS control module fuse
181-224 Fiat16 New GB 27-11-2007 11:30 Pagina 212
Page 215 of 266
214
(6) (7)(4) (5) (2) (1)
(3)
79J172
(33) (30) (29) (28) (8) (9) (14)
(16) (15) (17) (18) (19) (20) (21) (22)
(27)
(10) (11) (13)(12)
(25) (24)
(26) (23)
(32) (31)
79J149
80A
30A
140A
50A
30A
30A
30A
15A
15A
20A
50A
60A
40A
30A
30A
30A
50A
30A
Diesel engine
Main fuse / Primary fuse
(1)
(2)
(3)
(4)
(5)
(6)
(7)
(8)
(9)
(10)
(11)
(12)
(13)
(14)
(15)
(16)
(17)
(18)Glow
Fuel heater
All electric load
Light
Sub heater
Sub heater
Sub heater
Head light (Right) fuse
Head light (Left) fuse
Front fog light fuse
Ignition
Power steering control module fuse
ABS control module fuse
Radiator fan fuse
ABS control module fuse
Starting motor fuse
Ignition
Blower fan fuse
(34) (35)(36)
(37)
(38)
79J173
181-224 Fiat16 New GB 27-11-2007 11:30 Pagina 214
Page 219 of 266
218
HEADLIGHT
Open the engine hood. Disconnect the
coupler. Remove the sealing rubber.
Push the retaining spring forward and un-
hook it. Then remove the bulb. Install a
new bulb in the reverse order of removal.SIDE TURN SIGNAL LIGHT
As the bulb is built-in type, the light as-
sembly must be replaced. Remove the light
assembly by sliding the light housing left-
ward with your finger. CENTER INTERIOR LIGHT
(if equipped)
Pull down the lens by using a plane screw
driver covered with a soft cloth as shown.
To install it, simply push it back in.
The bulb can be removed by simply pulling
it out. When replacing the bulb, make sure
that the contact springs are holding the
bulb securely.
60G11554G12164J195
181-224 Fiat16 New GB 27-11-2007 11:30 Pagina 218