2007 FIAT CROMA service
[x] Cancel search: servicePage 76 of 166
75
CONNECT Nav+
Center number Enter Dial
Messages
fig. 59
F0L3072g
“Delete voice phonebook”
icon key
This icon key (Delete voice directo-
ry) allows to clear off previously
recorded voice samples; proceed as
follows:
– rotate the knob 15-fig. 1, select
the icon key and then press the knob
to confirm; the display will show the
following string: “Press “ENTER” to
confirm, “ESCAPE” to cancel”.
– pressing the knob 15-fig. 1clears
off voice samples, during deletion the
display will show “Please wait…”.
– pressing “ESC” 14-fig. 1deletion
is not performed and previous screen
is displayed.“Messages” FUNCTION
(SMS - Short Message Service)
“Messages” key allows reading and
sending short messages (maximum
length is 160 characters) by GSM
phone.
Read and sent messages are stored
into two separate boxes, which how-
ever share a common memory sec-
tion; so the sum of sent and read
stored messages must not exceed the
maximum number of allowed SMSs (it
depends on the SIM card).
Telephone module stops input of
new messages when the buffer is full
and the “Enter” key is disabled.In this case the display shows a string
with the following warning message:
“Further SMS messages cannot be
stored or received”.
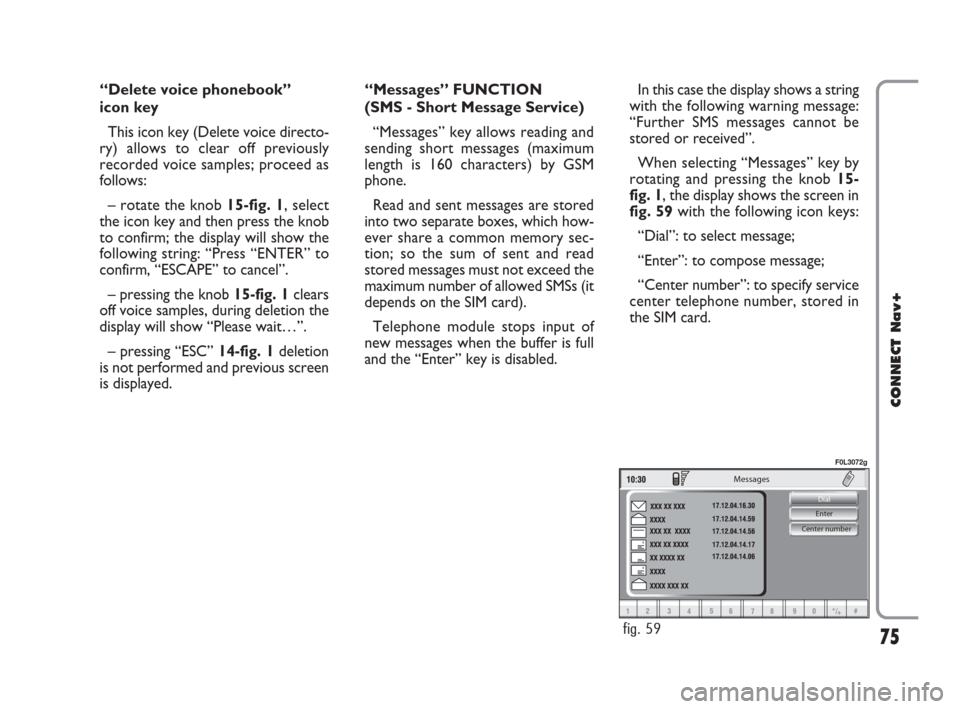
When selecting “Messages” key by
rotating and pressing the knob 15-
fig. 1, the display shows the screen in
fig. 59with the following icon keys:
“Dial”: to select message;
“Enter”: to compose message;
“Center number”: to specify service
center telephone number, stored in
the SIM card.
060-091 Connect CROMA GB 4-07-2007 14:20 Pagina 75
Page 80 of 166
79
CONNECT Nav+
Messages
Selected
Dial
Center number
fig. 66
F0L3079g
fig. 67
F0L3044g
Last number received
Name
Number
Call
Store
fig. 68
F0L3045g
Center number
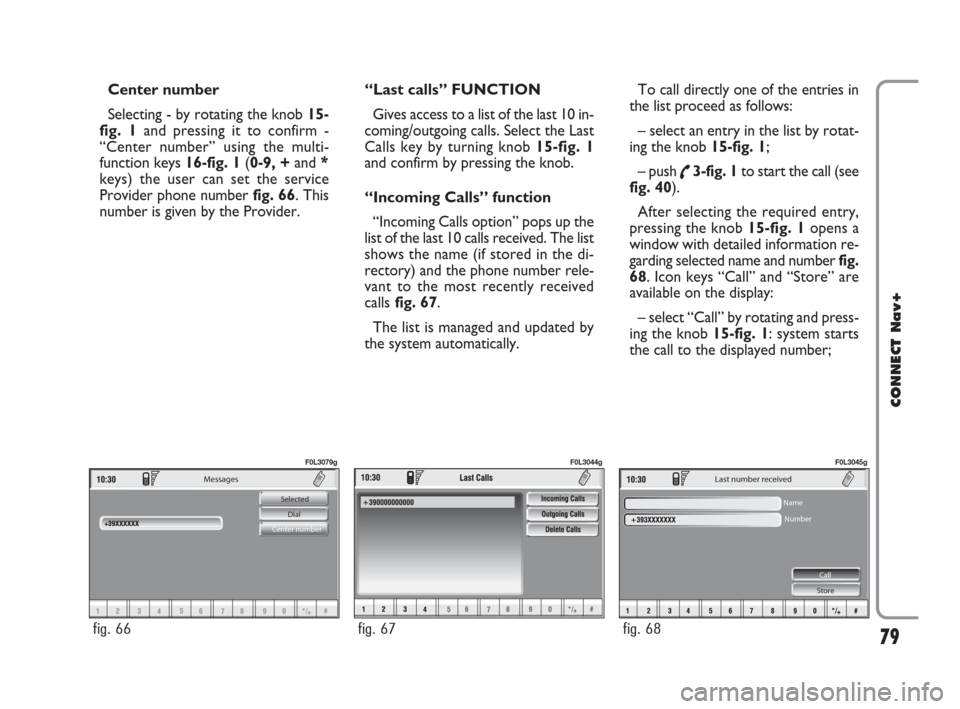
Selecting - by rotating the knob 15-
fig. 1and pressing it to confirm -
“Center number” using the multi-
function keys 16-fig. 1(0-9, +and *
keys) the user can set the service
Provider phone number fig. 66. This
number is given by the Provider.“Last calls” FUNCTION
Gives access to a list of the last 10 in-
coming/outgoing calls. Select the Last
Calls key by turning knob 15-fig. 1
and confirm by pressing the knob.
“Incoming Calls” function
“Incoming Calls option” pops up the
list of the last 10 calls received. The list
shows the name (if stored in the di-
rectory) and the phone number rele-
vant to the most recently received
callsfig. 67.
The list is managed and updated by
the system automatically.To call directly one of the entries in
the list proceed as follows:
– select an entry in the list by rotat-
ing the knob 15-fig. 1;
– push
˜3-fig. 1to start the call (see
fig. 40).
After selecting the required entry,
pressing the knob 15-fig. 1 opens a
window with detailed information re-
garding selected name and numberfig.
68. Icon keys “Call” and “Store” are
available on the display:
– select “Call” by rotating and press-
ing the knob 15-fig. 1: system starts
the call to the displayed number;
060-091 Connect CROMA GB 4-07-2007 14:21 Pagina 79
Page 88 of 166
“Settings”
Settings shall be performed with ref-
erence to the information provided by
the WAP service provider.
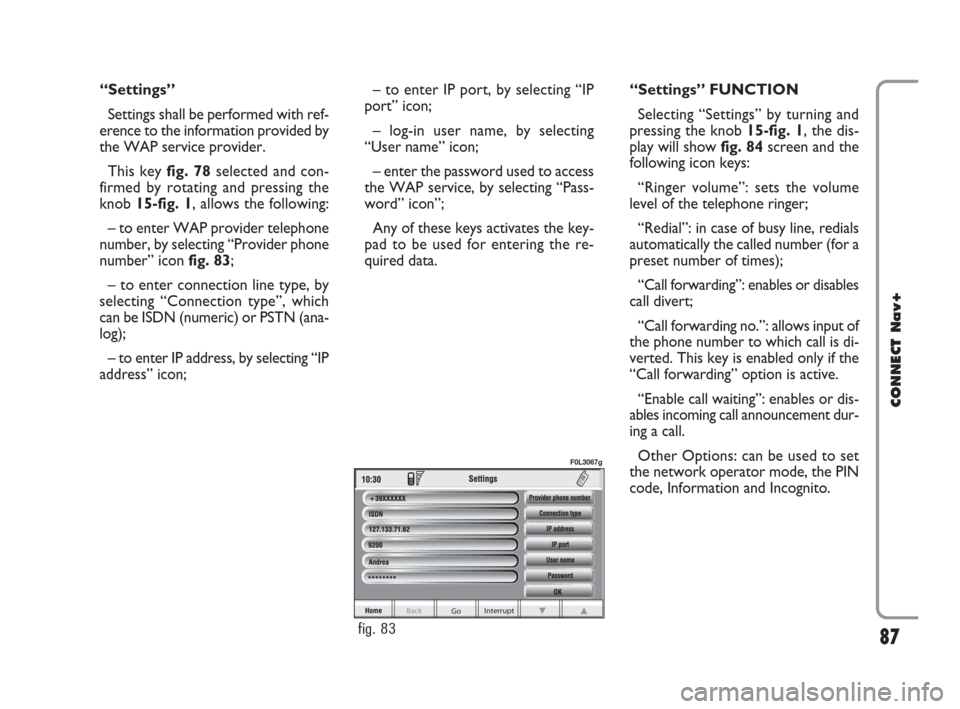
This key fig. 78selected and con-
firmed by rotating and pressing the
knob 15-fig. 1, allows the following:
– to enter WAP provider telephone
number, by selecting “Provider phone
number” icon fig. 83;
– to enter connection line type, by
selecting “Connection type”, which
can be ISDN (numeric) or PSTN (ana-
log);
– to enter IP address, by selecting “IP
address” icon;– to enter IP port, by selecting “IP
port” icon;
– log-in user name, by selecting
“User name” icon;
– enter the password used to access
the WAP service, by selecting “Pass-
word” icon”;
Any of these keys activates the key-
pad to be used for entering the re-
quired data.“Settings” FUNCTION
Selecting “Settings” by turning and
pressing the knob 15-fig. 1, the dis-
play will showfig. 84screen and the
following icon keys:
“Ringer volume”: sets the volume
level of the telephone ringer;
“Redial”: in case of busy line, redials
automatically the called number (for a
preset number of times);
“Call forwarding”: enables or disables
call divert;
“Call forwarding no.”: allows input of
the phone number to which call is di-
verted. This key is enabled only if the
“Call forwarding” option is active.
“Enable call waiting”: enables or dis-
ables incoming call announcement dur-
ing a call.
Other Options: can be used to set
the network operator mode, the PIN
code, Information and Incognito.
87
CONNECT Nav+
Go Interrupt
Back
fig. 83
F0L3067g
060-091 Connect CROMA GB 4-07-2007 14:21 Pagina 87
Page 92 of 166

“Information” icon key
“Information” shows information re-
lated to the GSM service provider fig.
92. Press “ESC” to quit the “Informa-
tion” screen 14-fig. 1.
91
CONNECT Nav+
fig. 92
F0L3087g
060-091 Connect CROMA GB 4-07-2007 14:21 Pagina 91
Page 104 of 166
103
CONNECT Nav+
POINTS OF INTEREST
This function is used to obtain a file
containing the location and informa-
tion on points of general interest such
as, for example, restaurants, museums,
stations etc., divided by category.
Selecting “Points of interest” rotat-
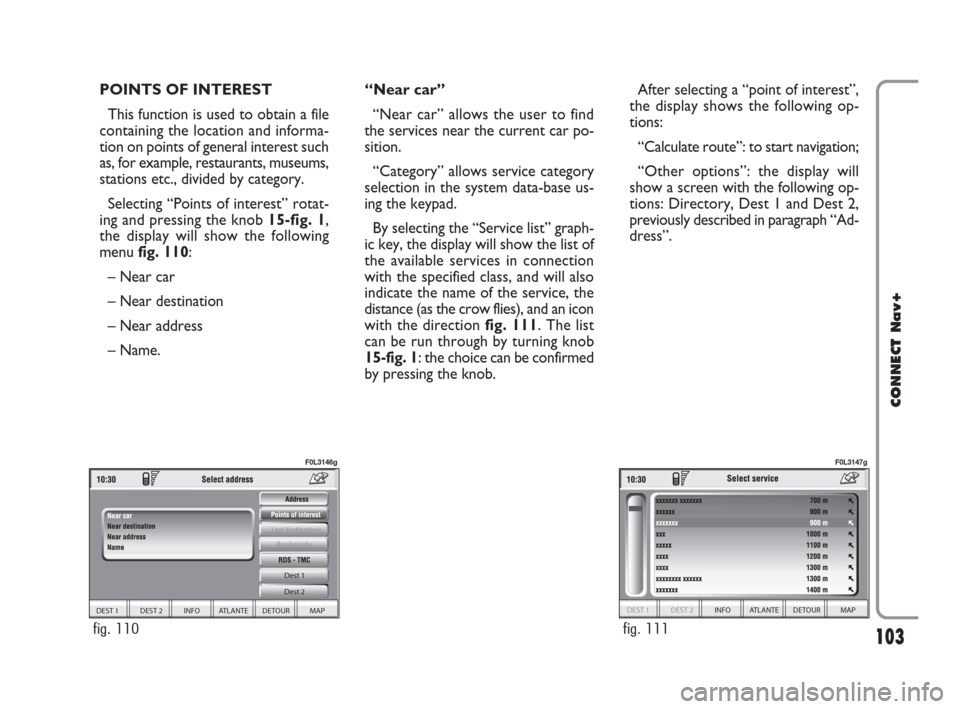
ing and pressing the knob 15-fig. 1,
the display will show the following
menu fig. 110:
– Near car
– Near destination
– Near address
– Name. “Near car”
“Near car” allows the user to find
the services near the current car po-
sition.
“Category” allows service category
selection in the system data-base us-
ing the keypad.
By selecting the “Service list” graph-
ic key, the display will show the list of
the available services in connection
with the specified class, and will also
indicate the name of the service, the
distance (as the crow flies), and an icon
with the direction fig. 111. The list
can be run through by turning knob
15-fig. 1: the choice can be confirmed
by pressing the knob.After selecting a “point of interest”,
the display shows the following op-
tions:
“Calculate route”: to start navigation;
“Other options”: the display will
show a screen with the following op-
tions: Directory, Dest 1 and Dest 2,
previously described in paragraph “Ad-
dress”.
DEST 1 DEST 2 INFO ATLANTE DETOUR MAP Dest 1
Dest 2
Bookmarks
fig. 110
F0L3146g
DEST 1 DEST 2 INFO ATLANTE DETOUR MAP
fig. 111
F0L3147g
092-115 Connect CROMA GB 4-07-2007 14:06 Pagina 103
Page 105 of 166
104
CONNECT Nav+
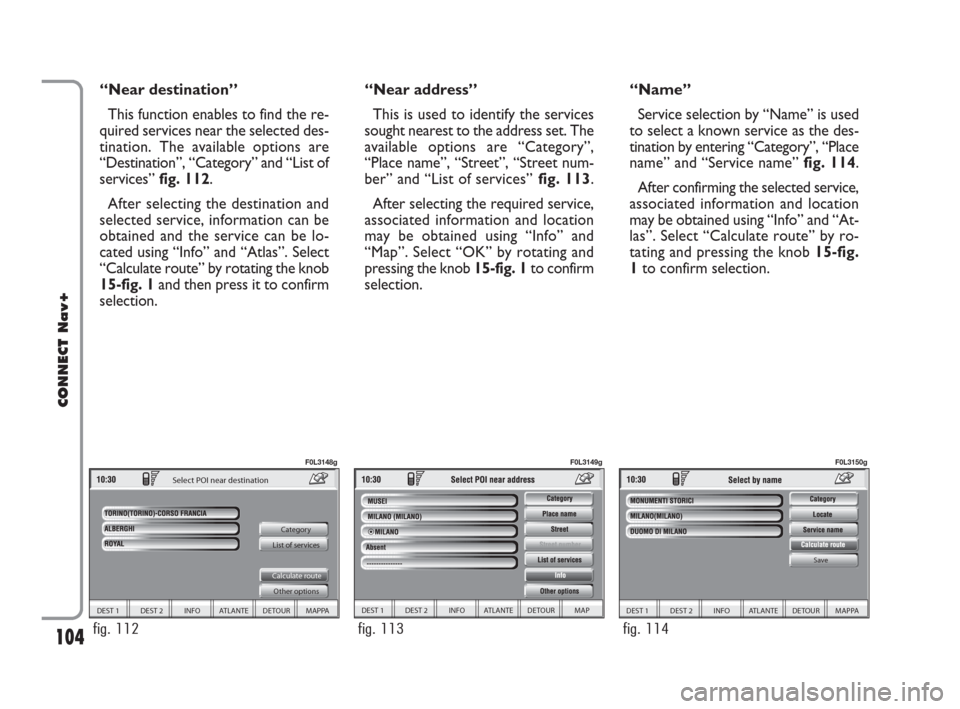
“Near destination”
This function enables to find the re-
quired services near the selected des-
tination. The available options are
“Destination”, “Category” and “List of
services” fig. 112.
After selecting the destination and
selected service, information can be
obtained and the service can be lo-
cated using “Info” and “Atlas”. Select
“Calculate route” by rotating the knob
15-fig. 1and then press it to confirm
selection.“Near address”
This is used to identify the services
sought nearest to the address set. The
available options are “Category”,
“Place name”, “Street”, “Street num-
ber” and “List of services”fig. 113.
After selecting the required service,
associated information and location
may be obtained using “Info” and
“Map”. Select “OK” by rotating and
pressing the knob 15-fig. 1to confirm
selection.“Name”
Service selection by “Name” is used
to select a known service as the des-
tination by entering “Category”, “Place
name” and “Service name” fig. 114.
After confirming the selected service,
associated information and location
may be obtained using “Info” and “At-
las”. Select “Calculate route” by ro-
tating and pressing the knob 15-fig.
1to confirm selection.
DEST 1 DEST 2 INFO ATLANTE DETOUR MAPPA
Category
List of services
Calculate route
Other options
Select POI near destination
fig. 112
F0L3148g
DEST 1 DEST 2 INFO ATLANTE DETOUR MAP
fig. 113
F0L3149g
DEST 1 DEST 2 INFO ATLANTE DETOUR MAPPA
Save
fig. 114
F0L3150g
092-115 Connect CROMA GB 4-07-2007 14:06 Pagina 104
Page 107 of 166
106
CONNECT Nav+
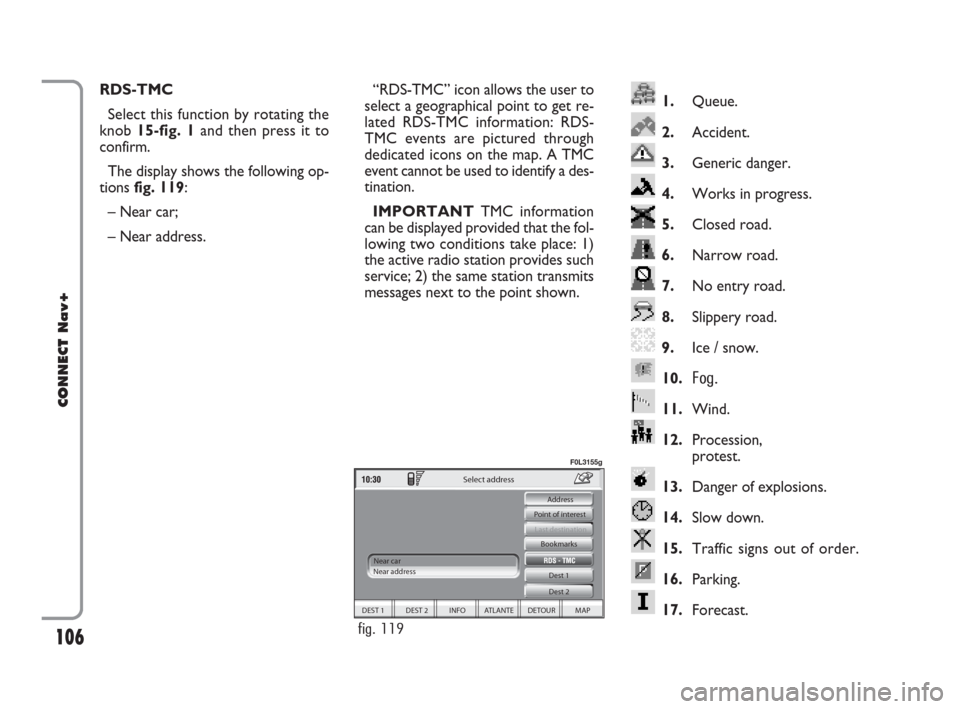
1.Queue.
2.Accident.
3.Generic danger.
4.Works in progress.
5.Closed road.
6.Narrow road.
7.No entry road.
8.Slippery road.
9.Ice / snow.
10.
Fog.
11.Wind.
12.Procession,
protest.
13.Danger of explosions.
14.Slow down.
15.Traffic signs out of order.
16.Parking.
17.Forecast.
RDS-TMC
Select this function by rotating the
knob 15-fig. 1and then press it to
confirm.
The display shows the following op-
tions fig. 119:
– Near car;
– Near address.“RDS-TMC” icon allows the user to
select a geographical point to get re-
lated RDS-TMC information: RDS-
TMC events are pictured through
dedicated icons on the map. A TMC
event cannot be used to identify a des-
tination.
IMPORTANTTMC information
can be displayed provided that the fol-
lowing two conditions take place: 1)
the active radio station provides such
service; 2) the same station transmits
messages next to the point shown.
DEST 1 DEST 2 INFO ATLANTE DETOUR MAP Dest 1
Dest 2 Bookmarks
Last destination
Select address
Near car
Near address Point of interest Address
fig. 119
F0L3155g
092-115 Connect CROMA GB 4-07-2007 14:06 Pagina 106
Page 112 of 166
111
CONNECT Nav+
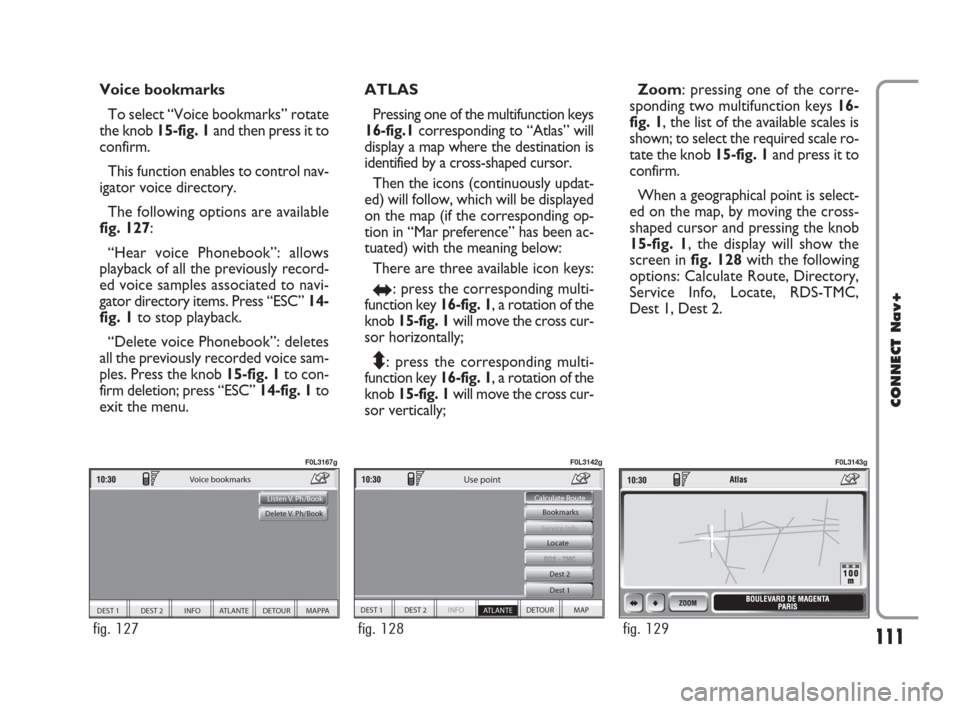
Voice bookmarks
To select “Voice bookmarks” rotate
the knob 15-fig. 1and then press it to
confirm.
This function enables to control nav-
igator voice directory.
The following options are available
fig. 127:
“Hear voice Phonebook”: allows
playback of all the previously record-
ed voice samples associated to navi-
gator directory items. Press “ESC”14-
fig. 1to stop playback.
“Delete voice Phonebook”: deletes
all the previously recorded voice sam-
ples. Press the knob 15-fig. 1to con-
firm deletion; press “ESC” 14-fig. 1to
exit the menu.ATLAS
Pressing one of the multifunction keys
16-fig.1corresponding to “Atlas” will
display a map where the destination is
identified by a cross-shaped cursor.
Then the icons (continuously updat-
ed) will follow, which will be displayed
on the map (if the corresponding op-
tion in “Mar preference” has been ac-
tuated) with the meaning below:
There are three available icon keys:
RE: press the corresponding multi-
function key 16-fig. 1, a rotation of the
knob 15-fig. 1will move the cross cur-
sor horizontally;
Q
Z: press the corresponding multi-
function key 16-fig. 1, a rotation of the
knob 15-fig. 1will move the cross cur-
sor vertically;Zoom: pressing one of the corre-
sponding two multifunction keys 16-
fig. 1, the list of the available scales is
shown; to select the required scale ro-
tate the knob 15-fig. 1and press it to
confirm.
When a geographical point is select-
ed on the map, by moving the cross-
shaped cursor and pressing the knob
15-fig. 1, the display will show the
screen in fig. 128with the following
options: Calculate Route, Directory,
Service Info, Locate, RDS-TMC,
Dest 1, Dest 2.
DEST 1 DEST 2 INFO ATLANTE DETOUR MAPPA
Voice bookmarks
Listen V. Ph/Book
Delete V. Ph/Book
fig. 127
F0L3167g
DEST 1 DEST 2 INFO
ATLANTE DETOUR MAP Bookmarks
Dest 1 Dest 2
Service info
Calculate Route
Use point
Locate
fig. 128
F0L3142g
fig. 129
F0L3143g
092-115 Connect CROMA GB 4-07-2007 14:06 Pagina 111