2007 DODGE SPRINTER warning
[x] Cancel search: warningPage 61 of 393

60 Controls in detailOpening and closing
3
Anti-trap protection
If the sliding door is obstructed during the
opening procedure, it moves back in the
opposite direction slightly and stops.
If the sliding door is obstructed during the
closing procedure, it opens fully again.You can fix the rear doors in place at an an-
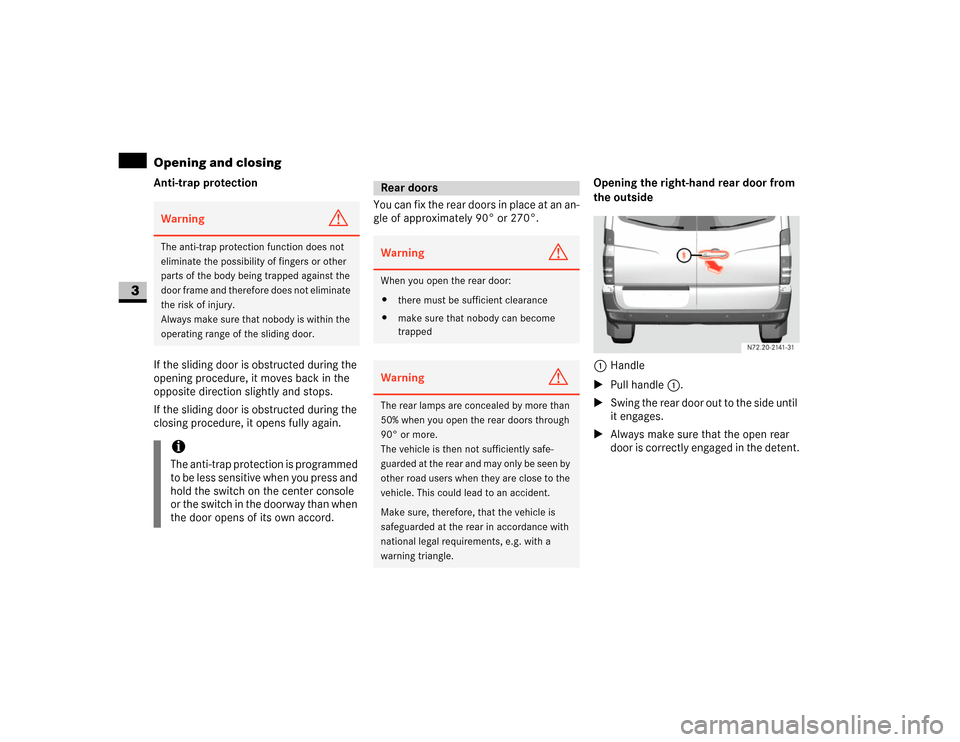
gle of approximately 90° or 270°.Opening the right-hand rear door from
the outside
1Handle
\1Pull handle 1.
\1Swing the rear door out to the side until
it engages.
\1Always make sure that the open rear
door is correctly engaged in the detent.Warning
G
The anti-trap protection function does not
eliminate the possibility of fingers or other
parts of the body being trapped against the
door frame and therefore does not eliminate
the risk of injury.
Always make sure that nobody is within the
operating range of the sliding door.iThe anti-trap protection is programmed
to be less sensitive when you press and
hold the switch on the center console
or the switch in the doorway than when
the door opens of its own accord.
Rear doorsWarning
G
When you open the rear door:
\4there must be sufficient clearance
\4make sure that nobody can become
trappedWarning
G
The rear lamps are concealed by more than
50% when you open the rear doors through
90° or more.
The vehicle is then not sufficiently safe-
guarded at the rear and may only be seen by
other road users when they are close to the
vehicle. This could lead to an accident.
Make sure, therefore, that the vehicle is
safeguarded at the rear in accordance with
national legal requirements, e.g. with a
warning triangle.
Page 62 of 393

61 Controls in detail
Opening and closing
3
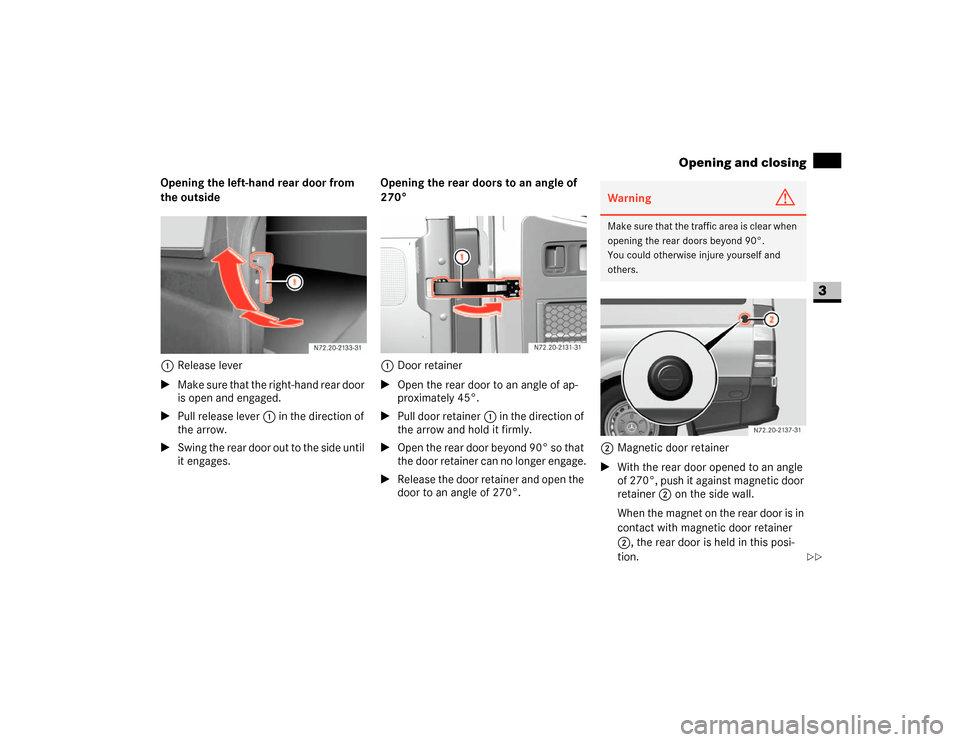
Opening the left-hand rear door from
the outside
1Release lever
\1Make sure that the right-hand rear door
is open and engaged.
\1Pull release lever1 in the direction of
the arrow.
\1Swing the rear door out to the side until
it engages.Opening the rear doors to an angle of
270°
1Door retainer
\1Open the rear door to an angle of ap-
proximately 45°.
\1Pull door retainer1 in the direction of
the arrow and hold it firmly.
\1Open the rear door beyond 90° so that
the door retainer can no longer engage.
\1Release the door retainer and open the
door to an angle of 270°.2Magnetic door retainer
\1With the rear door opened to an angle
of 270°, push it against magnetic door
retainer 2 on the side wall.
When the magnet on the rear door is in
contact with magnetic door retainer
2, the rear door is held in this posi-
tion.
Warning
G
Make sure that the traffic area is clear when
opening the rear doors beyond 90°.
You could otherwise injure yourself and
others.
\2\2
Page 63 of 393

62 Controls in detailOpening and closing
3
Closing the rear doors from outside\1Close the left-hand rear door firmly
from the outside.
\1Close the right-hand rear door firmly
from the outside.
Closing the rear doors from the 90° or
270° position
\1Pull the door away from the magnetic
door retainer if necessary (\2page 61).
\1Push the rear door closed firmly from
the outside.
\1The door retainer (\2page 61) is auto-
matically released from its detent.
Opening / closing the rear door from
the inside
The opening lever is on the inside of the
right-hand rear door. If a white marking is
visible, this indicates that the rear door is
unlocked.
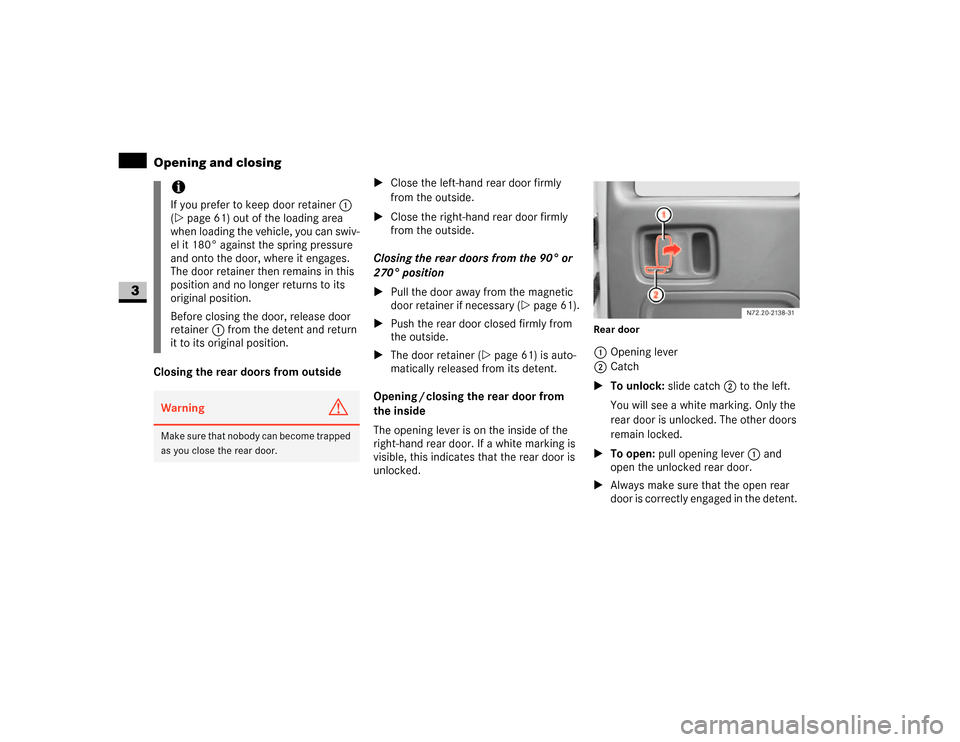
Rear door1Opening lever
2Catch
\1To unlock: slide catch2 to the left.
You will see a white marking. Only the
rear door is unlocked. The other doors
remain locked.
\1To open: pull opening lever1 and
open the unlocked rear door.
\1Always make sure that the open rear
door is correctly engaged in the detent.
iIf you prefer to keep door retainer1
(\2page 61) out of the loading area
when loading the vehicle, you can swiv-
el it 180° against the spring pressure
and onto the door, where it engages.
The door retainer then remains in this
position and no longer returns to its
original position.
Before closing the door, release door
retainer1 from the detent and return
it to its original position.Warning
G
Make sure that nobody can become trapped
as you close the rear door.
Page 64 of 393

63 Controls in detail
Opening and closing
3
\1To close: make sure that the left-hand
rear door is closed.
\1Pull the right-hand rear door firmly
closed by the door handle.
\1To lock: slide catch2 to the right.
Only the rear door is locked.
The white marking is no longer visible.Using the central locking switch, you can
centrally lock or unlock from the inside ei-
ther the entire vehicle or the sliding doors
and rear doors only.The central locking switch is located on the
center console.
1To lock / unlock the entire vehicle
2To lock / unlock the sliding doors and
rear doorWarning
G
M a k e s u r e t h a t n o b o d y c a n b e c o m e t r a p p e d
as you close the rear door.
Locking and unlocking centrally
from the insideWarning
G
Do not leave children unsupervised in the
vehicle, even if they are secured by a child
restraint system. The children could:
\4injure themselves on parts of the vehicle
\4be severely or even fatally injured by
prolonged exposure to intense heat
If the children open a door, they could:
\4cause injury to others as a result
\4get out of the vehicle and could either
injure themselves when doing so or they
could be injured by passing vehicles
\4sustain serious injuries if they were to
fall out of the vehicle, due in particular
to the height of the passenger compart-
ment from the ground
iIf the key is in position0 or no longer in
the ignition lock, the indicator lamp in
the central locking switch lights up for
5 seconds after it is pressed. It lights
up permanently if the key is in position
1 or2 in the ignition lock.
N54.25-2917-31
Page 67 of 393

66 Controls in detailOpening and closing
3
Deactivating the automatic locking
when driving function for the sliding
doors and the rear door
\1Close all the doors.
\1Turn the key to position1 or2 in the ig-
nition lock (\2page 67).
\1Press lower part 2 of the switch. Keep
it pressed for approximately
5seconds.
The indicator lamp in the switch flashes
twice.
The partition sliding door is in the partition
between the cab and the load compart-
ment.Operating the partition sliding door
from inside the cab
1To close
2To open
3To unlock
\1To open: turn the key counterclock-
wise 3.
The sliding door is unlocked.
\1Slide the sliding door to the right as far
as the stop2.
\1To close: slide the sliding door to the
left until it engages1.
The sliding door can be locked using
the key.Operating the partition sliding door
from inside the load compartment
1To open
2To close
3To unlock
\1To open: press the lever to the
right3.
The sliding door is unlocked.
\1Slide the sliding door to the left as far
as the stop1.
\1To close: slide the sliding door to the
right until it engages2.Partition sliding door*Warning
G
Make sure that nobody can become trapped
as you close the partition sliding door.
Page 69 of 393

68 Controls in detailSeats
3
Driver’s and co-driver’s seatsWarning
G
Only adjust the seats when the vehicle is
stationary and the handbrake is applied. You
could otherwise lose control of the vehicle
as a result of the seat moving and cause an
accident.Warning
G
Make sure that nobody can become trapped
as the seat is adjusted. Never place your
hands under the seat or near to moving
parts.
Your seat must be adjusted in such a way
that you can wear the seat belt correctly
(\2page 27).
Observe the following points:
\4Position the backrest as vertically as
possible and sit upright.
\4Avoid seat positions that do not allow
the seat belt to be routed correctly. The
shoulder section of the seat belt must
be routed across the middle of your
shoulder and must fit closely across
your chest. The lap section of the belt
must be routed as low as possible
across your pelvic area, i.e. across your
hip joints. Never drive with the backrest
tilted too far back.
\4Your arms should be slightly bent when
you are holding the steering wheel.
\4The distance from the pedals should be
such that you can depress them fully.
\4Adjust the head restraint in such a way
that the upper edge of the head restraint
is level with your head.
\4Make sure that you hear the seat en-
gage. Otherwise, the seat is not correct-
ly locked in place.
Injuries may be caused if these notes are
not observed.Warning
G
Avoid seat positions in which you cannot
wear your seat belt correctly. They are a
safety hazard and must therefore be
avoided.
Page 71 of 393

70 Controls in detailSeats
3
Seat suspension adjustment*
The seat suspension must be adjusted to
your body weight.
\1Relieve the load on the seat.
\1Select your body weight 88 to 165 lbs
(40 to 120 kg) using thumbwheel6
for optimal seat suspension.
The seat suspension becomes harder
as the load on the seat increases.
Vertical lock*
If the seat bounces up and down frequent-
ly, you can engage the seat in its lowest po-
sition.
\1Turn lever7 downward.
The next time the seat bounces, it will
engage in its lowest position.
\1Turn lever7 upward to release the
seat from the vertical lock.
The seat can now move up and down
again.Swivelling front seats*
The driver’s and co-driver’s seat can be ro-
tated by 180° to be opposite of the direc-
tion of travel.The seats engage in the direction of travel
or opposite the direction of travel as well
as at 50° pointing towards the exit.
!
When rotating the seats, make sure the-
re is sufficient space. If necessary, move
the seat fore or aft to avoid colliding with
adjacent add-on parts.
Fold the handbrake lever down as far as it
will go. You could otherwise damage the
handbrake or the handbrake lever.
i
Move the co-driver’s seat forward as far
as it will go before rotating it (\2page 69).
\1Make sure the handbrake is applied
and the handbrake lever is folded down
as far as it will go (\2page 115).
\1Set the steering wheel so that there is
sufficient clearance for turning and ad-
justing the driver’s seat (\2page 76).
Warning
G
Only adjust the seats when the vehicle is
stationary and the handbrake is applied. You
could otherwise lose control of the vehicle
as a result of the seat moving and cause an
accident.Warning
G
The driver’s and co-driver’s seat must be ad-
justed and properly engaged in the direction
of travel for driving. Otherwise you will not
be able to operate the vehicle safely.The restraint systems in your vehicle will
only function as intended when the driver’s
and co-driver’s seat are engaged in the di-
rection of travel.
Warning
G
Make sure nobody can become trapped
when unlocking and turning the seats. Never
hold your hands under the seat or near mo-
veable parts when turning the seats.
Page 72 of 393

71 Controls in detail
Seats
3
The seat release lever is located behind the
seat between the seat backrest and the
seat base.Co-driver’s seat\1Press lever 1 on the back of the seat
to the middle and turn the seat slightly
inwards.
\1The turning device is unlocked.
\1Release lever 1 again.
\1Turn the seat inwards to the desired
position.Twin co-driver's seat*Folding the seat cushion forward
1To release from the front anchorage
2To release from the rear anchorage
\1Lift the seat cushion out of front
anchorage1.
\1Pull the seat cushion towards the front
slightly and out of rear anchorage2.
\1Fold the seat cushion up by the rear
edge. 1Lever
Warning
G
You could knock yourself against the unpro-
tected pivoting frame if the seat is opposite
of the direction of travel and pushed right
back in a longitudinal direction.Therefore, center the seat above the seat
base whenever you leave it. Point out this
danger to passengers.iThe twin co-driver’s seat does not pro-
vide the same level of comfort as the
driver’s and co-driver’s seats.
There is only restricted seat width and
legroom.
iYou can store various articles in the
space under the twin co-driver’s seat.