Page 60 of 393

59 Controls in detail
Opening and closing
3
Opening / closing using the inside and
outside door handles
Observe the notes on anti-trap protection
(\2page 60).
1Button
2Outside door handle\1Briefly press button1 or pull outside
door handle 2.
The sliding door opens or closes and a
signal sounds.
\1Press button1 again or pull outside
door handle 2 again.
The sliding door stops.
Opening/closing with the remote con-
trol
\1Press and hold the button for
more than half a second.
The sliding door unlocks and opens or
closes.
\1Press the button again.
The sliding door stops.
Programming the remote control
If the vehicle is equipped with 2 sliding
doors, it is only possible to program the re-
mote control for one of the sliding doors.1Switch for sliding door on left-hand
side
2Switch for sliding door on right-hand
side
\1Make sure that the doors are closed.
\1Switch on the ignition (\2page 67).
\1Press and hold the upper part of
relevant switch1 or 2 on the center
console for 5 seconds.
The indicator lamp in the switch for the
sliding door concerned flashes and a
warning tone sounds three times as
confirmation. N72.16-2118-31
N72.16-2136-31
Page 61 of 393

60 Controls in detailOpening and closing
3
Anti-trap protection
If the sliding door is obstructed during the
opening procedure, it moves back in the
opposite direction slightly and stops.
If the sliding door is obstructed during the
closing procedure, it opens fully again.You can fix the rear doors in place at an an-
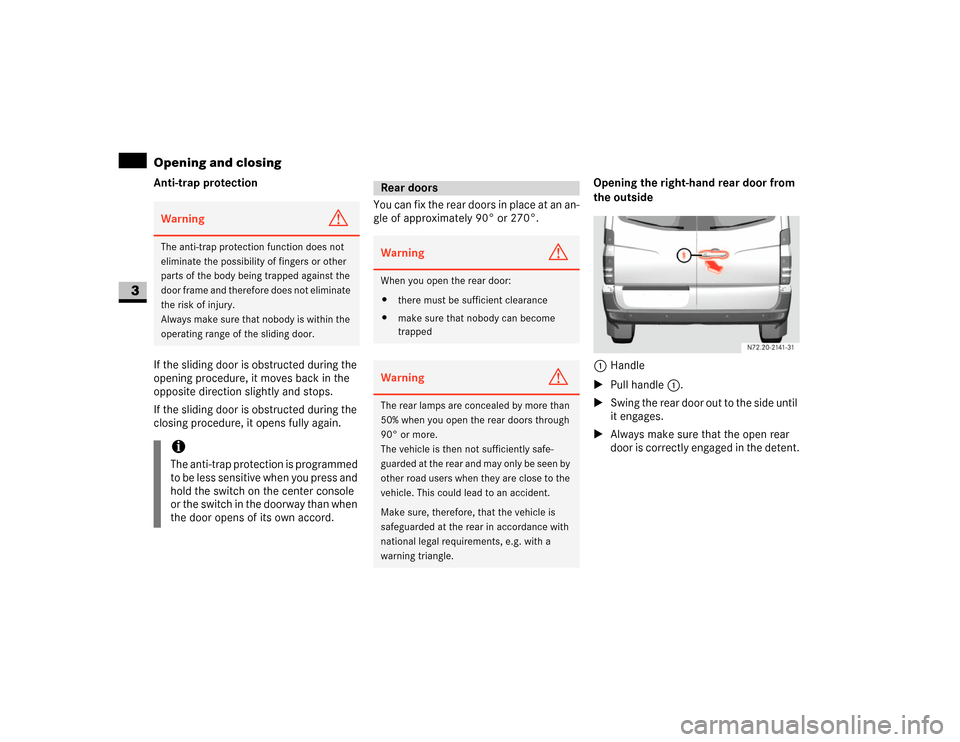
gle of approximately 90° or 270°.Opening the right-hand rear door from
the outside
1Handle
\1Pull handle 1.
\1Swing the rear door out to the side until
it engages.
\1Always make sure that the open rear
door is correctly engaged in the detent.Warning
G
The anti-trap protection function does not
eliminate the possibility of fingers or other
parts of the body being trapped against the
door frame and therefore does not eliminate
the risk of injury.
Always make sure that nobody is within the
operating range of the sliding door.iThe anti-trap protection is programmed
to be less sensitive when you press and
hold the switch on the center console
or the switch in the doorway than when
the door opens of its own accord.
Rear doorsWarning
G
When you open the rear door:
\4there must be sufficient clearance
\4make sure that nobody can become
trappedWarning
G
The rear lamps are concealed by more than
50% when you open the rear doors through
90° or more.
The vehicle is then not sufficiently safe-
guarded at the rear and may only be seen by
other road users when they are close to the
vehicle. This could lead to an accident.
Make sure, therefore, that the vehicle is
safeguarded at the rear in accordance with
national legal requirements, e.g. with a
warning triangle.
Page 64 of 393

63 Controls in detail
Opening and closing
3
\1To close: make sure that the left-hand
rear door is closed.
\1Pull the right-hand rear door firmly
closed by the door handle.
\1To lock: slide catch2 to the right.
Only the rear door is locked.
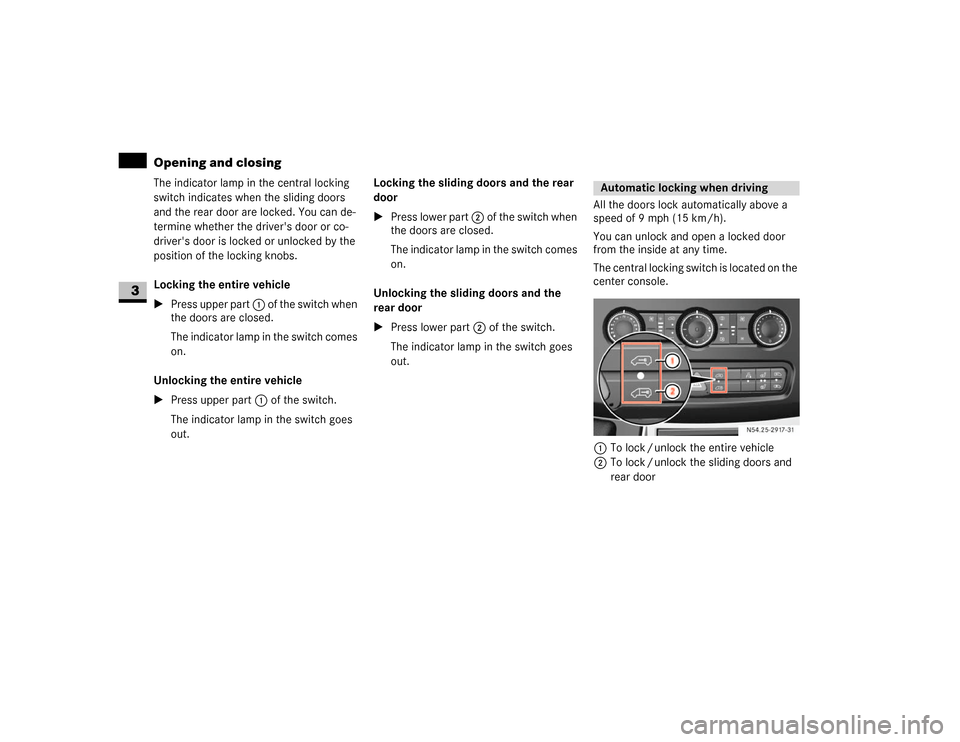
The white marking is no longer visible.Using the central locking switch, you can
centrally lock or unlock from the inside ei-
ther the entire vehicle or the sliding doors
and rear doors only.The central locking switch is located on the
center console.
1To lock / unlock the entire vehicle
2To lock / unlock the sliding doors and
rear doorWarning
G
M a k e s u r e t h a t n o b o d y c a n b e c o m e t r a p p e d
as you close the rear door.
Locking and unlocking centrally
from the insideWarning
G
Do not leave children unsupervised in the
vehicle, even if they are secured by a child
restraint system. The children could:
\4injure themselves on parts of the vehicle
\4be severely or even fatally injured by
prolonged exposure to intense heat
If the children open a door, they could:
\4cause injury to others as a result
\4get out of the vehicle and could either
injure themselves when doing so or they
could be injured by passing vehicles
\4sustain serious injuries if they were to
fall out of the vehicle, due in particular
to the height of the passenger compart-
ment from the ground
iIf the key is in position0 or no longer in
the ignition lock, the indicator lamp in
the central locking switch lights up for
5 seconds after it is pressed. It lights
up permanently if the key is in position
1 or2 in the ignition lock.
N54.25-2917-31
Page 65 of 393

64 Controls in detailOpening and closing
3
The indicator lamp in the central locking
switch indicates when the sliding doors
and the rear door are locked. You can de-
termine whether the driver's door or co-
driver's door is locked or unlocked by the
position of the locking knobs.
Locking the entire vehicle
\1Press upper part 1 of the switch when
the doors are closed.
The indicator lamp in the switch comes
on.
Unlocking the entire vehicle
\1Press upper part 1 of the switch.
The indicator lamp in the switch goes
out.Locking the sliding doors and the rear
door
\1Press lower part 2 of the switch when
the doors are closed.
The indicator lamp in the switch comes
on.
Unlocking the sliding doors and the
rear door
\1Press lower part 2 of the switch.
The indicator lamp in the switch goes
out.All the doors lock automatically above a
speed of 9 mph (15 km/h).
You can unlock and open a locked door
from the inside at any time.
The central locking switch is located on the
center console.
1To lock / unlock the entire vehicle
2To lock / unlock the sliding doors and
rear door
Automatic locking when driving
N54.25-2917-31
Page 74 of 393

73 Controls in detail
Seats
3
Removing the head restraints
\1Pull the head restraint up as far as it
will go.
\1Press release button1 and pull the
head restraint out.
Installing the head restraints
\1Insert the head restraint so that the rod
with the notches is in the direction of
travel on the left.
\1Push the head restraint down until it
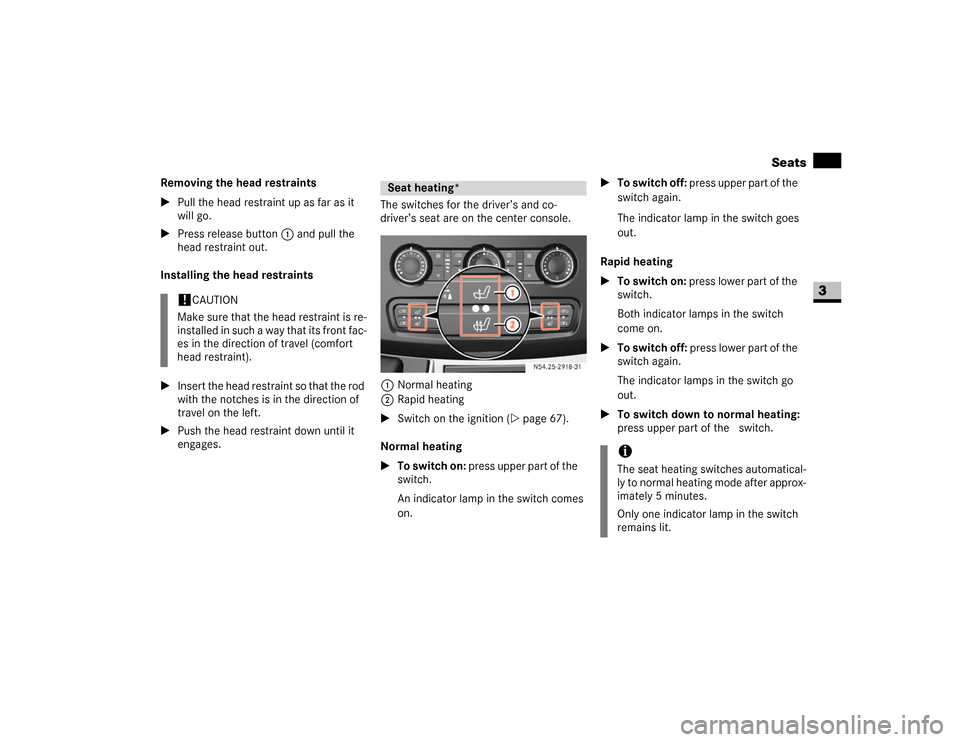
engages.The switches for the driver’s and co-
driver’s seat are on the center console.
1Normal heating
2Rapid heating
\1Switch on the ignition (\2page 67).
Normal heating
\1To switch on: press upper part of the&
switch.
An indicator lamp in the switch comes
on.\1To switch off: press upper part of the&
switch again.
The indicator lamp in the switch goes
out.
Rapid heating
\1To switch on: press lower part of the
switch.
Both indicator lamps in the switch
come on.
\1To switch off: press lower part of the
switch again.
The indicator lamps in the switch go
out.
\1To switch down to normal heating:
press upper part of the& switch.
!
CAUTION
Make sure that the head restraint is re-
installed in such a way that its front fac-
es in the direction of travel (comfort
head restraint).
Seat heating*
N54.25-2918-31
iThe seat heating switches automatical-
ly to normal heating mode after approx-
imately 5 minutes.
Only one indicator lamp in the switch
remains lit.
Page 129 of 393

128 Controls in detailGood visibility
3
The switch for the windshield heating is on
the center console.
1To switch on / off\1To switch on: press upper part of
theP switch.
The indicator lamp in the switch comes
on.
\1To switch off: press upper part of
theP switch again.
\1The indicator lamp in the switch goes
out.
The rear window heating is operational
while the engine is running.
The rear window heating consumes a lot of
energy. You should therefore switch the
rear window heating off as soon as the win-
dow is clear. The heating switches off auto-
matically after a maximum of 12 minutes.The switch for the rear window heating is
on the center console.
1To switch on / off
\1To switch on: press upper part of
theF switch.
The indicator lamp in the switch comes
on.
\1To switch off: press upper part of
theF switch again.
The indicator lamp in the switch goes
out.Warning
G
Clear ice or snow from the windshield before
commencing a journey. Iced-up windows re-
strict your view. You could cause an acci-
dent and endanger yourself and others. Do
not start the vehicle if the windows are iced
up, fogged up or covered in snow.
N54.25-2920-31
Rear window heating*N54.25-2921-31
Page 152 of 393

151 Controls in detail
Driving systems
3
Front sensors
Rear sensors
Minimum distance
If an obstacle is within this range, all seg-
ments of the warning displays light up and
you will hear an audible warning tone. The
distance may no longer be displayed if you
drive the vehicle closer to the obstacle
than the minimum distance.Warning displays
The warning displays indicate the distance
between the sensor and the obstacle.
The warning display for the front area is
located on the middle of the dashboard
above the center console.
Front area warning display1Left-hand side of vehicle
2Right-hand side of vehicle
3Indicator segments
Center
about 39 in (100 cm)
Corners
about 26 in (65 cm)
Center
about 71 in (180 cm)
Corners
about 39 in (100 cm)
Center
about 12 in (30 cm)
Corners, front
about 10 in (25 cm)
Corners, rear
about 12 in (30 cm)
!
CAUTION
Pay particular attention to obstacles
above or below the sensors when park-
ing, such as flower pots or trailer tow-
bars.
Parktronic does not detect such ob-
jects in the immediate vicinity. You
could damage the vehicle or objects.
Parktronic can malfunction as a conse-
quence of:
\4ultrasonic sources such as a truck’s
compressed-air brakes, an auto-
matic car wash or a pneumatic drill
\4attachments to the vehicle, e.g.
load-bearing implements or trailer
couplings
\4number plates (vehicle license
plates) that are not affixed flat
against the bumper
\4dirty or icy sensors
N54.65-2074-31
Page 167 of 393
166 Controls in detailFeatures
3
Covered storage compartment above the
center console*1Cover
2Release handle
\1Pull release handle2.
Cover1 swings upwards.
\1Close cover1 and engage it.The eyeglasses compartment is located in
the overhead control panel.
1Cover
\1To open: press cover1 of the eye-
glasses compartment.
The eyeglasses compartment folds out.
\1To close: press cover1 of the eye-
glasses compartment into the over-
head control panel until it engages.1Folding table
\1Pull folding table1 forward by the tab.
\1Fold folding table down in the direction
of the arrow and onto the seat cushion.
iThe cover on the storage compartment
must remain closed while the vehicle is
in motion.
Eyeglasses compartment
Folding table in the backrest*