Page 15 of 464

Automatic Transaxle Ignition Interlock System
This system prevents the key from being removed unless
the shift lever is in PARK. It also prevents shifting out of
PARK unless the key is in the ACC, or ON positions, and
the brake pedal is depressed.
SENTRY KEY — IF EQUIPPED
The Sentry Key Immobilizer System prevents unautho-
rized vehicle operation by disabling the engine. The
system does not need to be armed or activated. Operation
is automatic, regardless of whether the vehicle is locked
or unlocked.
The system uses ignition keys, which have an embedded
electronic chip (transponder), to prevent unauthorized
vehicle operation. Therefore, only keys that are pro-
grammed to the vehicle can be used to start and operate
the vehicle. The system will shut the engine off in two (2)
seconds if someone uses an invalid key to start the
engine.NOTE:A key, which has not been programmed, is also
considered an invalid key even if it is cut to fit the
ignition lock cylinder for that vehicle.
During normal operation, after turning on the ignition
switch, the Vehicle Security Alarm Indicator Light will
turn on for three (3) seconds for a bulb check. If the light
remains on after the bulb check, it indicates that there is
a problem with the electronics. In addition, if the light
begins to flash after the bulb check, it indicates that
someone used an invalid key to start the engine. Either of
these conditions will result in the engine being shut off
after two (2) seconds.
If the Vehicle Security Alarm Indicator Light turns on
during normal vehicle operation (vehicle running for
longer than 10 seconds), it indicates that there is a fault in
the electronics. Should this occur, have the vehicle ser-
viced as soon as possible.
THINGS TO KNOW BEFORE STARTING YOUR VEHICLE 15
2
Page 67 of 464

Data Parameters that May Be Recorded:
•Diagnostic trouble code(s) and warning lamp status
for electronically-controlled safety systems, including
the airbag system
•Airbag disable lamp status (if equipped)
•�Time�of airbag deployment (in terms of ignition
cycles and vehicle mileage)
•Airbag deployment level (if applicable)
•Seat belt status
•Brake status (service and parking brakes)
•Accelerator status (including vehicle speed)
•Engine control status (including engine speed)
•Cruise control status
•Traction/stability control status
Child Restraint
Everyone in your vehicle needs to be buckled up at all
times — babies and children, too. Every state in the
United States and all Canadian provinces require that
small children ride in proper restraint systems. This is the
law, and you can be prosecuted for ignoring it.
Children 12 years and under should ride properly buck-
led up in a seat appropriate for their age and size.
According to crash statistics, children are safer when
properly restrained in the rear seats, rather than in the
front.
THINGS TO KNOW BEFORE STARTING YOUR VEHICLE 67
2
Page 81 of 464
Periodic Safety Checks You Should Make Outside
The Vehicle
Tires
Examine tires for excessive tread wear or uneven wear
patterns. Check for stones, nails, glass, or other objects
lodged in the tread. Inspect tread and sidewall for cuts or
cracks. Check wheel nuts for tightness, and tires (includ-
ing spare) for proper pressure.
Lights
Have someone observe the operation of exterior lights
while you work the controls. Check turn signal and high
beam indicator lights on the instrument panel.
Fluid Leaks
Check area under vehicle after overnight parking for fuel,
engine coolant, oil or other fluid leaks. Also, if gasoline
fumes are detected or fuel, power steering fluid, trans-
mission fluid or brake fluid leaks are suspected, the cause
should be located and corrected immediately.
THINGS TO KNOW BEFORE STARTING YOUR VEHICLE 81
2
Page 136 of 464

Parade Mode (Daytime Brightness Feature)
Rotate the dimmer control upward to
the first detent. This feature brightens
the odometer and radio display when
the parking lights or headlights are on
during daylight conditions.
Automatic Headlights
This system automatically turns your headlights ON or
OFF based on ambient light levels. To turn the system
ON, turn the end of the Multi-Function Lever to the third
detent position. When the system is ON, the Headlight
Time Delay feature is also ON. This means your head-
lights will stay ON for up to 90 seconds after you turn the
ignition switch OFF. To turn the Automatic System OFF,
turn the end of the Multi-Function Lever to the OFF
position.NOTE:The engine must be running before the head-
lights will come ON in the Automatic mode.
Daytime Running Lights (Canada Only)
The high beam headlights will come on as Daytime
Running Lights whenever the ignition switch is on, the
headlights are off, and the parking brake is off. The
headlight switch must be used for normal night time
driving.
Lights-on Reminder
If the headlights or parking lights are on after the ignition
is turned OFF, a chime will sound to alert the driver
when the driver’s door is opened.
Headlight Time Delay
This feature provides the safety of headlight illumination
for up to 90 seconds, when leaving your vehicle in an
unlighted area.
136 UNDERSTANDING THE FEATURES OF YOUR VEHICLE
Page 141 of 464

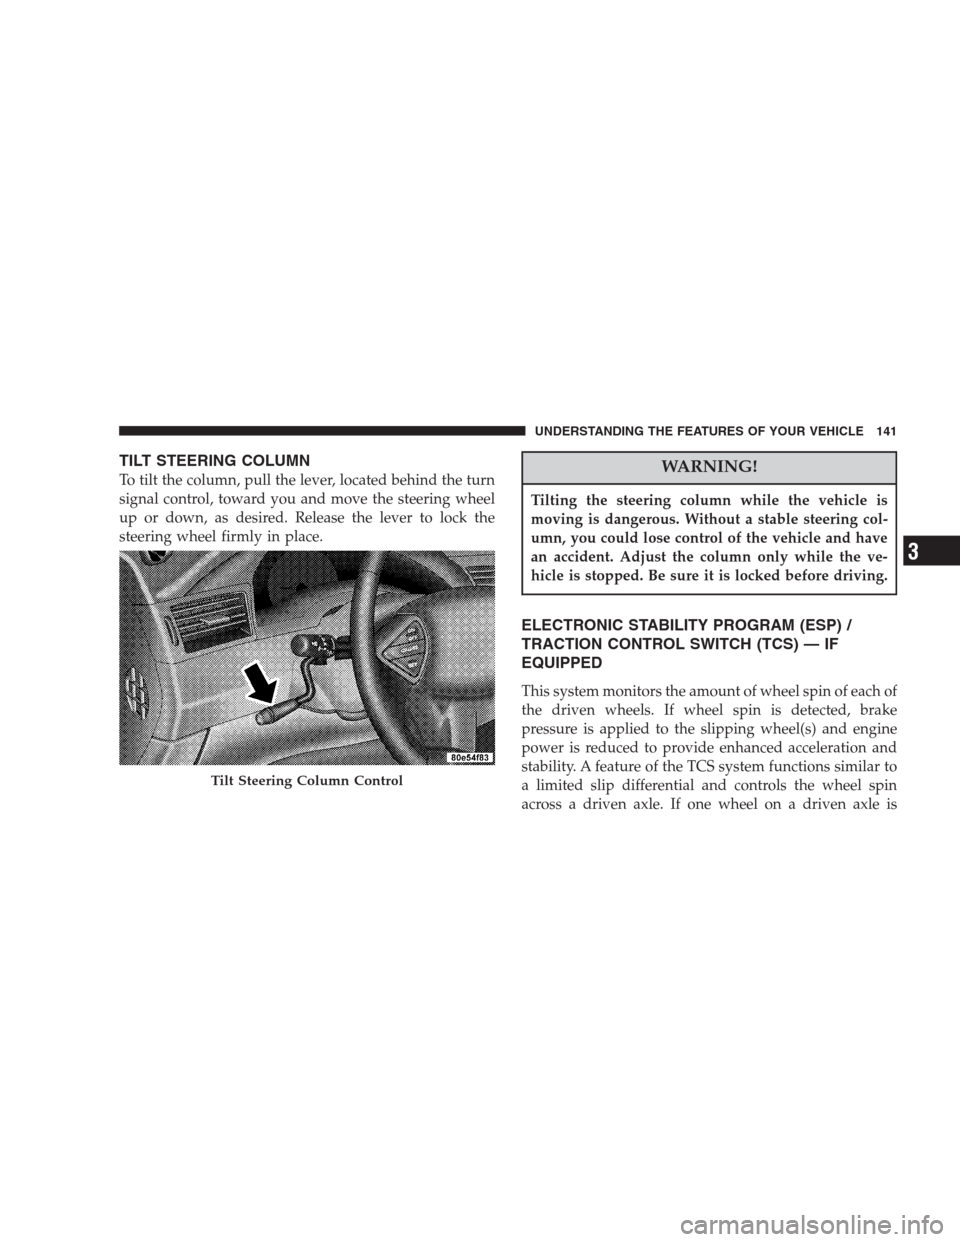
TILT STEERING COLUMN
To tilt the column, pull the lever, located behind the turn
signal control, toward you and move the steering wheel
up or down, as desired. Release the lever to lock the
steering wheel firmly in place.WARNING!
Tilting the steering column while the vehicle is
moving is dangerous. Without a stable steering col-
umn, you could lose control of the vehicle and have
an accident. Adjust the column only while the ve-
hicle is stopped. Be sure it is locked before driving.
ELECTRONIC STABILITY PROGRAM (ESP) /
TRACTION CONTROL SWITCH (TCS) — IF
EQUIPPED
This system monitors the amount of wheel spin of each of
the driven wheels. If wheel spin is detected, brake
pressure is applied to the slipping wheel(s) and engine
power is reduced to provide enhanced acceleration and
stability. A feature of the TCS system functions similar to
a limited slip differential and controls the wheel spin
across a driven axle. If one wheel on a driven axle is
Tilt Steering Column Control
UNDERSTANDING THE FEATURES OF YOUR VEHICLE 141
3
Page 142 of 464
spinning faster than the other, the system will apply the
brake of the spinning wheel. This will allow more engine
torque to be applied to the wheel that is not spinning.
This feature remains active even if TCS and ESP are in
either the “Partial Off” or “ESP Off” modes.
The ESP / TCS Indicator Lamp, located in the instrument
cluster, will light up when the Traction Control is in use.
To turn the system OFF, press the ESP “OFF” switch
located on center console next to the ash tray, until the
Traction Control Indicator in the instrument cluster lights
up.
To turn the system back ON, press the switch a second
time until the Traction Control Indicator turns OFF.
Traction Control Switch
142 UNDERSTANDING THE FEATURES OF YOUR VEHICLE
Page 148 of 464
ADJUSTABLE PEDALS — IF EQUIPPED
This feature allows both the brake and accelerator pedals
to move toward or away from the driver to provide
improved position with the steering wheel. The adjust-
able pedal system is designed to allow a greater range of
driver comfort for steering wheel tilt and seat position.
The switch is located on the drivers door trim panel next
to the power seat switches.
Press the switch forward to move the pedals forward
(toward the front of the vehicle).
Adjustable Pedal Switch
148 UNDERSTANDING THE FEATURES OF YOUR VEHICLE
Page 151 of 464

To Set At A Desired Speed:
When the vehicle has reached the desired speed, press
and release the “SET” button. Release the accelerator and
the vehicle will operate at the selected speed. The
CRUISE SET indicator located near the instrument clus-
ter odometer will illuminate showing the electronic
speed control is set.
NOTE:While in the AutoStick mode, Speed Control will
only function in third or fourth gear.
To Deactivate:
A soft tap on the brake pedal, pushing the “CANCEL”
button or normal braking while slowing the vehicle will
deactivate the speed control without erasing the memory.
Pushing the “ON/OFF” button to the OFF position or
turning off the ignition erases the speed memory.
To Resume Speed:
To resume a previously set speed, push and release the
“ACCEL/RESUME” button. Resume can be used at any
speed above 25 mph (40 km/h).
To Vary the Speed Setting:
When the speed control is set, speed can be increased by
pressing and holding the “ACCEL/RESUME” button.
When the button is released, a new set speed will be
established.
Tapping the “ACCEL/RESUME” button once will result
in a 2 mph (3 km/h) speed increase. Each time the button
is tapped, speed increases so that tapping the button
three times will increase speed by 6 mph (10 km/h), etc.
To decrease speed while speed control is set, press and
hold the “COAST” button. Release the button when the
desired speed is reached, and the new speed will be set.
UNDERSTANDING THE FEATURES OF YOUR VEHICLE 151
3