Safety Checks You Should Make Inside The
Vehicle
Heater Defroster Ducts
Inspect the heater defroster ducts for proper operation.
Check for proper air flow through all defroster ducts. If
there are any question regarding the operation of your
heater defroster ducts, have the system checked by an
authorized dealer
Seat Belts
Inspect the belt system periodically, checking for cuts,
frays and loose parts. Damaged parts must be replaced
immediately. Do not disassemble or modify the system.
Seat belt assemblies must be replaced after an accident if
they have been damaged (bent retractor, torn webbing,
etc.) or if the front airbags have deployed. If there is any
question regarding belt or retractor condition, replace the
belt.
Airbag Light
The light should come on and remain on for 6 to 8
seconds as a bulb check when the ignition switch is first
turned ON. If the light is not lit during starting, see you
authorized dealer. If the light stays on, flickers or comes
on while driving, have the system checked by an autho-
rized dealer. If there is a problem with the airbag light the
seatbelt light will flash.
Safety Checks You Should Make Outside The
Vehicle
Tires
Examine tires for tread wear or uneven wear patterns.
Check for stones, nails, glass or other objects lodged in
the tread.
Inspect for tread cuts or sidewall cracks. Check wheel
nuts for tightness and tires for proper pressure.
THINGS TO KNOW BEFORE STARTING YOUR VEHICLE 73
2
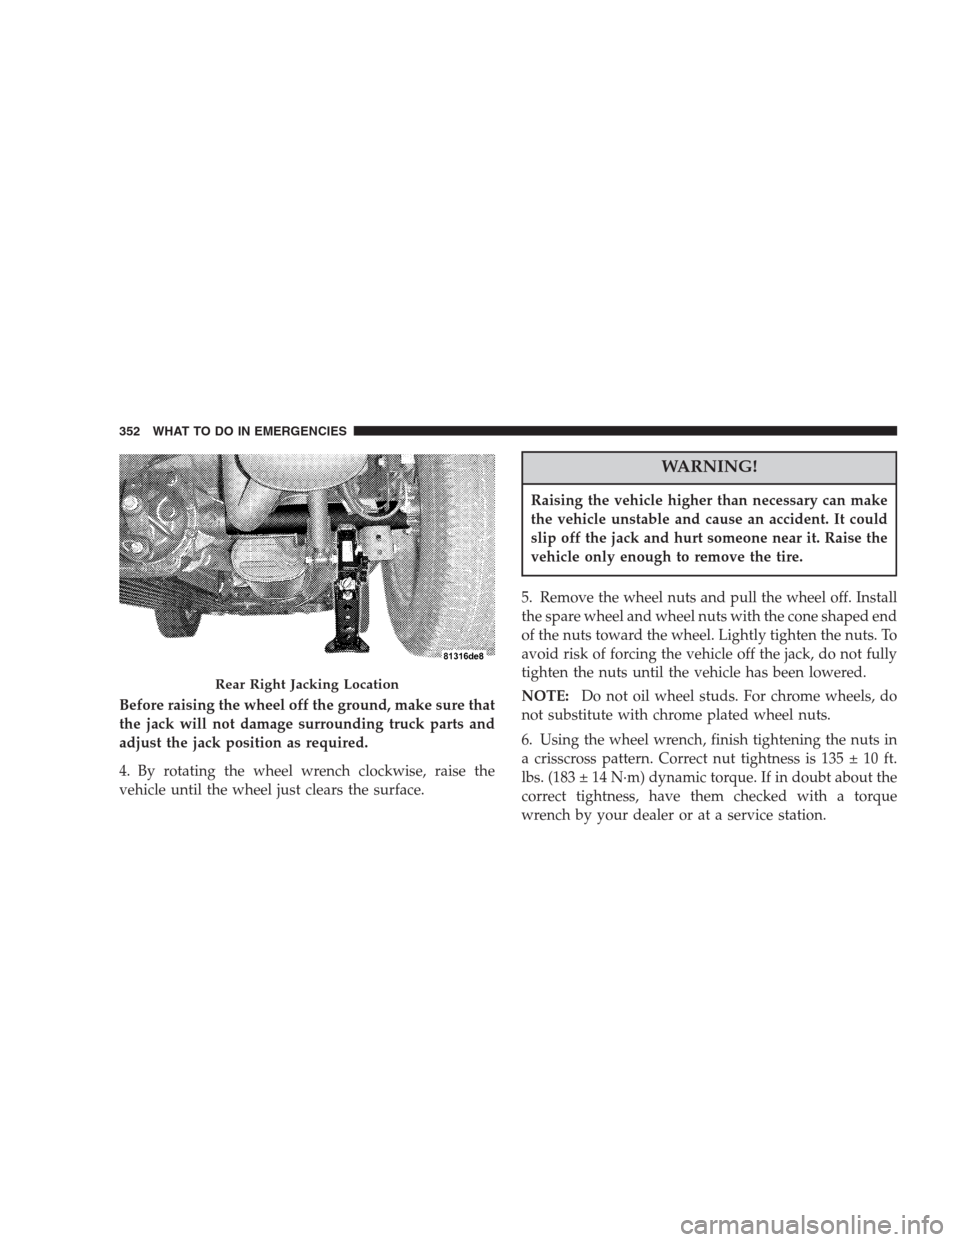
Before raising the wheel off the ground, make sure that
the jack will not damage surrounding truck parts and
adjust the jack position as required.
4. By rotating the wheel wrench clockwise, raise the
vehicle until the wheel just clears the surface.
WARNING!
Raising the vehicle higher than necessary can make
the vehicle unstable and cause an accident. It could
slip off the jack and hurt someone near it. Raise the
vehicle only enough to remove the tire.
5. Remove the wheel nuts and pull the wheel off. Install
the spare wheel and wheel nuts with the cone shaped end
of the nuts toward the wheel. Lightly tighten the nuts. To
avoid risk of forcing the vehicle off the jack, do not fully
tighten the nuts until the vehicle has been lowered.
NOTE:Do not oil wheel studs. For chrome wheels, do
not substitute with chrome plated wheel nuts.
6. Using the wheel wrench, finish tightening the nuts in
a crisscross pattern. Correct nut tightness is 135 ± 10 ft.
lbs. (183 ± 14 N·m) dynamic torque. If in doubt about the
correct tightness, have them checked with a torque
wrench by your dealer or at a service station.
Rear Right Jacking Location
352 WHAT TO DO IN EMERGENCIES