2007 CHEVROLET TRAIL BLAZER change time
[x] Cancel search: change timePage 182 of 574
Automatic Headlamp System
When it is dark enough outside, the Automatic
Headlamp System turns on the headlamps when
the vehicle is started and after the transaxle
has been shifted out of the PARK (P) position.
The headlamps, taillamps, sidemarker, and parking
lamps will come on. The instrument panel lights
and radio lights will also turn on at normal
brightness. Once on, the system remains on
during these conditions even if the vehicle
is shifted back into PARK (P).
The vehicle has a light sensor on the top of the
instrument panel. Make sure it is not covered or the
system may come on whenever the ignition is on
and the vehicle is shifted out of the PARK (P)
position.
The system could also turn on the lamps when
driving through a parking garage, heavy overcast
weather or a tunnel. This is normal.
There is a delay in the transition between the
daytime and nighttime operation of the Daytime
Running Lamps (DRL) and the automatic headlamp
systems, so that driving under bridges or bright
overhead street lights does not affect the system.The DRL and automatic headlamp system are only
affected when the light sensor sees a change in
lighting lasting longer than the delay.
If you start your vehicle in a dark garage, the
automatic headlamp system comes on after the
transmission is shifted out of PARK (P). Once you
leave the garage, it will take about one minute
for the automatic headlamp system to change to
DRL if it is light outside. During that delay, the
instrument panel cluster might not be as bright as
usual. Make sure the instrument panel brightness
control is in the full bright position.
If the vehicle is running and the automatic
headlamp system is already on, it can be turned off
by turning and releasing the headlamp control at
the off position. The automatic headlamp system
stays off until you turn and release the headlamp
control at the off position again. SeeHeadlamps
on page 180.
182
Page 192 of 574
Manual Operation
To change the current setting, select one of the
following:
w9x(Fan):This button allows you to manually
adjust the fan speed. Press the up arrow to
increase fan speed and the down arrow to
decrease fan speed. The display will change to
show you the selected fan speed and the driver’s
side temperature setting for ve seconds.
C(Mode):Press this button to manually change
the direction of the airow in your vehicle. Keep
pressing the button until the desired mode appears
on the display. The display will change to show
you the selected air delivery mode and the driver’s
temperature setting for ve seconds.
H(Vent):This mode directs air to the instrument
panel outlets.
)(Bi-Level):This mode directs approximately
half of the air to the instrument panel outlets,
then directs the remaining air to the oor outlets.
A little air is directed toward the windshield
and the side window outlets. Cooler air is directed
to the upper outlets and warmer air to the oor
outlets.
6(Floor):This mode directs most of the air
to the oor outlets. Some air also comes out
of the defroster and side window outlets.
The recirculation button cannot be selected in
oor mode.
@(Recirculation):Press this button to turn
recirculation mode on or off. When this button
is pressed, an indicator light in the button will
also come on to let you know that it is activated.
Recirculation mode is used to recirculate the
air inside of your vehicle. Use this mode to help
prevent outside odors and/or dust from entering
your vehicle or to help cool the air inside of
your vehicle more quickly. Recirculation mode
can be used with vent and bi-level modes, but it
cannot be used with oor, defog or defrost modes.
Defog and defrost modes are described later in
this section.
If recirculation mode is selected with oor,
defog, or defrost modes, the indicator will ash
three times and then turn off indicating the
selection is not available.
192
Page 193 of 574
You may also notice that the air conditioning
compressor will run while in recirculation mode.
This is normal and will help to prevent fogging.
If the weather is cold and damp, the system may
cause the windows to fog while using recirculation
mode. If the windows do start to fog, select
defog or defrost mode and increase fan speed.
Recirculation mode, if selected, will be cleared
when the engine is turned off.
#A/C (Air Conditioning):Press this button
to manually turn the air conditioning system on
or off. When the system is on, the system
will automatically begin to cool and dehumidify
the air inside of your vehicle. The air conditioning
symbol will appear on the display when the
air conditioning is on and will turn off when the
air conditioning is off.If you turn the air conditioning off while in front
defrost or defog mode, the air conditioning symbol
will turn off, however, the A/C compressor will
remain on to help de-humidify the air inside
the vehicle. If one of the other modes is selected
the compressor will then turn the A/C off until
it is selected again or the AUTO button is pressed.
To avoid fogging the inside glass on rainy and
humid days at a temperature above freezing,
press the air conditioning button to run the A/C
compressor. Also it is best to avoid the use of the
recirculation mode except when maximum air
conditioning performance is needed or for short
times to avoid exterior odors.
You may notice a slight change in engine
performance when the air-conditioning compressor
shuts off and turns on again. This is normal.
193
Page 217 of 574
Cruise Control Light
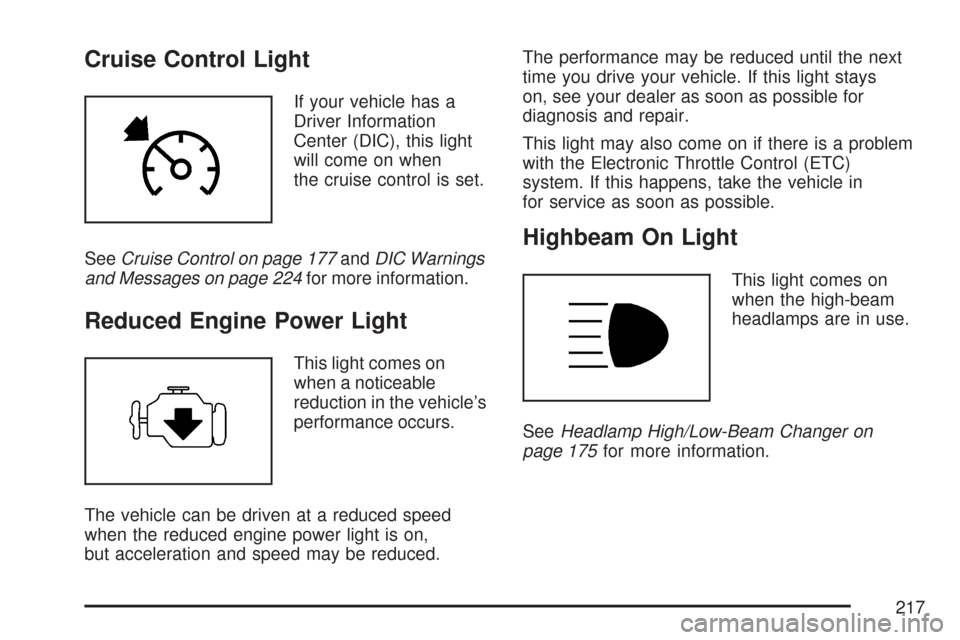
If your vehicle has a
Driver Information
Center (DIC), this light
will come on when
the cruise control is set.
SeeCruise Control on page 177andDIC Warnings
and Messages on page 224for more information.
Reduced Engine Power Light
This light comes on
when a noticeable
reduction in the vehicle’s
performance occurs.
The vehicle can be driven at a reduced speed
when the reduced engine power light is on,
but acceleration and speed may be reduced.The performance may be reduced until the next
time you drive your vehicle. If this light stays
on, see your dealer as soon as possible for
diagnosis and repair.
This light may also come on if there is a problem
with the Electronic Throttle Control (ETC)
system. If this happens, take the vehicle in
for service as soon as possible.
Highbeam On Light
This light comes on
when the high-beam
headlamps are in use.
SeeHeadlamp High/Low-Beam Changer on
page 175for more information.
217
Page 223 of 574
Fuel Range:Press the fuel information button
until RANGE appears on the display. This
mode shows the remaining distance you can
drive without refueling. It is based on fuel economy
and the fuel remaining in the fuel tank. The
display will show LOW if the fuel level is low.
The fuel economy data used to determine
fuel range is an average of recent driving
conditions. As your driving conditions change,
this data is gradually updated. Fuel range
cannot be reset.
Fuel Used:Press the fuel information button until
FUEL USED appears on the display. This mode
shows the number of gallons or liters of fuel used
since the last reset of this menu item. To reset
the fuel used information, press and hold the
select button for one second while FUEL USED
is displayed.
Average Fuel Economy:Press the fuel
information button until AVG. ECON appears on
the display. This mode shows how many miles per
gallon (MPG), liters per 100 kilometers (L/100 km),
or kilometers per liter (km/L) your vehicle is getting
based on current and past driving conditions.Press and hold the select button for one second
while AVG. ECON is displayed to reset the average
fuel economy. Average fuel economy will then be
calculated starting from that point. If the average
fuel economy is not reset, it will be continually
updated each time you drive.
Engine Oil Life System:Press the fuel
information button until ENGINE OIL LIFE appears
on the display. The engine oil life system shows
an estimate of the oil’s remaining useful life.
It will show 100% when the system is reset after
an oil change. It will alert you to change your oil on
a schedule consistent with your driving conditions.
Always reset the engine oil life system after an
oil change. To reset the engine oil life system,
seeEngine Oil Life System on page 408.
In addition to the engine oil life system monitoring
the oil life, additional maintenance is recommended
in the Maintenance Schedule in this manual.
SeeEngine Oil on page 402andScheduled
Maintenance on page 519.
223
Page 241 of 574
XM™ Satellite Radio Service
XM™ is a satellite radio service that is based in
the 48 contiguous United States and Canada.
XM™ offers a large variety of coast-to-coast
channels including music, news, sports, talk,
traffic/weather (U.S. subscribers), and children’s
programming. XM™ provides digital quality
audio and text information that includes song title
and artist name. A service fee is required in
order to receive the XM™ service. For more
information, contact XM™; In the U.S. at
www.xmradio.com or call 1-800-852-XMXM (9696)
or in Canada at www.xmradio.ca or call
1-877-GET-XMSR (438-9677).
Playing the Radio
PWR (Power):Press this knob to turn the system
on and off.
oVOLp(Volume):Turn theoVOLpknob
clockwise or counterclockwise to increase or
to decrease the volume.INFO (Information):When the ignition is off,
press this knob to display the time.
For RDS, press the INFO knob to change what
displays while using RDS. The display options
are station name, RDS station frequency,
PTY (program type), and the name of the
program (if available).
For XM™ (if equipped), press the INFO knob
while in XM™ mode to retrieve four different
categories of information related to the current
song or channel: Artist, Song Title, Category
or PTY, Channel Number/Channel Name.
To change the default on the display, press the
INFO knob until you see the desired display, then
press and hold the knob until a beep sounds.
The selected display becomes the default.
241
Page 248 of 574
3 REV (Reverse):Press and hold this pushbutton
to quickly reverse within a track. Press and hold
this pushbutton for less than two seconds to
reverse at six times the normal playing speed.
Press and hold it for more than two seconds
to reverse at 17 times the normal playing speed.
ET and the elapsed time of the track displays.
Release this pushbutton to play the passage.
4 FWD (Forward):Press and hold this pushbutton
to quickly advance within a track. Press and
hold this pushbutton for less than two seconds to
advance at six times the normal playing speed.
Press and hold it for more than two seconds
to advance at 17 times the normal playing speed.
ET and the elapsed time of the track displays.
Release this pushbutton to play the passage.
6 RDM (Random):Press this pushbutton to hear
the tracks in random, rather than sequential,
order. RDM ON displays. RDM T and the track
number displays when each track starts to
play. Press this pushbutton again to turn off
random play. RDM OFF displays.©SEEK¨:Pressthe left©arrow to go to the
start of the current or to the previous track. Press
the right
¨arrow to go to the start of the next track.
If either the left
©or right¨arrow is pressed more
than once, the player continues moving backward
or forward through the CD.
©SCAN¨:Press and hold either the left©
or right¨SCAN or TYPE arrow for more than
two seconds until SCAN displays and a beep
sounds. The radio goes to the next track, plays
for 10 seconds, then goes to the next track.
Press either the left
©or right¨SCAN or
TYPE arrow again, to stop scanning.
INFO (Information):Press this knob to see
how long the current track has been playing.
ET and the elapsed time displays. To change
the default on the display, track, or elapsed
time, press the knob until you see the desired
display, then press and hold the knob for
two seconds. The radio produces one beep
and the selected display becomes the default.
248
Page 251 of 574
XM™ Satellite Radio Service
XM™ is a satellite radio service that is based in
the 48 contiguous United States and Canada.
XM™ offers a large variety of coast-to-coast
channels including music, news, sports, talk,
traffic/weather (U.S. subscribers), and children’s
programming. XM™ provides digital quality
audio and text information that includes song title
and artist name. A service fee is required in
order to receive the XM™ service. For more
information, contact XM™; In the U.S. at
www.xmradio.com or call 1-800-852-XMXM (9696)
or in Canada at www.xmradio.ca or call
1-877-GET-XMSR (438-9677).
Playing the Radio
PWR (Power):Press this knob to turn the system
on and off.
oVOLp(Volume):Turn theoVOLpknob
clockwise or counterclockwise to increase or
to decrease the volume.DISPL (Display):When the ignition is turned off,
press this knob to display the time.
For RDS, press the DISPL knob to change the
display while using RDS. The display options
are station name, RDS station frequency, PTY,
and the name of the program (if available).
For XM™ (if equipped), press the DISPL knob
while in XM™ mode to retrieve four different
categories of information related to the current
song or channel: Artist, Song Title, Category
or PTY, Channel Number/Channel Name.
To change the default on the display, press the
DISPL knob until you see the desired display,
then press and hold this knob for two seconds.
The radio produces one beep and the selected
display becomes the default.
251