2007 CHEVROLET TRAIL BLAZER automatic transmission
[x] Cancel search: automatic transmissionPage 181 of 574
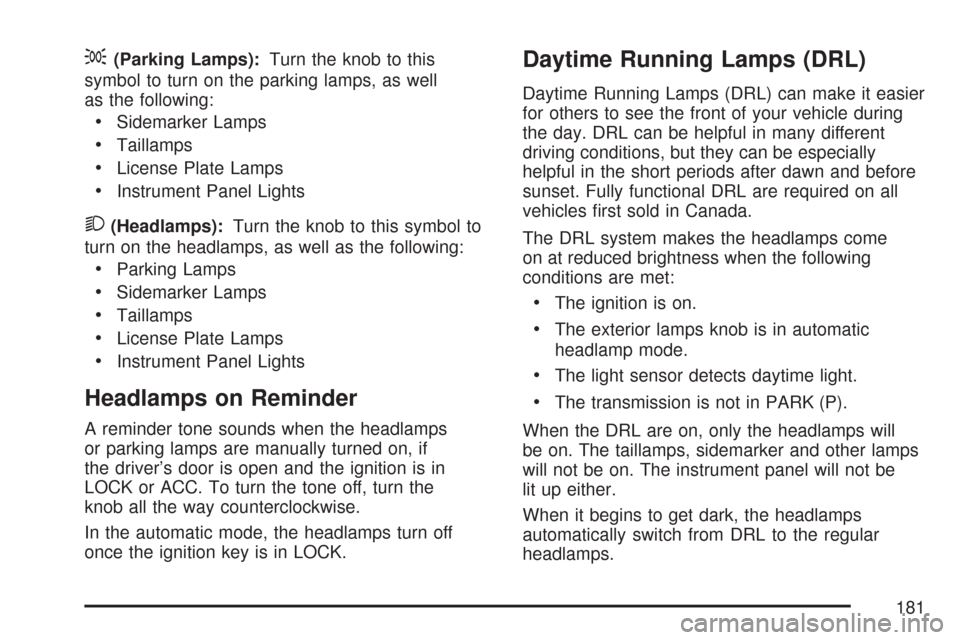
;(Parking Lamps):Turn the knob to this
symbol to turn on the parking lamps, as well
as the following:
Sidemarker Lamps
Taillamps
License Plate Lamps
Instrument Panel Lights
2(Headlamps):Turn the knob to this symbol to
turn on the headlamps, as well as the following:
Parking Lamps
Sidemarker Lamps
Taillamps
License Plate Lamps
Instrument Panel Lights
Headlamps on Reminder
A reminder tone sounds when the headlamps
or parking lamps are manually turned on, if
the driver’s door is open and the ignition is in
LOCK or ACC. To turn the tone off, turn the
knob all the way counterclockwise.
In the automatic mode, the headlamps turn off
once the ignition key is in LOCK.
Daytime Running Lamps (DRL)
Daytime Running Lamps (DRL) can make it easier
for others to see the front of your vehicle during
the day. DRL can be helpful in many different
driving conditions, but they can be especially
helpful in the short periods after dawn and before
sunset. Fully functional DRL are required on all
vehicles �rst sold in Canada.
The DRL system makes the headlamps come
on at reduced brightness when the following
conditions are met:
The ignition is on.
The exterior lamps knob is in automatic
headlamp mode.
The light sensor detects daytime light.
The transmission is not in PARK (P).
When the DRL are on, only the headlamps will
be on. The taillamps, sidemarker and other lamps
will not be on. The instrument panel will not be
lit up either.
When it begins to get dark, the headlamps
automatically switch from DRL to the regular
headlamps.
181
Page 182 of 574
Automatic Headlamp System
When it is dark enough outside, the Automatic
Headlamp System turns on the headlamps when
the vehicle is started and after the transaxle
has been shifted out of the PARK (P) position.
The headlamps, taillamps, sidemarker, and parking
lamps will come on. The instrument panel lights
and radio lights will also turn on at normal
brightness. Once on, the system remains on
during these conditions even if the vehicle
is shifted back into PARK (P).
The vehicle has a light sensor on the top of the
instrument panel. Make sure it is not covered or the
system may come on whenever the ignition is on
and the vehicle is shifted out of the PARK (P)
position.
The system could also turn on the lamps when
driving through a parking garage, heavy overcast
weather or a tunnel. This is normal.
There is a delay in the transition between the
daytime and nighttime operation of the Daytime
Running Lamps (DRL) and the automatic headlamp
systems, so that driving under bridges or bright
overhead street lights does not affect the system.The DRL and automatic headlamp system are only
affected when the light sensor sees a change in
lighting lasting longer than the delay.
If you start your vehicle in a dark garage, the
automatic headlamp system comes on after the
transmission is shifted out of PARK (P). Once you
leave the garage, it will take about one minute
for the automatic headlamp system to change to
DRL if it is light outside. During that delay, the
instrument panel cluster might not be as bright as
usual. Make sure the instrument panel brightness
control is in the full bright position.
If the vehicle is running and the automatic
headlamp system is already on, it can be turned off
by turning and releasing the headlamp control at
the off position. The automatic headlamp system
stays off until you turn and release the headlamp
control at the off position again. SeeHeadlamps
on page 180.
182
Page 229 of 574
SERVICE TIRE MONITOR
This message displays if a part on the Tire
Pressure Monitor (TPM) system is not working
properly. If you drive your vehicle while any of the
four sensors are missing or inoperable, the warning
comes on in about 20 minutes. A sensor would
be missing, for example, if you put different wheels
on your vehicle without transferring the sensors.
If the warning comes on and stays on, there may be
a problem with the TPM. See your dealer/retailer.
STABILITRAK ACTIVE
This message displays anytime the StabiliTrak®
system activates to maintain vehicle stability.
Any combination of engine speed management,
brake traction control, and stability control
displays this message.
STABILITRAK NOT READY
This message may display if driving conditions
delay StabiliTrak®system initialization. This
is normal. Once the system initializes, this
message will no longer be displayed on the DIC.
STABILITRAK OFF
This message displays when you press the
StabiliTrak®button for more than �ve seconds
or when stability control has been automatically
disabled. The StabiliTrak
®button is located on
the transmission shift handle. To limit wheel
spin and realize the full bene�ts of the stability
enhancement system, you should normally
leave StabiliTrak
®on. However, you should
turn StabiliTrak®off if your vehicle gets stuck
in sand, mud, ice, or snow and you want to rock
your vehicle to attempt to free it, or if you are
driving in extreme off-road conditions and require
more wheel spin. SeeIf Your Vehicle is Stuck
in Sand, Mud, Ice, or Snow on page 354.
To turn the StabiliTrak
®system back on, press
the StabiliTrak®button again.
229
Page 314 of 574
For more information on the stability messages,
seeDIC Warnings and Messages on page 224.
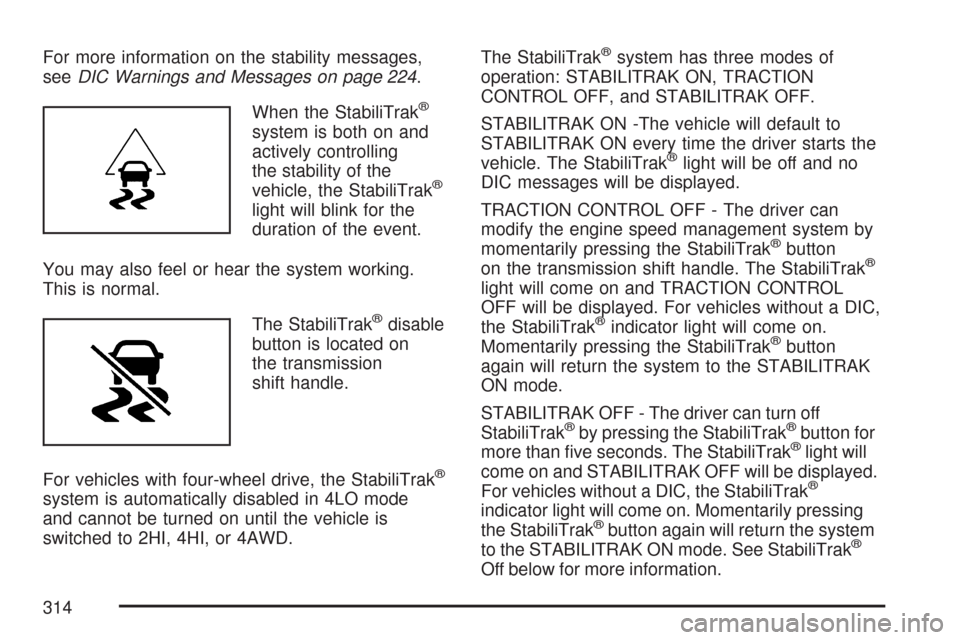
When the StabiliTrak
®
system is both on and
actively controlling
the stability of the
vehicle, the StabiliTrak
®
light will blink for the
duration of the event.
You may also feel or hear the system working.
This is normal.
The StabiliTrak
®disable
button is located on
the transmission
shift handle.
For vehicles with four-wheel drive, the StabiliTrak
®
system is automatically disabled in 4LO mode
and cannot be turned on until the vehicle is
switched to 2HI, 4HI, or 4AWD.The StabiliTrak
®system has three modes of
operation: STABILITRAK ON, TRACTION
CONTROL OFF, and STABILITRAK OFF.
STABILITRAK ON -The vehicle will default to
STABILITRAK ON every time the driver starts the
vehicle. The StabiliTrak
®light will be off and no
DIC messages will be displayed.
TRACTION CONTROL OFF - The driver can
modify the engine speed management system by
momentarily pressing the StabiliTrak
®button
on the transmission shift handle. The StabiliTrak®
light will come on and TRACTION CONTROL
OFF will be displayed. For vehicles without a DIC,
the StabiliTrak
®indicator light will come on.
Momentarily pressing the StabiliTrak®button
again will return the system to the STABILITRAK
ON mode.
STABILITRAK OFF - The driver can turn off
StabiliTrak
®by pressing the StabiliTrak®button for
more than �ve seconds. The StabiliTrak®light will
come on and STABILITRAK OFF will be displayed.
For vehicles without a DIC, the StabiliTrak
®
indicator light will come on. Momentarily pressing
the StabiliTrak®button again will return the system
to the STABILITRAK ON mode. See StabiliTrak®
Off below for more information.
314
Page 317 of 574
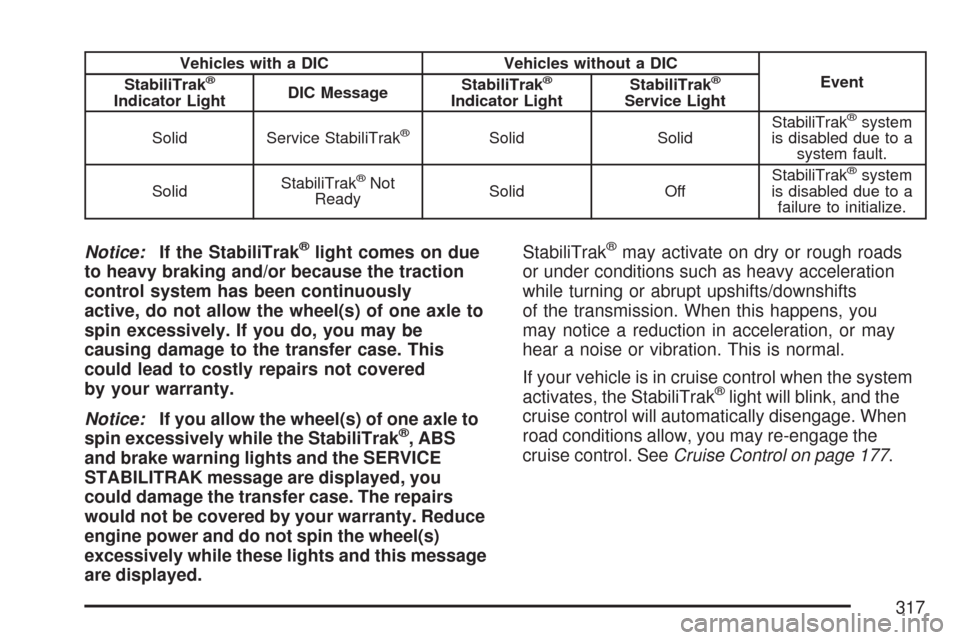
Vehicles with a DIC Vehicles without a DIC
Event
StabiliTrak®
Indicator LightDIC MessageStabiliTrak
®
Indicator LightStabiliTrak
®
Service Light
Solid Service StabiliTrak
®Solid SolidStabiliTrak
®system
is disabled due to a
system fault.
SolidStabiliTrak
®Not
ReadySolid OffStabiliTrak®system
is disabled due to a
failure to initialize.
Notice:If the StabiliTrak®light comes on due
to heavy braking and/or because the traction
control system has been continuously
active, do not allow the wheel(s) of one axle to
spin excessively. If you do, you may be
causing damage to the transfer case. This
could lead to costly repairs not covered
by your warranty.
Notice:If you allow the wheel(s) of one axle to
spin excessively while the StabiliTrak
®, ABS
and brake warning lights and the SERVICE
STABILITRAK message are displayed, you
could damage the transfer case. The repairs
would not be covered by your warranty. Reduce
engine power and do not spin the wheel(s)
excessively while these lights and this message
are displayed.StabiliTrak
®may activate on dry or rough roads
or under conditions such as heavy acceleration
while turning or abrupt upshifts/downshifts
of the transmission. When this happens, you
may notice a reduction in acceleration, or may
hear a noise or vibration. This is normal.
If your vehicle is in cruise control when the system
activates, the StabiliTrak
®light will blink, and the
cruise control will automatically disengage. When
road conditions allow, you may re-engage the
cruise control. SeeCruise Control on page 177.
317
Page 365 of 574
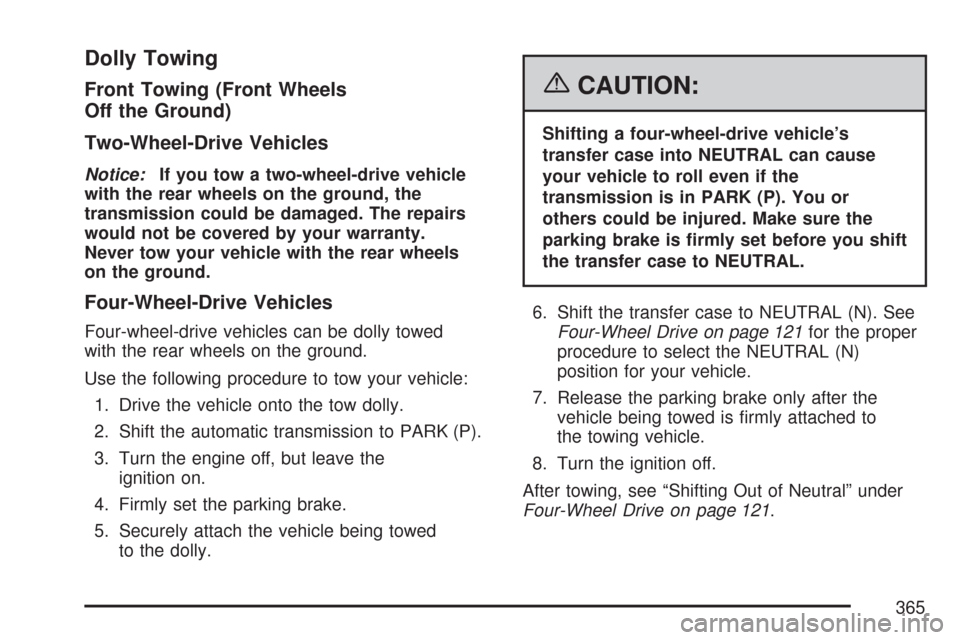
Dolly Towing
Front Towing (Front Wheels
Off the Ground)
Two-Wheel-Drive Vehicles
Notice:If you tow a two-wheel-drive vehicle
with the rear wheels on the ground, the
transmission could be damaged. The repairs
would not be covered by your warranty.
Never tow your vehicle with the rear wheels
on the ground.
Four-Wheel-Drive Vehicles
Four-wheel-drive vehicles can be dolly towed
with the rear wheels on the ground.
Use the following procedure to tow your vehicle:
1. Drive the vehicle onto the tow dolly.
2. Shift the automatic transmission to PARK (P).
3. Turn the engine off, but leave the
ignition on.
4. Firmly set the parking brake.
5. Securely attach the vehicle being towed
to the dolly.
{CAUTION:
Shifting a four-wheel-drive vehicle’s
transfer case into NEUTRAL can cause
your vehicle to roll even if the
transmission is in PARK (P). You or
others could be injured. Make sure the
parking brake is �rmly set before you shift
the transfer case to NEUTRAL.
6. Shift the transfer case to NEUTRAL (N). See
Four-Wheel Drive on page 121for the proper
procedure to select the NEUTRAL (N)
position for your vehicle.
7. Release the parking brake only after the
vehicle being towed is �rmly attached to
the towing vehicle.
8. Turn the ignition off.
After towing, see “Shifting Out of Neutral” under
Four-Wheel Drive on page 121.
365
Page 378 of 574
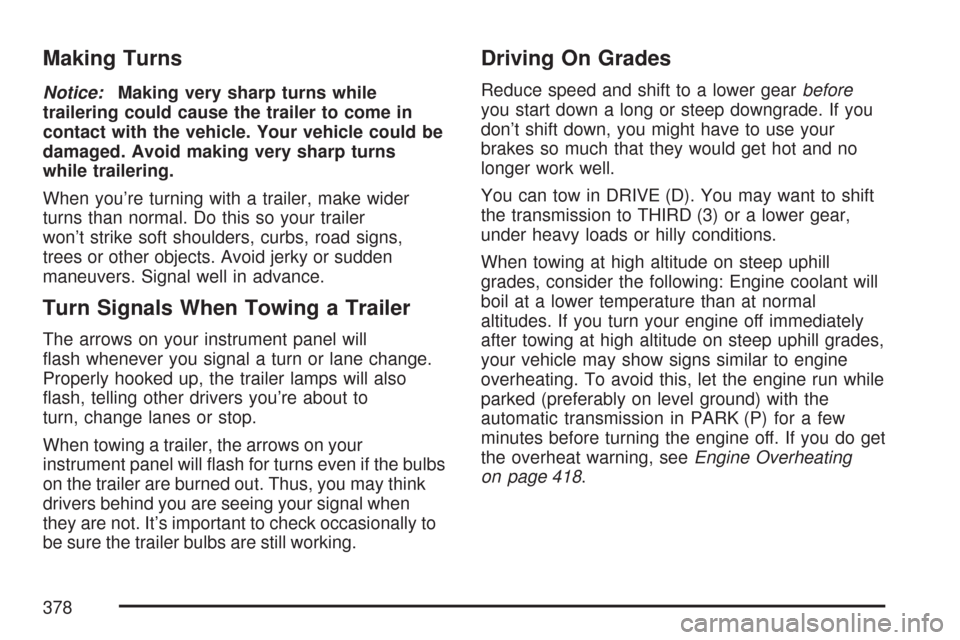
Making Turns
Notice:Making very sharp turns while
trailering could cause the trailer to come in
contact with the vehicle. Your vehicle could be
damaged. Avoid making very sharp turns
while trailering.
When you’re turning with a trailer, make wider
turns than normal. Do this so your trailer
won’t strike soft shoulders, curbs, road signs,
trees or other objects. Avoid jerky or sudden
maneuvers. Signal well in advance.
Turn Signals When Towing a Trailer
The arrows on your instrument panel will
�ash whenever you signal a turn or lane change.
Properly hooked up, the trailer lamps will also
�ash, telling other drivers you’re about to
turn, change lanes or stop.
When towing a trailer, the arrows on your
instrument panel will �ash for turns even if the bulbs
on the trailer are burned out. Thus, you may think
drivers behind you are seeing your signal when
they are not. It’s important to check occasionally to
be sure the trailer bulbs are still working.
Driving On Grades
Reduce speed and shift to a lower gearbefore
you start down a long or steep downgrade. If you
don’t shift down, you might have to use your
brakes so much that they would get hot and no
longer work well.
You can tow in DRIVE (D). You may want to shift
the transmission to THIRD (3) or a lower gear,
under heavy loads or hilly conditions.
When towing at high altitude on steep uphill
grades, consider the following: Engine coolant will
boil at a lower temperature than at normal
altitudes. If you turn your engine off immediately
after towing at high altitude on steep uphill grades,
your vehicle may show signs similar to engine
overheating. To avoid this, let the engine run while
parked (preferably on level ground) with the
automatic transmission in PARK (P) for a few
minutes before turning the engine off. If you do get
the overheat warning, seeEngine Overheating
on page 418.
378
Page 380 of 574
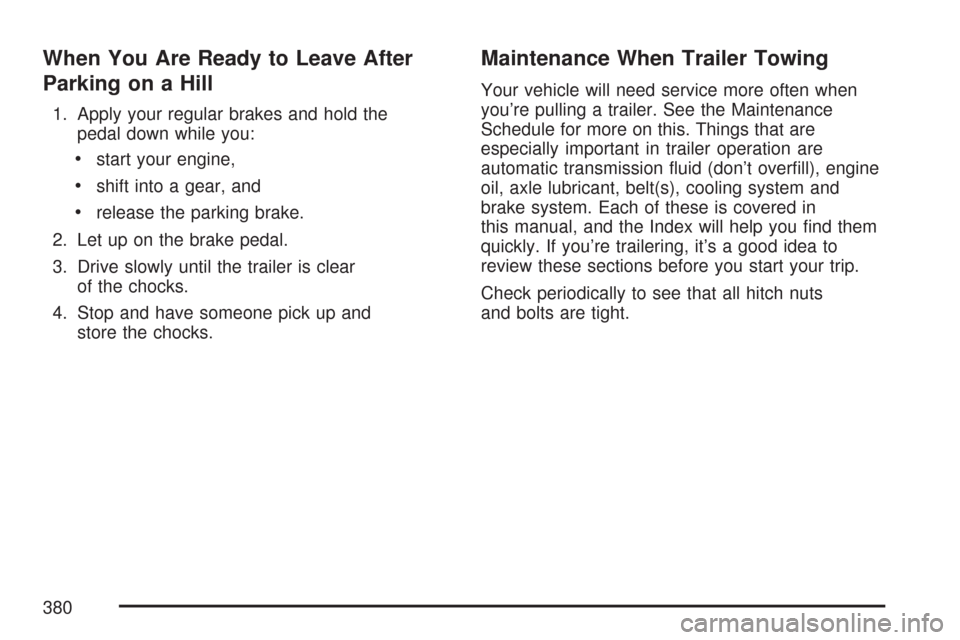
When You Are Ready to Leave After
Parking on a Hill
1. Apply your regular brakes and hold the
pedal down while you:
start your engine,
shift into a gear, and
release the parking brake.
2. Let up on the brake pedal.
3. Drive slowly until the trailer is clear
of the chocks.
4. Stop and have someone pick up and
store the chocks.
Maintenance When Trailer Towing
Your vehicle will need service more often when
you’re pulling a trailer. See the Maintenance
Schedule for more on this. Things that are
especially important in trailer operation are
automatic transmission �uid (don’t over�ll), engine
oil, axle lubricant, belt(s), cooling system and
brake system. Each of these is covered in
this manual, and the Index will help you �nd them
quickly. If you’re trailering, it’s a good idea to
review these sections before you start your trip.
Check periodically to see that all hitch nuts
and bolts are tight.
380