2007 CHEVROLET TRAIL BLAZER fog light
[x] Cancel search: fog lightPage 167 of 574
Instrument Panel Overview........................ 170
Hazard Warning Flashers.......................... 172
Other Warning Devices............................. 172
Horn.......................................................... 172
Tilt Wheel.................................................. 173
Turn Signal/Multifunction Lever.................. 173
Turn and Lane-Change Signals................. 174
Headlamp High/Low-Beam Changer.......... 175
Flash-to-Pass............................................ 175
Windshield Wipers..................................... 175
Windshield Washer.................................... 176
Rear Window Wiper/Washer...................... 176
Cruise Control........................................... 177
Headlamps................................................ 180
Headlamps on Reminder........................... 181
Daytime Running Lamps (DRL)................. 181
Automatic Headlamp System..................... 182
Fog Lamps................................................ 183
Instrument Panel Brightness...................... 183
Dome Lamps............................................. 183
Dome Lamp Override................................ 184
Entry Lighting............................................ 184
Exit Lighting.............................................. 184
Reading Lamps......................................... 184Electric Power Management...................... 185
Battery Run-Down Protection..................... 186
Accessory Power Outlet(s)........................ 186
Ashtray(s) and Cigarette Lighter................ 187
Climate Controls......................................... 187
Dual Climate Control System..................... 187
Dual Automatic Climate Control System....... 190
Outlet Adjustment...................................... 195
Rear Climate Control System.................... 196
Warning Lights, Gages, and Indicators..... 198
Instrument Panel Cluster........................... 199
Speedometer and Odometer...................... 200
Trip Odometer........................................... 200
Tachometer............................................... 201
Safety Belt Reminder Light........................ 201
Passenger Safety Belt Reminder Light....... 202
Airbag Readiness Light............................. 202
Passenger Airbag Status Indicator............. 203
Charging System Light.............................. 206
Voltmeter Gage......................................... 207
Brake System Warning Light..................... 208
Anti-Lock Brake System Warning Light...... 209
StabiliTrak
®Service Light........................... 210
Section 3 Instrument Panel
167
Page 171 of 574
The main components of your instrument panel are the following:
A. Exterior Lamp Control. SeeHeadlamps
on page 180. Dome Lamp Override Button.
SeeDome Lamp Override on page 184.
Instrument Panel Brightness Control. See
Instrument Panel Brightness on page 183.
Fog Lamp Button (If Equipped). SeeFog
Lamps on page 183.
B. Air Outlets. SeeOutlet Adjustment
on page 195.
C. Turn Signal/Multifunction Lever. SeeTurn
Signal/Multifunction Lever on page 173.
D. Instrument Panel Cluster. SeeInstrument
Panel Cluster on page 199.
E. Ignition Switch. SeeIgnition Positions
on page 112.
F. Transfer Case Controls. See “Automatic
Transfer Case” underFour-Wheel Drive
on page 121.
G. Rear Window Washer/Wiper. SeeWindshield
Washer on page 176.H. Audio System. SeeAudio System(s)
on page 238.
I. Climate Controls. SeeDual Climate
Control System on page 187.
J. Hood Release. SeeHood Release
on page 394.
K. Ashtray. SeeAshtray(s) and Cigarette
Lighter on page 187.
L. Shift Lever and StabiliTrak
®Button.
SeeShifting Into Park (P) on page 127
andStabiliTrak
®System on page 313.
M. Lighter. SeeAshtray(s) and Cigarette
Lighter on page 187.
N. Accessory Power Outlet. SeeAccessory
Power Outlet(s) on page 186.
O. Rear Window Defogger. See “Rear Window
Defogger” underDual Climate Control System
on page 187andDual Automatic Climate
Control System on page 190.
P. Glove Box. SeeGlove Box on page 161.
171
Page 183 of 574
Fog Lamps
Your vehicle may have this feature. Use your fog
lamps for better vision in foggy or misty conditions.
Your ignition must be in RUN for your fog lamps
to work.
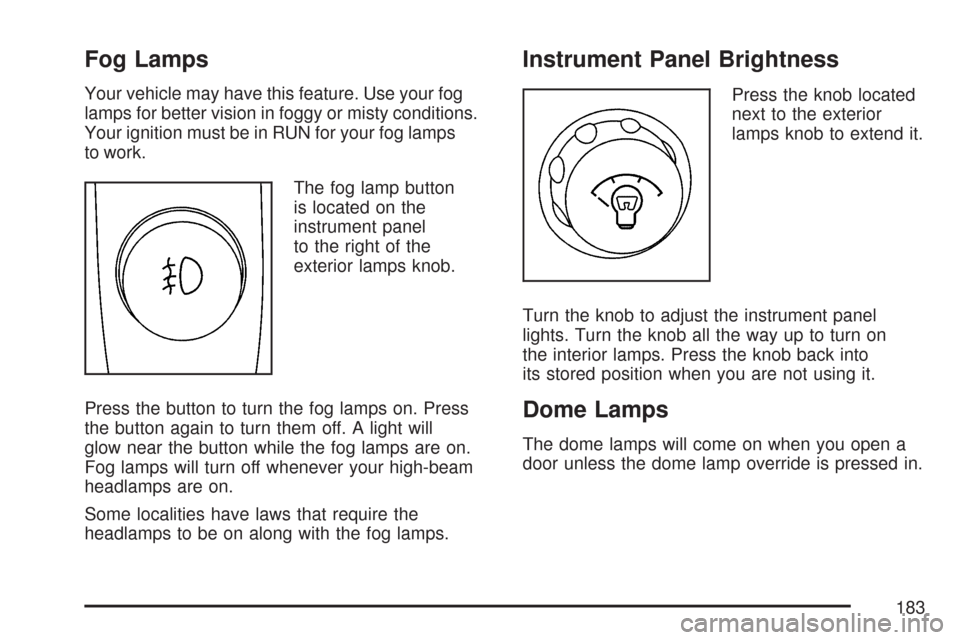
The fog lamp button
is located on the
instrument panel
to the right of the
exterior lamps knob.
Press the button to turn the fog lamps on. Press
the button again to turn them off. A light will
glow near the button while the fog lamps are on.
Fog lamps will turn off whenever your high-beam
headlamps are on.
Some localities have laws that require the
headlamps to be on along with the fog lamps.
Instrument Panel Brightness
Press the knob located
next to the exterior
lamps knob to extend it.
Turn the knob to adjust the instrument panel
lights. Turn the knob all the way up to turn on
the interior lamps. Press the knob back into
its stored position when you are not using it.
Dome Lamps
The dome lamps will come on when you open a
door unless the dome lamp override is pressed in.
183
Page 185 of 574
Electric Power Management
The vehicle has Electric Power Management
(EPM) that estimates the battery’s temperature and
state of charge. It then adjusts the voltage for
best performance and extended life of the battery.
When the battery’s state of charge is low, the
voltage is raised slightly to quickly put the charge
back in. When the state of charge is high, the
voltage is lowered slightly to prevent overcharging.
If the vehicle has a voltmeter gage or voltage
display on the Driver Information Center (DIC),
you may see the voltage move up or down.
This is normal. If there is a problem, an alert will
be displayed.
The battery can be discharged at idle if the
electrical loads are very high. This is true for all
vehicles. This is because the generator (alternator)
may not be spinning fast enough at idle to
produce all the power that is needed for very
high electrical loads.A high electrical load occurs when several of the
following loads are on: headlamps, high beams,
fog lamps, rear window defogger, climate
control fan at high speed, heated seats, engine
cooling fans, trailer loads, and loads plugged
into accessory power outlets.
EPM works to prevent excessive discharge
of the battery. It does this by balancing the
generator’s output and the vehicle’s electrical
needs. It can increase engine idle speed to
generate more power, whenever needed.
It can temporarily reduce the power demands
of some accessories.
Normally, these actions occur in steps or levels,
without being noticeable. In rare cases at the
highest levels of corrective action, this action
may be noticeable to the driver. If so, a Driver
Information Center (DIC) message might be
displayed, such as Battery Saver Active or
Service Battery Charging System. If this message
is displayed, it is recommended that the driver
reduce the electrical loads as much as possible.
SeeDIC Warnings and Messages on page 224.
185
Page 188 of 574
To change the current mode, select one of the
following:
H(Vent):This mode directs air to the instrument
panel outlets.
)(Bi-Level):This mode directs about half of
the air to the instrument panel outlets; then directs
most of the remaining air to the �oor outlets. A little
air is directed toward the windshield and the side
window outlets. Cooler air is directed to the upper
vents and warmer air to the �oor outlets.
6(Floor):This mode directs most of the air to the
�oor outlets with a little air directed to the windshield
and the side window outlets. The recirculation
button cannot be selected while in �oor mode.
@(Recirculation):Recirculation mode is used
to recirculate the air inside of your vehicle. When
this button is pressed, an indicator light in the
button will come on to let you know that it is active.
Use this mode to help prevent outside odors and/or
dust from entering your vehicle or to help cool the
air inside of your vehicle more quickly. The air
conditioning compressor will also come on when
this mode is activated. While in recirculation mode,the windows may fog when the weather is cold and
damp. To clear the fog, select either the defog or
defrost mode and increase fan speed.
Defog and defrost modes are described later in this
section.
Driver’s Side Temperature Lever:The lever on
the left side of the climate control panel is
used to raise or lower the temperature on the
driver’s side of the vehicle. Slide the lever up or
down to adjust the temperature.
Passenger’s Side Temperature Lever:The lever
on the right side of the climate control panel is
used to raise or lower the temperature on the
passenger’s side of the vehicle. Slide the lever up
or down to adjust the temperature. This lever also
adjusts the temperature to the rear seat outlets.
When the temperature outside is 0°F (-18°C) or
lower, use the engine coolant heater, if the vehicle
has one, to provide warmer air, faster to your
vehicle.
#(Air Conditioning):Press this button to turn
the air-conditioning system on or off. When the
button is pressed, an indicator light will come on
and the system will begin to cool and dehumidify
188
Page 189 of 574
the air inside of the vehicle. You may notice a
slight change in engine performance when the
air conditioning compressor shuts off and turns
on again. This is normal.
Defogging and Defrosting
Fog on the inside of windows is a result of
high humidity (moisture) condensing on the
cool window glass. This can be minimized if the
climate control system is used properly. There
are two modes to choose from to clear fog or
frost from your windshield. Use the defog mode to
clear the windows of fog or moisture and warm
the passengers. Use the defrost mode to remove
fog or frost from the windshield more quickly.
Turn the right knob clockwise or counterclockwise
to select one of the following modes:
-(Defog):This mode directs the air to the
�oor outlets, windshield and side window outlets.
The recirculation button cannot be selected
while in defog mode.
1(Defrost):This mode directs most of the
air to the windshield and the side window outlets,
with only a little air directed to the �oor outlets.The air conditioning compressor may run to
dehumidify the air to prevent window fogging.
The recirculation button cannot be selected while
in defrost mode. Do not drive the vehicle until
all the windows are clear.
Rear Window Defogger
If your vehicle has the rear window defogger
a warming grid is used to remove fog on the
rear window.
<(Rear):Press this button to turn the rear
window defogger on or off. An indicator light in the
button will come on to let you know that the rear
window defogger is active. The rear window
defogger will automatically turn off approximately
ten minutes after the button is pressed.
If your vehicle has heated mirrors, this button will
activate them.
Notice:Do not use anything sharp on the
inside of the rear window. If you do, you could
cut or damage the warming grid, and the repairs
would not be covered by your warranty. Do not
attach a temporary vehicle license, tape, a decal
or anything similar to the defogger grid.
189
Page 192 of 574
Manual Operation
To change the current setting, select one of the
following:
w9x(Fan):This button allows you to manually
adjust the fan speed. Press the up arrow to
increase fan speed and the down arrow to
decrease fan speed. The display will change to
show you the selected fan speed and the driver’s
side temperature setting for �ve seconds.
C(Mode):Press this button to manually change
the direction of the air�ow in your vehicle. Keep
pressing the button until the desired mode appears
on the display. The display will change to show
you the selected air delivery mode and the driver’s
temperature setting for �ve seconds.
H(Vent):This mode directs air to the instrument
panel outlets.
)(Bi-Level):This mode directs approximately
half of the air to the instrument panel outlets,
then directs the remaining air to the �oor outlets.
A little air is directed toward the windshield
and the side window outlets. Cooler air is directed
to the upper outlets and warmer air to the �oor
outlets.
6(Floor):This mode directs most of the air
to the �oor outlets. Some air also comes out
of the defroster and side window outlets.
The recirculation button cannot be selected in
�oor mode.
@(Recirculation):Press this button to turn
recirculation mode on or off. When this button
is pressed, an indicator light in the button will
also come on to let you know that it is activated.
Recirculation mode is used to recirculate the
air inside of your vehicle. Use this mode to help
prevent outside odors and/or dust from entering
your vehicle or to help cool the air inside of
your vehicle more quickly. Recirculation mode
can be used with vent and bi-level modes, but it
cannot be used with �oor, defog or defrost modes.
Defog and defrost modes are described later in
this section.
If recirculation mode is selected with �oor,
defog, or defrost modes, the indicator will �ash
three times and then turn off indicating the
selection is not available.
192
Page 193 of 574
You may also notice that the air conditioning
compressor will run while in recirculation mode.
This is normal and will help to prevent fogging.
If the weather is cold and damp, the system may
cause the windows to fog while using recirculation
mode. If the windows do start to fog, select
defog or defrost mode and increase fan speed.
Recirculation mode, if selected, will be cleared
when the engine is turned off.
#A/C (Air Conditioning):Press this button
to manually turn the air conditioning system on
or off. When the system is on, the system
will automatically begin to cool and dehumidify
the air inside of your vehicle. The air conditioning
symbol will appear on the display when the
air conditioning is on and will turn off when the
air conditioning is off.If you turn the air conditioning off while in front
defrost or defog mode, the air conditioning symbol
will turn off, however, the A/C compressor will
remain on to help de-humidify the air inside
the vehicle. If one of the other modes is selected
the compressor will then turn the A/C off until
it is selected again or the AUTO button is pressed.
To avoid fogging the inside glass on rainy and
humid days at a temperature above freezing,
press the air conditioning button to run the A/C
compressor. Also it is best to avoid the use of the
recirculation mode except when maximum air
conditioning performance is needed or for short
times to avoid exterior odors.
You may notice a slight change in engine
performance when the air-conditioning compressor
shuts off and turns on again. This is normal.
193