2007 CHEVROLET IMPALA tow
[x] Cancel search: towPage 126 of 460

Mirrors
Manual Rearview Mirror
If the vehicle has this mirror, it has a lever located at
the bottom of the mirror between the two lamps.
The lever is used to change the mirror from the
day to the night position. To reduce glare from
headlamps behind you while driving at night, pull
the lever toward you. To return the mirror to the day
position, return the lever to its original position.
There are two map lamps located on the bottom of
the mirror. Press the button next to each lamp to
turn it on and off.
Manual Rearview Mirror with
OnStar
®
If the vehicle has this mirror, it has a lever located
at the bottom of the mirror between the two
lamps. The lever is used to change the mirror
from the day to the night position. To reduce glare
from headlamps behind you while driving at
night, pull the lever toward you. To return the
mirror to the day position, return the lever
to its original position.There are two map lamps located on the bottom of
the mirror. Press the button next to each lamp to
turn it on and off.
There are also OnStar
®buttons located at the
bottom of the mirror face. See your dealer for more
information on the system and how to subscribe to
OnStar
®. SeeOnStar®System on page 128for
more information about the services OnStar®
provides.
Automatic Dimming Rearview Mirror
with OnStar
®
The vehicle may have an automatic dimming
rearview mirror with the OnStar®System.
Press the button located below the mirror, on the far
left, for up to three seconds to turn the automatic
dimming feature off and on.
There are two map lamps located on the bottom of
the mirror. Press the button next to each lamp to
turn it on and off.
There are also OnStar
®buttons located at the
bottom of the mirror. See your dealer for more
information on the system and how to subscribe to
OnStar
®. SeeOnStar®System on page 128for
more information about the service OnStar®
provides.
126
Page 155 of 460

Headlamp High/Low-Beam Changer
To change the headlamps from low beam to
high beam, push the turn signal/multifunction lever
toward the front of the vehicle.
This light on the
instrument panel
cluster comes on if
the high beam lamps
are turned on while
the ignition is on.
To change the headlamps from high beam to low
beam, pull the turn signal lever toward the rear
of the vehicle.
Flash-to-Pass
With the turn signal lever in the low-beam position,
pull the lever toward you momentarily to switch
to high-beam (to signal that you are going to pass).
If the headlamps are on, they will return to
low-beam when the lever is released.
This feature operates even when the headlamps
are off.
Windshield Wipers
Be sure to clear ice and snow from the wiper
blades before using them. If they are frozen to the
windshield, gently loosen or thaw them. Damaged
wiper blades may not clear the windshield well,
making it harder to see and drive safely. If the
blades do become damaged, install new blades or
blade inserts. For more information, seeWindshield
Wiper Blade Replacement on page 349.
Heavy snow or ice can overload the wiper motor.
A circuit breaker will stop the motor until it
cools down. Clear away snow or ice to prevent
an overload.
The windshield wipers are controlled by turning
the band with the wiper symbol.
8(Mist):Turn the band to mist for a single
wiping cycle. Hold it there until the wipers start.
Then let go. The wipers will stop after one wipe.
Hold the band on mist longer, for more wipe cycles.
9(Off):To stop the wipers, move the band
to off.
155
Page 182 of 460

When the ignition is on, the brake system warning
light will also come on when you set your
parking brake. The light will stay on if your parking
brake does not release fully. If it stays on after
your parking brake is fully released, it means you
have a brake problem.
If the light comes on while you are driving, pull
off the road and stop carefully. You may notice that
the pedal is harder to push, or the pedal may go
closer to the �oor. It may take longer to stop.
If the light is still on, have the vehicle towed for
service. SeeTowing Your Vehicle on page 282.
{CAUTION:
Your brake system may not be working
properly if the brake system warning light
is on. Driving with the brake system
warning light on can lead to an accident.
If the light is still on after you have pulled
off the road and stopped carefully, have
the vehicle towed for service.
Anti-Lock Brake System
Warning Light
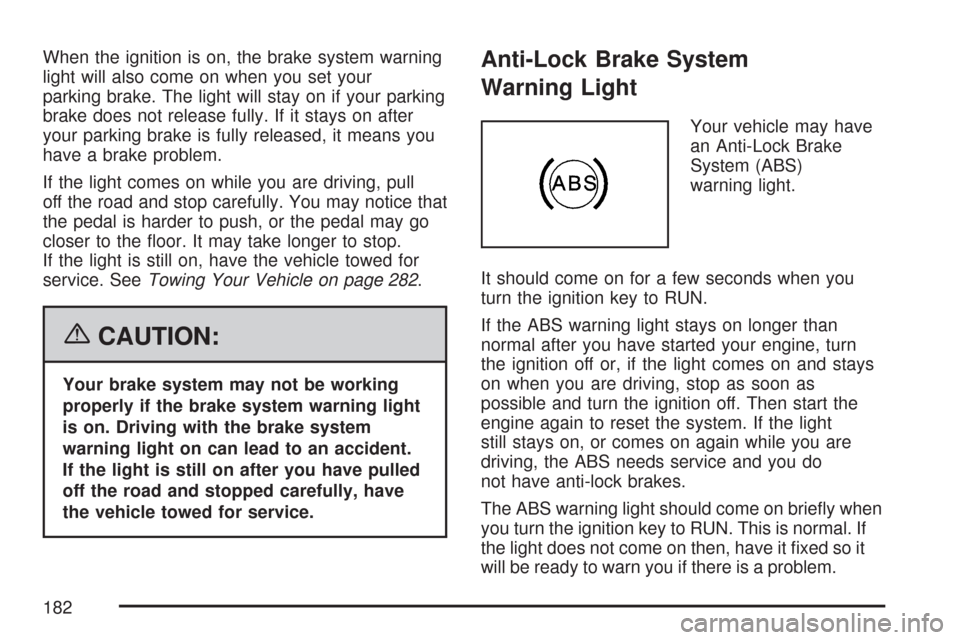
Your vehicle may have
an Anti-Lock Brake
System (ABS)
warning light.
It should come on for a few seconds when you
turn the ignition key to RUN.
If the ABS warning light stays on longer than
normal after you have started your engine, turn
the ignition off or, if the light comes on and stays
on when you are driving, stop as soon as
possible and turn the ignition off. Then start the
engine again to reset the system. If the light
still stays on, or comes on again while you are
driving, the ABS needs service and you do
not have anti-lock brakes.
The ABS warning light should come on brie�y when
you turn the ignition key to RUN. This is normal. If
the light does not come on then, have it �xed so it
will be ready to warn you if there is a problem.
182
Page 184 of 460

Engine Coolant Temperature Gage
This gage shows the engine coolant temperature.
If the gage pointer moves towards the “H”
(United States) or the shaded in thermostat
(Canada), it means that your engine coolant has
overheated. If you have been operating your
vehicle under normal driving conditions, you should
pull off the road, stop your vehicle and turn off
the engine as soon as possible.
SeeEngine Overheating on page 323for more
information.
Tire Pressure Light
This light comes on
brie�y when you turn
the ignition to RUN.
This light will also come on when one or more of
your tires are signi�cantly underin�ated.
A CHECK TIRE PRESSURE message in the
Driver Information Center (DIC) will accompany
the light. SeeDIC Warnings and Messages
on page 199for more information.
Stop and check your tires as soon as it is safe to
do so. If underin�ated, in�ate to the proper
pressure. SeeTires on page 351for more
information.
United StatesCanada
184
Page 186 of 460

This light should come on, as a check to show
you it is working, when the ignition is on and the
engine is not running. If the light does not
come on, have it repaired. This light will also
come on during a malfunction in one of two ways:
Light Flashing— A mis�re condition has
been detected. A mis�re increases vehicle
emissions and may damage the emission
control system on your vehicle. Diagnosis
and service may be required.
Light On Steady— An emission control
system malfunction has been detected on
your vehicle. Diagnosis and service may be
required.
If the Light is Flashing
The following may prevent more serious damage
to your vehicle:
Reducing vehicle speed
Avoiding hard accelerations
Avoiding steep uphill grades
If you are towing a trailer, reduce the amount
of cargo being hauled as soon as it is
possibleIf the light stops �ashing and remains on steady,
see “If the Light Is On Steady” following.
If the light continues to �ash, when it is safe to do
so, stop the vehicle. Find a safe place to park
your vehicle. Turn the key off, wait at least
10 seconds and restart the engine. If the light
remains on steady, see “If the Light Is On Steady”
following. If the light is still �ashing, follow the
previous steps, and see your dealer for service as
soon as possible.
If the Light Is On Steady
You may be able to correct the emission system
malfunction by considering the following:
Did you recently put fuel into your vehicle?
If so, reinstall the fuel cap, making sure to fully
install the cap. SeeFilling the Tank on page 302.
The diagnostic system can determine if the
fuel cap has been left off or improperly installed.
A loose or missing fuel cap will allow fuel to
evaporate into the atmosphere. A few driving trips
with the cap properly installed should turn the
light off.
186
Page 247 of 460

Your Driving, the Road, and
Your Vehicle............................................ 248
Defensive Driving...................................... 248
Drunken Driving........................................ 249
Control of a Vehicle.................................. 252
Braking...................................................... 252
Anti-Lock Brake System (ABS).................. 253
Braking in Emergencies............................. 255
Traction Control System (TCS).................. 256
Steering.................................................... 257
Off-Road Recovery.................................... 260
Passing..................................................... 260
Loss of Control.......................................... 262
Driving at Night......................................... 263
Driving in Rain and on Wet Roads............ 264City Driving............................................... 267
Freeway Driving........................................ 268
Before Leaving on a Long Trip.................. 269
Highway Hypnosis..................................... 270
Hill and Mountain Roads........................... 270
Winter Driving........................................... 272
If Your Vehicle is Stuck in Sand, Mud,
Ice, or Snow.......................................... 276
Rocking Your Vehicle to Get It Out........... 277
Loading Your Vehicle................................ 277
Towing........................................................ 282
Towing Your Vehicle................................. 282
Recreational Vehicle Towing...................... 282
Towing a Trailer........................................ 284
Section 4 Driving Your Vehicle
247
Page 277 of 460

Rocking Your Vehicle to Get It Out
First, turn the steering wheel left and right.
That will clear the area around the front wheels.
If your vehicle has traction control, you should turn
the traction control system off. SeeTraction
Control System (TCS) on page 256. Then shift
back and forth between REVERSE (R) and
a forward gear, spinning the wheels as little as
possible. Release the accelerator pedal while you
shift, and press lightly on the accelerator pedal
when the transaxle is in gear. By slowly spinning
the wheels in the forward and reverse directions,
you will cause a rocking motion that may free your
vehicle. If that does not get your vehicle out
after a few tries, it may need to be towed out.
If your vehicle does need to be towed out,
seeTowing Your Vehicle on page 282.
Loading Your Vehicle
It is very important to know how much weight your
vehicle can carry. Two labels on your vehicle
show how much weight it may properly carry, the
Tire and Loading Information label and the
Vehicle Certi�cation label.
{CAUTION:
Do not load your vehicle any heavier than
the Gross Vehicle Weight Rating (GVWR),
or either the maximum front or rear Gross
Axle Weight Rating (GAWR). If you do,
parts on your vehicle can break, and it
can change the way your vehicle handles.
These could cause you to lose control
and crash. Also, overloading can shorten
the life of your vehicle.
277
Page 279 of 460

4. The resulting �gure equals the available
amount of cargo and luggage load capacity.
For example, if the “XXX” amount equals
1400 lbs and there will be �ve 150 lb
passengers in your vehicle, the amount of
available cargo and luggage load capacity is
650 lbs (1400−750 (5 x 150) = 650 lbs).
5. Determine the combined weight of luggage
and cargo being loaded on the vehicle. That
weight may not safely exceed the available
cargo and luggage load capacity calculated in
Step 4.
6. If your vehicle will be towing a trailer, the load
from your trailer will be transferred to your
vehicle. Consult this manual to determine how
this reduces the available cargo and luggage
load capacity for your vehicle.
If your vehicle can tow a trailer, seeTowing a
Trailer on page 284for important information
on towing a trailer, towing safety rules, and
trailering tips.
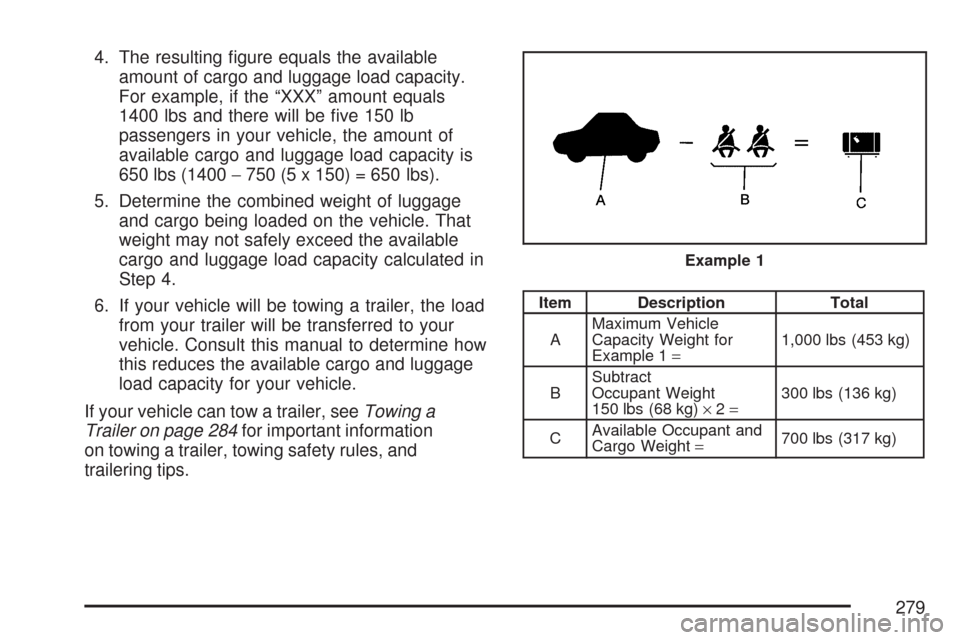
Item Description Total
AMaximum Vehicle
Capacity Weight for
Example 1=1,000 lbs (453 kg)
BSubtract
Occupant Weight
150 lbs (68 kg)×2=300 lbs (136 kg)
CAvailable Occupant and
Cargo Weight=700 lbs (317 kg) Example 1
279