2007 CHEVROLET EXPRESS PASSANGER light
[x] Cancel search: lightPage 98 of 458
Restraint System Check
Checking the Restraint Systems
Now and then, make sure the safety belt reminder
light and all your belts, buckles, latch plates,
retractors and anchorages are working properly.
Look for any other loose or damaged safety belt
system parts. If you see anything that might keep
a safety belt system from doing its job, have it
repaired. SeeCare of Safety Belts on page 385
for more information.
Torn or frayed safety belts may not protect you in
a crash. They can rip apart under impact forces.
If a belt is torn or frayed, get a new one right away.
Also look for any opened or broken airbag covers,
and have them repaired or replaced. The airbag
system does not need regular maintenance.
Notice:If you damage the covering for the
driver’s or the right front passenger’s airbag,
the airbag may not work properly. You may
have to replace the airbag module in the
steering wheel or both the airbag module
and the instrument panel for the right front
passenger’s airbag. Do not open or break
the airbag coverings.
Replacing Restraint System Parts
After a Crash
{CAUTION:
A crash can damage the restraint systems
in your vehicle. A damaged restraint
system may not properly protect the
person using it, resulting in serious
injury or even death in a crash. To help
make sure your restraint systems are
working properly after a crash, have
them inspected and any necessary
replacements made as soon as possible.
If you have had a crash, do you need new
safety belts or LATCH system parts?
After a very minor collision, nothing may be
necessary. But if the belts were stretched,
as they would be if worn during a more severe
crash, then you need new parts.
98
Page 99 of 458
If the LATCH system was being used during a
more severe crash, you may need new LATCH
system parts.
If belts are cut or damaged, replace them.
Collision damage also may mean you will need to
have LATCH system, safety belt or seat parts
repaired or replaced. New parts and repairs may
be necessary even if the belt or LATCH system
was not being used at the time of the collision.
If an airbag inflates, if your vehicle has these,
you will need to replace airbag system parts.
See the part on the airbag system earlier in this
section.
If the frontal airbags inflate, you will also need to
replace the driver’s and right front passenger’s
safety belt buckle assembly. Be sure to do
so. Then the new buckle assembly will be there
to help protect you in a collision.After a crash you may need to replace the
driver and front passenger’s safety belt buckle
assemblies, even if the frontal airbags have
not deployed. On some models, the driver and
front passenger’s safety belt buckle assemblies
contain safety belt pretensioners. If your vehicle
has safety belt pretensioners, have them checked
if your vehicle has been in a collision, or if your
airbag readiness light stays on after you start your
vehicle or while you are driving. SeeAirbag
Readiness Light on page 169.
99
Page 116 of 458
Power Windows
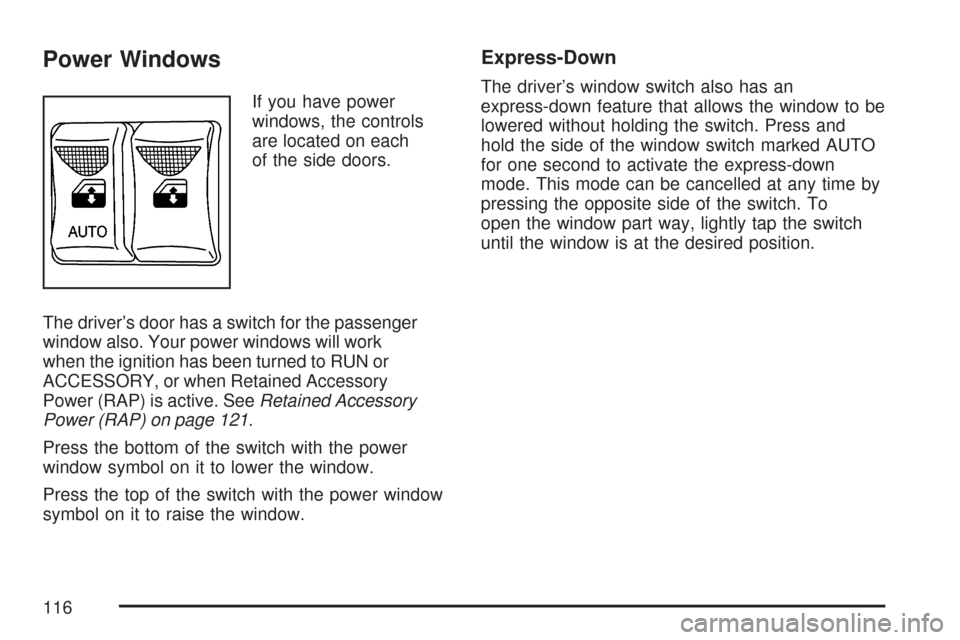
If you have power
windows, the controls
are located on each
of the side doors.
The driver’s door has a switch for the passenger
window also. Your power windows will work
when the ignition has been turned to RUN or
ACCESSORY, or when Retained Accessory
Power (RAP) is active. SeeRetained Accessory
Power (RAP) on page 121.
Press the bottom of the switch with the power
window symbol on it to lower the window.
Press the top of the switch with the power window
symbol on it to raise the window.
Express-Down
The driver’s window switch also has an
express-down feature that allows the window to be
lowered without holding the switch. Press and
hold the side of the window switch marked AUTO
for one second to activate the express-down
mode. This mode can be cancelled at any time by
pressing the opposite side of the switch. To
open the window part way, lightly tap the switch
until the window is at the desired position.
116
Page 118 of 458

Visor Vanity Mirror
You may have visor vanity mirrors, with or without
lamps. Lift the mirror cover to turn the lamps
on, if you have them.
Theft-Deterrent Systems
Vehicle theft is big business, especially in some
cities. Although your vehicle has a number of
theft-deterrent features, we know that nothing we
put on it can make it impossible to steal.
Passlock®
Your vehicle is equipped with the Passlock®
theft-deterrent system.
Passlock
®is a passive theft-deterrent system.
Passlock®enables fuel if the ignition lock cylinder
is turned with a valid key. If a correct key is not
used or the ignition lock cylinder is tampered with,
fuel is disabled.During normal operation, the SECURITY light will
go off approximately five seconds after the key
is turned to RUN. SeeSecurity Light on page 183.
If the engine stalls and the SECURITY light flashes,
wait until the light stops flashing before trying to
restart the engine. Remember to release the key
from START as soon as the engine starts.
If the engine is running and the SECURITY light
comes on, you will be able to restart the engine if
you turn the engine off. However, your Passlock
®
system is not working properly and must be
serviced by your dealer/retailer. Your vehicle is not
protected by Passlock
®at this time. You may
also want to check the fuse. SeeFuses and Circuit
Breakers on page 393. See your dealer/retailer
for service.
Do not leave the key or device that disarms
or deactivates the theft deterrent system in
the vehicle.
118
Page 128 of 458
Parking Brake
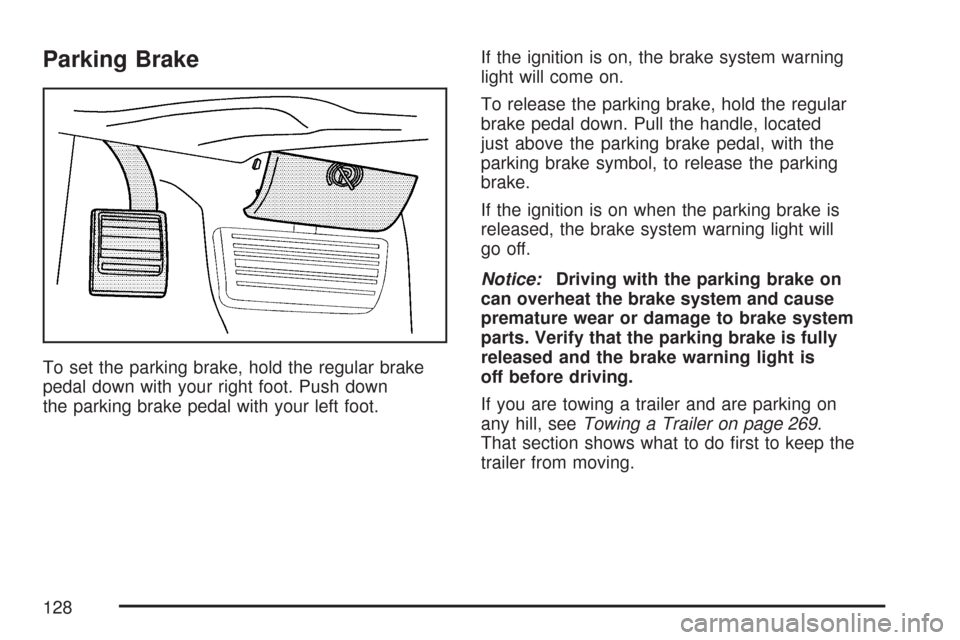
To set the parking brake, hold the regular brake
pedal down with your right foot. Push down
the parking brake pedal with your left foot.If the ignition is on, the brake system warning
light will come on.
To release the parking brake, hold the regular
brake pedal down. Pull the handle, located
just above the parking brake pedal, with the
parking brake symbol, to release the parking
brake.
If the ignition is on when the parking brake is
released, the brake system warning light will
go off.
Notice:Driving with the parking brake on
can overheat the brake system and cause
premature wear or damage to brake system
parts. Verify that the parking brake is fully
released and the brake warning light is
off before driving.
If you are towing a trailer and are parking on
any hill, seeTowing a Trailer on page 269.
That section shows what to do first to keep the
trailer from moving.
128
Page 134 of 458

Mirrors
Manual Rearview Mirror
Pull the tab under the mirror toward you to reduce
glare from headlamps behind you after dark.
Push the tab away from you to restore the mirror
to the original position.
If you have a cargo van without the rear door
glass, your vehicle may not have an inside
rearview mirror.
Automatic Dimming Rearview Mirror
with Compass and Temperature
Display
Your vehicle may have this mirror. When on, an
automatic dimming mirror will dim to the proper
level to minimize glare from lights behind you
after dark.
The mirror also includes a dual display in the
upper right corner of the mirror with the compass
reading and the outside temperature.
Yb:Briefly press this button to turn the display
on or off.
Temperature Display
The temperature can be displayed by pressing the
compass/temperature button. Pressing the
compass/temperature button once briefly, will
toggle the display reading on and off. To alternate
the temperature reading between Fahrenheit and
Celsius, press and hold the compass/temperature
button for approximately three seconds until
the display blinks F and C. After approximately
five seconds of inactivity, the display will stop
blinking and display the last selection made.
If an abnormal reading is displayed, see your
dealer/retailer.
Automatic Dimming Mirror Operation
O
:Press this button to turn the automatic
dimming feature on or off. The indicator light to
the left of the button will turn on to indicate when
the feature is on. Once the mirror is turned off,
it will remain off until it is turned back on, or until
the vehicle is restarted.
Compass Operation
Press the compass/temperature button once
briefly to turn the display on or off.
134
Page 139 of 458
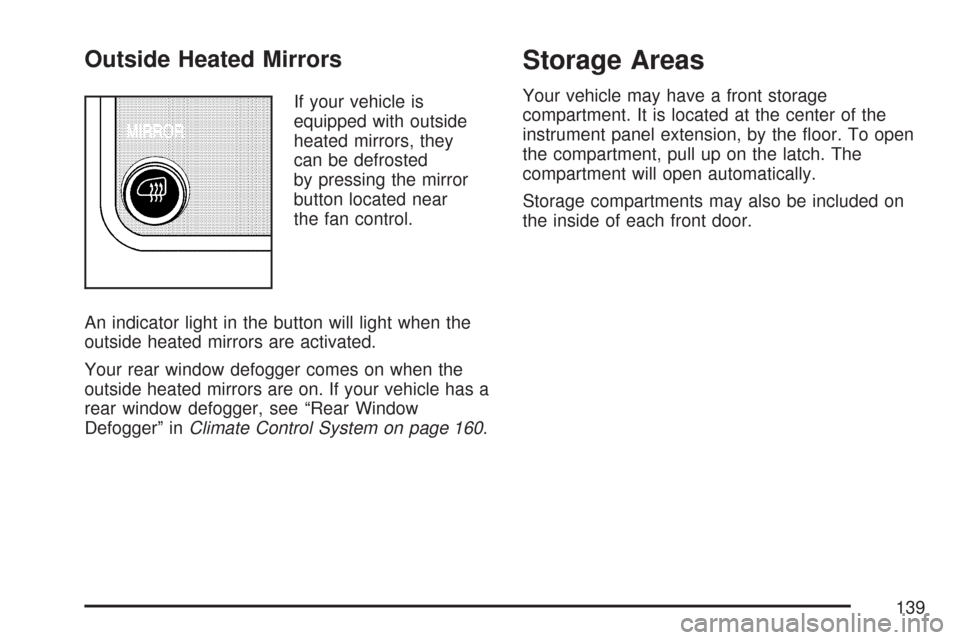
Outside Heated Mirrors
If your vehicle is
equipped with outside
heated mirrors, they
can be defrosted
by pressing the mirror
button located near
the fan control.
An indicator light in the button will light when the
outside heated mirrors are activated.
Your rear window defogger comes on when the
outside heated mirrors are on. If your vehicle has a
rear window defogger, see “Rear Window
Defogger” inClimate Control System on page 160.
Storage Areas
Your vehicle may have a front storage
compartment. It is located at the center of the
instrument panel extension, by the floor. To open
the compartment, pull up on the latch. The
compartment will open automatically.
Storage compartments may also be included on
the inside of each front door.
139
Page 141 of 458

Instrument Panel Overview........................ 144
Hazard Warning Flashers.......................... 146
Other Warning Devices............................. 146
Horn.......................................................... 146
Tilt Wheel.................................................. 147
Turn Signal/Multifunction Lever.................. 147
Turn and Lane-Change Signals................. 148
Headlamp High/Low-Beam Changer.......... 149
Flash-to-Pass............................................ 149
Windshield Wipers..................................... 150
Windshield Washer.................................... 151
Cruise Control........................................... 151
Exterior Lamps.......................................... 155
Headlamps on Reminder........................... 156
Daytime Running Lamps (DRL)................. 156
Instrument Panel Brightness...................... 157
Dome Lamps............................................. 157
Dome Lamp Override................................ 157
Entry Lighting............................................ 158
Exit Lighting.............................................. 158
Reading Lamps......................................... 158Battery Run-Down Protection..................... 158
Accessory Power Outlet(s)........................ 158
Ashtray(s) and Cigarette Lighter................ 159
Climate Controls......................................... 160
Climate Control System............................. 160
Outlet Adjustment...................................... 162
Rear Heating System................................ 163
Rear Air Conditioning and Heating
System.................................................. 164
Warning Lights, Gages, and Indicators..... 166
Instrument Panel Cluster........................... 167
Speedometer and Odometer...................... 168
Trip Odometer........................................... 168
Safety Belt Reminder Light........................ 168
Passenger Safety Belt Reminder Light....... 169
Airbag Readiness Light............................. 169
Airbag Off Light......................................... 170
Passenger Airbag Status Indicator............. 172
Charging System Light.............................. 174
Voltmeter Gage......................................... 175
Section 3 Instrument Panel
141