2007 CHEVROLET AVEO radio
[x] Cancel search: radioPage 187 of 436
While your vehicle is parked:
•Familiarize yourself with all of its controls.
•Familiarize yourself with its operation.
•Set up your audio system by presetting your
favorite radio stations, setting the tone, and
adjusting the speakers. Then, when driving
conditions permit, you can tune to your favorite
radio stations using the presets and steering
wheel controls if the vehicle has them.
Notice:Before adding any sound equipment
to your vehicle, such as an audio system,
CD player, CB radio, mobile telephone,
or two-way radio, make sure that it can be
added by checking with your dealer/retailer.
Also, check federal rules covering mobile radio
and telephone units. If sound equipment can
be added, it is very important to do it properly.
Added sound equipment can interfere with
the operation of your vehicle’s engine, radio,
or other systems, and even damage them. Your
vehicle’s systems can interfere with the
operation of sound equipment that has
been added.
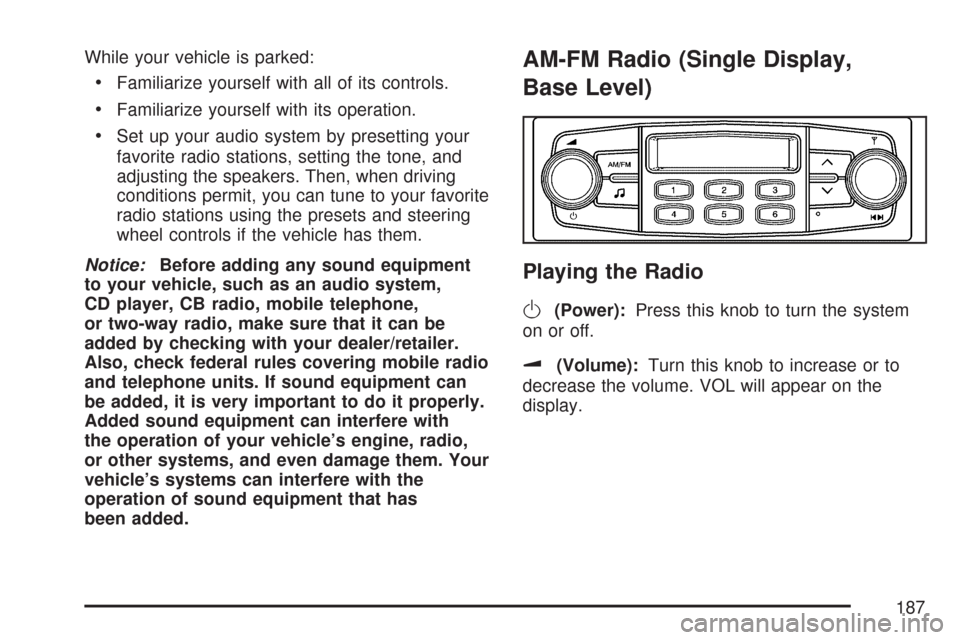
AM-FM Radio (Single Display,
Base Level)
Playing the Radio
O
(Power):Press this knob to turn the system
on or off.
u(Volume):Turn this knob to increase or to
decrease the volume. VOL will appear on the
display.
187
Page 188 of 436
Finding a Station
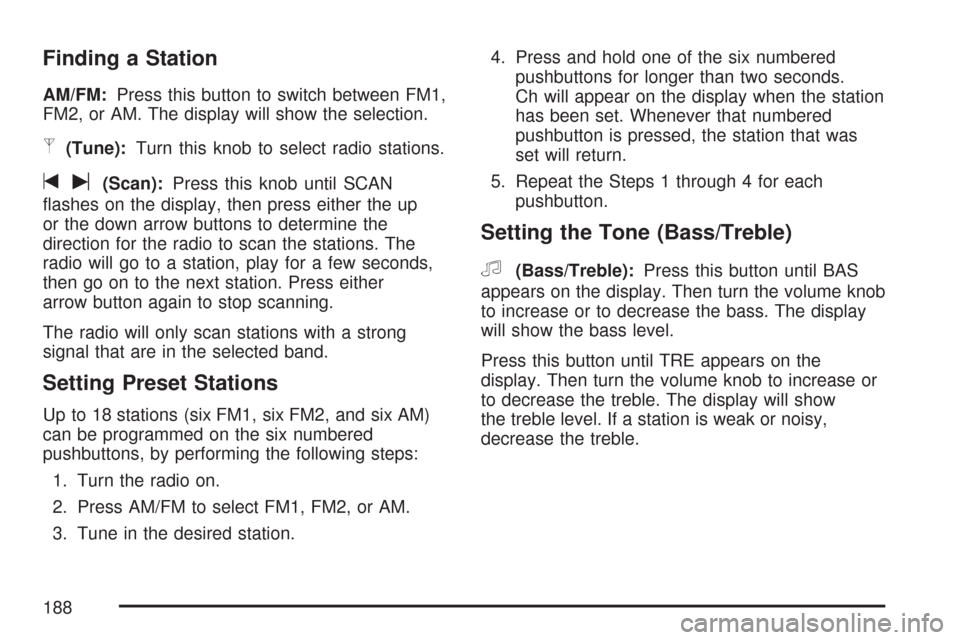
AM/FM:Press this button to switch between FM1,
FM2, or AM. The display will show the selection.
p(Tune):Turn this knob to select radio stations.
tu(Scan):Press this knob until SCAN
flashes on the display, then press either the up
or the down arrow buttons to determine the
direction for the radio to scan the stations. The
radio will go to a station, play for a few seconds,
then go on to the next station. Press either
arrow button again to stop scanning.
The radio will only scan stations with a strong
signal that are in the selected band.
Setting Preset Stations
Up to 18 stations (six FM1, six FM2, and six AM)
can be programmed on the six numbered
pushbuttons, by performing the following steps:
1. Turn the radio on.
2. Press AM/FM to select FM1, FM2, or AM.
3. Tune in the desired station.4. Press and hold one of the six numbered
pushbuttons for longer than two seconds.
Ch will appear on the display when the station
has been set. Whenever that numbered
pushbutton is pressed, the station that was
set will return.
5. Repeat the Steps 1 through 4 for each
pushbutton.
Setting the Tone (Bass/Treble)
f
(Bass/Treble):Press this button until BAS
appears on the display. Then turn the volume knob
to increase or to decrease the bass. The display
will show the bass level.
Press this button until TRE appears on the
display. Then turn the volume knob to increase or
to decrease the treble. The display will show
the treble level. If a station is weak or noisy,
decrease the treble.
188
Page 189 of 436
Adjusting the Speakers (Balance/Fade)
f
(Balance/Fade):To adjust the balance
between the right and the left speakers, press this
button until BAL appears on the display. Then
turn the volume knob to increase or to decrease
the balance between the right and the left
speakers. The display will show the balance level.
To adjust the fade between the front and the
rear speakers, press this button until FAD appears
on the display. Then turn the volume knob to
increase or to decrease the fade between the front
and the rear speakers. The display will show the
fade level.
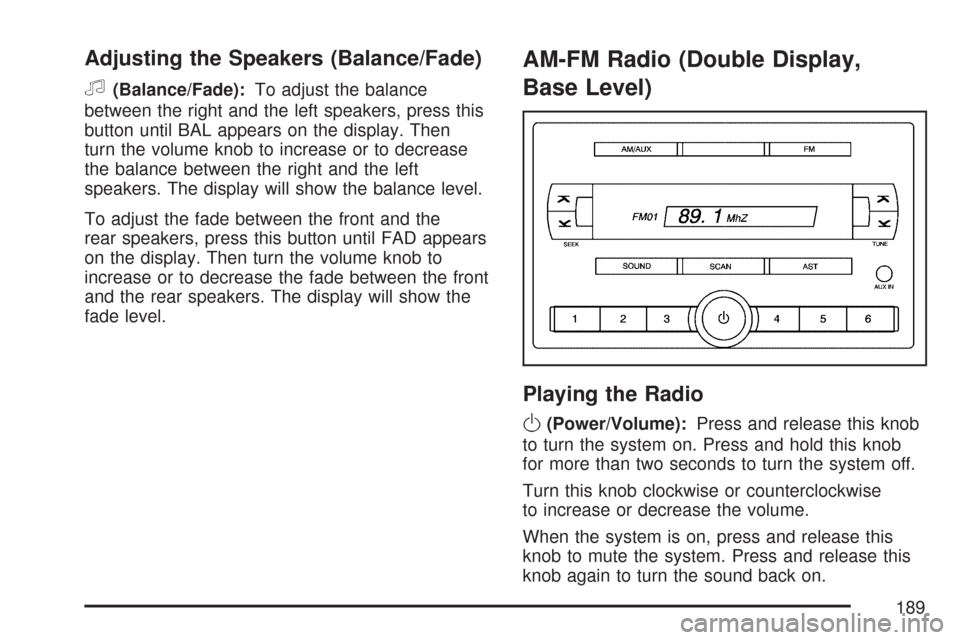
AM-FM Radio (Double Display,
Base Level)
Playing the Radio
O
(Power/Volume):Press and release this knob
to turn the system on. Press and hold this knob
for more than two seconds to turn the system off.
Turn this knob clockwise or counterclockwise
to increase or decrease the volume.
When the system is on, press and release this
knob to mute the system. Press and release this
knob again to turn the sound back on.
189
Page 190 of 436
The previous volume setting is maintained
whenever the radio is turned on. The volume can
be adjusted by using the volume knob.
Finding a Station
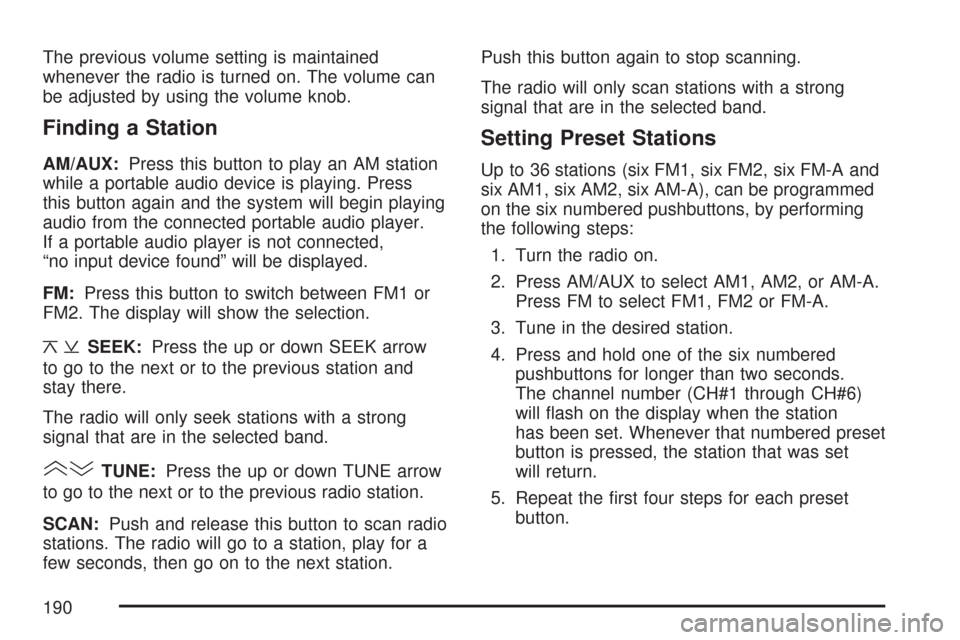
AM/AUX:Press this button to play an AM station
while a portable audio device is playing. Press
this button again and the system will begin playing
audio from the connected portable audio player.
If a portable audio player is not connected,
“no input device found” will be displayed.
FM:Press this button to switch between FM1 or
FM2. The display will show the selection.
¦¥SEEK:Press the up or down SEEK arrow
to go to the next or to the previous station and
stay there.
The radio will only seek stations with a strong
signal that are in the selected band.
()TUNE:Press the up or down TUNE arrow
to go to the next or to the previous radio station.
SCAN:Push and release this button to scan radio
stations. The radio will go to a station, play for a
few seconds, then go on to the next station.Push this button again to stop scanning.
The radio will only scan stations with a strong
signal that are in the selected band.
Setting Preset Stations
Up to 36 stations (six FM1, six FM2, six FM-A and
six AM1, six AM2, six AM-A), can be programmed
on the six numbered pushbuttons, by performing
the following steps:
1. Turn the radio on.
2. Press AM/AUX to select AM1, AM2, or AM-A.
Press FM to select FM1, FM2 or FM-A.
3. Tune in the desired station.
4. Press and hold one of the six numbered
pushbuttons for longer than two seconds.
The channel number (CH#1 through CH#6)
will flash on the display when the station
has been set. Whenever that numbered preset
button is pressed, the station that was set
will return.
5. Repeat the first four steps for each preset
button.
190
Page 191 of 436
AST (Automatic Store):Six FM1 preset stations
with the strongest reception in the region can
be automatically stored. Press the AST button for
longer than one second. The display will show
AUTO SCANNING and then SCANNING will flash
on display. Once the stations are stored, the
radio will switch to FM1 and the first preset station
will begin to play. FM-A will appear on the
display when listening to the automatic stored
stations. Press the AM or FM button to cancel
automatic store.
Order of Sound Function
The order for displayed sound function is BASS,
MID, TRE, FAD, BAL, EQ OFF, and VOL.
Setting the Tone
(Bass/Midrange/Treble)
SOUND (Bass/Midrange/Treble):Press this
button until BAS appears on the display. Turn the
power/volume knob to increase or to decrease
the bass. The display will show the bass
level. When finished making the selection, press
this button to select the bass level.Press this button until MID appears on the display.
Turn the power/volume knob to increase or to
decrease the midrange. The display will show
the midrange level. When finished making
the selection, press this button to select the
midrange level.
Press this button until TRE appears on the
display. Turn the power/volume knob to increase
or to decrease the treble. The display will
show the treble level. When finished making the
selection, press this button to select the treble
level. If a station is weak or there is static,
decrease the treble.
Adjusting the Speakers (Balance/Fade)
SOUND (Balance/Fade):To adjust the balance
between the right and the left speakers, press this
button until BAL appears on the display. Turn
the power/volume knob to increase or to decrease.
The display will show the balance level. When
finished making the selection, press this button to
select the balance level.
191
Page 192 of 436
To adjust the fade between the front and the rear
speakers, press this button until FAD appears
on the display. Turn the power/volume knob
to increase or to decrease the fade between the
front and the rear speakers. The display will
show the fade level. When finished making the
selection, press this button to select the fade level.
Setting the EQ (Equalization)
SOUND (Equalization):Press this button until
EQ OFF appears on the display to select
customized equalization settings designed for
classic, dance, rock, jazz, pop, voice, and techno.
Turn the power/volume knob until the desired
equalization setting appears on the display. When
finished making the selection, press the SOUND
button to select the equalization setting.
To cancel an equalization setting, press the
SOUND button until EQ OFF appears on the
display, turn the power/volume knob until OFF
appears on the display, then press the SOUND
button again to select the equalization setting.
Order of Sound Function
The order for displayed sound function is EQ OFF,
CLASSIC, DANCE, ROCK, JAZZ, POP, VOICE,
TECHNO, and EQ OFF.
Using the Auxiliary Input Jack
AUX IN (Auxiliary Input):Your radio system has
an auxiliary input jack located on the lower right
side of the faceplate. This is not an audio
output; do not plug the headphone set into the
front auxiliary input jack. You can however,
connect an external audio device such as an iPod,
laptop computer, MP3 player, CD changer, or
XM™ receiver, etc. to the auxiliary input jack for
use as another source for audio listening.
The auxiliary input jack will also accept cell phone
connectors. Plug the cell phone connector into
the auxiliary input jack to hear the other side of a
cell phone’s conversation through the vehicle
sound system.
192
Page 193 of 436
Drivers are encouraged to set up any auxiliary
device while the vehicle is in park (P). See
Defensive Driving on page 220for more
information on driver distraction.
To use a portable audio player, connect a 3.5 mm
(1/8 inch) cable to the radio’s front auxiliary
input jack. When a device is connected, turn the
portable audio player on. Press and hold the radio
AM/AUX button for more than two seconds or
until audio from the device begins to play over the
car speakers.
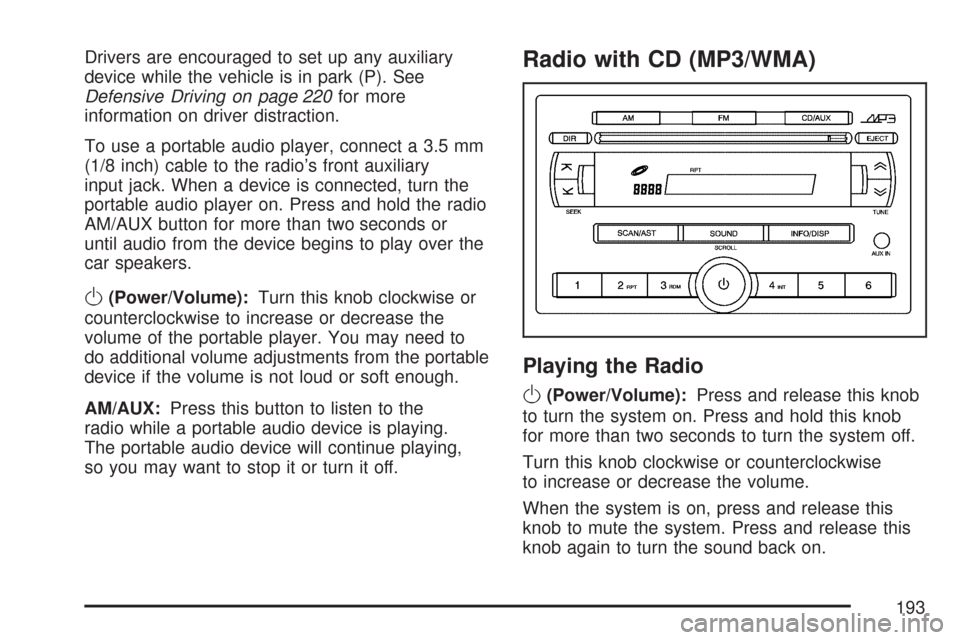
O(Power/Volume):Turn this knob clockwise or
counterclockwise to increase or decrease the
volume of the portable player. You may need to
do additional volume adjustments from the portable
device if the volume is not loud or soft enough.
AM/AUX:Press this button to listen to the
radio while a portable audio device is playing.
The portable audio device will continue playing,
so you may want to stop it or turn it off.
Radio with CD (MP3/WMA)
Playing the Radio
O
(Power/Volume):Press and release this knob
to turn the system on. Press and hold this knob
for more than two seconds to turn the system off.
Turn this knob clockwise or counterclockwise
to increase or decrease the volume.
When the system is on, press and release this
knob to mute the system. Press and release this
knob again to turn the sound back on.
193
Page 194 of 436
Finding a Station
AM:Press this button to switch to an AM station.
The display shows the selection.
FM:Press this button to switch to an FM station.
The display shows the selection.
()TUNE:Press the up(or down)
TUNE arrow to select radio stations.
Press the up
(TUNE arrow to increase or the
down
)to decrease the radio frequencies.
¥SEEK:Press the up¦or down¥SEEK
arrow to seek radio stations.
Press the up
¦SEEK arrow to seek the next
radio station or the down
¥SEEK arrow to seek
the previous radio station.
SCAN/AST:Press this button to scan radio
stations. The radio goes to a station, plays for a
few seconds, then goes to the next station.
Press this button again to stop scanning.
The radio scans stations only with a strong signal
that are in the selected band.
AST (Automatic Store)
Six FM1 preset stations with the strongest
reception in the region can be automatically stored.
Press the AST button for more than two seconds.
The display shows AUTO SCANNING and
then SCANNING flashes on the display. Once the
stations are stored, the radio switches to FM1
and the first preset station begins to play. FM-A
displays while listening to the automatic stored
stations. Press the AM or FM button to cancel
automatic store.
Setting Preset Stations
Up to 24 stations (six FM1, six FM2, six AM1, and
six AM2), can be programmed on the six numbered
buttons, by performing the following steps:
1. Turn the radio on.
2. Press the AM or FM button to select FM1,
FM2, AM1 or AM2.
3. Tune in the desired station.
194