2007 CHEVROLET AVEO ECO mode
[x] Cancel search: ECO modePage 180 of 436
The ABS warning light will come on briefly when
you turn the ignition to ON. This is normal. If
the light does not come on then, have it fixed so it
will be ready to warn you if there is a problem.
Hold Mode Light
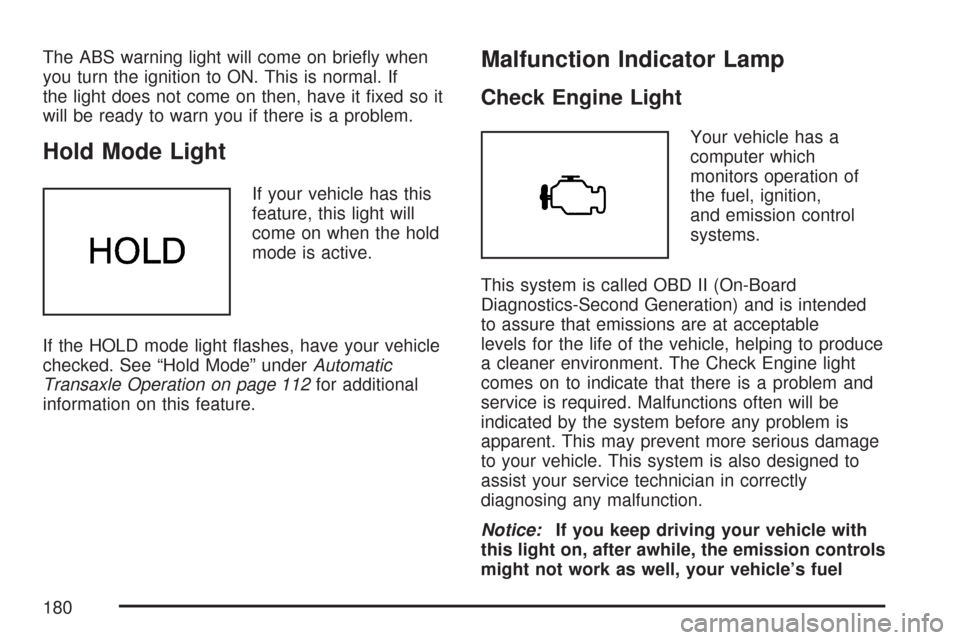
If your vehicle has this
feature, this light will
come on when the hold
mode is active.
If the HOLD mode light flashes, have your vehicle
checked. See “Hold Mode” underAutomatic
Transaxle Operation on page 112for additional
information on this feature.
Malfunction Indicator Lamp
Check Engine Light
Your vehicle has a
computer which
monitors operation of
the fuel, ignition,
and emission control
systems.
This system is called OBD II (On-Board
Diagnostics-Second Generation) and is intended
to assure that emissions are at acceptable
levels for the life of the vehicle, helping to produce
a cleaner environment. The Check Engine light
comes on to indicate that there is a problem and
service is required. Malfunctions often will be
indicated by the system before any problem is
apparent. This may prevent more serious damage
to your vehicle. This system is also designed to
assist your service technician in correctly
diagnosing any malfunction.
Notice:If you keep driving your vehicle with
this light on, after awhile, the emission controls
might not work as well, your vehicle’s fuel
180
Page 199 of 436
Using the Auxiliary Input Jack
The radio system has an auxiliary input jack
located on the lower right side of the faceplate.
This is not an audio output. Do not plug the
headphone set into the front auxiliary input jack.
An external audio device such as an iPod,
laptop computer, MP3 player, CD changer, or
cassette tape player, etc. can be connected to the
auxiliary input jack for use as another source
for audio listening.
The auxiliary input jack also accepts cell phone
connectors. Plug the cell phone connector into the
auxiliary input jack to hear a person speaking
on a cell phone during conversation through the
vehicle sound system.
Drivers are encouraged to set up any auxiliary
device while the vehicle is in PARK (P). See
Defensive Driving on page 220for more
information on driver distraction.To use a portable audio player, connect a 3.5 mm
(1/8 inch) cable to the radio’s front auxiliary
input jack. While a device is connected, turn the
portable audio player on and press the radio
CD/AUX button to hear audio from the device over
the vehicle speakers.
CD/AUX (CD/Auxiliary):Press this button once
to play a CD while a portable audio device is
playing. Press this button a second time for the
system to begin playing audio from the connected
portable audio player. Once in this mode,
“Auxinput” appears on the display. If the auxiliary
jack does not detect the presence of an output
jack, the auxiliary mode does not display.
O(Power/Volume):Turn theOknob clockwise
or counterclockwise to increase or decrease the
volume of the portable player. Additional
adjustments on a portable device might be needed
to get the desired volume.
199
Page 206 of 436
If the CD is not playing correctly, for any other
reason, try a known good CD.
If any error occurs repeatedly or if an error cannot
be corrected, contact your dealer/retailer. If the
radio displays an error message, write it down and
provide it to your dealer/retailer when reporting
the problem.
Using the Auxiliary Input Jack
AUX IN (Auxiliary Input):The radio system has
an auxiliary input jack located on the lower
right side of the faceplate. This is not an audio
output. Do not plug the headphone set into
the front auxiliary input jack. An external audio
device such as an iPod, laptop computer,
MP3 player, CD changer, or XM™ receiver, etc.
can be connected to the auxiliary input jack for use
as another source for audio listening.
The auxiliary input jack also accepts cell phone
connectors. Plug the cell phone connector into the
auxiliary input jack to hear a person speck on a
cell phone during a conversation through the
vehicle sound system.Drivers are encouraged to set up any auxiliary
device while the vehicle is in PARK (P). See
Defensive Driving on page 220for more
information on driver distraction.
To use a portable audio player, connect a 3.5 mm
(1/8 inch) cable to the radio’s front auxiliary
input jack. While a device is connected, turn the
portable audio player on and press the radio
CD/AUX button to hear audio from the device over
the vehicle speakers.
O(Power/Volume):Turn theOknob clockwise
or counterclockwise to increase or decrease the
volume of the portable player. Additional
adjustments on a portable device might be needed
to get the desired volume.
CD/AUX (CD/Auxiliary):Press this button once
to play a CD while a portable audio device is
playing. Press this button a second time for the
system to begin playing audio from the connected
portable audio player. Once in this mode,
“Auxinput” displays. If the auxiliary jack does not
detect the presence of an output jack, the auxiliary
mode does not display.
206
Page 210 of 436
All of the CD functions work the same while
playing an MP3/WMA, except for those listed here.
See “Playing a CD” earlier for more information.
SCROLL (MP3/WMA Mode Only):Press the
SOUND button for longer than two seconds. The
song title or other available information of a song
scrolls on/off. The offset is scroll on. The scroll
mode can be changed only when the SOUND
button is pressed for longer than two seconds.
DIR (Directory):Press this button to repeat the
tracks in the current directory. DIR displays.
Press this button again to repeat the tracks in all
of the directories. ALL displays.
Press this button again to turn off repeat play.
¦¥SEEK (Previous/Next Folder) (in
MP3/WMA Mode):Press the up
¦or down¥
SEEK arrow to change the folder. If CD-R does not
have any folder, “ROOT” flashes on the display
for a short time.
()TUNE (Previous/Next Track):Press the
up
(TUNE arrow to go to the next track.
The track number displays. Press the down
)
TUNE arrow to go to the start of the current track.
The player continues moving forward or backward
through the CD with each press of the up
(
or down)TUNE arrow.
INFO/DISP (Information/Display):Press this
button to display additional text information related
to the current MP3/WMA song. A choice of
additional information such as: Song Title, Album
Title, and Artist. Bit rate might also display.
When information is not available, No Info
(information) displays.
Press this button for longer than two seconds to
change display mode.
210
Page 214 of 436
All of the CD functions work the same while
playing an MP3/WMA, except for those listed here.
See “Playing a CD” earlier for more information.
SCROLL (MP3/WMA Mode Only):Press
the SOUND button for longer than two seconds.
The song title and other available information
of the song scrolls on/off. The offset is scroll on.
The scroll mode can be changed only when
the SOUND button is pressed for longer than
two seconds.
1 DIR (Directory):Press this button to repeat the
tracks in the current directory. DIR displays.
Press this button again to repeat the tracks in all
of the directories. ALL displays.
Press this button again to turn off repeat play.
¦¥SEEK (Previous/Next Folder) (in
MP3/WMA Mode):Press the up
¦or down¥
SEEK arrow to change the folder. If CD-R does not
have any folder, “ROOT” flashes on the display
for a short time.
()TUNE (Previous/Next Track):Press the
up
(TUNE arrow to go to the next track.
The track number displays. Press the down
)
TUNE arrow to go to the start of the current track.
The player continues moving forward or backward
through the CD with each press of the up or
down arrows.
INFO/DISP (Information/Display):Press this
button to display additional text information related
to the current MP3/WMA song. A choice of
additional information such as: Song Title, Album
Title, and Artist. Bit rate might also display.
When information is not available, No Info
(information) displays.
Press this button for longer than two seconds to
change display mode.
214
Page 215 of 436
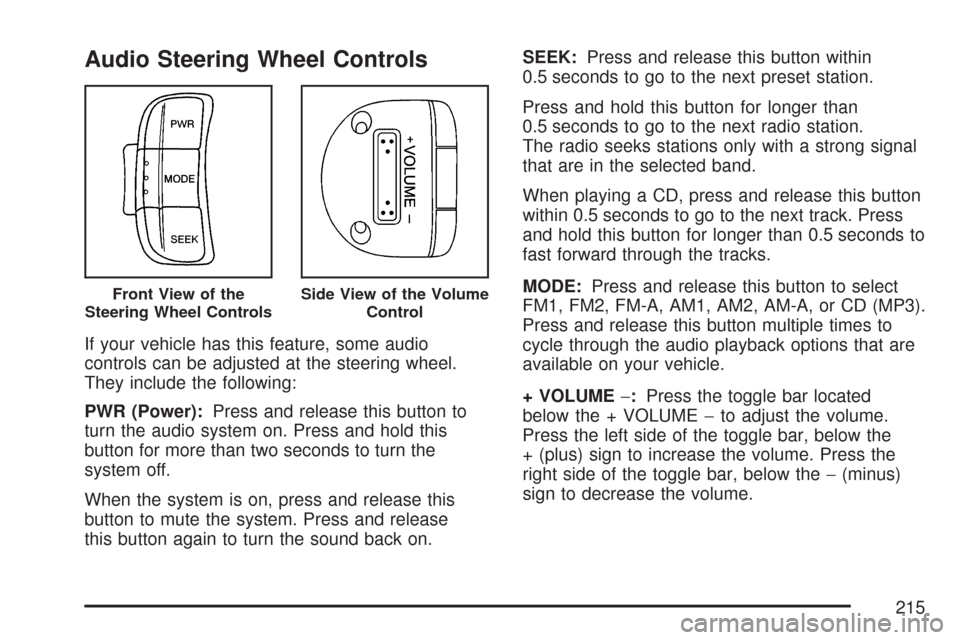
Audio Steering Wheel Controls
If your vehicle has this feature, some audio
controls can be adjusted at the steering wheel.
They include the following:
PWR (Power):Press and release this button to
turn the audio system on. Press and hold this
button for more than two seconds to turn the
system off.
When the system is on, press and release this
button to mute the system. Press and release
this button again to turn the sound back on.SEEK:Press and release this button within
0.5 seconds to go to the next preset station.
Press and hold this button for longer than
0.5 seconds to go to the next radio station.
The radio seeks stations only with a strong signal
that are in the selected band.
When playing a CD, press and release this button
within 0.5 seconds to go to the next track. Press
and hold this button for longer than 0.5 seconds to
fast forward through the tracks.
MODE:Press and release this button to select
FM1, FM2, FM-A, AM1, AM2, AM-A, or CD (MP3).
Press and release this button multiple times to
cycle through the audio playback options that are
available on your vehicle.
+ VOLUME−:Press the toggle bar located
below the + VOLUME−to adjust the volume.
Press the left side of the toggle bar, below the
+ (plus) sign to increase the volume. Press the
right side of the toggle bar, below the−(minus)
sign to decrease the volume.
Front View of the
Steering Wheel ControlsSide View of the Volume
Control
215
Page 225 of 436
Avoid needless heavy braking. Some people drive
in spurts — heavy acceleration followed by heavy
braking — rather than keeping pace with traffic.
This is a mistake. The brakes may not have time to
cool between hard stops. The brakes will wear out
much faster if you do a lot of heavy braking. If you
keep pace with the traffic and allow realistic
following distances, you will eliminate a lot of
unnecessary braking. That means better braking
and longer brake life.
If your vehicle’s engine ever stops while you are
driving, brake normally but do not pump the
brakes. If you do, the pedal may get harder to
push down. If the engine stops, you will still have
some power brake assist. But you will use it
when you brake. Once the power assist is used
up, it may take longer to stop and the brake pedal
will be harder to push.
Adding non-GM accessories can affect your
vehicle’s performance. SeeAccessories and
Modifications on page 264.Anti-Lock Brake System (ABS)
Your vehicle might have the Anti-Lock Brake
System (ABS), an advanced electronic braking
system that will help prevent a braking skid.
If your vehicle has ABS,
this warning light will
come on briefly
when you start your
vehicle.
The warning light is on the instrument panel
cluster for a sedan. SeeAnti-Lock Brake System
Warning Light on page 179. For hatchback
models, the warning light is on the Secondary
Information Center (SIC). SeeAnti-Lock Brake
System Warning Light on page 179.
225
Page 410 of 436
In many instances, mechanical failures are
covered under Chevrolet’s Bumper-to-Bumper
warranty, and the duration of the Base Warranty
Coverage for Canadian customers of the new
Vehicle Limited Warranty. However, any cost for
parts and labor for non-warranty repairs are
the responsibility of the driver.
For prompt and efficient assistance when calling,
please provide the following to the Roadside
Assistance Representative:
•Your name, home address, and home
telephone number.
•Telephone number of your location.
•Location of the vehicle.
•Model, year, color, and license plate number.
•Odometer reading, Vehicle Identification
Number (VIN), and delivery date of the vehicle.
•Description of the problem.While we hope you never have the occasion to
use our service, it is added security while traveling
for you and your family. Remember, we are
only a phone call away. U.S. customers call
Chevrolet Roadside Assistance:1-800-CHEV-USA
(1-800-243-8872), text telephone (TTY) users,
call1-888-889-2438, Canadian customers
call1-800-268-6800.
Chevrolet and General Motors of Canada Limited
reserve the right to limit services or reimbursement
to an owner or driver when, in their sole
discretion, the claims become excessive in
frequency or type of occurrence.
Roadside Assistance is not part of or included in
the coverage provided by the New Vehicle Limited
Warranty. Chevrolet and General Motors of
Canada Limited reserve the right to make any
changes or discontinue the Roadside Assistance
program at any time without notification.
410