2007 CHEVROLET AVEO ECO mode
[x] Cancel search: ECO modePage 3 of 436
GENERAL MOTORS, GM, the GM Emblem,
CHEVROLET, the CHEVROLET Emblem, and
the name AVEO are registered trademarks
of General Motors Corporation.
This manual includes the latest information at
the time it was printed. We reserve the right
to make changes after that time without further
notice. For vehicles first sold in Canada, substitute
the name “General Motors of Canada Limited”
for Chevrolet Motor Division whenever it appears
in this manual.This manual describes features that may be
available in this model, but your vehicle may not
have all of them. For example, more than one
entertainment system may be offered or your
vehicle may have been ordered without a front
passenger or rear seats.
Keep this manual in the vehicle, so it will be there
if it is needed while you are on the road. If the
vehicle is sold, leave this manual in the vehicle.
Canadian Owners
A French language copy of this manual can be
obtained from your dealer/retailer or from:
Helm, Incorporated
P.O. Box 07130
Detroit, MI 48207
Litho in U.S.A.
Part No. 15876628 B Second Printing
©2006 General Motors Corporation. All Rights Reserved.
3
Page 60 of 436
2. If the child restraint manufacturer recommends
that the top tether be attached, attach and
tighten the top tether to the top tether anchor,
if equipped. Refer to the child restraint
instructions and the following steps:
2.1. Find the top tether anchor.
2.2. Flip the cover to access the top tether
anchors.
2.3. For hatchback models, remove the
cargo shade before installing the top
tether. The cargo shade should remain
off while the top tether is in use.
2.4. Raise the head restraint if the desired
seating position has an adjustable head
restraint. SeeHead Restraints on
page 12.2.5. Route and tighten the top tether
according to your child restraint
instructions and the following
instructions:
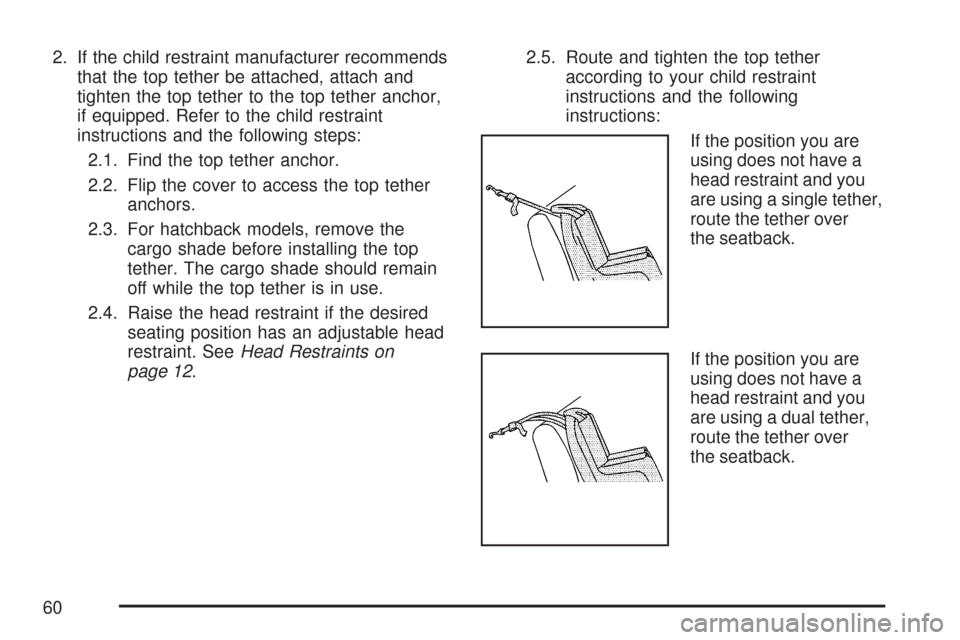
If the position you are
using does not have a
head restraint and you
are using a single tether,
route the tether over
the seatback.
If the position you are
using does not have a
head restraint and you
are using a dual tether,
route the tether over
the seatback.
60
Page 104 of 436
Arming the System
To arm the system, do the following:
1. Close the doors, the windows, the hood, and
the trunk or liftgate.
Ensure that the windows are closed, as the
system can be armed even if the windows
are open.
2. Turn the key to LOCK and remove the key
from the ignition.
If the key is inserted in the ignition, the
transmitter will not arm the theft-deterrent
system.
3. Lock the doors by pressing the lock button on
the remote keyless entry transmitter.
•The LED light on the transmitter will
flash once.
•All of the doors will lock.
•The hazard warning lamps will flash once
and the horn will chirp.
•The security light will flash to indicate that
the theft-deterrent system is armed. For
hatchback models, the security light
is located on the secondary information
center (SIC) on the center of the instrument
panel. SeeSecondary Information Center
(SIC) (Hatchback Only) on page 174.
For sedan models, the security light is
located on the center of the instrument
panel near the clock. SeeInstrument Panel
Overview on page 132.
To avoid activating the alarm by accident, do one
of the following:
•Unlock the driver’s or passenger’s front door
using the key.
•Press the unlock button on the remote keyless
entry transmitter.
Unlocking a door any other way will activate the
alarm when a door or the trunk or liftgate is
opened.
If you do not want to arm the theft-deterrent
system, lock the vehicle using the key or the
manual door locks.
104
Page 105 of 436
Disarming the System
To disarm the system, do one of the following:
•Unlock the driver’s or passenger’s front
door using the key.
•Press the unlock button on the remote keyless
entry transmitter.
- The LED light on the transmitter will
flash once.
- All of the doors will unlock.
- The hazard warning lamps will
flash twice.
If the door is not opened or if the engine is not
started within 30 seconds after disarming the
system using the transmitter, all of the doors will
automatically lock and the theft-deterrent mode will
rearm.
How the System Alarm is Activated
If a door or the trunk or liftgate is opened without
using the key or the remote keyless entry
transmitter, the horn will sound and the lamps will
flash for up to 30 seconds.
How to Turn Off the System Alarm
If the system alarm is active, it can be deactivated
using one of the following methods:
•Press the lock or unlock buttons on the
remote keyless entry transmitter.
•Unlock the driver’s or passenger’s front door
using the key.
Otherwise, the alarm will automatically stop after
30 seconds. The system will then lock the
doors and rearm the theft-deterrent system.
How to Detect a Tamper Condition
If the hazard warning lamps flash once when you
press the lock or unlock buttons on the remote
keyless entry transmitter, the theft-deterrent
system alarm was activated while you were away.
105
Page 114 of 436
AUTOMATIC OVERDRIVE (D4):This position is
for normal driving.
When operating your vehicle in severe cold
conditions, the transaxle may be prevented from
shifting into D4 gear until the transaxle fluid
has warmed up to it’s operational temperature.
Notice:If your vehicle seems to start up rather
slowly or not shift gears when you go faster,
and you continue to drive your vehicle that
way, you could damage the transaxle.
Have your vehicle serviced right away. You
can drive in SECOND (2) when you are driving
less than 35 mph (55 km/h) and AUTOMATIC
OVERDRIVE (D4) for higher speeds until then.
SECOND (2):This position gives you more
power but lower fuel economy. You can use
SECOND (2) on hills. It can help control your
speed as you go down steep mountain roads,
but then you would also want to use your brakes
off and on.Notice:Do not drive in SECOND (2) at speeds
over 65 mph (105 km/h), or you can damage the
transaxle. Use AUTOMATIC OVERDRIVE (D4) as
much as possible. Do not shift into SECOND (2)
unless you are going slower than 65 mph
(105 km/h) or you can damage your engine.
FIRST (1):This position gives you even more
power but lower fuel economy than SECOND (2).
You can use it on very steep hills, or in deep
snow or mud. If the shift lever is put in FIRST (1),
the transaxle will not shift into first gear until
the vehicle is going slowly enough.
Notice:Spinning the tires or holding the
vehicle in one place on a hill using only the
accelerator pedal may damage the transaxle. If
you are stuck, do not spin the tires. When
stopping on a hill, use the brakes, or parking
brake to hold the vehicle in place.
If there is a malfunction with the automatic
transaxle, the malfunction indicator lamp (MIL) or
the HOLD indicator light will turn on or flash.
SeeMalfunction Indicator Lamp on page 180or
Hold Mode Light on page 180.
Have your vehicle fixed as soon as possible.
114
Page 115 of 436
Hold Mode
If your vehicle’s transaxle has hold mode, you can
select this mode to drive with some characteristics
of a manual transaxle. With hold mode turned
on, the automatic transaxle will stay in a specific
gear range.
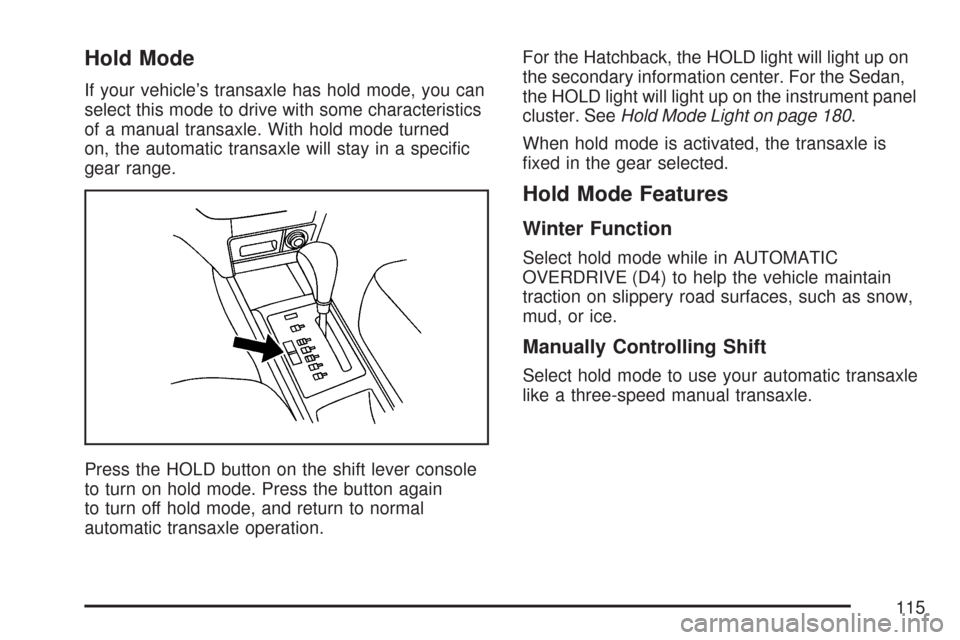
Press the HOLD button on the shift lever console
to turn on hold mode. Press the button again
to turn off hold mode, and return to normal
automatic transaxle operation.For the Hatchback, the HOLD light will light up on
the secondary information center. For the Sedan,
the HOLD light will light up on the instrument panel
cluster. SeeHold Mode Light on page 180.
When hold mode is activated, the transaxle is
fixed in the gear selected.
Hold Mode Features
Winter Function
Select hold mode while in AUTOMATIC
OVERDRIVE (D4) to help the vehicle maintain
traction on slippery road surfaces, such as snow,
mud, or ice.
Manually Controlling Shift
Select hold mode to use your automatic transaxle
like a three-speed manual transaxle.
115
Page 130 of 436
Cruise Control Light.................................. 171
Highbeam On Light................................... 171
Daytime Running Lamps (DRL)
Indicator Light........................................ 171
Door Ajar Light.......................................... 172
Fuel Gage................................................. 172
Low Fuel Warning Light............................ 173
Secondary Information Center (SIC).......... 174
Secondary Information Center (SIC)
(Hatchback Only)................................... 174
Clock (Hatchback Only)............................. 175
Safety Belt Reminder Light........................ 175
Airbag Readiness Light............................. 176
Passenger Airbag Status Indicator
(Hatchback)............................................ 177
Charging System Light.............................. 179
Anti-Lock Brake System Warning Light...... 179
Hold Mode Light........................................ 180
Malfunction Indicator Lamp........................ 180Oil Pressure Light..................................... 184
Fog Lamp Light......................................... 185
Door Ajar Light.......................................... 185
Audio System(s)......................................... 186
AM-FM Radio (Single Display,
Base Level)........................................... 187
AM-FM Radio (Double Display,
Base Level)........................................... 189
Radio with CD (MP3/WMA)....................... 193
Radio with Six-Disc CD (MP3/WMA)......... 200
Using an MP3 (Radio with CD Player)...... 207
Using an MP3 (Radio with Six-Disc
Player)................................................... 211
Audio Steering Wheel Controls.................. 215
Radio Reception........................................ 216
Care of Your CDs..................................... 216
Care of the CD Player.............................. 216
Fixed Mast Antenna (Hatchback)............... 217
Backglass Antenna (Sedan)....................... 217
Section 3 Instrument Panel
130
Page 152 of 436
On hot days, open the windows to let hot inside
air escape; then close them. This helps to reduce
the time it takes for your vehicle to cool down.
It also helps the system to operate more efficiently.
For quick cool down on hot days, do the
following:
1. Select the vent mode.
2. Select the highest fan speed.
3. Press the A/C button.
4. Select the recirculation mode.
5. Select the coolest temperature.
Using these settings together for long periods of
time may cause the air inside of your vehicle
to become too dry. To prevent this from
happening, after the air in your vehicle has cooled,
turn the recirculation mode off.
The air conditioning system removes moisture
from the air, so you may sometimes notice a small
amount of water dripping underneath your
vehicle while idling or after turning off the engine.
This is normal.Defogging and Defrosting
Fog on the inside of windows is a result of high
humidity or moisture condensing on the cool
window glass. This can be minimized if the climate
control system is used properly. There are two
modes to clear fog or frost from your windshield.
Use the defog mode to clear the windows of
fog or moisture and warm the passengers. Use
the defrost mode to remove fog or frost from
the windshield more quickly.
For best results, clear all snow and ice from the
windshield before defrosting.
Select one of these available modes from the
right knob.
0(Defog):This mode directs most of the air to
the windshield and the floor outlets. A small
amount of air is also directed to the outboard
outlets for the side windows and to the instrument
panel side outlets. When you select this mode,
the system runs the air-conditioning compressor.
To defog the windows faster, turn the temperature
control knob clockwise to the warmest setting.
152