2007 CHEVROLET AVALANCHE sunroof
[x] Cancel search: sunroofPage 1 of 618

Seats and Restraint Systems
....................... 7
Front Seats
.............................................. 9
Rear Seats
............................................. 19
Safety Belts
............................................ 21
Child Restraints
...................................... 45
Airbag System
........................................ 72
Restraint System Check
......................... 88
Features and Controls
................................ 91
Keys
....................................................... 93
Doors and Locks
.................................. 102
Windows
............................................... 116
Theft-Deterrent Systems
....................... 118
Starting and Operating Your Vehicle
....... 122
Mirrors
.................................................. 145
OnStar
®System
................................... 156Universal Home Remote System
.......... 159
Storage Areas
...................................... 170
Sunroof
................................................ 199
Instrument Panel
....................................... 201
Instrument Panel Overview
................... 204
Climate Controls
................................... 227
Warning Lights, Gages, and
Indicators
.......................................... 239
Driver Information Center (DIC)
............ 257
Audio System(s)
................................... 286
Driving Your Vehicle
................................. 351
Your Driving, the Road, and
Your Vehicle
..................................... 352
Towing
................................................. 408
2007 Chevrolet Avalanche Owner ManualM
1
Page 92 of 618

Automatic Dimming Rearview Mirror with
Compass and Temperature Display......... 148
Outside Power Mirrors............................... 152
Outside Power Foldaway Mirrors............... 153
OnStar
®System.......................................... 156
Universal Home Remote System................ 159
Universal Home Remote System
(With Three Round LED)....................... 159
Universal Home Remote System
(With One Triangular LED)..................... 160
Universal Home Remote
System Operation
(With Three Round LED)....................... 161
Universal Home Remote
System Operation
(With One Triangular LED)..................... 166Storage Areas............................................. 170
Glove Box................................................. 170
Cupholder(s).............................................. 170
Center Overhead Console......................... 171
Front Armrest Storage Area....................... 171
Center Console Storage Area.................... 171
Luggage Carrier........................................ 171
Rear Storage Area.................................... 173
Cargo Cover Panels.................................. 173
All-Weather Cargo Area............................. 186
Top-Box Storage....................................... 191
Tonneau Cover......................................... 192
Sunroof....................................................... 199
Section 2 Features and Controls
92
Page 124 of 618

Key In the Ignition
Never leave your vehicle with the keys inside,
as it is an easy target for joy riders or thieves.
If you leave the key in the ignition and park your
vehicle, a chime will sound, when you open
the driver’s door. Always remember to remove
your key from the ignition and take it with you.
This will lock your ignition and transmission.
Also, always remember to lock the doors.
The battery could be drained if you leave the
key in the ignition while your vehicle is parked.
You may not be able to start your vehicle after
it has been parked for an extended period
of time.
Retained Accessory Power (RAP)
Your vehicle has a Retained Accessory
Power (RAP) feature which will allow certain
features on your vehicle to continue to work
up to 10 minutes after the ignition key is
turned to LOCK.The radio, power windows, if the vehicle has a
sunroof and the OnStar
®System, will work when
the ignition key is in RUN or ACCESSORY.
Once the key is turned from RUN to LOCK, these
features will continue to work for up to 10 minutes
or until a door is opened.
Starting the Engine
To place the transmission in the proper gear:
Move your shift lever to PARK (P) or
NEUTRAL (N). Your engine will not start in
any other position -- this is a safety feature.
To restart when you are already moving,
use NEUTRAL (N) only.
Starting Procedure
1. With your foot off the accelerator pedal, turn
the ignition key to START. When the engine
starts, let go of the key. The idle speed will go
down as your engine gets warm. Do not
race the engine immediately after starting it.
Operate the engine and transmission gently to
allow the oil to warm up and lubricate all
moving parts.
124
Page 199 of 618

Sunroof
Your vehicle may be equipped with a power
sliding sunroof. To open or close the sunroof,
the ignition needs to be turned to ON, or Retained
Accessory Power (RAP) must be active. When
RAP is active, the sunroof will work for 10 minutes
after the ignition is turned off, or until a front
door is opened. SeeRetained Accessory Power
(RAP) on page 124for more information.
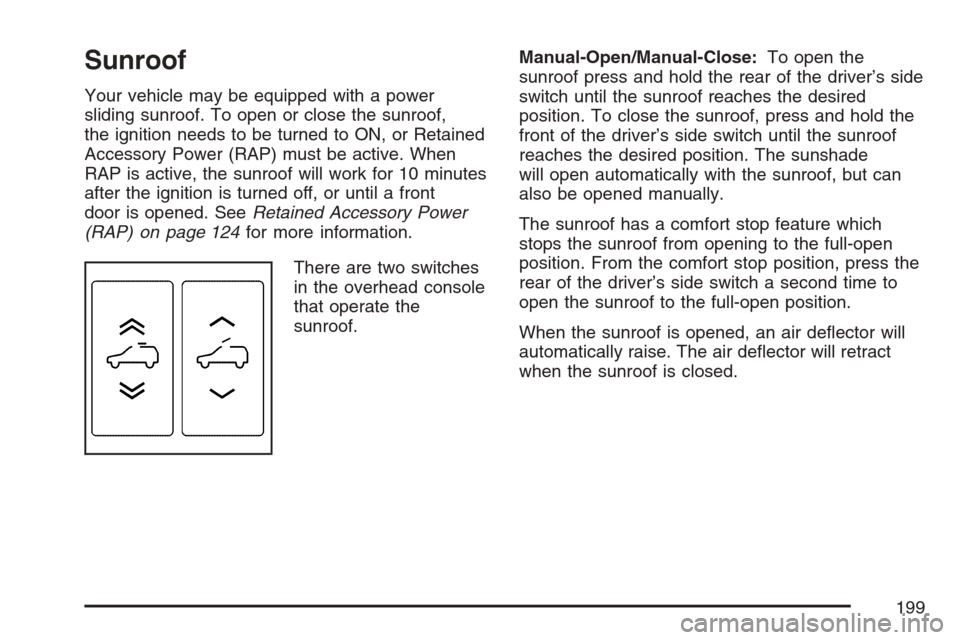
There are two switches
in the overhead console
that operate the
sunroof.Manual-Open/Manual-Close:To open the
sunroof press and hold the rear of the driver’s side
switch until the sunroof reaches the desired
position. To close the sunroof, press and hold the
front of the driver’s side switch until the sunroof
reaches the desired position. The sunshade
will open automatically with the sunroof, but can
also be opened manually.
The sunroof has a comfort stop feature which
stops the sunroof from opening to the full-open
position. From the comfort stop position, press the
rear of the driver’s side switch a second time to
open the sunroof to the full-open position.
When the sunroof is opened, an air de�ector will
automatically raise. The air de�ector will retract
when the sunroof is closed.
199
Page 200 of 618

Express-Open/Express-Close:To express-open
the sunroof, fully press and release the rear of
the driver’s side switch. The sunroof will open
automatically. To stop the sunroof partway, press
the switch a second time. To express-close
the sunroof, fully press and release the front of
the driver’s side switch. The sunroof will close
automatically. To stop the sunroof partway, press
the switch a second time. The sunshade will
open automatically with the sunroof, but can also
be opened manually.
The sunroof has a comfort stop feature which
stops the sunroof from opening to the full-open
position. From the comfort stop position, press the
rear of the driver’s side switch a second time to
open the sunroof to the full-open position.
When the sunroof is opened, an air de�ector will
automatically raise. The air de�ector will retract
when the sunroof is closed.Vent:The sunroof has an express-vent open
feature. From the closed position, press the rear
of the passenger’s side switch to vent the sunroof.
To stop the sunroof partway, press the switch a
second time. To close the sunroof, press and hold
the front of the passenger’s side switch. To
stop the sunroof partway, release the switch.
Anti-Pinch Feature:If an object is in the path
of the sunroof while it is closing, the anti-pinch
feature will detect the object and stop the sunroof
from closing at the point of the obstruction.
The sunroof will then open halfway, and the air
de�ector will raise. To close the sunroof once
it has re-opened, refer to the “Express-Close” or
“Manual-Close” functions described previously.
If the sunroof is in the vent position, and there
is an object in the path of the sunroof when
it closing, the anti-pinch feature will detect the
object and stop the sunroof. To close the sunroof
once it has re-opened, refer to the “Manual-Close”
or “Express-Close” functions described previously.
200
Page 349 of 618

Care of Your CDs and DVDs
Handle CDs carefully. Store them in their original
cases or other protective cases and away from
direct sunlight and dust. The CD player scans
the bottom surface of the disc. If the surface of a
CD is damaged, such as cracked, broken, or
scratched, the CD does not play properly or not
at all. If the surface of a CD is soiled, take a soft,
lint free cloth or dampen a clean, soft cloth in
a mild, neutral detergent solution mixed with
water, and clean it. Make sure the wiping process
starts from the center to the edge.
Do not touch the bottom side of a CD while
handling it; this could damage the surface.
Pick up CDs by grasping the outer edges or
the edge of the hole and the outer edge.
Care of the CD and DVD Player
The use of CD lens cleaners for CDs is not
advised, due to the risk of contaminating the
lens of the CD optics with lubricants internal to
the CD mechanism.
Fixed Mast Antenna
The �xed mast antenna can withstand most car
washes without being damaged. If the mast should
ever become slightly bent, straighten it out by
hand. If the mast is badly bent, replace it.
Check occasionally to make sure the mast
is still tightened to its base. If tightening is
required, tighten by hand, then with a wrench
one quarter turn.
XM™ Satellite Radio Antenna
System
The XM™ Satellite Radio antenna is located on
the roof of your vehicle. Keep this antenna clear
of snow and ice build up for clear radio reception.
A vehicle with a sunroof might not get the best
performance from the XM™ system if the sunroof
is open.
Loading items onto the roof of your vehicle can
interfere with the performance of the XM™ system.
Make sure the XM™ Satellite Radio antenna is
not obstructed.
349
Page 554 of 618

Fuses Usage
30 Daytime Running Lamps
31Driver’s Side High-Beam
Headlamp
32 Not Used
33 Sunroof
34Key Ignition System,
Theft Deterrent System
35 Windshield Wiper
36 SEO B2 Up�tter Usage (Battery)
37 Electric Adjustable Pedals
38 Climate Controls (Battery)
39 Airbag System (Ignition)
40 Ampli�er
41 Audio System
42 Four-Wheel Drive
43Miscellaneous (Ignition),
Rear Vision Camera,
Cruise ControlFuses Usage
44 Liftgate Release
45OnStar
®, Rear Seat
Entertainment Display
46 Instrument Panel Cluster
47 Not Used
48 Not Used
49Auxiliary Climate Control (Ignition),
Compass-Temperature Mirror
50 Rear Defogger
51 Airbag System (Battery)
52 SEO B1 Up�tter Usage (Battery)
53Cigarette Lighter, Auxiliary
Power Outlet
54Automatic Level Control
Compressor Relay,
SEO Up�tter Usage
55 Climate Controls (Ignition)
56Engine Control Module,
Secondary Fuel Pump (Ignition)
554
Page 615 of 618

Seats (cont.)
Rear Seat Operation.................................. 19
Reclining Seatbacks................................... 14
Secondary Latch System............................. 529
Securing a Child Restraint
Center Front Seat Position......................... 67
Rear Seat Position..................................... 65
Right Front Seat Position........................... 68
Security Light.............................................. 255
Service........................................................ 432
Accessories and Modi�cations.................. 433
Adding Equipment to the Outside
of Your Vehicle..................................... 435
California Proposition 65 Warning............. 433
Doing Your Own Work............................. 434
Engine Soon Light................................... 250
Publications Ordering Information............. 600
Servicing Your Airbag-Equipped
Vehicle....................................................... 86
Sheet Metal Damage................................... 544
Shifting Into Park (P)................................... 139
Shifting Out of Park (P)............................... 141
Shoulder Belt Height Adjuster........................ 34
Signals, Turn and Lane-Change.................. 208Spare Tire................................................... 536
Installing.................................................. 522
Removing................................................ 518
Storing..................................................... 533
Speci�cations, Capacities............................ 556
Speedometer............................................... 241
StabiliTrak
®System..................................... 359
StabiliTrak®Indicator Light........................... 248
Starting Your Engine................................... 124
Steering...................................................... 363
Steering Wheel Controls, Audio................... 347
Steering Wheel, Tilt Wheel.......................... 207
Storage Areas
All-Weather Cargo Area........................... 186
Center Console Storage Area................... 171
Center Overhead Console........................ 171
Cupholder(s)............................................ 170
Front Armrest Storage Area...................... 171
Glove Box................................................ 170
Luggage Carrier....................................... 171
Rear Storage Area................................... 173
Top-Box Storage...................................... 191
Stuck in Sand, Mud, Ice, or Snow............... 400
Sun Visors.................................................. 118
Sunroof....................................................... 199
615