2007 CHEVROLET AVALANCHE roof
[x] Cancel search: roofPage 87 of 618

Adding Equipment to Your
Airbag-Equipped Vehicle
Q:Is there anything I might add to the front
or sides of the vehicle that could keep
the airbags from working properly?
A:Yes. If you add things that change your
vehicle’s frame, bumper system, height, front
end or side sheet metal, they may keep the
airbag system from working properly. Also,
the airbag system may not work properly if you
relocate any of the airbag sensors. If you have
any questions about this, you should contact
Customer Assistance before you modify your
vehicle. The phone numbers and addresses
for Customer Assistance are in Step Two of
the Customer Satisfaction Procedure in this
manual. SeeCustomer Satisfaction Procedure
on page 582.
Q:Because I have a disability, I have to get
my vehicle modi�ed. How can I �nd out
whether this will affect my airbag system?
A:Changing or moving any parts of the
front seats, safety belts, the airbag sensing
and diagnostic module, rollover sensor
module, steering wheel, instrument panel,
overhead console, ceiling headliner, ceiling
and pillar garnish trim, roof-mounted rollover
airbag modules, or airbag wiring can affect the
operation of the airbag system. If you have
questions, call Customer Assistance. The
phone numbers and addresses for Customer
Assistance are in Step Two of the Customer
Satisfaction Procedure in this manual.
SeeCustomer Satisfaction Procedure
on page 582.
87
Page 88 of 618

Restraint System Check
Checking the Restraint Systems
Now and then, make sure the safety belt reminder
light and all your belts, buckles, latch plates,
retractors and anchorages are working properly.
Look for any other loose or damaged safety
belt system parts. If you see anything that might
keep a safety belt system from doing its job,
have it repaired. Keep safety belts clean and
dry. SeeCare of Safety Belts on page 540
for more information.
Torn or frayed safety belts may not protect you in
a crash. They can rip apart under impact forces.
If a belt is torn or frayed, get a new one right away.Also look for any opened or broken airbag covers,
and have them repaired or replaced. The airbag
system does not need regular maintenance.
Notice:If you damage the covering for the
driver’s or the right front passenger’s airbag,
or the side impact airbag covering on the
ceiling near the side windows, the airbag may
not work properly. You may have to replace
the airbag module in the steering wheel, both
the airbag module and the instrument panel
for the right front passenger’s airbag, or
side impact airbag module and ceiling covering
for roof-mounted rollover airbags (if equipped).
Do not open or break the airbag coverings.
88
Page 92 of 618

Automatic Dimming Rearview Mirror with
Compass and Temperature Display......... 148
Outside Power Mirrors............................... 152
Outside Power Foldaway Mirrors............... 153
OnStar
®System.......................................... 156
Universal Home Remote System................ 159
Universal Home Remote System
(With Three Round LED)....................... 159
Universal Home Remote System
(With One Triangular LED)..................... 160
Universal Home Remote
System Operation
(With Three Round LED)....................... 161
Universal Home Remote
System Operation
(With One Triangular LED)..................... 166Storage Areas............................................. 170
Glove Box................................................. 170
Cupholder(s).............................................. 170
Center Overhead Console......................... 171
Front Armrest Storage Area....................... 171
Center Console Storage Area.................... 171
Luggage Carrier........................................ 171
Rear Storage Area.................................... 173
Cargo Cover Panels.................................. 173
All-Weather Cargo Area............................. 186
Top-Box Storage....................................... 191
Tonneau Cover......................................... 192
Sunroof....................................................... 199
Section 2 Features and Controls
92
Page 124 of 618

Key In the Ignition
Never leave your vehicle with the keys inside,
as it is an easy target for joy riders or thieves.
If you leave the key in the ignition and park your
vehicle, a chime will sound, when you open
the driver’s door. Always remember to remove
your key from the ignition and take it with you.
This will lock your ignition and transmission.
Also, always remember to lock the doors.
The battery could be drained if you leave the
key in the ignition while your vehicle is parked.
You may not be able to start your vehicle after
it has been parked for an extended period
of time.
Retained Accessory Power (RAP)
Your vehicle has a Retained Accessory
Power (RAP) feature which will allow certain
features on your vehicle to continue to work
up to 10 minutes after the ignition key is
turned to LOCK.The radio, power windows, if the vehicle has a
sunroof and the OnStar
®System, will work when
the ignition key is in RUN or ACCESSORY.
Once the key is turned from RUN to LOCK, these
features will continue to work for up to 10 minutes
or until a door is opened.
Starting the Engine
To place the transmission in the proper gear:
Move your shift lever to PARK (P) or
NEUTRAL (N). Your engine will not start in
any other position -- this is a safety feature.
To restart when you are already moving,
use NEUTRAL (N) only.
Starting Procedure
1. With your foot off the accelerator pedal, turn
the ignition key to START. When the engine
starts, let go of the key. The idle speed will go
down as your engine gets warm. Do not
race the engine immediately after starting it.
Operate the engine and transmission gently to
allow the oil to warm up and lubricate all
moving parts.
124
Page 171 of 618

Center Overhead Console
Your vehicle may have an overhead console
with reading lights and a small storage area.
Press the button next to the light to turn it
on and off.
Front Armrest Storage Area
Your vehicle may have a center armrest storage
compartment in the front bench seat.
To open it, fold down the armrest and press the
latch handle located at the front of the armrest.
Then, let the cover pop up and swing open.
Center Console Storage Area
Your vehicle may have a console compartment
with cupholders between the bucket seats.
To open it, press the button and lift the console
cover open.
The rear of the console has a cupholder that folds
down for the rear seat passenger to use.
Luggage Carrier
The vehicle may have a luggage carrier that can
be used to load things on top of the vehicle.
The luggage carrier has siderails attached to the
roof. It may also have crossrails which can be
moved back and forth to help secure cargo. Tie
the load to the siderails or siderail supports.
Notice:Loading cargo on the luggage carrier
that weighs more than 200 lbs (91 kg) or
hangs over the rear or sides of the vehicle
may damage your vehicle. Load cargo so
that it rests on the slats as far forward
as possible and against the side rails,
making sure to fasten it securely.
Do not exceed the maximum vehicle capacity
when loading your vehicle. For more information
on vehicle capacity and loading, seeLoading
Your Vehicle on page 402.
171
Page 172 of 618

To prevent damage or loss of cargo while you are
driving, check now and then to make sure the
luggage and cargo are still securely fastened.
Be sure the cargo is properly loaded.
If small heavy objects are placed on the roof,
cut a piece of 3/8 inch plywood to �t inside
the crossrails and siderails to spread the load.
Tie the plywood to the siderail supports.
Tie the load to the crossrails or the siderail
supports. Use the crossrails only to keep
the load from sliding. To move a crossrail, turn
the release knobs, on both sides of the rail,
counterclockwise to loosen it. Slide the
crossrail to the desired position balancing the
force side to side. Turn the release knobs,
on both sides of the rail, clockwise to tighten
it. Try to slide the crossrail back and forth
slightly to be sure it is tight.
If you need to carry long items, move the
crossrails as far apart as they will go. Tie
the load to the crossrails and the siderails
or siderail supports. Also tie the load to
the bumpers. Do not tie the load so tightly
that the crossrails or siderails are damaged.
After moving a crossrail, be sure it is securely
locked into the siderail.
Your vehicle has a Center High-Mounted
Stoplamp (CHMSL) located above the rear glass.
If items are loaded on the roof of the vehicle,
care should be taken not to block or damage
the CHMSL unit.
172
Page 199 of 618

Sunroof
Your vehicle may be equipped with a power
sliding sunroof. To open or close the sunroof,
the ignition needs to be turned to ON, or Retained
Accessory Power (RAP) must be active. When
RAP is active, the sunroof will work for 10 minutes
after the ignition is turned off, or until a front
door is opened. SeeRetained Accessory Power
(RAP) on page 124for more information.
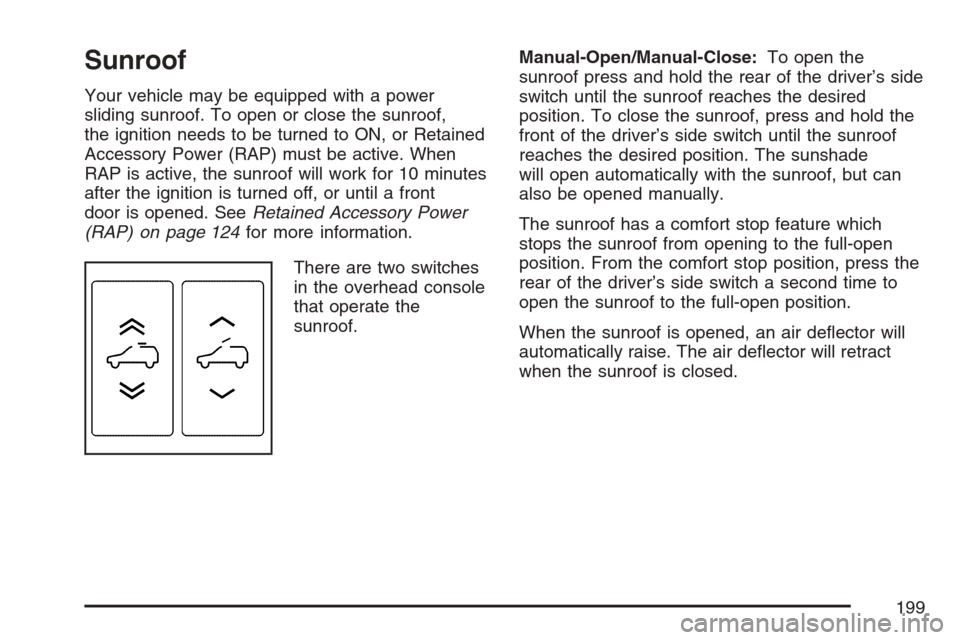
There are two switches
in the overhead console
that operate the
sunroof.Manual-Open/Manual-Close:To open the
sunroof press and hold the rear of the driver’s side
switch until the sunroof reaches the desired
position. To close the sunroof, press and hold the
front of the driver’s side switch until the sunroof
reaches the desired position. The sunshade
will open automatically with the sunroof, but can
also be opened manually.
The sunroof has a comfort stop feature which
stops the sunroof from opening to the full-open
position. From the comfort stop position, press the
rear of the driver’s side switch a second time to
open the sunroof to the full-open position.
When the sunroof is opened, an air de�ector will
automatically raise. The air de�ector will retract
when the sunroof is closed.
199
Page 200 of 618

Express-Open/Express-Close:To express-open
the sunroof, fully press and release the rear of
the driver’s side switch. The sunroof will open
automatically. To stop the sunroof partway, press
the switch a second time. To express-close
the sunroof, fully press and release the front of
the driver’s side switch. The sunroof will close
automatically. To stop the sunroof partway, press
the switch a second time. The sunshade will
open automatically with the sunroof, but can also
be opened manually.
The sunroof has a comfort stop feature which
stops the sunroof from opening to the full-open
position. From the comfort stop position, press the
rear of the driver’s side switch a second time to
open the sunroof to the full-open position.
When the sunroof is opened, an air de�ector will
automatically raise. The air de�ector will retract
when the sunroof is closed.Vent:The sunroof has an express-vent open
feature. From the closed position, press the rear
of the passenger’s side switch to vent the sunroof.
To stop the sunroof partway, press the switch a
second time. To close the sunroof, press and hold
the front of the passenger’s side switch. To
stop the sunroof partway, release the switch.
Anti-Pinch Feature:If an object is in the path
of the sunroof while it is closing, the anti-pinch
feature will detect the object and stop the sunroof
from closing at the point of the obstruction.
The sunroof will then open halfway, and the air
de�ector will raise. To close the sunroof once
it has re-opened, refer to the “Express-Close” or
“Manual-Close” functions described previously.
If the sunroof is in the vent position, and there
is an object in the path of the sunroof when
it closing, the anti-pinch feature will detect the
object and stop the sunroof. To close the sunroof
once it has re-opened, refer to the “Manual-Close”
or “Express-Close” functions described previously.
200