2007 CHEVROLET AVALANCHE rear view mirror
[x] Cancel search: rear view mirrorPage 210 of 618

You control the windshield wipers by turning the
band with the wiper symbol on it.
8(Mist):For a single wiping cycle, turn the
band to mist. Hold it there until the wipers start.
Then let go. The wipers will stop after
one wipe. If you want more wipe cycles, hold
the band on mist longer.
6(Delay):You can set the wiper speed for a long
or short delay between wiping cycles. This can
be very useful in light rain or snow. Turn the band
to choose the delay time. The closer to the top
of the lever, the shorter the delay.
6(Low Speed):For steady wiping at low
speed, turn the band away from you to the
�rst solid band past the delay settings.
1(High Speed):For high-speed wiping,
turn the band further, to the second solid band
past the delay settings.
9(Off):To stop the wipers, move the band to off.
Rainsense™ II Wipers
If your vehicle has Rainsense™ II windshield
wipers, the moisture sensor is located next to
the inside rearview mirror and is mounted on the
windshield. When active, these sensors are
able to detect moisture on the windshield and
automatically turn on the wipers.
To turn on the Rainsense™ feature, the wipers
must be set to one of the �ve delay settings on
the multifunction lever. Each of the �ve settings
adjusts the sensitivity of the rainsensor.
Since different drivers have different setting
preferences, it is recommended that the mid-range
setting (position 3) be used initially. For more
wipes, select the higher settings; for fewer wipes,
select the lower settings located closer to the
off position on the multifunction lever.
The rainsensor will automatically control the
frequency of the wipes from the off setting to
the high speed setting according to the weather
conditions. The wipers can be left in a rainsense
mode even when it is not raining.
Notice:Going through an automatic car
wash with the wipers on can damage them.
Turn the wipers off when going through
an automatic car wash.
210
Page 230 of 618

Rear Window Defogger
The rear window defogger uses a warming grid
to remove fog from the rear window.
<(Rear Window Defogger):Press this button
on the right knob to turn on the rear window
defogger. The system will automatically turn off
several minutes after it has been activated.
The defogger can also be turned off by pressing
the button again or by turning off the engine.
Do not drive the vehicle until all the windows
are clear.
If your vehicle has heated outside rearview
mirrors, the mirrors will heat to help clear fog
or frost from the surface of the mirror when
the rear window defog button is pressed.
Notice:Do not use anything sharp on the
inside of the rear window. If you do, you
could cut or damage the warming grid,
and the repairs would not be covered by
your warranty. Do not attach a temporary
vehicle license, tape, a decal or anything
similar to the defogger grid.
Dual Automatic Climate
Control System
With this system, you can control the heating,
cooling and ventilation in your vehicle. Your
vehicle also has a �ow-through ventilation system
described later in this section.
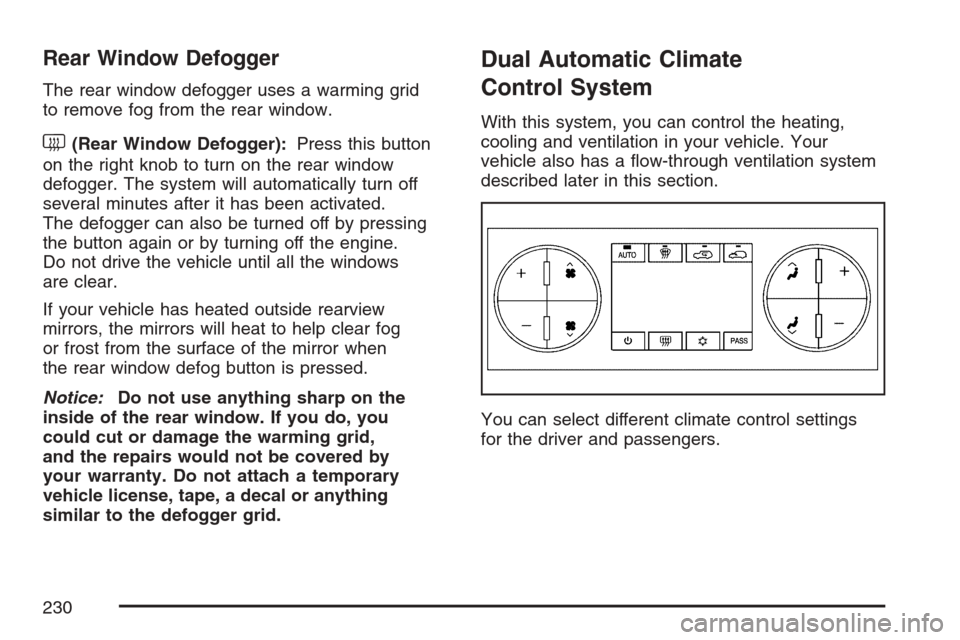
You can select different climate control settings
for the driver and passengers.
230
Page 238 of 618

Rear Window Defogger
The rear window defogger uses a warming grid
to remove fog from the rear window.
<(Rear Window Defogger):Press this button
to turn on the rear window defogger. It will
automatically turn off several minutes after it
has been activated. The defogger can also be
turned off by pressing the button again or by
turning off the engine. Do not drive the vehicle
until all the windows are clear.
If your vehicle has heated outside rearview
mirrors, the mirrors will heat to help clear fog
or frost from the surface of the mirror when
the rear window defog button is pressed.
Notice:Do not use a razor blade or sharp
object to clear the inside rear window. Do not
adhere anything to the defogger grid lines
in the rear glass. These actions may damage
the rear defogger. Repairs would not be
covered by your warranty.
Outlet Adjustment
Your vehicle has air outlets located in the center
and on the side of your instrument panel that
allow you to adjust the direction and amount of
air�ow inside the vehicle. Move the louvers up or
down. Use the thumbwheel next to or underneath
the outlet to close the louvers. For the most
efficient air�ow and temperature control, keep
the outlet in the fully opened position.
Operation Tips
Keep the hood and front air inlets free of ice,
snow, or any other obstruction, such as
leaves. The heater and defroster will work far
better, reducing the chance of fogging the
inside of your windows.
Keep the air path under the front seats clear
of objects. This helps air to circulate
throughout your vehicle.
Adding outside equipment to the front of your
vehicle, such as hood-air de�ectors, etc.,
may affect the performance of the heating
and air conditioning system. Check with
your dealer before adding equipment to the
outside of your vehicle.
238
Page 385 of 618

After Off-Road Driving
Remove any brush or debris that has collected
on the underbody, chassis, or under the hood.
These accumulations can be a �re hazard.
After operation in mud or sand, have the brake
linings cleaned and checked. These substances
can cause glazing and uneven braking. Check the
body structure, steering, suspension, wheels,
tires, and exhaust system for damage. Also, check
the fuel lines and cooling system for any leakage.
Your vehicle will require more frequent service
due to off-road use. Refer to the Maintenance
Schedule for additional information.
Driving at Night
Night driving is more dangerous than day driving.
One reason is that some drivers are likely to
be impaired — by alcohol or drugs, with night
vision problems, or by fatigue.
Here are some tips on night driving.
Drive defensively.
Do not drink and drive.
Adjust the inside rearview mirror to reduce the
glare from headlamps behind you.
Since you cannot see as well, you may need
to slow down and keep more space between
you and other vehicles.
Slow down, especially on higher speed roads.
Your vehicle’s headlamps can light up only so
much road ahead.
In remote areas, watch for animals.
If you are tired, pull off the road in a safe
place and rest.
385
Page 611 of 618

M
Maintenance Schedule
Additional Required Services.................... 566
At Each Fuel Fill...................................... 570
At Least Once a Month............................ 571
At Least Once a Year.............................. 571
Introduction.............................................. 560
Maintenance Footnotes............................ 568
Maintenance Record................................ 578
Maintenance Requirements...................... 560
Normal Maintenance
Replacement Parts............................... 576
Owner Checks and Services.................... 570
Recommended Fluids and Lubricants....... 574
Scheduled Maintenance........................... 563
Using....................................................... 561
Your Vehicle and the Environment............ 560
Malfunction Indicator Light........................... 250
Manual Seats.................................................. 9
Memory Seat, Mirrors, and Pedals................ 13
Message
DIC Warnings and Messages................... 267
Midgate
®..................................................... 105Mirrors
Automatic Dimming Rearview with
Compass and Temperature Display....... 148
Automatic Dimming Rearview
with OnStar
®, Compass and
Temperature Display............................. 145
Outside Power Foldaway Mirrors.............. 153
Outside Power Mirrors............................. 152
MP3 ...................................................319, 325
MyGMLink.com............................................ 585
N
Navigation/Radio System,
see Navigation Manual............................. 334
New Vehicle Break-In.................................. 122
Normal Maintenance Replacement Parts..... 576
611
Page 613 of 618

Pretensioners, Safety Belt............................. 44
Programmable Automatic Door Locks.......... 103
Q
Questions and Answers About
Safety Belts............................................... 25
R
Radios........................................................ 286
Care of Your CD and DVD Player............ 349
Care of Your CDs and DVDs................... 349
Navigation/Radio System,
see Navigation Manual......................... 334
Radio with CD......................................... 291
Radio with CD and DVD.......................... 301
Rear Seat Audio...................................... 345
Setting the Time.....................288, 289, 290
Theft-Deterrent......................................... 347
Understanding Reception......................... 348
Rainsense™ II Wipers................................. 210
Reading Lamps........................................... 220
Rear Axle.................................................... 482
Locking.................................................... 359Rear Door Security Locks........................... 104
Rear Safety Belt Comfort Guides.................. 41
Rear Seat Audio (RSA)............................... 345
Rear Seat Entertainment System................. 334
Rear Seat Operation..................................... 19
Rear Seat Passengers, Safety Belts.............. 37
Rear Storage Area...................................... 173
Rearview Mirror, Automatic Dimming with
Compass and Temperature Display.......... 148
Rearview Mirror, Automatic Dimming
with OnStar®, Compass and
Temperature Display................................ 145
Reclining Seatbacks...................................... 14
Recommended Fluids and Lubricants.......... 574
Recovery Hooks.......................................... 401
Recreational Vehicle Towing........................ 408
Remote Keyless Entry (RKE) System............ 94
Remote Keyless Entry (RKE)
System, Operation..................................... 95
Removing the Flat Tire and Installing
the Spare Tire.......................................... 522
Removing the Spare Tire and Tools............ 518
Replacement Bulbs..................................... 490
613