Page 12 of 50

Cockpit
10
Instrument cluster
For descriptions of equipment listed here
without a page reference, please refer to
the Owner's Manual for the BMW Z4 under the
respective term. <
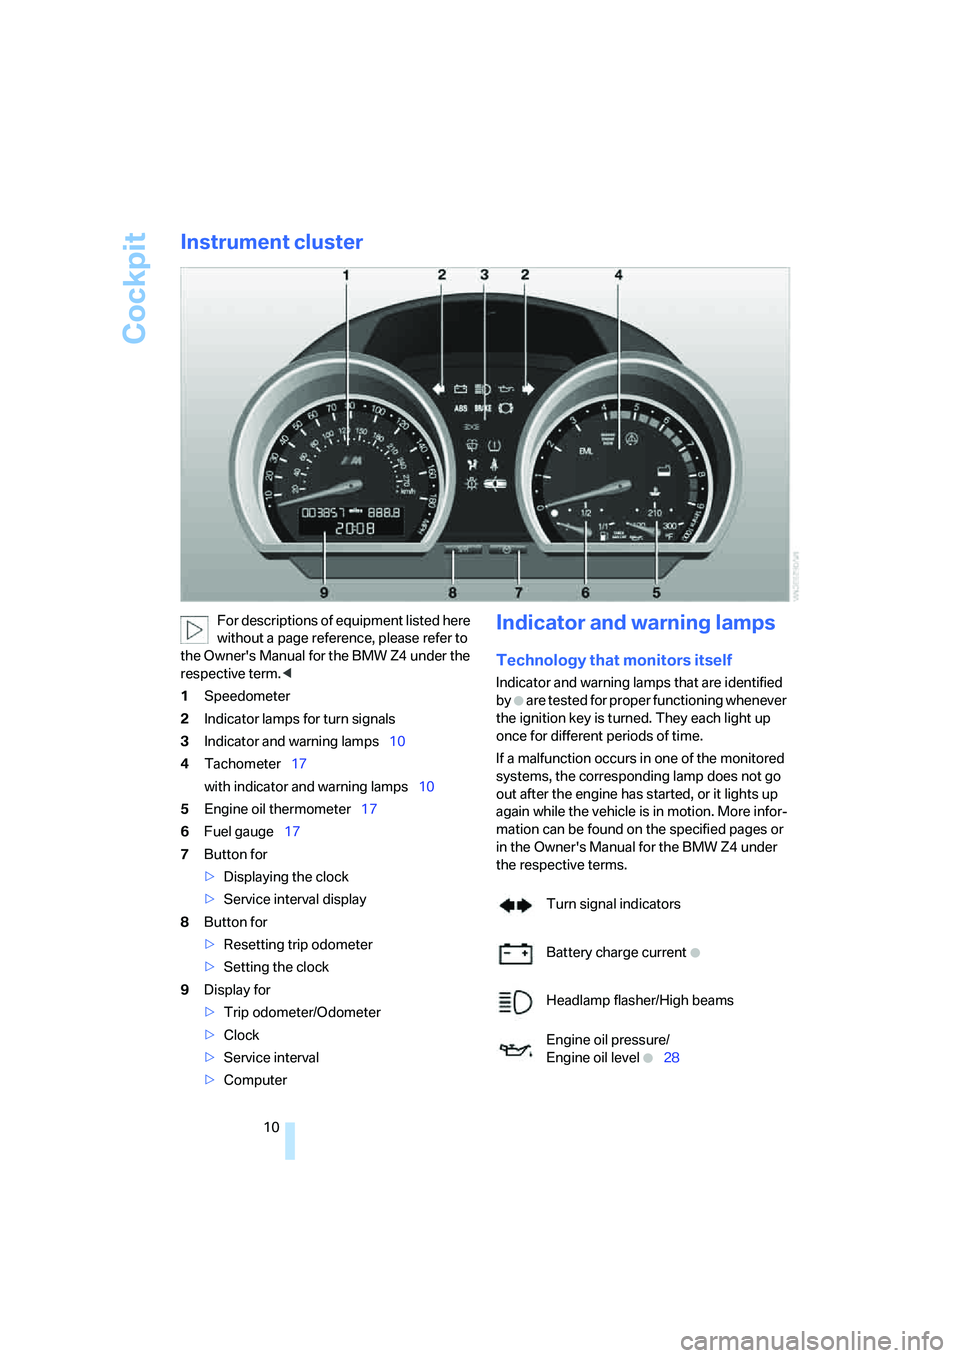
1 Speedometer
2 Indicator lamps for turn signals
3 Indicator and warning lamps 10
4 Tachometer 17
with indicator and warning lamps 10
5 Engine oil thermometer 17
6 Fuel gauge 17
7 Button for
>Displaying the clock
> Service interval display
8 Button for
>Resetting trip odometer
> Setting the clock
9 Display for
>Trip odometer/Odometer
> Clock
> Service interval
> ComputerIndicator and warning lamps
Technology that monitors itself
Indicator and warning lamps that are identified
by
+ are tested for proper functioning whenever
the ignition key is turned. They each light up
once for different periods of time.
If a malfunction occurs in one of the monitored
systems, the corresponding lamp does not go
out after the engine has started, or it lights up
again while the vehicle is in motion. More infor-
mation can be found on the specified pages or
in the Owner's Manual for the BMW Z4 under
the respective terms.
Turn signal indicators
Battery charge current
+
Headlamp flasher/High beams
Engine oil pressure/
Engine oil level
+28
Page 33 of 50

Reference
At a glance
Controls
Driving tips
Mobility
31
Replacing components
Onboard tool kit
The onboard tool kit is stored in a tool pouch.
Roadster
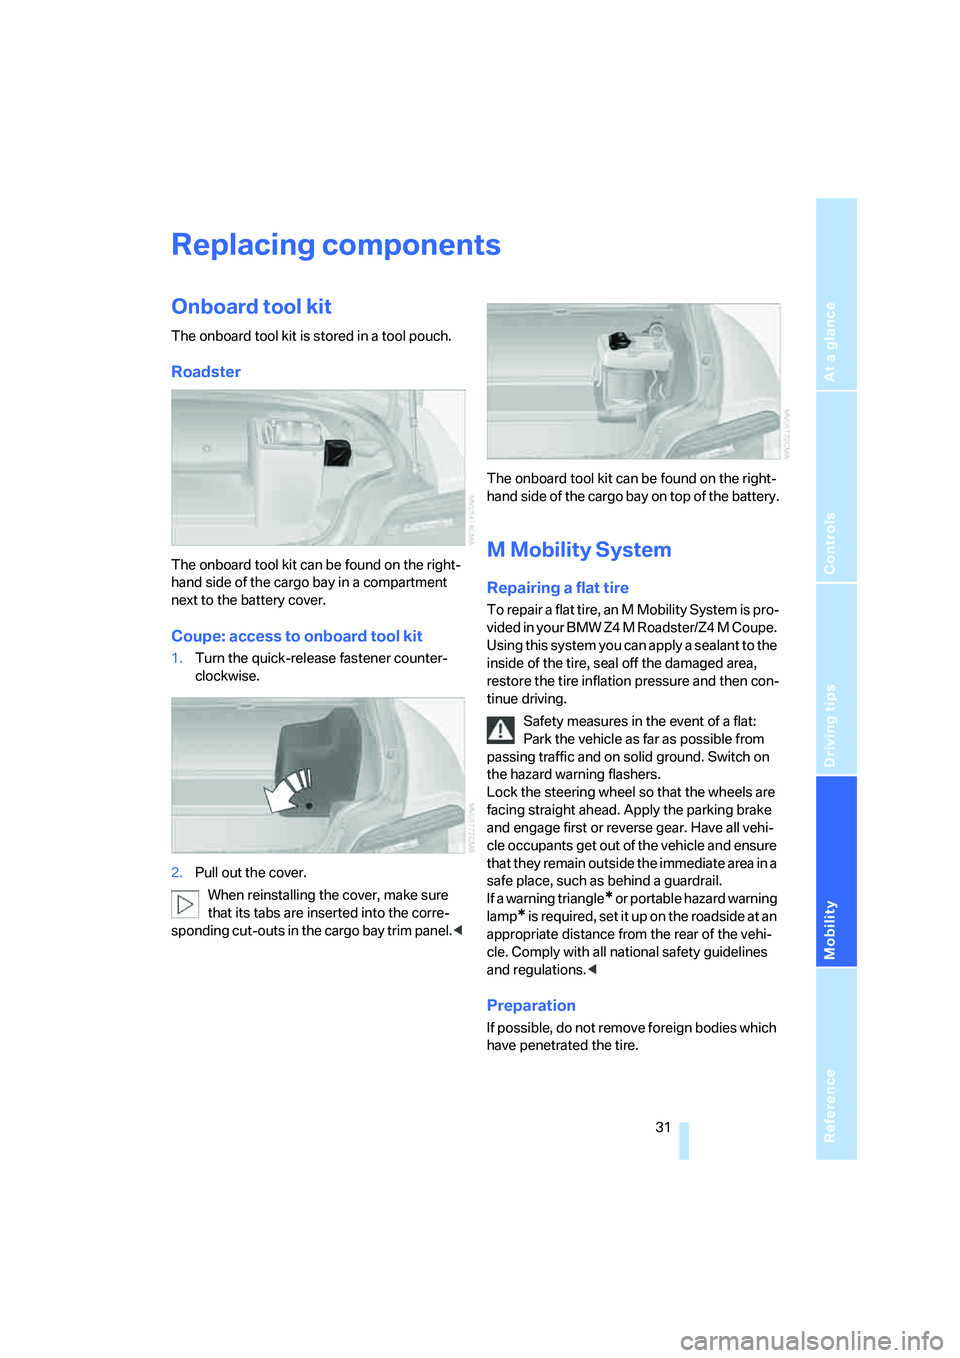
The onboard tool kit can be found on the right-
hand side of the cargo bay in a compartment
next to the battery cover.
Coupe: access to onboard tool kit
1.Turn the quick-release fastener counter-
clockwise.
2. Pull out the cover.
When reinstalling the cover, make sure
that its tabs are inserted into the corre-
sponding cut-outs in the cargo bay trim panel.
hand side of the cargo bay on top of the battery.
M Mobility System
Repairing a flat tire
To repair a flat tire, an M Mobility System is pro-
vided in your BMW Z4 M Roadster/Z4 M Coupe.
Using this system you can apply a sealant to the
inside of the tire, seal off the damaged area,
restore the tire inflation pressure and then con-
tinue driving.
Safety measures in the event of a flat:
Park the vehicle as far as possible from
passing traffic and on solid ground. Switch on
the hazard warning flashers.
Lock the steering wheel so that the wheels are
facing straight ahead. Apply the parking brake
and engage first or reve rse gear. Have all vehi-
cle occupants get out of the vehicle and ensure
that they remain outside the immediate area in a
safe place, such as behind a guardrail.
If a warning triangle
* or portable hazard warning
lamp
* is required, set it up on the roadside at an
appropriate distance from the rear of the vehi-
cle. Comply with all national safety guidelines
and regulations. <
Preparation
If possible, do not remove foreign bodies which
have penetrated the tire.
Page 34 of 50

Replacing components
32
Corresponding information on using the
M Mobility System is also provided on the
device. <
Before using the M Mobility System, note
the information on the sealant bottle. <
Pull the sticker for the sp eed limit off the sealant
bottle and affix it to the steering wheel.
Please observe the expiry date on the
sealant bottle. <
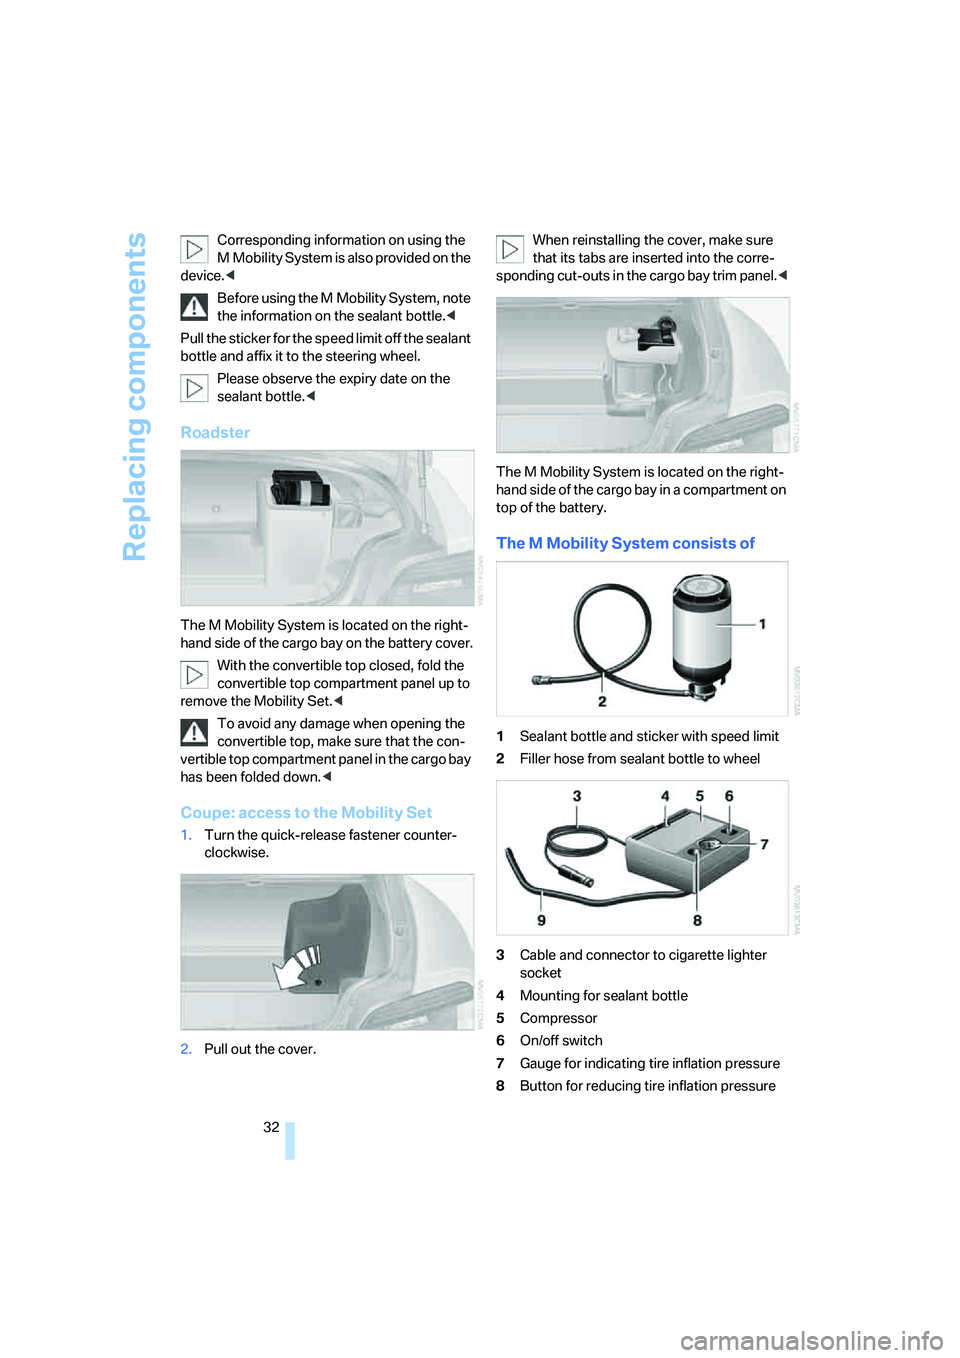
Roadster
The M Mobility System is located on the right-
hand side of the cargo bay on the battery cover.
With the convertible top closed, fold the
convertible top compartment panel up to
remove the Mobility Set. <
To avoid any damage when opening the
convertible top, make sure that the con-
vertible top compartment panel in the cargo bay
has been folded down. <
Coupe: access to the Mobility Set
1.Turn the quick-release fastener counter-
clockwise.
2. Pull out the cover. When reinstalling the cover, make sure
that its tabs are inserted into the corre-
sponding cut-outs in the cargo bay trim panel. <
The M Mobility System is located on the right-
hand side of the cargo bay in a compartment on
top of the battery.
The M Mobility System consists of
1 Sealant bottle and sticker with speed limit
2 Filler hose from sealant bottle to wheel
3 Cable and connector to cigarette lighter
socket
4 Mounting for sealant bottle
5 Compressor
6 On/off switch
7 Gauge for indicating tire inflation pressure
8 Button for reducing tire inflation pressure