2007 BMW MOTORRAD K 1200 S suspension
[x] Cancel search: suspensionPage 4 of 166

Table of ContentsYou can also consult the index at
the end of this Rider's Manual if
you want to find a particular topic
or item of information.
1 General instructions . . . . . 5
Overview . . . . . . . . . . . . . . . . . . . . . . 6
Abbreviations and symbols . . . . 6
Equipment . . . . . . . . . . . . . . . . . . . . 7
Technical data . . . . . . . . . . . . . . . . 7
Currency . . . . . . . . . . . . . . . . . . . . . . 7
2 General views . . . . . . . . . . . . . 9
General view, left side . . . . . . . . 11
General view, right side . . . . . . 13
Underneath the seat . . . . . . . . . 14
Handlebar fitting, left . . . . . . . . . 15
Handlebar fitting, right . . . . . . . . 16
Instrument cluster . . . . . . . . . . . . 17
Headlight . . . . . . . . . . . . . . . . . . . . . 183 Status indicators . . . . . . . 19
Standard status
indicators . . . . . . . . . . . . . . . . . . . . . 20
Status indicators with on-
board computer
OE
........... 21
Status indicators with
tyre-pressure monitoring
(RDC)
OE...................... 22
Standard warnings . . . . . . . . . . . 22
Warnings issued by the on-
board computer
OE
........... 27
ABS warnings . . . . . . . . . . . . . . . . 29
ASC warnings
OE
............. 31
RDC warnings
OE
............. 33
Anti-theft alarm
warnings
OE................... 38
4 Operation . . . . . . . . . . . . . . . . 41
Ignition switch and steering
lock . . . . . . . . . . . . . . . . . . . . . . . . . . 42
Electronic immobiliser . . . . . . . . 43
Clock . . . . . . . . . . . . . . . . . . . . . . . . . 44
Odometer and tripmeters . . . . 45
On-board computer
OE
....... 47 Tyre pressure monitoring
RDC
OE
....................... 51
Lights . . . . . . . . . . . . . . . . . . . . . . . . 52
Turn indicators . . . . . . . . . . . . . . . 53
Hazard warning flashers . . . . . . 53
Emergency off switch (kill
switch) . . . . . . . . . . . . . . . . . . . . . . . 54
Grip heating
OE
............... 55
Automatic Stability Control
ASC
OE
....................... 55
Clutch . . . . . . . . . . . . . . . . . . . . . . . . 56
Brakes . . . . . . . . . . . . . . . . . . . . . . . 57
Mirrors . . . . . . . . . . . . . . . . . . . . . . . 58
Spring preload . . . . . . . . . . . . . . . 58
Damping . . . . . . . . . . . . . . . . . . . . . 59
Electronic Suspension Ad-
justment ESA
OE
............. 59
Tyres . . . . . . . . . . . . . . . . . . . . . . . . . 62
Headlight . . . . . . . . . . . . . . . . . . . . . 62
Seat . . . . . . . . . . . . . . . . . . . . . . . . . . 63
Helmet holder . . . . . . . . . . . . . . . . 65
Luggage loops . . . . . . . . . . . . . . . 66
Page 9 of 166

ESA Electronic SuspensionAdjustment
Electronic Suspension
Adjustment.
RDC Tyre pressure control
(ReifenDruck-Control)EquipmentWhen you ordered your BMW
motorcycle, you chose various
items of custom equipment. This
Rider's Manual describes option-
al extras (OE) offered by BMW
and selected optional accessor-
ies (OA). This explains why the
manual may also contain de-
scriptions of equipment which
you have not ordered. Please
note, too, that your motorcycle
might not be exactly as illus-
trated in this manual on account
of country-specific differences.
If your BMW was supplied with
equipment not described in
this Rider's Manual, you will find these features described in
separate manuals.
Technical dataAll dimensions, weights and
power ratings stated in the
Rider's Manual are quoted to the
standards and comply with the
tolerance requirements of the
Deutsche Institut für Normung
e.V. Versions for individual
countries may differ.CurrencyThe high safety and quality
standards of BMW motorcycles
are maintained by constant
development work on designs,
equipment and accessories.
Because of this, your motorcycle
may differ from the information
supplied in the Rider's Manual.
Nor can BMW Motorrad entirely
rule out errors and omissions.
We hope you will appreciate that
no claims can be entertained onthe basis of the data, illustrations
or descriptions in this manual.
17zGeneral instructions
Page 13 of 166

General view, left side1Adjuster for headlight beam
throw (underneath the in-
strument cluster) ( 63)
2 Clutch-fluid reservoir
( 103)
3 Adjuster for spring preload,
rear ( 58)
4 Seat lock (underneath the
rear light) ( 63)
5 Adjuster for damping char-
acteristic, rear suspension
( 59)
6 Power socket ( 88)
211zGeneral views
Page 43 of 166

Operation
Operation
Ignition switch and steering lock..... 42
Electronic immobiliser . . . ............ 43
Clock ................................ 44
Odometer and tripmeters ............ 45
On-board computer
OE
............... 47
Tyre pressure monitoring
RDC
OE
.............................. 51
Lights ................................ 52
Turn indicators ....................... 53
Hazard warning flashers . . ............ 53
Emergency off switch (kill switch) . . . . 54
Grip heating
OE
....................... 55
Automatic Stability Control
ASC
OE
.............................. 55
Clutch ............................... 56 Brakes . .
............................. 57
Mirrors . . ............................. 58
Spring preload ....................... 58
Damping ............................. 59
Electronic Suspension Adjustment
ESA
OE
............................... 59
Tyres . . . ............................. 62
Headlight ............................ 62
Seat ................................. 63
Helmet holder ....................... 65
Luggage loops ....................... 66
441zOperation
Page 60 of 166

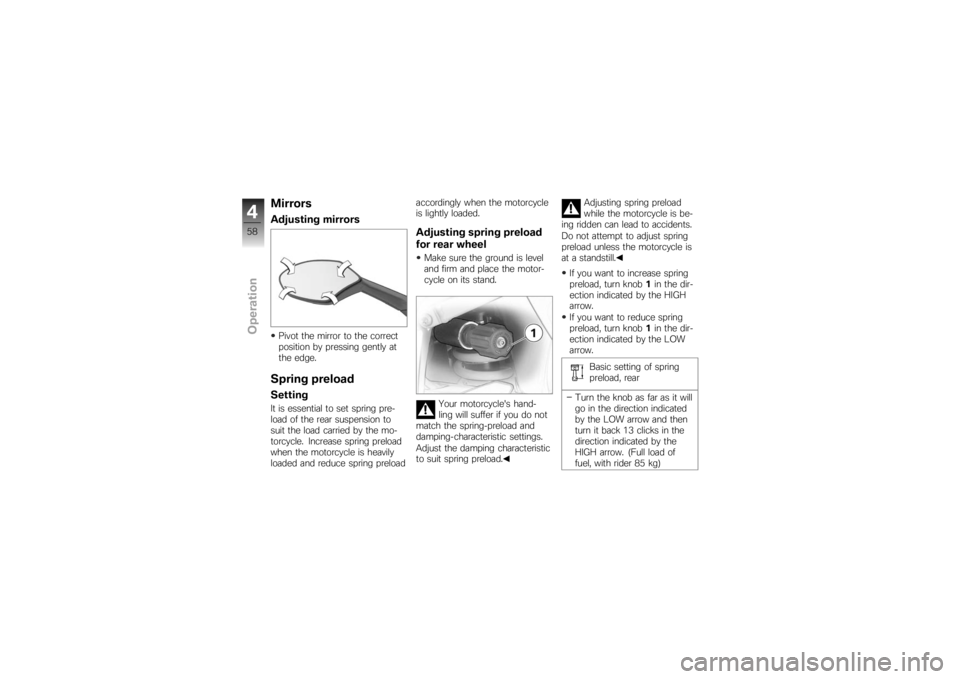
MirrorsAdjusting mirrorsPivot the mirror to the correct
position by pressing gently at
the edge.Spring preloadSettingIt is essential to set spring pre-
load of the rear suspension to
suit the load carried by the mo-
torcycle. Increase spring preload
when the motorcycle is heavily
loaded and reduce spring preloadaccordingly when the motorcycle
is lightly loaded.
Adjusting spring preload
for rear wheelMake sure the ground is level
and firm and place the motor-
cycle on its stand.
Your motorcycle's hand-
ling will suffer if you do not
match the spring-preload and
damping-characteristic settings.
Adjust the damping characteristic
to suit spring preload. Adjusting spring preload
while the motorcycle is be-
ing ridden can lead to accidents.
Do not attempt to adjust spring
preload unless the motorcycle is
at a standstill.
If you want to increase spring
preload, turn knob 1in the dir-
ection indicated by the HIGH
arrow.
If you want to reduce spring
preload, turn knob 1in the dir-
ection indicated by the LOW
arrow.
Basic setting of spring
preload, rear
Turn the knob as far as it will
go in the direction indicated
by the LOW arrow and then
turn it back 13 clicks in the
direction indicated by the
HIGH arrow. (Full load of
fuel, with rider 85 kg)
458zOperation
Page 61 of 166

DampingSettingDamping must be adapted to
suit spring preload. An increase
in spring preload requires firmer
damping, a reduction in spring
preload requires softer damping.Adjusting damping for
rear wheelMake sure the ground is level
and firm and place the motor-
cycle on its stand.
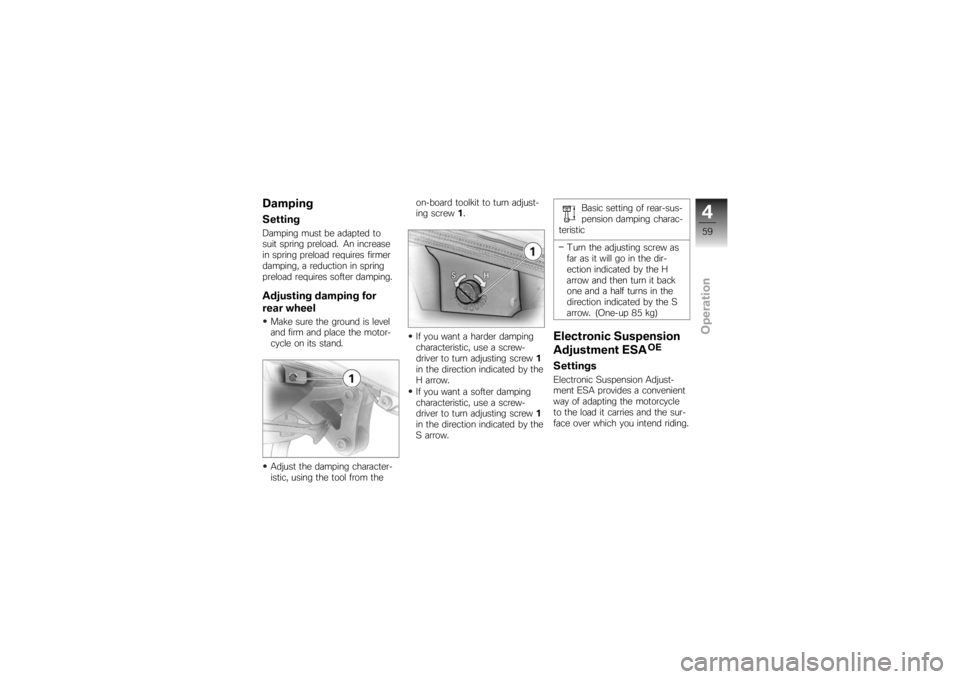
Adjust the damping character-
istic, using the tool from theon-board toolkit to turn adjust-
ing screw
1.
If you want a harder damping
characteristic, use a screw-
driver to turn adjusting screw 1
in the direction indicated by the
H arrow.
If you want a softer damping
characteristic, use a screw-
driver to turn adjusting screw 1
in the direction indicated by the
S arrow. Basic setting of rear-sus-
pension damping charac-
teristic
Turn the adjusting screw as
far as it will go in the dir-
ection indicated by the H
arrow and then turn it back
one and a half turns in the
direction indicated by the S
arrow. (One-up 85 kg)
Electronic Suspension
Adjustment ESA
OE
SettingsElectronic Suspension Adjust-
ment ESA provides a convenient
way of adapting the motorcycle
to the load it carries and the sur-
face over which you intend riding.
459zOperation
Page 62 of 166

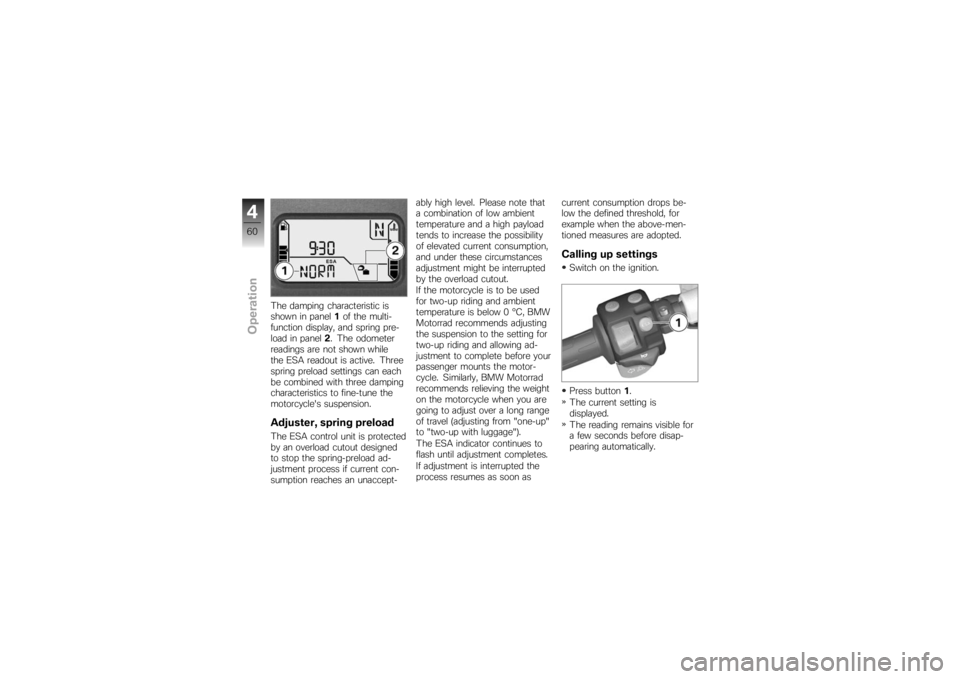
The damping characteristic is
shown in panel1of the multi-
function display, and spring pre-
load in panel 2. The odometer
readings are not shown while
the ESA readout is active. Three
spring preload settings can each
be combined with three damping
characteristics to fine-tune the
motorcycle's suspension.Adjuster, spring preloadThe ESA control unit is protected
by an overload cutout designed
to stop the spring-preload ad-
justment process if current con-
sumption reaches an unaccept- ably high level. Please note that
a combination of low ambient
temperature and a high payload
tends to increase the possibility
of elevated current consumption,
and under these circumstances
adjustment might be interrupted
by the overload cutout.
If the motorcycle is to be used
for two-up riding and ambient
temperature is below 0 °C, BMW
Motorrad recommends adjusting
the suspension to the setting for
two-up riding and allowing ad-
justment to complete before your
passenger mounts the motor-
cycle. Similarly, BMW Motorrad
recommends relieving the weight
on the motorcycle when you are
going to adjust over a long range
of travel (adjusting from "one-up"
to "two-up with luggage").
The ESA indicator continues to
flash until adjustment completes.
If adjustment is interrupted the
process resumes as soon as
current consumption drops be-
low the defined threshold, for
example when the above-men-
tioned measures are adopted.
Calling up settingsSwitch on the ignition.
Press button
1.
The current setting is
displayed.
The reading remains visible for
a few seconds before disap-
pearing automatically.
460zOperation
Page 63 of 166

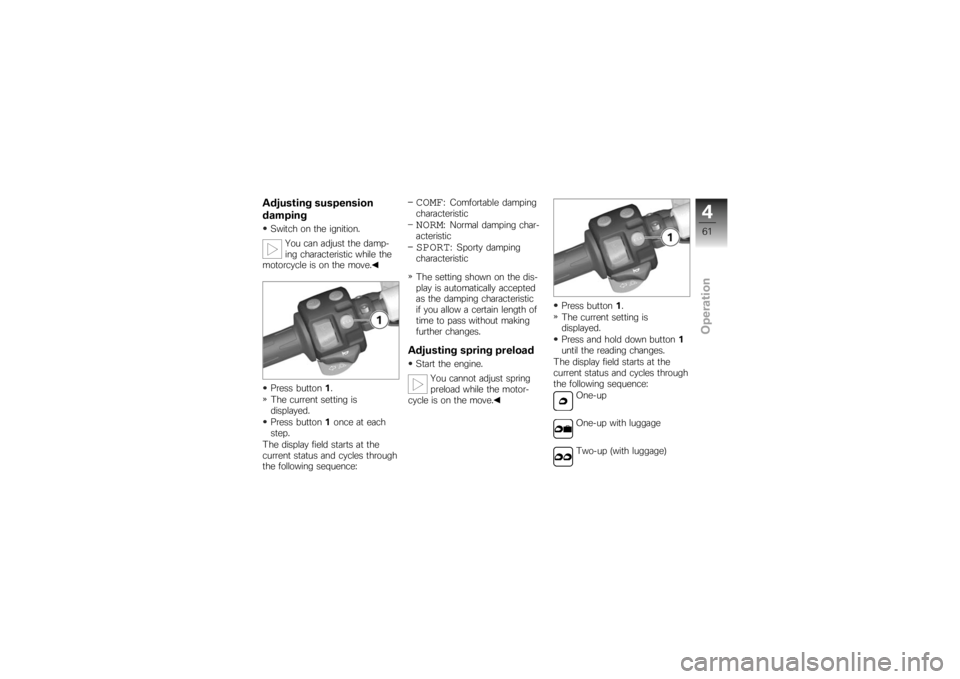
Adjusting suspension
dampingSwitch on the ignition.You can adjust the damp-
ing characteristic while the
motorcycle is on the move.
Press button 1.
The current setting is
displayed.
Press button 1once at each
step.
The display field starts at the
current status and cycles through
the following sequence:
COMF
: Comfortable damping
characteristic
NORM
: Normal damping char-
acteristic
SPORT
: Sporty damping
characteristic
The setting shown on the dis-
play is automatically accepted
as the damping characteristic
if you allow a certain length of
time to pass without making
further changes.
Adjusting spring preloadStart the engine.
You cannot adjust spring
preload while the motor-
cycle is on the move. Press button
1.
The current setting is
displayed.
Press and hold down button 1
until the reading changes.
The display field starts at the
current status and cycles through
the following sequence: One-up
One-up with luggage
Two-up (with luggage)
461zOperation