Page 18 of 168
Handlebar fitting, left1Operating the odometer
( 47), Operating the on-
board computer
OE
( 50)
2 Operating ASC
OE
( 58)
3 Operating the ESAOE
( 62)
4 Horn
5 Flashing turn indicators,
left ( 55), Hazard warn-
ing flashers ( 56)
6 High-beam headlight and
headlight flasher ( 54)
216zGeneral views
Page 21 of 168
Headlight1High-beam headlight
2 Low-beam headlight
3 Side light
219zGeneral views
Page 24 of 168
Standard status
indicatorsMultifunction display1Clock ( 46)
2 Gear ( 22)
3 Coolant temperature
( 22)
4 Odometer and tripmeters
( 47)
5 Fuel capacity ( 22)
Telltale lights1Flashing turn indicators, left
2 High-beam headlight
3 Idle
4 Flashing turn indicators,
rightFuel capacity
The horizontal bars below
the fuel-pump symbol in-
dicate the remaining quantity of
fuel.
When the fuel in the tank is
topped up the gauge briefly
shows the original level, before
the reading is updated.
Gear
The gear engaged or
N
for neutral appears on the
display.
If no gear is engaged, the
'neutral' telltale light also
lights up.
Coolant temperature
The horizontal bars below
the temperature symbol
indicate the coolant temperature.
Service-due indicatorIf the next service is due in less
than one month, the date for the
322zStatus indicators
Page 30 of 168

If the battery is not char-
ging, continuing to ride can
cause it to discharge completely,
in which case it will suffer irrepar-
able damage.
If possible, do not continue your
journey.
Battery is not being charged.
You can continue to ride until
the battery is discharged. Bear
in mind, however, that the en-
gine could cut out suddenly
and that the battery could dis-
charge until completely flat,
in which case it might have
suffered irreparable damage.
Have the fault rectified as
quickly as possible by a
specialist workshop, preferably
an authorised BMW Motorrad
dealer.
Rear light bulb defective General warning light shows
yellow.
LAMPR !
appears on the dis-
play.
A defective bulb places
your safety at risk because
it is easier for other users to
oversee the motorcycle.
Replace defective bulbs as
soon as possible; always carry a
complete set of spare bulbs if
possible.
Rear light or brake light bulb de-
fective.
Replacing brake light and rear
light bulb ( 122)
Front light bulb defective
LAMPF !
appears on the dis-
play.
A defective bulb places
your safety at risk because
it is easier for other users to
oversee the motorcycle.
Replace defective bulbs as
soon as possible; always carry a complete set of spare bulbs if
possible.
Low-beam headlight, high-beam
headlight, side-light or turn-indic-
ator bulb defective.
Replacing low-beam and high-
beam headlight bulb ( 118)
Replacing parking-light bulb
( 120)
Replacing turn indicator bulbs,
front and rear ( 124)
Bulbs defective General warning light shows
yellow.
LAMPS !
appears on the dis-
play.
A defective bulb places
your safety at risk because
it is easier for other users to
oversee the motorcycle.
Replace defective bulbs as
soon as possible; always carry a
complete set of spare bulbs if
possible.
328zStatus indicators
Page 56 of 168

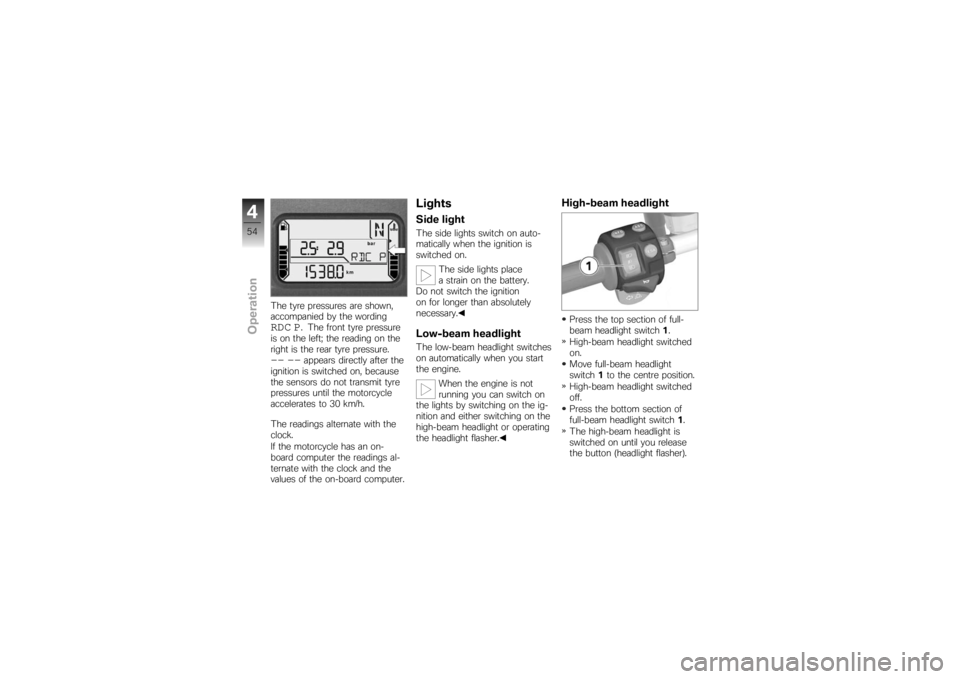
The tyre pressures are shown,
accompanied by the wordingRDC P
. The front tyre pressure
is on the left; the reading on the
right is the rear tyre pressure.
-- --
appears directly after the
ignition is switched on, because
the sensors do not transmit tyre
pressures until the motorcycle
accelerates to 30 km/h.
The readings alternate with the
clock.
If the motorcycle has an on-
board computer the readings al-
ternate with the clock and the
values of the on-board computer.
LightsSide lightThe side lights switch on auto-
matically when the ignition is
switched on.
The side lights place
a strain on the battery.
Do not switch the ignition
on for longer than absolutely
necessary.Low-beam headlightThe low-beam headlight switches
on automatically when you start
the engine.
When the engine is not
running you can switch on
the lights by switching on the ig-
nition and either switching on the
high-beam headlight or operating
the headlight flasher.
High-beam headlightPress the top section of full-
beam headlight switch 1.
High-beam headlight switched
on.
Move full-beam headlight
switch 1to the centre position.
High-beam headlight switched
off.
Press the bottom section of
full-beam headlight switch 1.
The high-beam headlight is
switched on until you release
the button (headlight flasher).
454zOperation
Page 67 of 168

The settings shown on the
display are automatically ac-
cepted as the spring preload
and, if applicable, the damp-
ing characteristic if you allow a
certain length of time to pass
without pressing making further
changes. The reading flashes
while spring preload adjustment
is in progress.
Wait until adjustment com-
pletes (reading stops flashing)
before pulling away.TyresChecking tyre pressureMake sure the ground is level
and firm and place the motor-
cycle on its stand.Incorrect tyre pressures im-
pair the motorcycle's hand-
ling characteristics and increase
the rate of tyre wear.
Always check that the tyre pres-
sures are correct. At high road speeds, tyre
valves have a tendency to
open as a result of centrifugal
force.
Fit metal valve caps with rubber
seals and screw them on firmly
to prevent sudden deflation.
Check that tyre pressures are
correct as per the data below.
Tyre pressure, front
2.5 bar (one-up, tyre cold)
2.5 bar (two-up and/or with
luggage, tyre cold) Tyre pressure, rear
2.9 bar (one-up, tyre cold)
2.9 bar (two-up and/or with
luggage, tyre cold) If tyre pressure is too low:
Correct tyre pressure.
HeadlightAdjusting headlight for
driving on left/driving on
rightIf the motorcycle is ridden in a
country where the opposite rule
of the road applies, its asymmet-
ric low-beam headlight will tend
to dazzle oncoming traffic.
Have the headlight set accord-
ingly by a specialist workshop,
preferably an authorised BMW
Motorrad dealer.
Commercially available ad-
hesive tape will damage the
plastic lens of the light.
Consult a specialist workshop,
preferably an authorised BMW
Motorrad dealer, in order to avoid
damaging the plastic lens of the
light.
465zOperation
Page 120 of 168

Press the lever down to the
ground.BulbsGeneral instructionsThe failure of a bulb is signalled
in the display by the defective
lamp symbol. If the brake or rear
light fails, the symbol is accom-
panied by the 'General' warning
light, which lights up yellow. If
the rear light fails the second fil-
ament of the brake light shines
at reduced brightness to double
as a rear light. Even though you
have this substitute rear light, theindicators in the display tell you
that a bulb defect has occurred.
A defective bulb places
your safety at risk because
it is easier for other users to
oversee the motorcycle.
Replace defective bulbs as
soon as possible; always carry a
complete set of spare bulbs if
possible.
The bulb is pressurised and
can cause injury if dam-
aged.
Wear protective goggles and
gloves when changing bulbs.
The types of bulb fitted to
your motorcycle are listed
in the section entitled "Technical
data".
Do not touch the glass of
new bulbs with your fingers.
Use a clean, dry cloth to hold
the bulbs when handling them.
Dirt deposits, in particular oil and
grease, interfere with heat radi- ation from the bulb. This leads
to overheating and shortens the
bulb's operating life.
Replacing low-beam and
high-beam headlight bulb
If it is not standing firmly,
the motorcycle could topple
in the course of the operations
described below.
Always make sure that the
motorcycle is stable and firmly
supported.
Make sure the ground is level
and firm and place the motor-
cycle on its stand.
Switch off the ignition. Turn the handlebars to the
left to facilitate access.
8118zMaintenance
Page 121 of 168
Remove cover1(high-beam
headlight) or cover 2(low-beam
headlight) by turning cover
counter-clockwise.
Disconnect plug 3. Disengage spring clip
4from
the latches and swing it up.
The spring clip might face
in a direction other than
that shown here, depending on
the light. Remove bulb
5.
Replace the defective bulb.
Bulb for high-beam
headlight
H7/12V/55W Bulb for low-beam head-
light
H7/12V/55W
8119zMaintenance