Page 110 of 173
Remove oil filler cap1by turn-
ing it counter-clockwise.
Use a dry cloth to wipe oil dip-
stick 2clean Seat the oil dipstick on the
oil filler neck, but do not en-
gage the threads. Make sure
that the dipstick is seated in
guide
3.
Remove the oil dipstick and
check the oil level. Engine oil, specified level
Between MIN and MAX
marks (Seat the oil dipstick
on the oil filler neck, but do
not engage the threads.)
If the oil level is below the MIN
mark: Top up the engine oil.
If the oil level is above the MAX
mark: Have the oil level corrected by
a specialist workshop, prefer-
8108zMaintenance
Page 111 of 173

ably an authorised BMW Mo-
torrad dealer.
Install the oil dipstick.
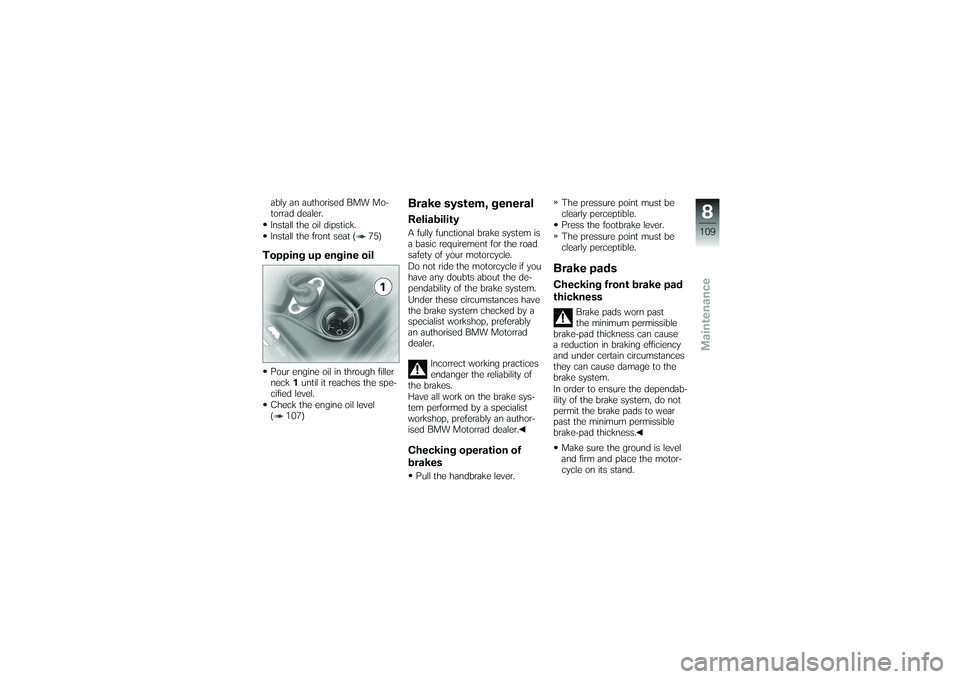
Install the front seat ( 75)Topping up engine oilPour engine oil in through filler
neck1until it reaches the spe-
cified level.
Check the engine oil level
( 107)
Brake system, generalReliabilityA fully functional brake system is
a basic requirement for the road
safety of your motorcycle.
Do not ride the motorcycle if you
have any doubts about the de-
pendability of the brake system.
Under these circumstances have
the brake system checked by a
specialist workshop, preferably
an authorised BMW Motorrad
dealer.
Incorrect working practices
endanger the reliability of
the brakes.
Have all work on the brake sys-
tem performed by a specialist
workshop, preferably an author-
ised BMW Motorrad dealer.Checking operation of
brakesPull the handbrake lever. The pressure point must be
clearly perceptible.
Press the footbrake lever.
The pressure point must be
clearly perceptible.
Brake padsChecking front brake pad
thickness
Brake pads worn past
the minimum permissible
brake-pad thickness can cause
a reduction in braking efficiency
and under certain circumstances
they can cause damage to the
brake system.
In order to ensure the dependab-
ility of the brake system, do not
permit the brake pads to wear
past the minimum permissible
brake-pad thickness.
Make sure the ground is level
and firm and place the motor-
cycle on its stand.
8109zMaintenance
Page 112 of 173
Visually inspect the left and
right brake pads to ascertain
their thickness. Viewing direc-
tion: Between wheel and front
fork toward the brake caliper.Brake-pad wear limit,
front
min 1 mm (Friction pad only,
without backing plate)
The wear indicators
(grooves) must be clearly
visible.
If the wear indicating mark is no
longer clearly visible: Have the brake pads replaced
by a specialist workshop,
preferably an authorised BMW
Motorrad dealer.
Checking rear brake pad
thickness
Brake pads worn past
the minimum permissible
brake-pad thickness can cause
a reduction in braking efficiency
and under certain circumstances
they can cause damage to the
brake system.
In order to ensure the dependab-
ility of the brake system, do not
permit the brake pads to wear
past the minimum permissible
brake-pad thickness.
Make sure the ground is level
and firm and place the motor-
cycle on its stand.
8110zMaintenance
Page 113 of 173
Visually inspect the brake pads
from the right to ascertain their
thickness.Brake-pad wear limit, rear
min 1 mm (Wear limit, fric-
tion pad only, without back-
ing plate)
Make sure that the brake
disc is not visible through
the bore in the inboard brake
pad. If the brake disc is visible:
Have the brake pads replaced
by a specialist workshop,
preferably an authorised BMW
Motorrad dealer.
Brake fluidChecking brake-fluid
level, front brakes
A low fluid level in the
brake reservoir can allow air
to penetrate the brake system.
This significantly reduces braking
efficiency.
Check the brake-fluid level at
regular intervals.
Make sure the ground is level
and firm and place the motor-
cycle on its centre stand.
Turn the handlebars once from
full left lock to full right lock
and then centre the handle-
bars. Check the brake fluid level in
brake fluid reservoir
1.
The brake fluid level in the
brake fluid reservoir drops
as the brake pads wear.
8111zMaintenance
Page 114 of 173
Brake fluid level, front
DOT4 brake fluid
Do not permit the brake fluid
level to drop below the MIN
mark. (Brake-fluid reservoir
horizontal. Before reading
the level, swing the handle-
bars once from full left lock
to full right lock.)
If the brake fluid level drops be-
low the permitted level: Have the defect rectified as
quickly as possible by a spe- cialist workshop, preferably
an authorised BMW Motorrad
dealer.
Checking brake-fluid
level, rear brakes
A low fluid level in the
brake reservoir can allow air
to penetrate the brake system.
This significantly reduces braking
efficiency.
Check the brake-fluid level at
regular intervals.
Make sure the ground is level
and firm and place the motor-
cycle on its centre stand. Check the brake fluid level in
brake fluid reservoir
1.
The brake fluid level in the
brake fluid reservoir drops
as the brake pads wear.
8112zMaintenance
Page 115 of 173

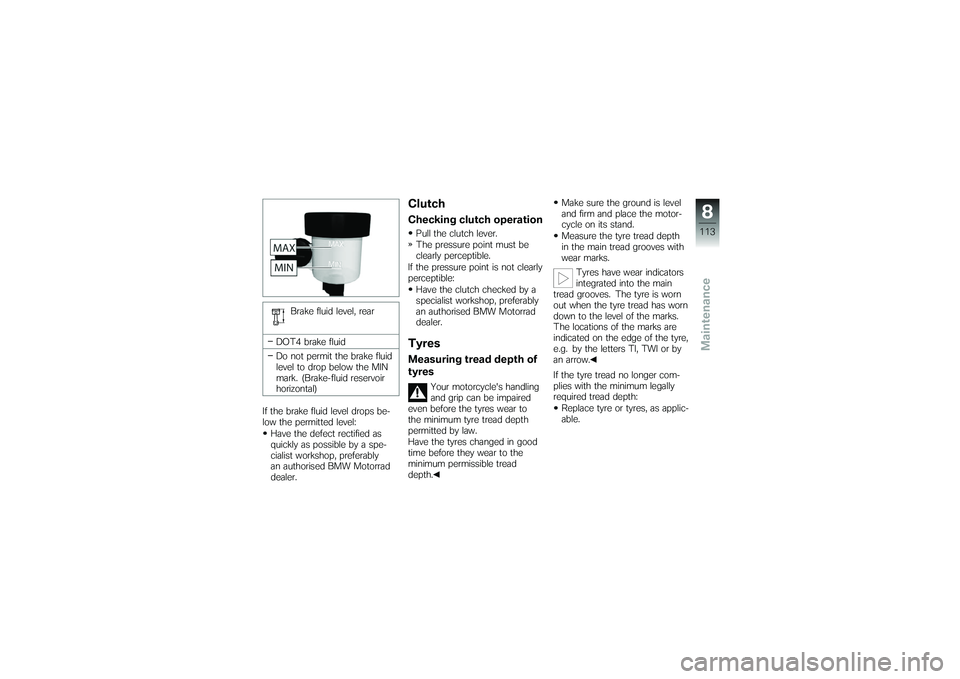
Brake fluid level, rear
DOT4 brake fluid
Do not permit the brake fluid
level to drop below the MIN
mark. (Brake-fluid reservoir
horizontal)
If the brake fluid level drops be-
low the permitted level: Have the defect rectified as
quickly as possible by a spe-
cialist workshop, preferably
an authorised BMW Motorrad
dealer.
ClutchChecking clutch operationPull the clutch lever.
The pressure point must be
clearly perceptible.
If the pressure point is not clearly
perceptible: Have the clutch checked by a
specialist workshop, preferably
an authorised BMW Motorrad
dealer.TyresMeasuring tread depth of
tyres
Your motorcycle's handling
and grip can be impaired
even before the tyres wear to
the minimum tyre tread depth
permitted by law.
Have the tyres changed in good
time before they wear to the
minimum permissible tread
depth. Make sure the ground is level
and firm and place the motor-
cycle on its stand.
Measure the tyre tread depth
in the main tread grooves with
wear marks.
Tyres have wear indicators
integrated into the main
tread grooves. The tyre is worn
out when the tyre tread has worn
down to the level of the marks.
The locations of the marks are
indicated on the edge of the tyre,
e.g. by the letters TI, TWI or by
an arrow.
If the tyre tread no longer com-
plies with the minimum legally
required tread depth:
Replace tyre or tyres, as applic-
able.
8113zMaintenance
Page 116 of 173

RimsVisual inspectionMake sure the ground is level
and firm and place the motor-
cycle on its stand.
Visually inspect the rims for
defects.
Have damaged rims checked
and, if necessary, replaced by a
specialist workshop, preferably
an authorised BMW Motorrad
dealer.WheelsRecommended tyresFor each size of tyre BMW Mo-
torrad tests certain makes, and
approves those that it certifies
as roadworthy. If BMW Motorrad
has not approved the wheels and
tyres, it cannot assess their suit-
ability or provide any guarantee
of road safety.Use only wheels and tyres ap-
proved by BMW Motorrad for
your type of motorcycle.
You can obtain detailed informa-
tion from your authorised BMW
Motorrad dealer or on the Inter-
net at www.bmw-motorrad.com.
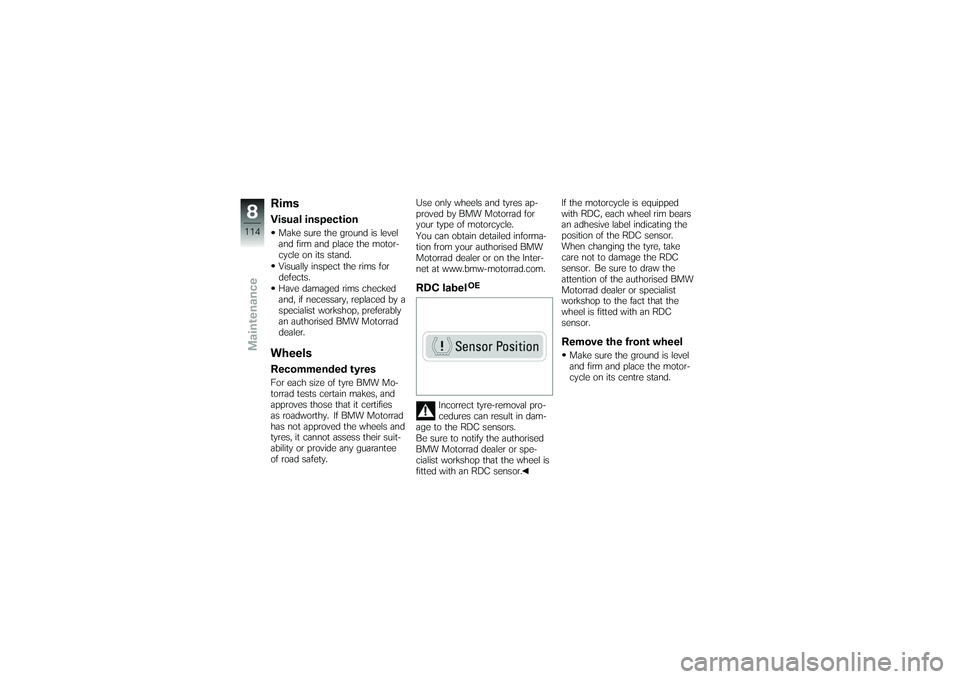
RDC label
OE
Incorrect tyre-removal pro-
cedures can result in dam-
age to the RDC sensors.
Be sure to notify the authorised
BMW Motorrad dealer or spe-
cialist workshop that the wheel is
fitted with an RDC sensor. If the motorcycle is equipped
with RDC, each wheel rim bears
an adhesive label indicating the
position of the RDC sensor.
When changing the tyre, take
care not to damage the RDC
sensor. Be sure to draw the
attention of the authorised BMW
Motorrad dealer or specialist
workshop to the fact that the
wheel is fitted with an RDC
sensor.
Remove the front wheelMake sure the ground is level
and firm and place the motor-
cycle on its centre stand.
8114zMaintenance
Page 117 of 173
Remove screws1on left and
right.
Pull the front mudguard for-
ward to remove. Once the calipers have
been removed, there is
a risk of the brake pads being
pressed together to the extent
that they cannot be slipped back
over the brake disc on reas-
sembly.
Do not operate the handbrake
lever when the brake calipers
have been removed.
Remove securing screws 2of
the left and right brake calipers. Force the brake pads slightly
apart by rocking brake
calipers
3back and forth A
against brake discs 4.
Mask off the parts of the wheel
rim that could be scratched in
the process of removing the
brake calipers.
Carefully pull the brake calipers
back and out until clear of the
brake discs.
When removing the left brake
caliper, take care not to dam-
age the ABS sensor cable.
When removing the right brake
caliper, take care not to alter
8115zMaintenance