2007 BMW MOTORRAD G650 XMOTO wheel
[x] Cancel search: wheelPage 4 of 132
Table of ContentsYou can also consult the index at
the end of this Rider's Manual if
you want to find a particular topic
or item of information.
1 General instructions . . . . . 5
Overview ...................... 6
Abbreviations and symbols . . . . 6
Equipment . . . . . . .............. 6
Technical data . . .............. 7
Currency . ..................... 7
2 General views . . . . . . . . . . . . . 9
General view, left side . . . . . . . . 11
General view, right side . . . . . . 13
Underneath the seat ......... 14
Handlebar fitting, left ......... 15
Handlebar fitting, right . . . . . . . . 16
Instrument cluster . . . ......... 17
Headlight . .................... 18
3 Status indicators . . . . . . . 19
Status indicators ............. 20
Standard warnings . . ......... 20
ABS warnings
OE
............. 23 4 Operation . . . . . . . . . . . . . . . . 27
Ignition switch and steering
lock . . . . . .
.................... 28
Multifunction display ......... 28
Lights . . . . .................... 31
Turn indicators . . ............. 32
Emergency off switch (kill
switch) . . . .................... 32
BMW Motorrad ABS
OE
...... 33
Mirrors . . . .................... 33
Spring preload . . ............. 34
Damping . .................... 35
Tyres . . . . . .................... 37
Headlight . .................... 38
Seat . . . . . . .................... 38
5 Riding . . . . . . . . . . . . . . . . . . . . 41
Safety instructions . . ......... 42
Checklist . .................... 44
Starting . . . .................... 44
Running in . . . . . . ............. 46
Brakes . . . .................... 47
Parking your motorcycle . . . . . 49
Refuelling .................... 50 6 Engineering details . . . . . 51
Brake system with BMW Mo-
torrad ABS
OE
................ 52
7 Accessories . . . . . . . . . . . . . 55
General instructions . ......... 56
Power socketOE.............. 56
Luggage . .................... 57
8 Maintenance . . . . . . . . . . . . 59
Notes ........................ 60
Toolkit ........................ 60
Engine oil .................... 61
Brake system . . . ............. 63
Brake pads . . . . . . ............. 64
Brake fluid .................... 65
Coolant . . . .................... 67
Clutch . . . . .................... 68
Tyres . . . . . .................... 69
Rims . ........................ 69
Chain . . . . . .................... 69
Wheels . . . .................... 71
BMW Motorrad auxiliary
stand . . . . . .................... 78
Page 5 of 132
BMW Motorrad front-wheel
stand ......................... 79
Fuses ........................ 81
Bulbs . ........................ 82
Jump starting . . . ............. 90
Battery . . . . . . ................. 91
Number-plate carrier . . . ...... 95
9 Care . . . . . . ................ 97
Care products . . . ............. 98
Washing motorcycle . . . . ...... 98
Cleaning easily damaged
components . ................. 98
Paint care . . . ................. 99
Protective wax coating . .... 100
Laying up motorcycle . . .... 100
Restoring motorcycle to
use......................... 100
10 Technical data . . . . . . . 101
Troubleshooting chart . . .... 102
Threaded fasteners . . . . .... 103
Engine . . . . . . ............... 105
Fuel . . ...................... 106
Engine oil . . . ............... 106
Clutch ...................... 107
Transmission ............... 107 Rear-wheel drive
........... 108
Running gear ............... 108
Brakes . . . . . . ............... 109
Wheels and tyres ........... 109
Electrics . . . . . ............... 110
Frame ...................... 112
Dimensions . ............... 112
Weights . . . . . ............... 113
Riding specifications . . . .... 113
11 Service . . . . . . . . . . . . . . . . 115
BMW Motorrad service . .... 116
BMW Motorrad service
quality ...................... 116
BMW Motorrad Service
Card: on-the-spot break-
down assistance ........... 116
BMW Motorrad service net-
work . . ...................... 117
Maintenance work . . . . . . .... 117
Confirmation of mainten-
ance work . . . ............... 118
Confirmation of service . .... 123
Page 27 of 132
Self-diagnosis not completedABS warning light flashes.
The ABS function is not
available, because self-
diagnosis did not complete. The
motorcycle has to move forward
a few metres for the wheel
sensors to be tested. Pull away slowly. Bear in mind
that the ABS function is not
available until self-diagnosis has
completed.
ABS deactivated ABS warning light shows.
The rider has switched off the
ABS system.
with OE BMW Motorrad ABS: Activate the ABS function
( 33) ABS fault
ABS warning light shows.
The ABS control unit has detec-
ted a fault. The ABS function is
not available. You can continue to ride. Bear
in mind that the ABS function
is not available. Bear in mind
the more detailed information
on situations that can lead to
an ABS fault ( 53).
Have the fault rectified as
quickly as possible by a
specialist workshop, preferably
an authorised BMW Motorrad
dealer.
325zStatus indicators
Page 34 of 132
Turn indicatorsOperating flashing turn
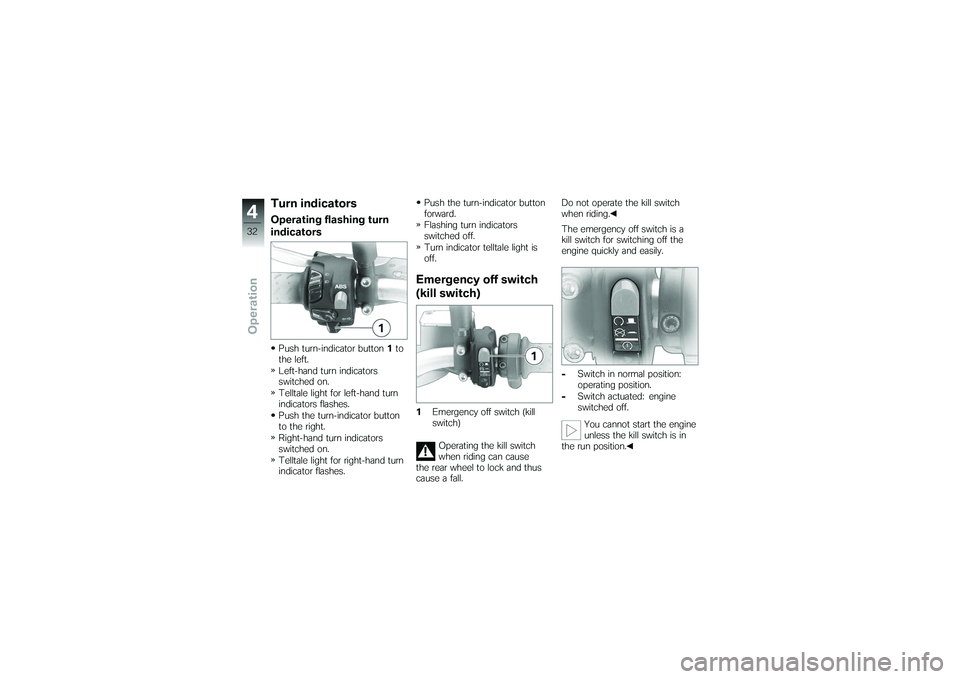
indicatorsPush turn-indicator button1to
the left.
Left-hand turn indicators
switched on.
Telltale light for left-hand turn
indicators flashes.
Push the turn-indicator button
to the right.
Right-hand turn indicators
switched on.
Telltale light for right-hand turn
indicator flashes. Push the turn-indicator button
forward.
Flashing turn indicators
switched off.
Turn indicator telltale light is
off.
Emergency off switch
(kill switch)1
Emergency off switch (kill
switch)
Operating the kill switch
when riding can cause
the rear wheel to lock and thus
cause a fall. Do not operate the kill switch
when riding.
The emergency off switch is a
kill switch for switching off the
engine quickly and easily.
-
Switch in normal position:
operating position.
- Switch actuated: engine
switched off.
You cannot start the engine
unless the kill switch is in
the run position.
432zOperation
Page 36 of 132
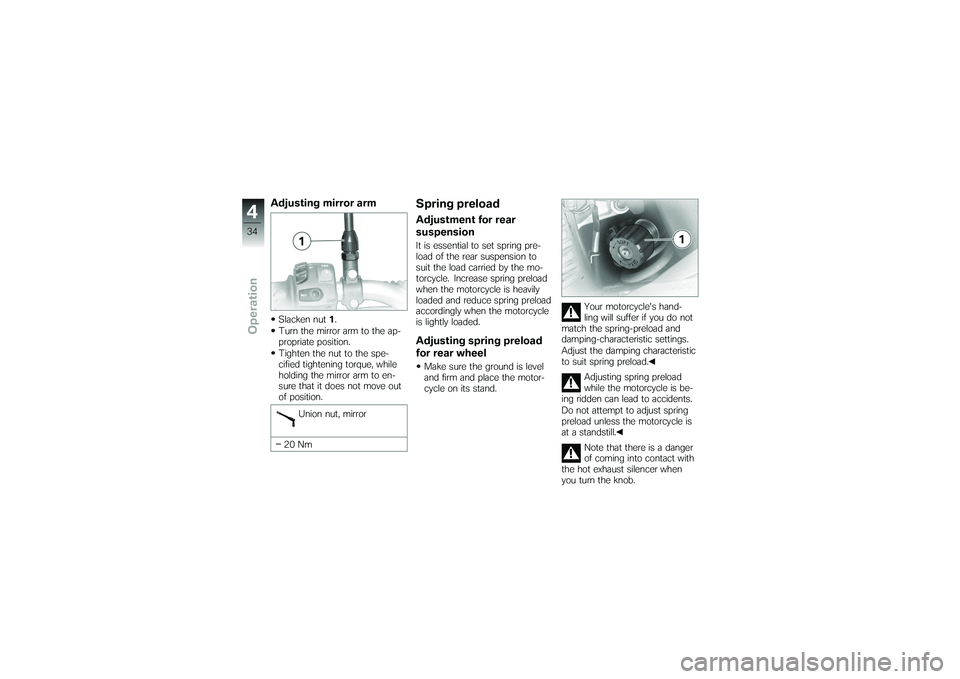
Adjusting mirror armSlacken nut1.
Turn the mirror arm to the ap-
propriate position.
Tighten the nut to the spe-
cified tightening torque, while
holding the mirror arm to en-
sure that it does not move out
of position.
Union nut, mirror
20 Nm
Spring preloadAdjustment for rear
suspensionIt is essential to set spring pre-
load of the rear suspension to
suit the load carried by the mo-
torcycle. Increase spring preload
when the motorcycle is heavily
loaded and reduce spring preload
accordingly when the motorcycle
is lightly loaded.Adjusting spring preload
for rear wheelMake sure the ground is level
and firm and place the motor-
cycle on its stand. Your motorcycle's hand-
ling will suffer if you do not
match the spring-preload and
damping-characteristic settings.
Adjust the damping characteristic
to suit spring preload.
Adjusting spring preload
while the motorcycle is be-
ing ridden can lead to accidents.
Do not attempt to adjust spring
preload unless the motorcycle is
at a standstill.
Note that there is a danger
of coming into contact with
the hot exhaust silencer when
you turn the knob.
434zOperation
Page 37 of 132
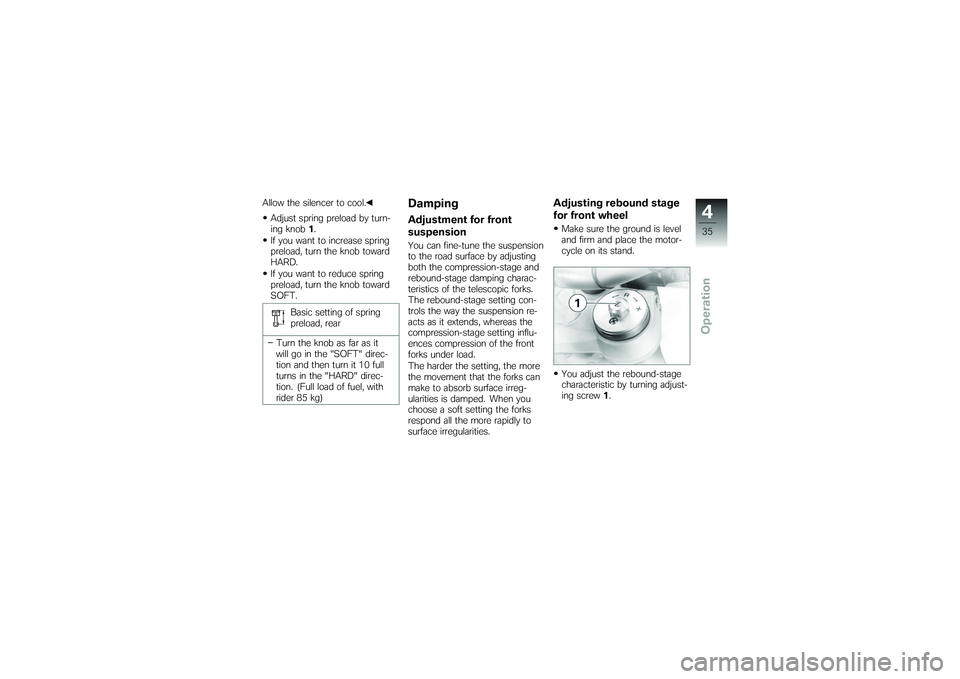
Allow the silencer to cool.Adjust spring preload by turn-
ing knob 1.
If you want to increase spring
preload, turn the knob toward
HARD.
If you want to reduce spring
preload, turn the knob toward
SOFT.
Basic setting of spring
preload, rear
Turn the knob as far as it
will go in the "SOFT" direc-
tion and then turn it 10 full
turns in the "HARD" direc-
tion. (Full load of fuel, with
rider 85 kg)
DampingAdjustment for front
suspensionYou can fine-tune the suspension
to the road surface by adjusting
both the compression-stage and
rebound-stage damping charac-
teristics of the telescopic forks.
The rebound-stage setting con-
trols the way the suspension re-
acts as it extends, whereas the
compression-stage setting influ-
ences compression of the front
forks under load.
The harder the setting, the more
the movement that the forks can
make to absorb surface irreg-
ularities is damped. When you
choose a soft setting the forks
respond all the more rapidly to
surface irregularities.
Adjusting rebound stage
for front wheelMake sure the ground is level
and firm and place the motor-
cycle on its stand.
You adjust the rebound-stage
characteristic by turning adjust-
ing screw 1.
435zOperation
Page 38 of 132
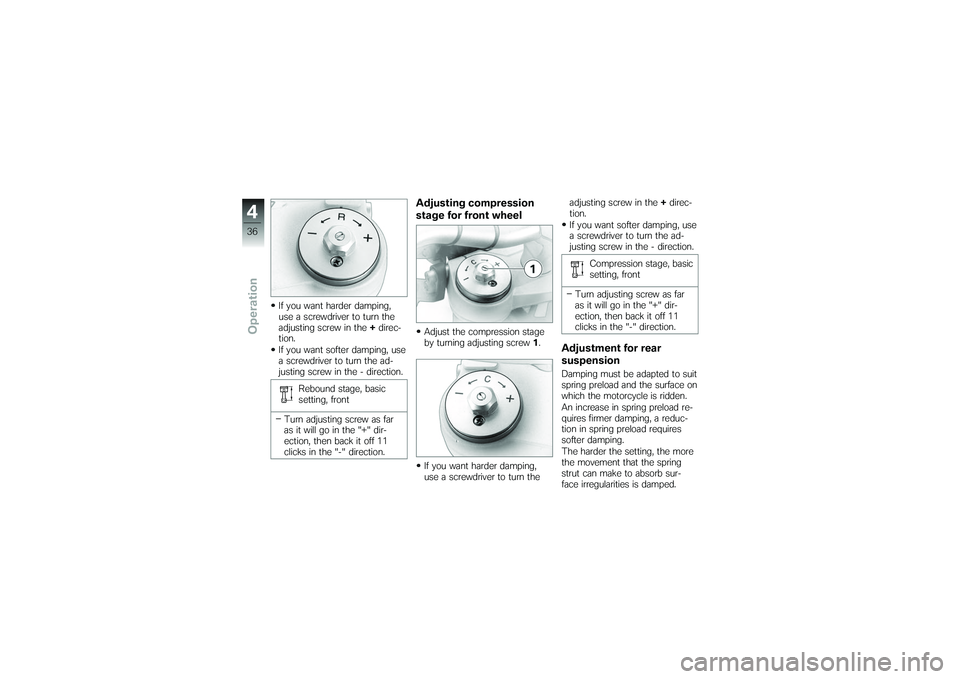
If you want harder damping,
use a screwdriver to turn the
adjusting screw in the+direc-
tion.
If you want softer damping, use
a screwdriver to turn the ad-
justing screw in the - direction.
Rebound stage, basic
setting, front
Turn adjusting screw as far
as it will go in the "+" dir-
ection, then back it off 11
clicks in the "-" direction.
Adjusting compression
stage for front wheelAdjust the compression stage
by turning adjusting screw 1.
If you want harder damping,
use a screwdriver to turn the adjusting screw in the
+direc-
tion.
If you want softer damping, use
a screwdriver to turn the ad-
justing screw in the - direction.
Compression stage, basic
setting, front
Turn adjusting screw as far
as it will go in the "+" dir-
ection, then back it off 11
clicks in the "-" direction.
Adjustment for rear
suspensionDamping must be adapted to suit
spring preload and the surface on
which the motorcycle is ridden.
An increase in spring preload re-
quires firmer damping, a reduc-
tion in spring preload requires
softer damping.
The harder the setting, the more
the movement that the spring
strut can make to absorb sur-
face irregularities is damped.
436zOperation
Page 39 of 132
When you choose a soft setting
the spring strut responds all the
more rapidly to surface irregularit-
ies.Adjusting damping for
rear wheelMake sure the ground is level
and firm and place the motor-
cycle on its stand.There is a risk of injury
by burns if you adjust the
damping characteristic while the
silencer is hot.
Use a screwdriver extension and
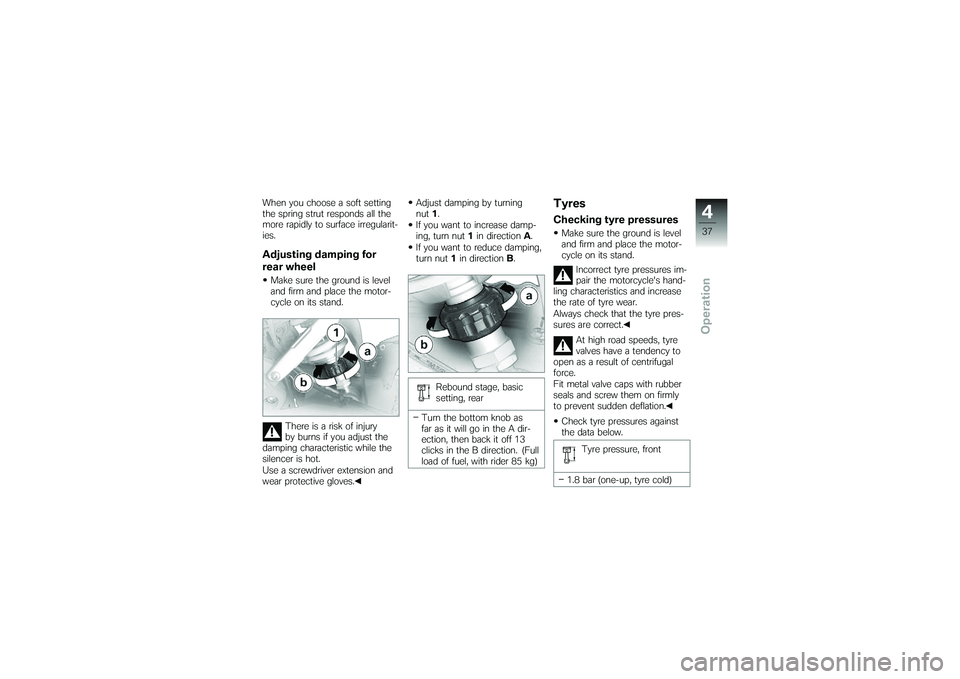
wear protective gloves. Adjust damping by turning
nut
1.
If you want to increase damp-
ing, turn nut 1in direction A.
If you want to reduce damping,
turn nut 1in direction B.
Rebound stage, basic
setting, rear
Turn the bottom knob as
far as it will go in the A dir-
ection, then back it off 13
clicks in the B direction. (Full
load of fuel, with rider 85 kg)
TyresChecking tyre pressuresMake sure the ground is level
and firm and place the motor-
cycle on its stand. Incorrect tyre pressures im-
pair the motorcycle's hand-
ling characteristics and increase
the rate of tyre wear.
Always check that the tyre pres-
sures are correct.
At high road speeds, tyre
valves have a tendency to
open as a result of centrifugal
force.
Fit metal valve caps with rubber
seals and screw them on firmly
to prevent sudden deflation.
Check tyre pressures against
the data below.
Tyre pressure, front
1.8 bar (one-up, tyre cold)
437zOperation