2007 BMW 760LI SEDAN remote control
[x] Cancel search: remote controlPage 86 of 253
Everything under control
84
Settings on Control Display
Setting units of measure and display
format
You can change the units of measure used in
the displays of fuel consumption, distances and
temperatures as well as the display format for
the time and date.
iDrive, for principle details, refer to page16.
1.Press the button to open the start
menu.
2.Move the controller toward "Settings".
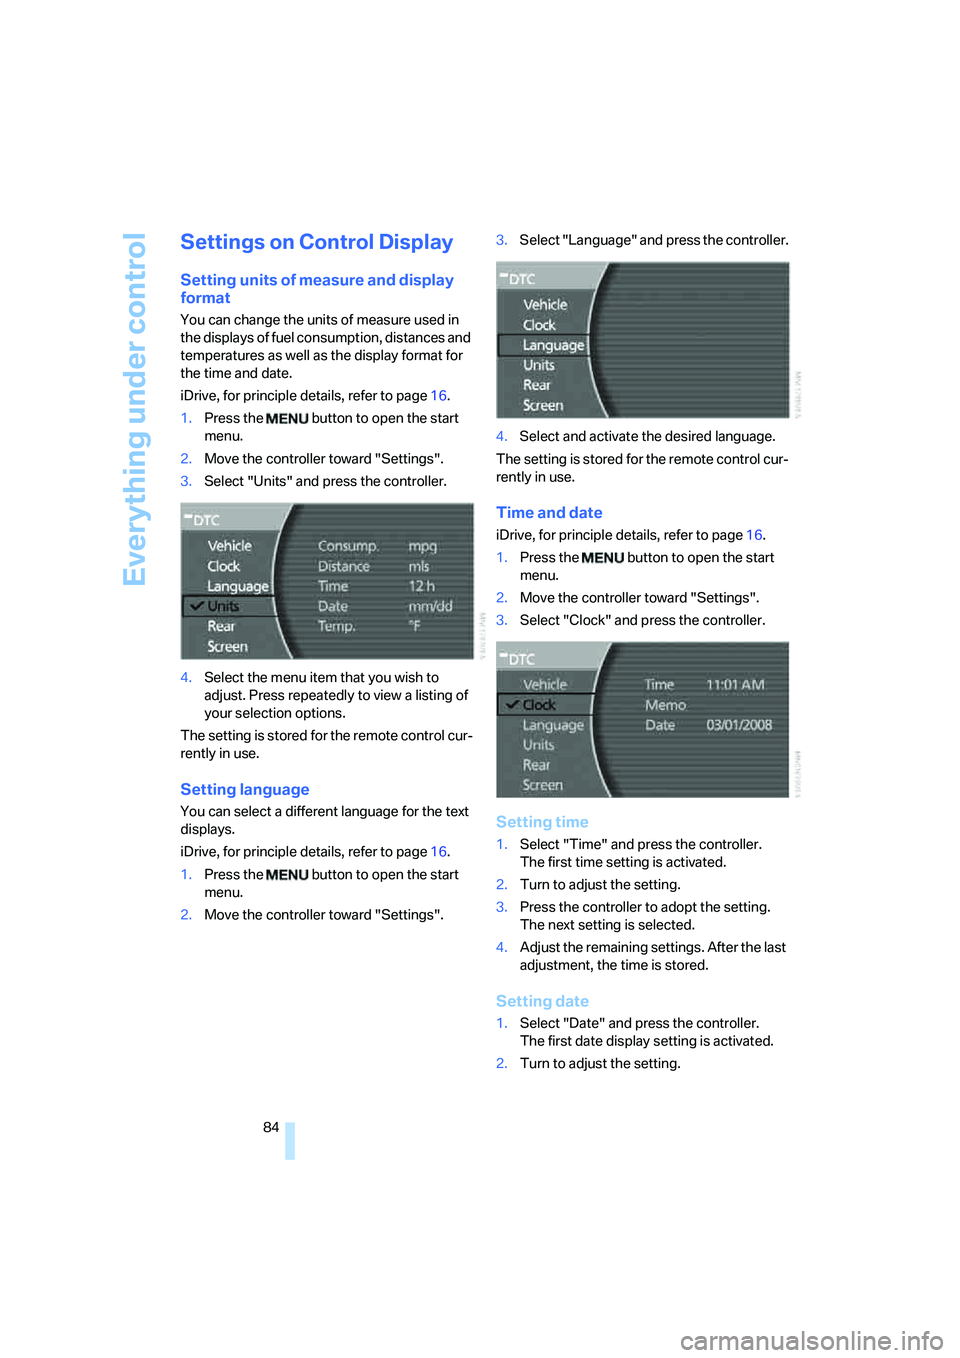
3.Select "Units" and press the controller.
4.Select the menu item that you wish to
adjust. Press repeatedly to view a listing of
your selection options.
The setting is stored for the remote control cur-
rently in use.
Setting language
You can select a different language for the text
displays.
iDrive, for principle details, refer to page16.
1.Press the button to open the start
menu.
2.Move the controller toward "Settings".3.Select "Language" and press the controller.
4.Select and activate the desired language.
The setting is stored for the remote control cur-
rently in use.
Time and date
iDrive, for principle details, refer to page16.
1.Press the button to open the start
menu.
2.Move the controller toward "Settings".
3.Select "Clock" and press the controller.
Setting time
1.Select "Time" and press the controller.
The first time setting is activated.
2.Turn to adjust the setting.
3.Press the controller to adopt the setting.
The next setting is selected.
4.Adjust the remaining settings. After the last
adjustment, the time is stored.
Setting date
1.Select "Date" and press the controller.
The first date display setting is activated.
2.Turn to adjust the setting.
Page 87 of 253
Controls
85Reference
At a glance
Driving tips
Communications
Navigation
Entertainment
Mobility
3.Press the controller to adopt the setting.
The next setting is selected.
4.Adjust the remaining settings. After the last
adjustment, the date is stored.
The setting is stored for the remote control cur-
rently in use.
Hour signal activation
You will hear four tones just before the top of
each hour.
Select "Memo" and press the controller.
The symbol indicates the menu that is cur-
rently activated.
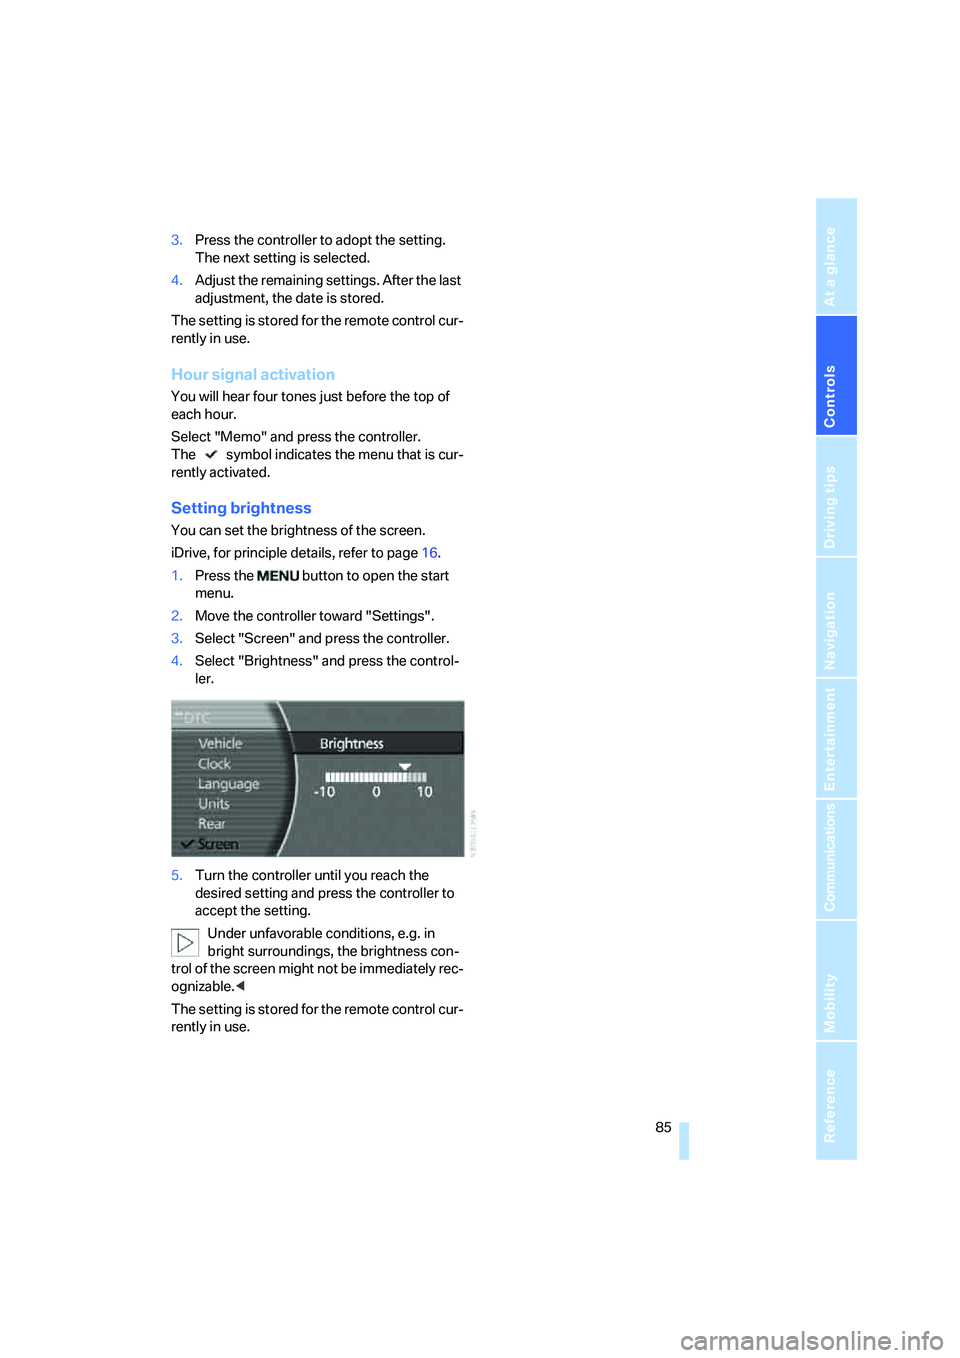
Setting brightness
You can set the brightness of the screen.
iDrive, for principle details, refer to page16.
1.Press the button to open the start
menu.
2.Move the controller toward "Settings".
3.Select "Screen" and press the controller.
4.Select "Brightness" and press the control-
ler.
5.Turn the controller until you reach the
desired setting and press the controller to
accept the setting.
Under unfavorable conditions, e.g. in
bright surroundings, the brightness con-
trol of the screen might not be immediately rec-
ognizable.<
The setting is stored for the remote control cur-
rently in use.
Page 89 of 253
Controls
87Reference
At a glance
Driving tips
Communications
Navigation
Entertainment
Mobility
iDrive, for principle details, refer to page16.
1.Press the button to open the start
menu.
2.Move the controller toward "Settings".
3.Select "Vehicle" and press the controller.
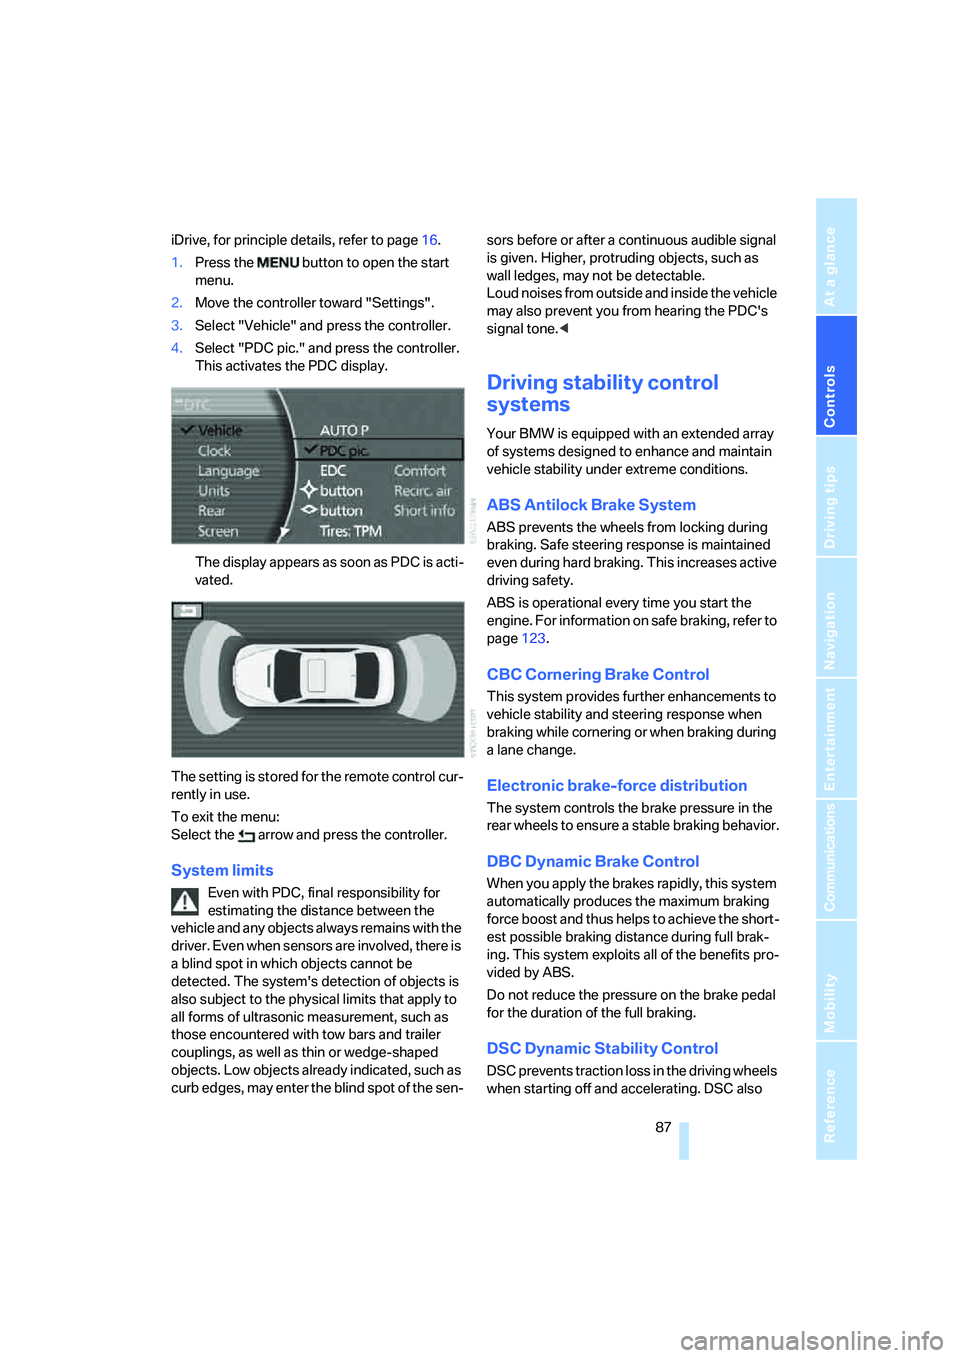
4.Select "PDC pic." and press the controller.
This activates the PDC display.
The display appears as soon as PDC is acti-
vated.
The setting is stored for the remote control cur-
rently in use.
To exit the menu:
Select the arrow and press the controller.
System limits
Even with PDC, final responsibility for
estimating the distance between the
vehicle and any objects always remains with the
driver. Even when sensors are involved, there is
a blind spot in which objects cannot be
detected. The system's detection of objects is
also subject to the physical limits that apply to
all forms of ultrasonic measurement, such as
those encountered with tow bars and trailer
couplings, as well as thin or wedge-shaped
objects. Low objects already indicated, such as
curb edges, may enter the blind spot of the sen-sors before or after a continuous audible signal
is given. Higher, protruding objects, such as
wall ledges, may not be detectable.
Loud noises from outside and inside the vehicle
may also prevent you from hearing the PDC's
signal tone.<
Driving stability control
systems
Your BMW is equipped with an extended array
of systems designed to enhance and maintain
vehicle stability under extreme conditions.
ABS Antilock Brake System
ABS prevents the wheels from locking during
braking. Safe steering response is maintained
even during hard braking. This increases active
driving safety.
ABS is operational every time you start the
engine. For information on safe braking, refer to
page123.
CBC Cornering Brake Control
This system provides further enhancements to
vehicle stability and steering response when
braking while cornering or when braking during
a lane change.
Electronic brake-force distribution
The system controls the brake pressure in the
rear wheels to ensure a stable braking behavior.
DBC Dynamic Brake Control
When you apply the brakes rapidly, this system
automatically produces the maximum braking
force boost and thus helps to achieve the short-
est possible braking distance during full brak-
ing. This system exploits all of the benefits pro-
vided by ABS.
Do not reduce the pressure on the brake pedal
for the duration of the full braking.
DSC Dynamic Stability Control
DSC prevents traction loss in the driving wheels
when starting off and accelerating. DSC also
Page 100 of 253
Technology for comfort, convenience and safety
98
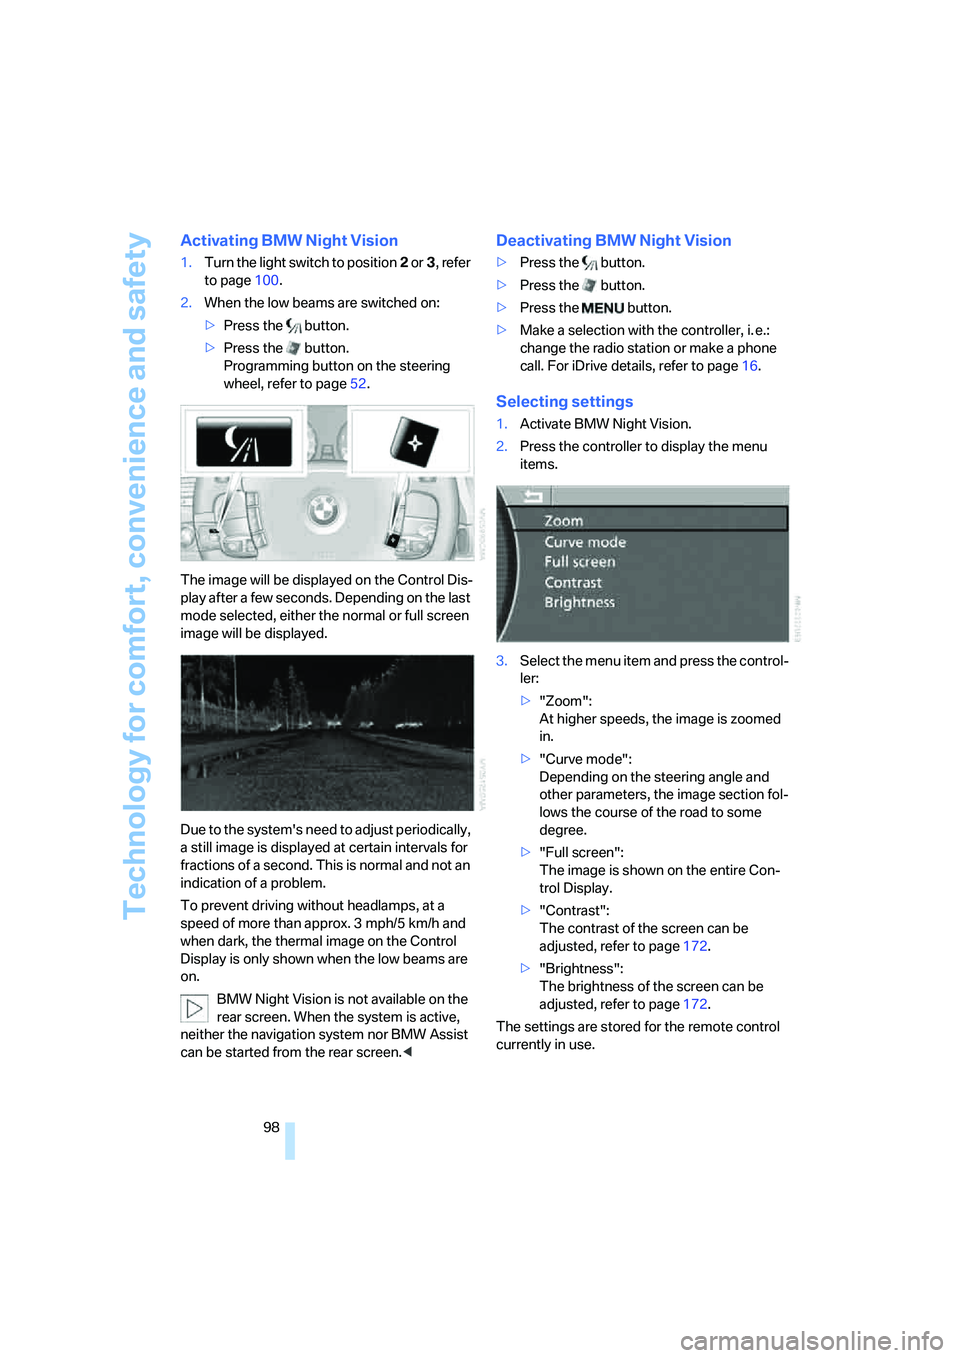
Activating BMW Night Vision
1.Turn the light switch to position2 or3, refer
to page100.
2.When the low beams are switched on:
>Press the button.
>Press the button.
Programming button on the steering
wheel, refer to page52.
The image will be displayed on the Control Dis-
play after a few seconds. Depending on the last
mode selected, either the normal or full screen
image will be displayed.
Due to the system's need to adjust periodically,
a still image is displayed at certain intervals for
fractions of a second. This is normal and not an
indication of a problem.
To prevent driving without headlamps, at a
speed of more than approx. 3 mph/5 km/h and
when dark, the thermal image on the Control
Display is only shown when the low beams are
on.
BMW Night Vision is not available on the
rear screen. When the system is active,
neither the navigation system nor BMW Assist
can be started from the rear screen.<
Deactivating BMW Night Vision
>Press the button.
>Press the button.
>Press the button.
>Make a selection with the controller, i. e.:
change the radio station or make a phone
call. For iDrive details, refer to page16.
Selecting settings
1.Activate BMW Night Vision.
2.Press the controller to display the menu
items.
3.Select the menu item and press the control-
ler:
>"Zoom":
At higher speeds, the image is zoomed
in.
>"Curve mode":
Depending on the steering angle and
other parameters, the image section fol-
lows the course of the road to some
degree.
>"Full screen":
The image is shown on the entire Con-
trol Display.
>"Contrast":
The contrast of the screen can be
adjusted, refer to page172.
>"Brightness":
The brightness of the screen can be
adjusted, refer to page172.
The settings are stored for the remote control
currently in use.
Page 102 of 253
Lamps
100
Lamps
Parking lamps/low beams
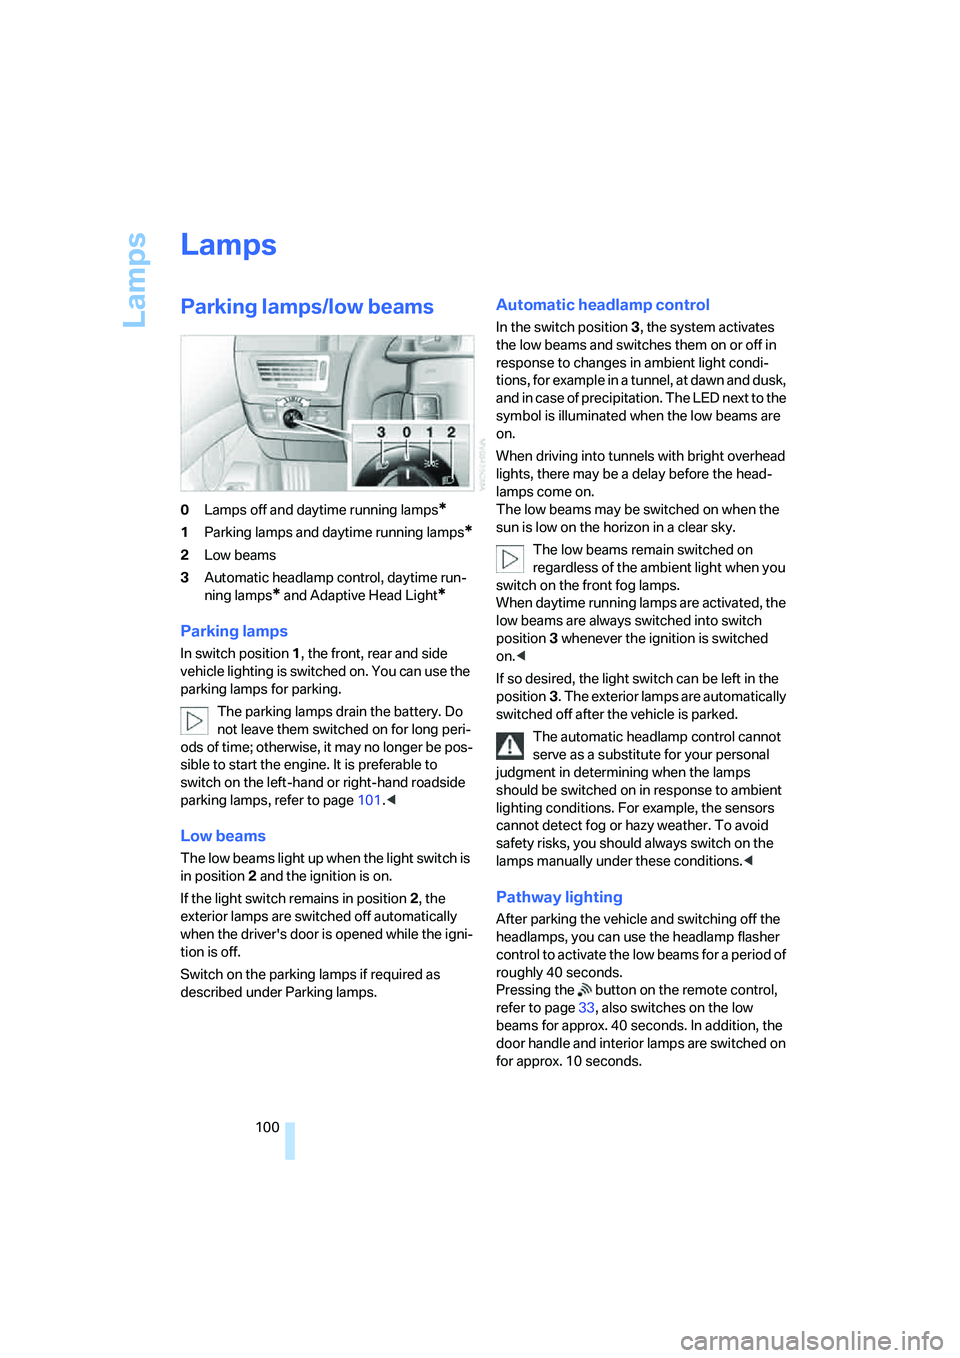
0Lamps off and daytime running lamps*
1Parking lamps and daytime running lamps*
2Low beams
3Automatic headlamp control, daytime run-
ning lamps
* and Adaptive Head Light*
Parking lamps
In switch position1, the front, rear and side
vehicle lighting is switched on. You can use the
parking lamps for parking.
The parking lamps drain the battery. Do
not leave them switched on for long peri-
ods of time; otherwise, it may no longer be pos-
sible to start the engine. It is preferable to
switch on the left-hand or right-hand roadside
parking lamps, refer to page101.<
Low beams
The low beams light up when the light switch is
in position 2 and the ignition is on.
If the light switch remains in position 2, the
exterior lamps are switched off automatically
when the driver's door is opened while the igni-
tion is off.
Switch on the parking lamps if required as
described under Parking lamps.
Automatic headlamp control
In the switch position3, the system activates
the low beams and switches them on or off in
response to changes in ambient light condi-
tions, for example in a tunnel, at dawn and dusk,
and in case of precipitation. The LED next to the
symbol is illuminated when the low beams are
on.
When driving into tunnels with bright overhead
lights, there may be a delay before the head-
lamps come on.
The low beams may be switched on when the
sun is low on the horizon in a clear sky.
The low beams remain switched on
regardless of the ambient light when you
switch on the front fog lamps.
When daytime running lamps are activated, the
low beams are always switched into switch
position3 whenever the ignition is switched
on.<
If so desired, the light switch can be left in the
position3. The exterior lamps are automatically
switched off after the vehicle is parked.
The automatic headlamp control cannot
serve as a substitute for your personal
judgment in determining when the lamps
should be switched on in response to ambient
lighting conditions. For example, the sensors
cannot detect fog or hazy weather. To avoid
safety risks, you should always switch on the
lamps manually under these conditions.<
Pathway lighting
After parking the vehicle and switching off the
headlamps, you can use the headlamp flasher
control to activate the low beams for a period of
roughly 40 seconds.
Pressing the button on the remote control,
refer to page33, also switches on the low
beams for approx. 40 seconds. In addition, the
door handle and interior lamps are switched on
for approx. 10 seconds.
Page 106 of 253
Climate
104
Automatic climate control
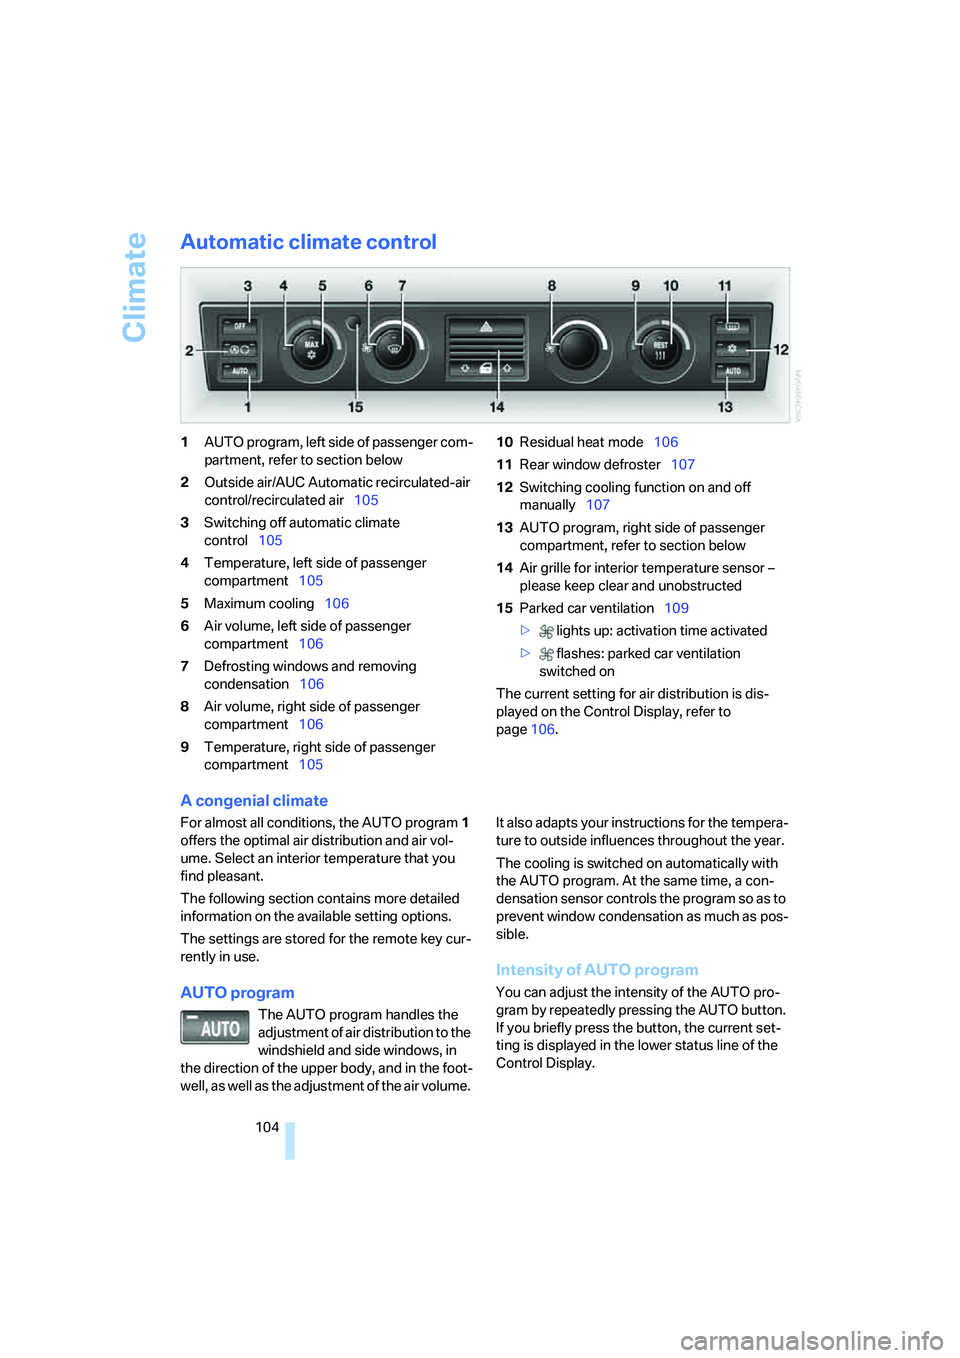
1AUTO program, left side of passenger com-
partment, refer to section below
2Outside air/AUC Automatic recirculated-air
control/recirculated air105
3Switching off automatic climate
control105
4Temperature, left side of passenger
compartment105
5Maximum cooling106
6Air volume, left side of passenger
compartment106
7Defrosting windows and removing
condensation106
8Air volume, right side of passenger
compartment106
9Temperature, right side of passenger
compartment10510Residual heat mode106
11Rear window defroster107
12Switching cooling function on and off
manually107
13AUTO program, right side of passenger
compartment, refer to section below
14Air grille for interior temperature sensor –
please keep clear and unobstructed
15Parked car ventilation109
> lights up: activation time activated
> flashes: parked car ventilation
switched on
The current setting for air distribution is dis-
played on the Control Display, refer to
page106.
A congenial climate
For almost all conditions, the AUTO program1
offers the optimal air distribution and air vol-
ume. Select an interior temperature that you
find pleasant.
The following section contains more detailed
information on the available setting options.
The settings are stored for the remote key cur-
rently in use.
AUTO program
The AUTO program handles the
adjustment of air distribution to the
windshield and side windows, in
the direction of the upper body, and in the foot-
well, as well as the adjustment of the air volume. It also adapts your instructions for the tempera-
ture to outside influences throughout the year.
The cooling is switched on automatically with
the AUTO program. At the same time, a con-
densation sensor controls the program so as to
prevent window condensation as much as pos-
sible.
Intensity of AUTO program
You can adjust the intensity of the AUTO pro-
gram by repeatedly pressing the AUTO button.
If you briefly press the button, the current set-
ting is displayed in the lower status line of the
Control Display.
Page 113 of 253
Controls
111Reference
At a glance
Driving tips
Communications
Navigation
Entertainment
Mobility
Practical interior accessories
Integrated universal remote
control*
The concept
The integrated universal remote control can
replace as many as three hand-held transmit-
ters for various remote-controlled accessories,
such as door openers and house alarm sys-
tems. The integrated universal remote control
registers and stores signals from the original
hand-held transmitters.
The signal of an original hand-held transmitter
can be programmed into one of the three mem-
ory buttons1. After this, the programmed
memory button1 will operate the system in
question. The LED2 flashes to confirm trans-
mission of the signal.
Should you sell your vehicle one day, be sure to
delete the stored programs beforehand for your
security, refer to page112.
To prevent possible damage or injury,
during programming or before each use
of the programmed device by the integrated
universal remote control, always inspect the
immediate area to make certain that no people,
animals or objects are within the swiveling and
movement range of the device. Also, comply
with the safety precautions of the original hand-
held transmitter.<
Checking compatibility
If you see this symbol on the packaging
or in the manual supplied with the orig-
inal hand-held transmitter, it is safe to
assume that it is compatible with the integrated
universal remote control.
If you have additional questions, please contact
your BMW center or call: 1-800-355-3515.
Information is also provided on the Internet at:
www.bmwusa.com or
www.homelink.com.
HomeLink is a registered trademark of
Johnson Controls, Inc.
Programming
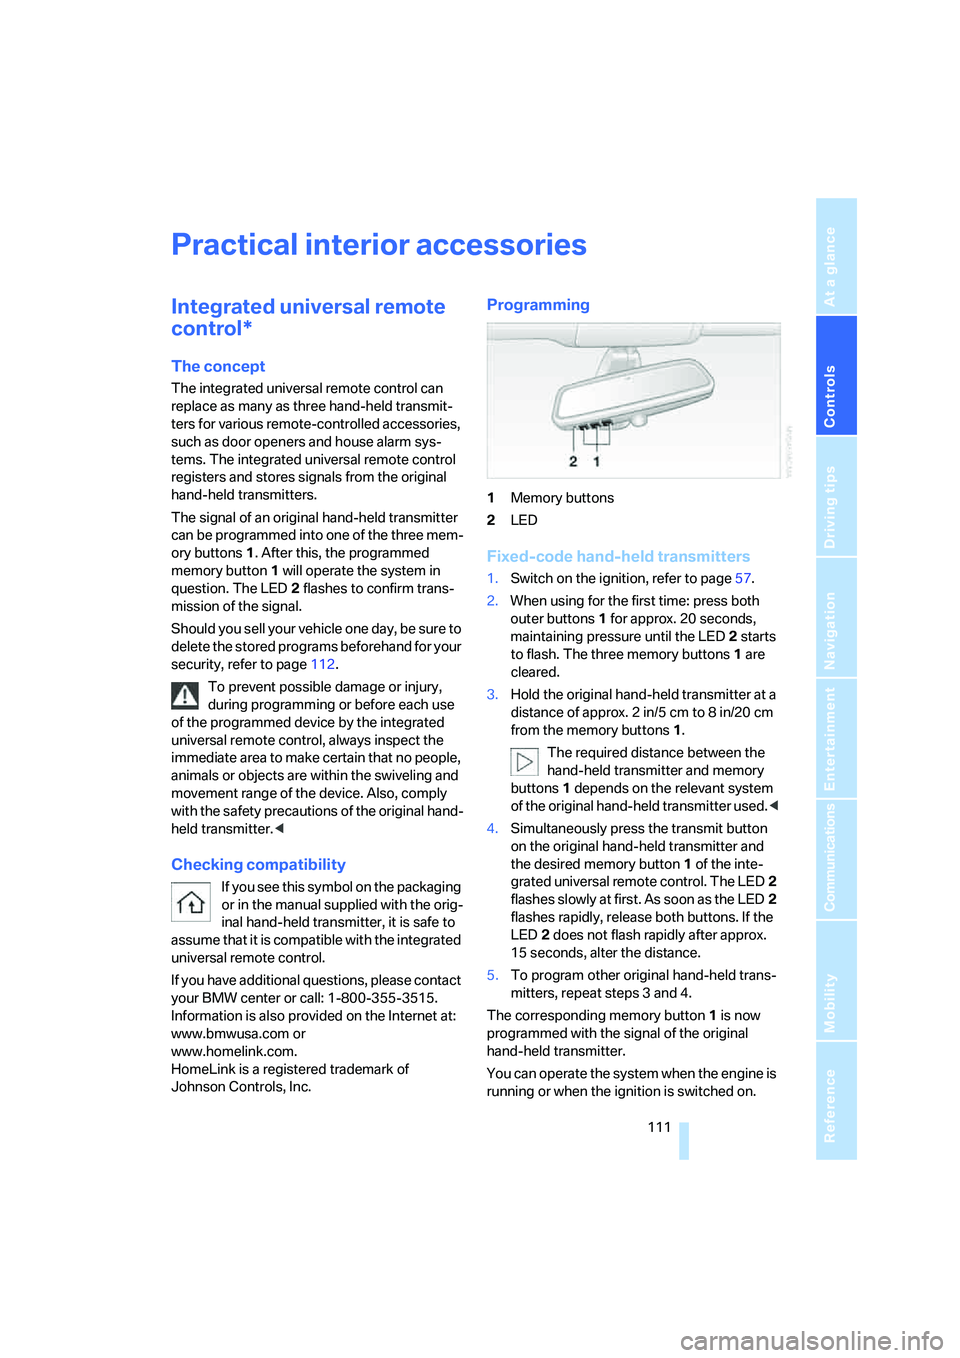
1Memory buttons
2LED
Fixed-code hand-held transmitters
1.Switch on the ignition, refer to page57.
2.When using for the first time: press both
outer buttons1 for approx. 20 seconds,
maintaining pressure until the LED2 starts
to flash. The three memory buttons1 are
cleared.
3.Hold the original hand-held transmitter at a
distance of approx. 2in/5cm to 8in/20cm
from the memory buttons1.
The required distance between the
hand-held transmitter and memory
buttons1 depends on the relevant system
of the original hand-held transmitter used.<
4.Simultaneously press the transmit button
on the original hand-held transmitter and
the desired memory button1 of the inte-
grated universal remote control. The LED2
flashes slowly at first. As soon as the LED2
flashes rapidly, release both buttons. If the
LED2 does not flash rapidly after approx.
15 seconds, alter the distance.
5.To program other original hand-held trans-
mitters, repeat steps 3 and 4.
The corresponding memory button1 is now
programmed with the signal of the original
hand-held transmitter.
You can operate the system when the engine is
running or when the ignition is switched on.
Page 114 of 253
Practical interior accessories
112 If the device cannot be operated after
repeated programming, check whether
the original hand-held transmitter uses an alter-
nating-code system. To do so, either read the
instructions of the original hand-held transmit-
ter or press and hold down the programmed
memory button1 of the integrated universal
remote control. If the LED2 on the integrated
universal remote control flashes rapidly for a
short time and then remains lit for approx.
2 seconds, then this indicates that the original
hand-held transmitter is equipped with an alter-
nating-code system. In the case of an alternat-
ing-code system, program the memory
buttons1 as described in the Alternating-code
transmitters section below.<
Alternating-code transmitters
Consult the operating instructions of the unit
you wish to set when programming the univer-
sal remote control. You will find information
there on the possibilities for synchronization.
When programming hand-held transmitters
that employ an alternating code, please follow
the supplementary instructions below:
Programming will be easier with the aid of
a second person.<
1.Park your vehicle within the range of the
remote-controlled device.
2.Program the integrated universal remote
control as described above in the Fixed-
code hand-held transmitters section.
3.Locate the button on the receiver of the
device you want to set up, e.g. on the upper
section of its motor.
4.Press the button on the receiver of the
device you want to set up. After step 4, you
have approx. 30 seconds for step 5.
5.Press the programmable memory button1
on the integrated universal remote control
three times.
The corresponding memory button1 is now
programmed with the signal of the original
hand-held transmitter.
If you have any additional questions,
please contact your BMW center.<
Clearing memory buttons
Press both outer buttons1 for approx. 20 sec-
onds, maintaining pressure until the LED2
starts to flash:
All of the memory buttons have been cleared.
It is not possible to clear individual memory
buttons1.
Roller sun blinds*
Rear window blind
Briefly press the button on the driver's door with
the ignition in radio ready state or higher.
Roller sun blinds for rear side windows
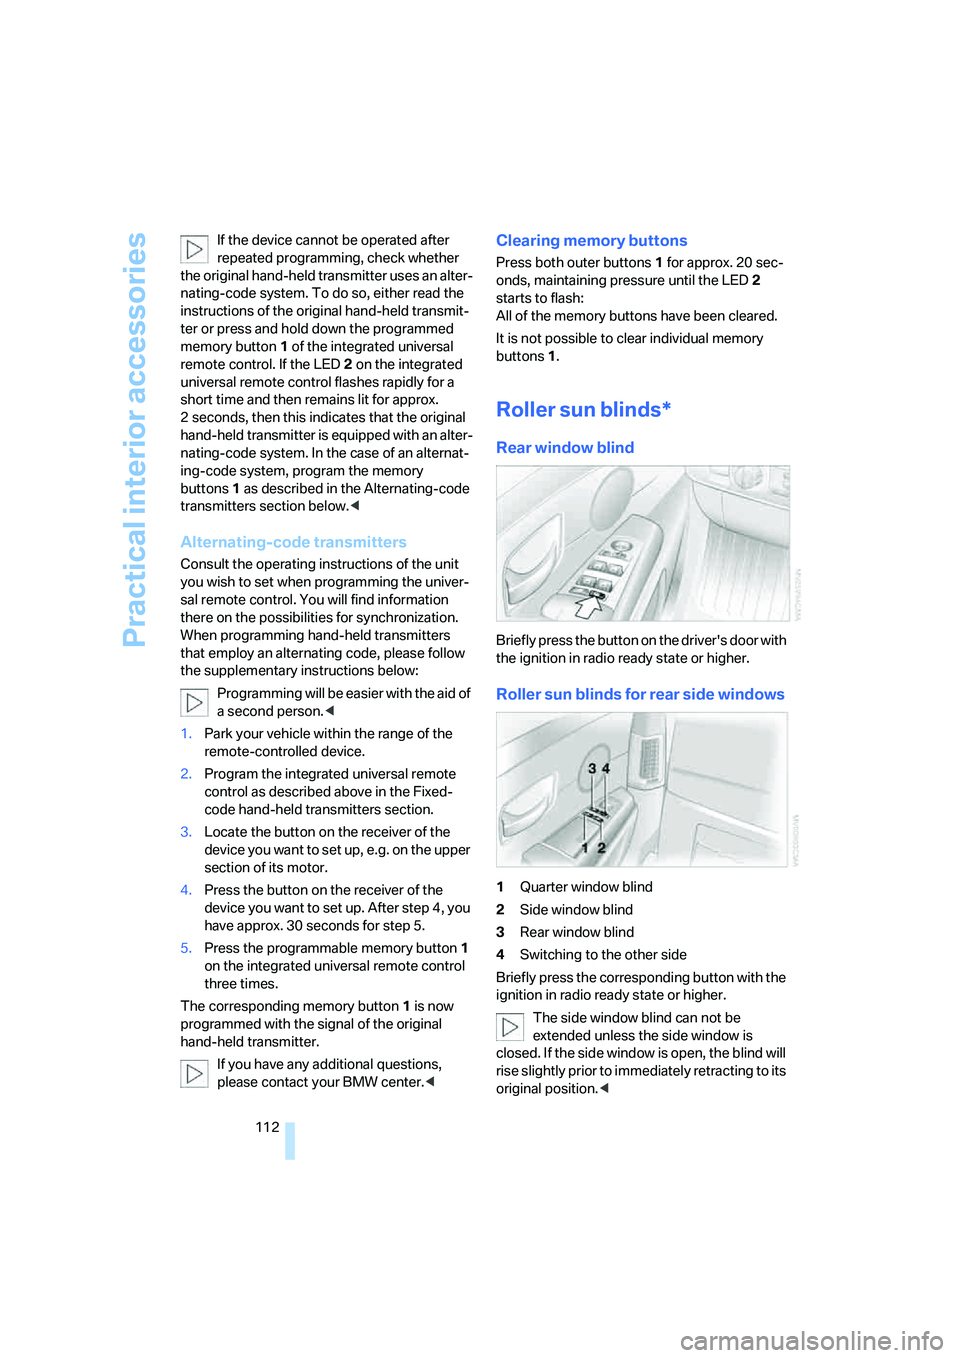
1Quarter window blind
2Side window blind
3Rear window blind
4Switching to the other side
Briefly press the corresponding button with the
ignition in radio ready state or higher.
The side window blind can not be
extended unless the side window is
closed. If the side window is open, the blind will
rise slightly prior to immediately retracting to its
original position.<