2007 BMW 760LI SEDAN remote control
[x] Cancel search: remote controlPage 59 of 253
Controls
57Reference
At a glance
Driving tips
Communications
Navigation
Entertainment
Mobility
Driving
Ignition lock
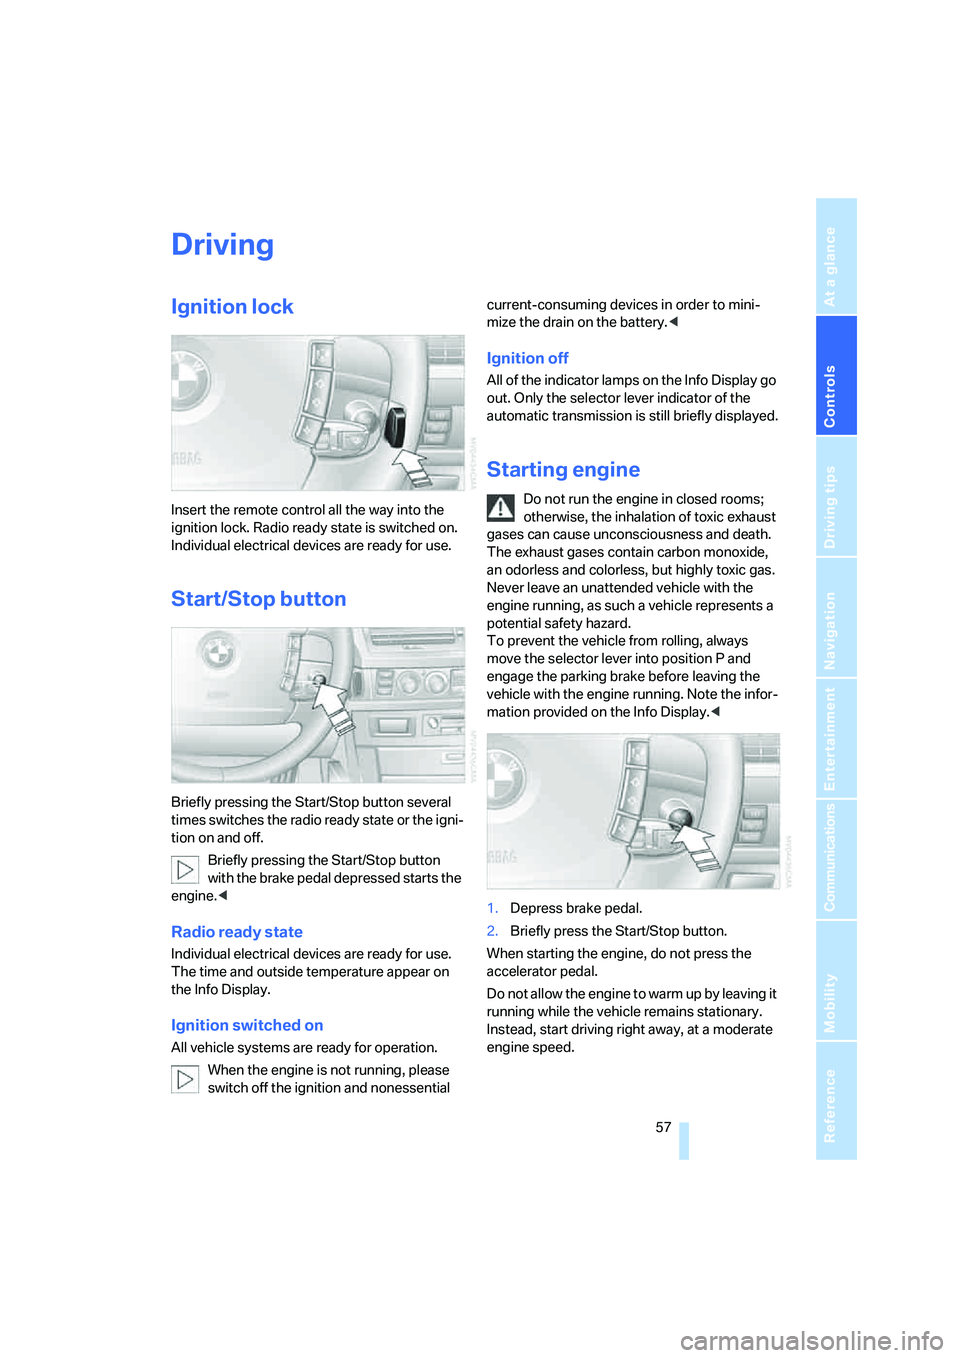
Insert the remote control all the way into the
ignition lock. Radio ready state is switched on.
Individual electrical devices are ready for use.
Start/Stop button
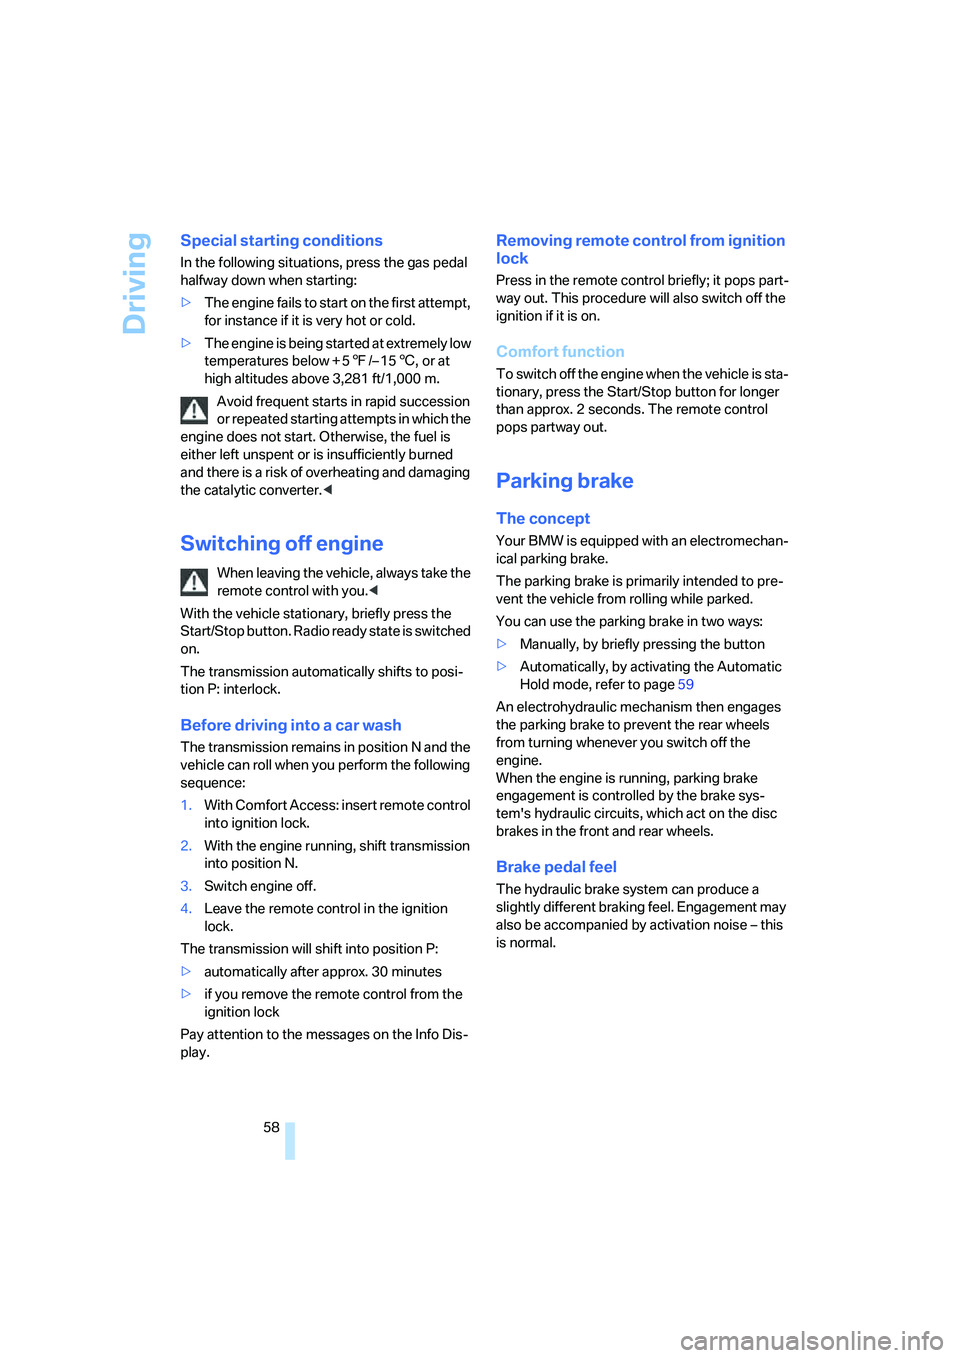
Briefly pressing the Start/Stop button several
times switches the radio ready state or the igni-
tion on and off.
Briefly pressing the Start/Stop button
with the brake pedal depressed starts the
engine.<
Radio ready state
Individual electrical devices are ready for use.
The time and outside temperature appear on
the Info Display.
Ignition switched on
All vehicle systems are ready for operation.
When the engine is not running, please
switch off the ignition and nonessential current-consuming devices in order to mini-
mize the drain on the battery.<
Ignition off
All of the indicator lamps on the Info Display go
out. Only the selector lever indicator of the
automatic transmission is still briefly displayed.
Starting engine
Do not run the engine in closed rooms;
otherwise, the inhalation of toxic exhaust
gases can cause unconsciousness and death.
The exhaust gases contain carbon monoxide,
an odorless and colorless, but highly toxic gas.
Never leave an unattended vehicle with the
engine running, as such a vehicle represents a
potential safety hazard.
To prevent the vehicle from rolling, always
move the selector lever into position P and
engage the parking brake before leaving the
vehicle with the engine running. Note the infor-
mation provided on the Info Display.<
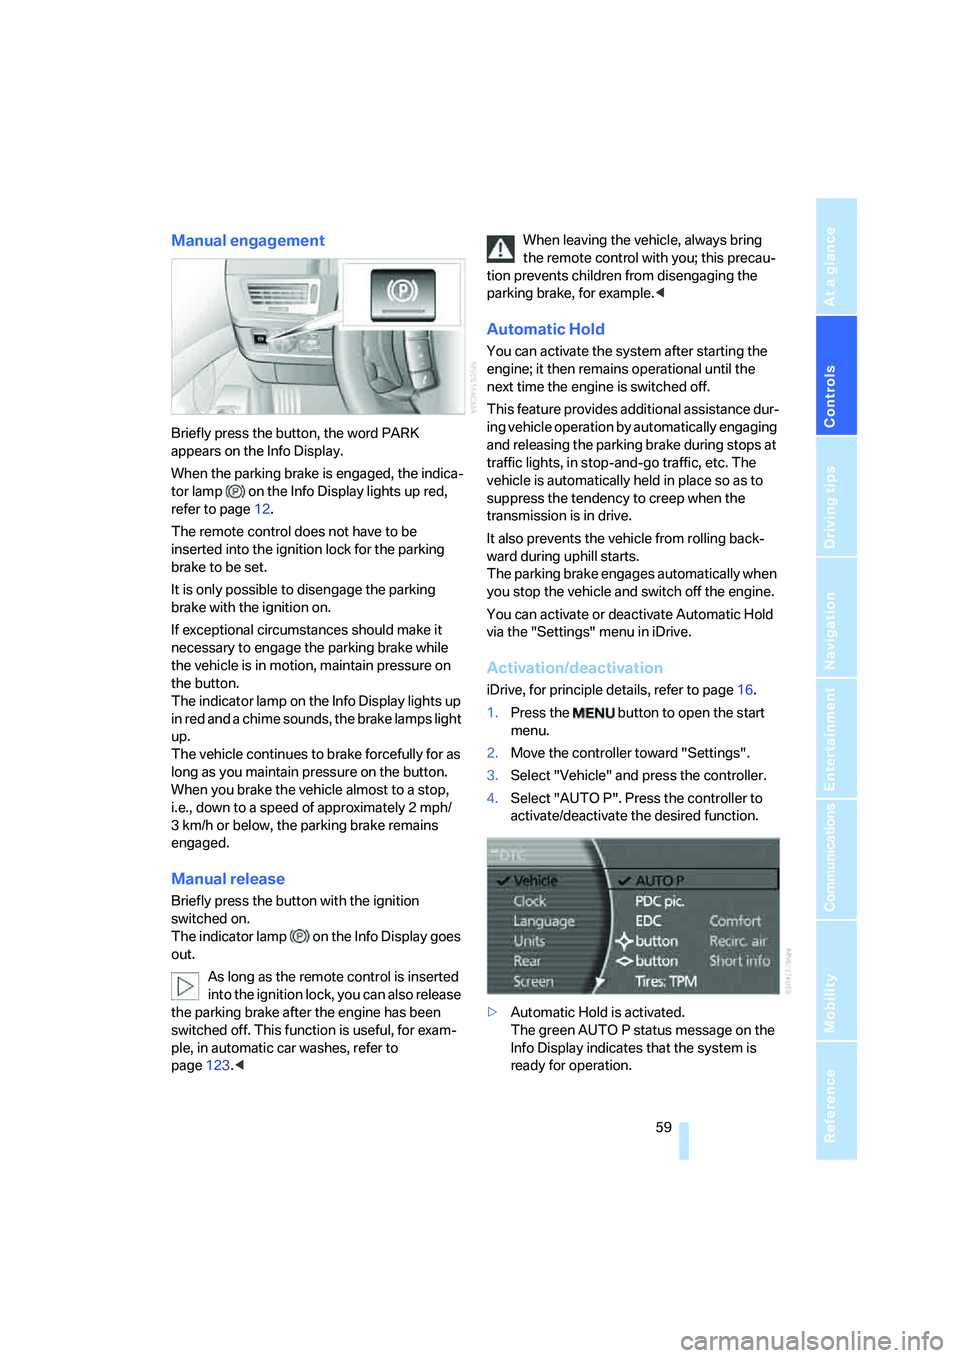
1.Depress brake pedal.
2.Briefly press the Start/Stop button.
When starting the engine, do not press the
accelerator pedal.
Do not allow the engine to warm up by leaving it
running while the vehicle remains stationary.
Instead, start driving right away, at a moderate
engine speed.
Page 60 of 253
Driving
58
Special starting conditions
In the following situations, press the gas pedal
halfway down when starting:
>The engine fails to start on the first attempt,
for instance if it is very hot or cold.
>The engine is being started at extremely low
temperatures below + 57/– 156, or at
high altitudes above 3,281 ft/1,000 m.
Avoid frequent starts in rapid succession
or repeated starting attempts in which the
engine does not start. Otherwise, the fuel is
either left unspent or is insufficiently burned
and there is a risk of overheating and damaging
the catalytic converter.<
Switching off engine
When leaving the vehicle, always take the
remote control with you.<
With the vehicle stationary, briefly press the
Start/Stop button. Radio ready state is switched
on.
The transmission automatically shifts to posi-
tion P: interlock.
Before driving into a car wash
The transmission remains in position N and the
vehicle can roll when you perform the following
sequence:
1.With Comfort Access: insert remote control
into ignition lock.
2.With the engine running, shift transmission
into position N.
3.Switch engine off.
4.Leave the remote control in the ignition
lock.
The transmission will shift into position P:
>automatically after approx. 30 minutes
>if you remove the remote control from the
ignition lock
Pay attention to the messages on the Info Dis-
play.
Removing remote control from ignition
lock
Press in the remote control briefly; it pops part-
way out. This procedure will also switch off the
ignition if it is on.
Comfort function
To switch off the engine when the vehicle is sta-
tionary, press the Start/Stop button for longer
than approx. 2 seconds. The remote control
pops partway out.
Parking brake
The concept
Your BMW is equipped with an electromechan-
ical parking brake.
The parking brake is primarily intended to pre-
vent the vehicle from rolling while parked.
You can use the parking brake in two ways:
>Manually, by briefly pressing the button
>Automatically, by activating the Automatic
Hold mode, refer to page59
An electrohydraulic mechanism then engages
the parking brake to prevent the rear wheels
from turning whenever you switch off the
engine.
When the engine is running, parking brake
engagement is controlled by the brake sys-
tem's hydraulic circuits, which act on the disc
brakes in the front and rear wheels.
Brake pedal feel
The hydraulic brake system can produce a
slightly different braking feel. Engagement may
also be accompanied by activation noise – this
is normal.
Page 61 of 253
Controls
59Reference
At a glance
Driving tips
Communications
Navigation
Entertainment
Mobility
Manual engagement
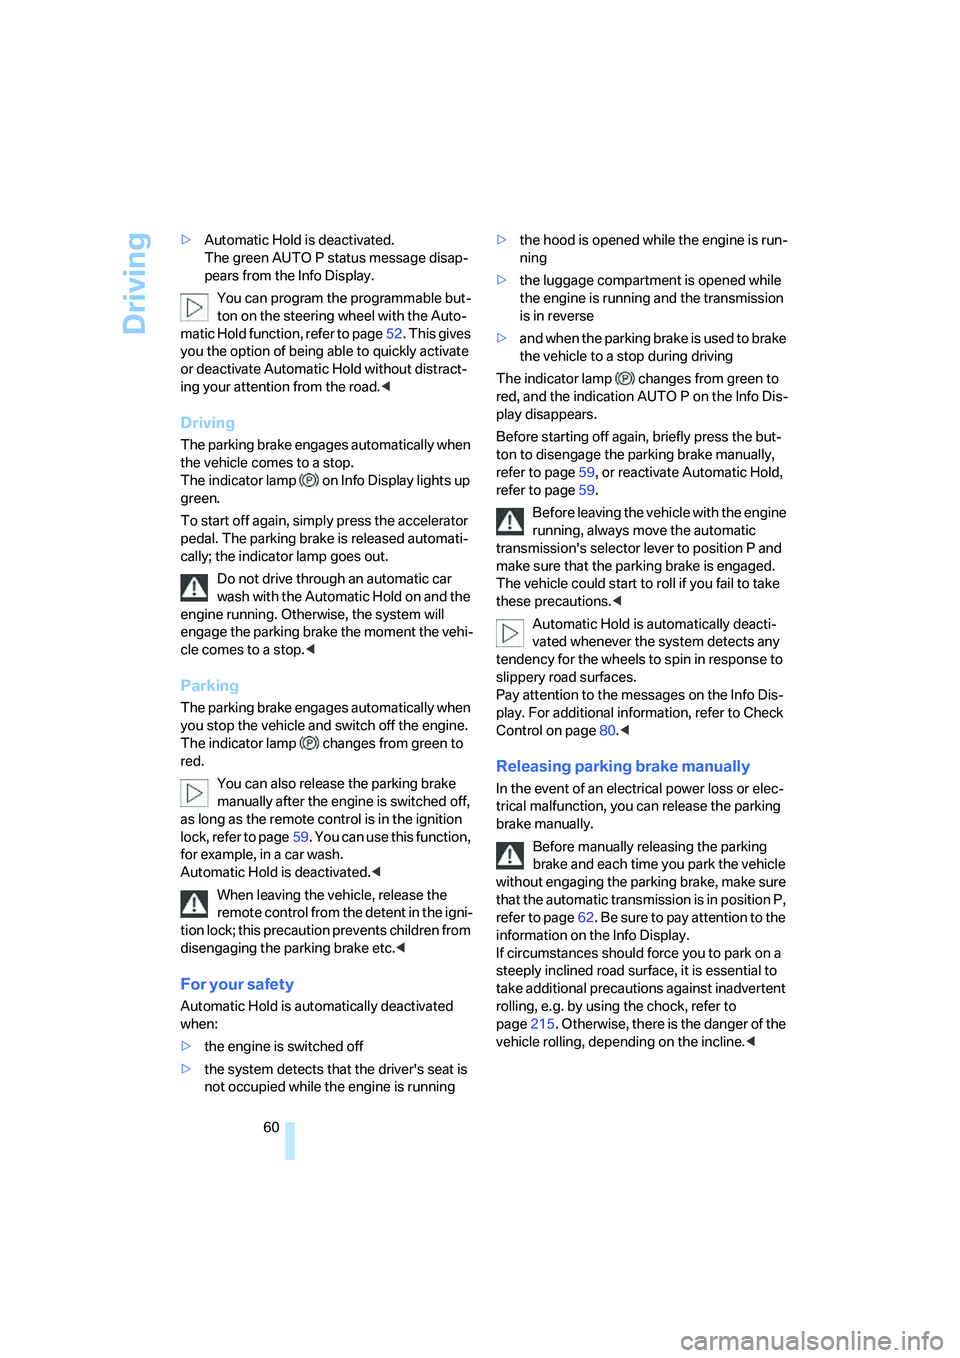
Briefly press the button, the word PARK
appears on the Info Display.
When the parking brake is engaged, the indica-
tor lamp on the Info Display lights up red,
refer to page12.
The remote control does not have to be
inserted into the ignition lock for the parking
brake to be set.
It is only possible to disengage the parking
brake with the ignition on.
If exceptional circumstances should make it
necessary to engage the parking brake while
the vehicle is in motion, maintain pressure on
the button.
The indicator lamp on the Info Display lights up
in red and a chime sounds, the brake lamps light
up.
The vehicle continues to brake forcefully for as
long as you maintain pressure on the button.
When you brake the vehicle almost to a stop,
i.e., down to a speed of approximately 2 mph/
3 km/h or below, the parking brake remains
engaged.
Manual release
Briefly press the button with the ignition
switched on.
The indicator lamp on the Info Display goes
out.
As long as the remote control is inserted
into the ignition lock, you can also release
the parking brake after the engine has been
switched off. This function is useful, for exam-
ple, in automatic car washes, refer to
page123.
tion prevents children from disengaging the
parking brake, for example.<
Automatic Hold
You can activate the system after starting the
engine; it then remains operational until the
next time the engine is switched off.
This feature provides additional assistance dur-
ing vehicle operation by automatically engaging
and releasing the parking brake during stops at
traffic lights, in stop-and-go traffic, etc. The
vehicle is automatically held in place so as to
suppress the tendency to creep when the
transmission is in drive.
It also prevents the vehicle from rolling back-
ward during uphill starts.
The parking brake engages automatically when
you stop the vehicle and switch off the engine.
You can activate or deactivate Automatic Hold
via the "Settings" menu in iDrive.
Activation/deactivation
iDrive, for principle details, refer to page16.
1.Press the button to open the start
menu.
2.Move the controller toward "Settings".
3.Select "Vehicle" and press the controller.
4.Select "AUTO P". Press the controller to
activate/deactivate the desired function.
>Automatic Hold is activated.
The green AUTO P status message on the
Info Display indicates that the system is
ready for operation.
Page 62 of 253
Driving
60 >Automatic Hold is deactivated.
The green AUTO P status message disap-
pears from the Info Display.
You can program the programmable but-
ton on the steering wheel with the Auto-
matic Hold function, refer to page52. This gives
you the option of being able to quickly activate
or deactivate Automatic Hold without distract-
ing your attention from the road.<
Driving
The parking brake engages automatically when
the vehicle comes to a stop.
The indicator lamp on Info Display lights up
green.
To start off again, simply press the accelerator
pedal. The parking brake is released automati-
cally; the indicator lamp goes out.
Do not drive through an automatic car
wash with the Automatic Hold on and the
engine running. Otherwise, the system will
engage the parking brake the moment the vehi-
cle comes to a stop.<
Parking
The parking brake engages automatically when
you stop the vehicle and switch off the engine.
The indicator lamp changes from green to
red.
You can also release the parking brake
manually after the engine is switched off,
as long as the remote control is in the ignition
lock, refer to page59. You can use this function,
for example, in a car wash.
Automatic Hold is deactivated.<
When leaving the vehicle, release the
remote control from the detent in the igni-
tion lock; this precaution prevents children from
disengaging the parking brake etc.<
For your safety
Automatic Hold is automatically deactivated
when:
>the engine is switched off
>the system detects that the driver's seat is
not occupied while the engine is running>the hood is opened while the engine is run-
ning
>the luggage compartment is opened while
the engine is running and the transmission
is in reverse
>and when the parking brake is used to brake
the vehicle to a stop during driving
The indicator lamp changes from green to
red, and the indication AUTO P on the Info Dis-
play disappears.
Before starting off again, briefly press the but-
ton to disengage the parking brake manually,
refer to page59, or reactivate Automatic Hold,
refer to page59.
Before leaving the vehicle with the engine
running, always move the automatic
transmission's selector lever to position P and
make sure that the parking brake is engaged.
The vehicle could start to roll if you fail to take
these precautions.<
Automatic Hold is automatically deacti-
vated whenever the system detects any
tendency for the wheels to spin in response to
slippery road surfaces.
Pay attention to the messages on the Info Dis-
play. For additional information, refer to Check
Control on page80.<
Releasing parking brake manually
In the event of an electrical power loss or elec-
trical malfunction, you can release the parking
brake manually.
Before manually releasing the parking
brake and each time you park the vehicle
without engaging the parking brake, make sure
that the automatic transmission is in position P,
refer to page62. Be sure to pay attention to the
information on the Info Display.
If circumstances should force you to park on a
steeply inclined road surface, it is essential to
take additional precautions against inadvertent
rolling, e.g. by using the chock, refer to
page215. Otherwise, there is the danger of the
vehicle rolling, depending on the incline.<
Page 65 of 253
Controls
63Reference
At a glance
Driving tips
Communications
Navigation
Entertainment
Mobility
The selector lever immediately returns to the
center position when released.
Selecting P
Press button P.
P Park
Select only when the vehicle is stationary.
The rear wheels are locked.
Transmission automatically shifts into P
as soon as you switch off the engine
unless N is selected and the remote control is
in the ignition lock, refer to page58.<
R Reverse
Select only when the vehicle is stationary.
N Neutral
You can select this position, for example, in car
washes. The vehicle can roll.
Transmission remains in N even after the
ignition is switched off whenever you
leave the remote control in the ignition lock.
This function is useful in automatic car washes,
etc.
After approx. 30 minutes the system automati-
cally shifts into position P. Pay attention to the
messages on the Info Display.
Switching off engine, refer to page58.<
D Drive, automatic position
This is the mode recommended for normal
vehicle operation. All forward gears are avail-
able.
Under normal operating conditions, the fuel
consumption is lowest when driving in posi-
tion D.
Kick-down
The kick-down mode provides maximum accel-
eration.
Press the accelerator pedal beyond the full-
throttle resistance point.
Sport program and manual operation
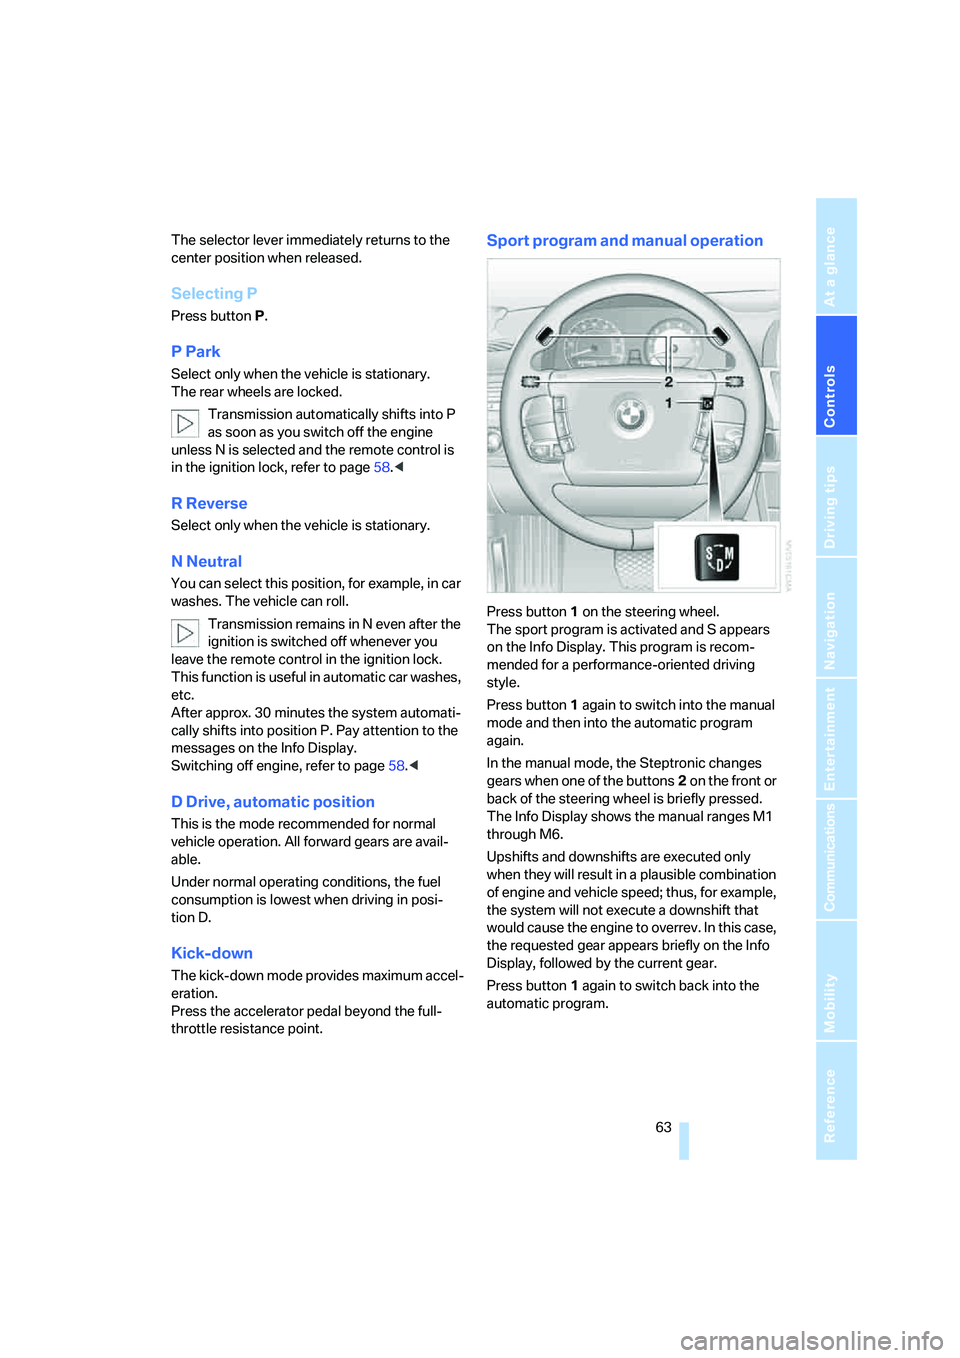
Press button1 on the steering wheel.
The sport program is activated and S appears
on the Info Display. This program is recom-
mended for a performance-oriented driving
style.
Press button1 again to switch into the manual
mode and then into the automatic program
again.
In the manual mode, the Steptronic changes
gears when one of the buttons2 on the front or
back of the steering wheel is briefly pressed.
The Info Display shows the manual ranges M1
through M6.
Upshifts and downshifts are executed only
when they will result in a plausible combination
of engine and vehicle speed; thus, for example,
the system will not execute a downshift that
would cause the engine to overrev. In this case,
the requested gear appears briefly on the Info
Display, followed by the current gear.
Press button1 again to switch back into the
automatic program.
Page 68 of 253
Driving
66
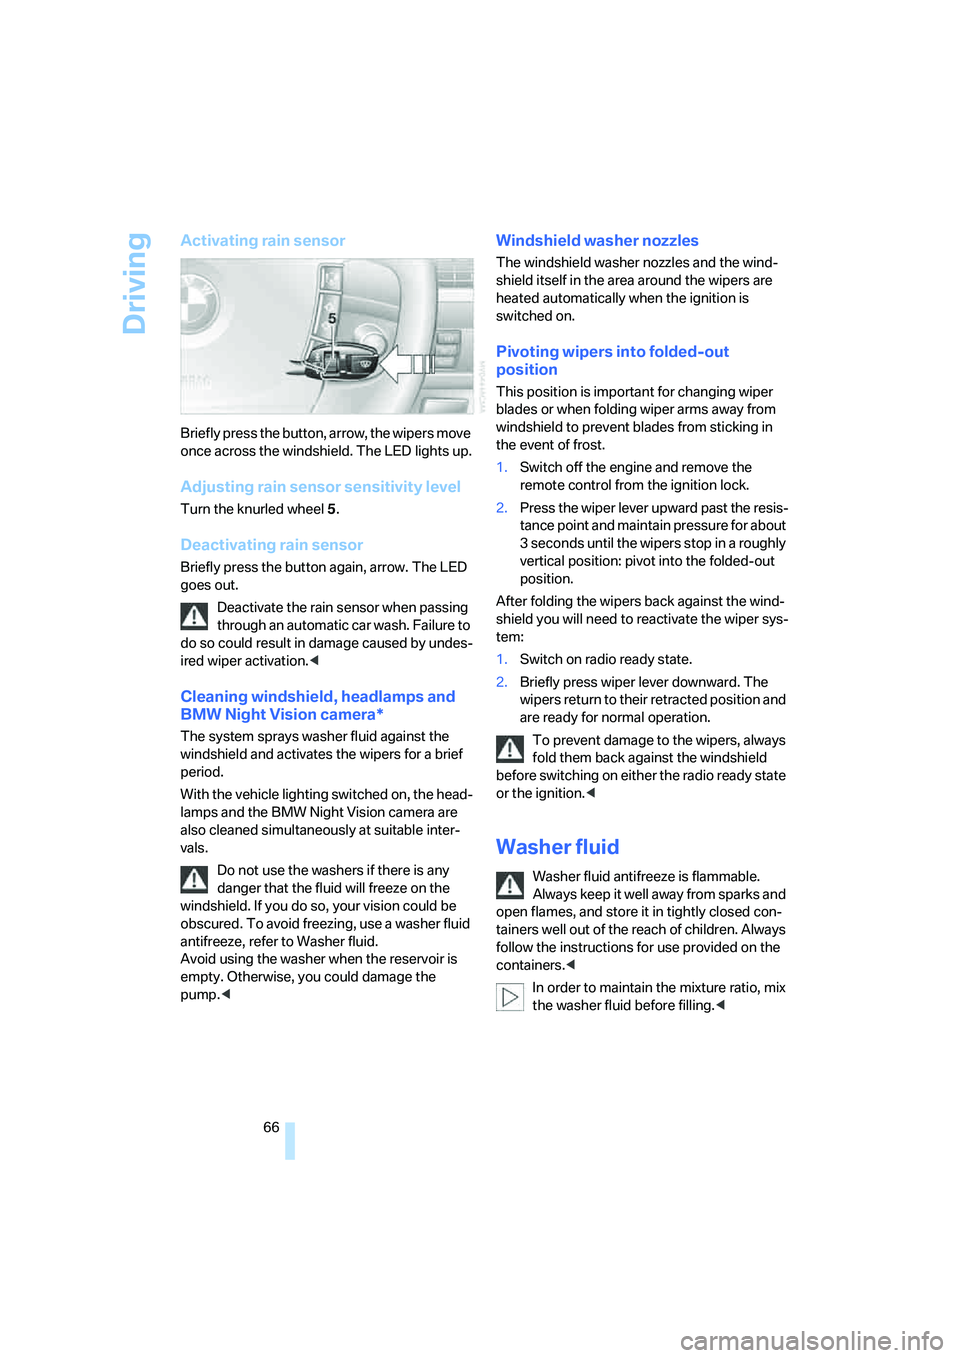
Activating rain sensor
Briefly press the button, arrow, the wipers move
once across the windshield. The LED lights up.
Adjusting rain sensor sensitivity level
Turn the knurled wheel 5.
Deactivating rain sensor
Briefly press the button again, arrow. The LED
goes out.
Deactivate the rain sensor when passing
through an automatic car wash. Failure to
do so could result in damage caused by undes-
ired wiper activation.<
Cleaning windshield, headlamps and
BMW Night Vision camera*
The system sprays washer fluid against the
windshield and activates the wipers for a brief
period.
With the vehicle lighting switched on, the head-
lamps and the BMW Night Vision camera are
also cleaned simultaneously at suitable inter-
vals.
Do not use the washers if there is any
danger that the fluid will freeze on the
windshield. If you do so, your vision could be
obscured. To avoid freezing, use a washer fluid
antifreeze, refer to Washer fluid.
Avoid using the washer when the reservoir is
empty. Otherwise, you could damage the
pump.<
Windshield washer nozzles
The windshield washer nozzles and the wind-
shield itself in the area around the wipers are
heated automatically when the ignition is
switched on.
Pivoting wipers into folded-out
position
This position is important for changing wiper
blades or when folding wiper arms away from
windshield to prevent blades from sticking in
the event of frost.
1.Switch off the engine and remove the
remote control from the ignition lock.
2.Press the wiper lever upward past the resis-
tance point and maintain pressure for about
3 seconds until the wipers stop in a roughly
vertical position: pivot into the folded-out
position.
After folding the wipers back against the wind-
shield you will need to reactivate the wiper sys-
tem:
1.Switch on radio ready state.
2.Briefly press wiper lever downward. The
wipers return to their retracted position and
are ready for normal operation.
To prevent damage to the wipers, always
fold them back against the windshield
before switching on either the radio ready state
or the ignition.<
Washer fluid
Washer fluid antifreeze is flammable.
Always keep it well away from sparks and
open flames, and store it in tightly closed con-
tainers well out of the reach of children. Always
follow the instructions for use provided on the
containers.<
In order to maintain the mixture ratio, mix
the washer fluid before filling.<
Page 80 of 253
Everything under control
78
Resetting values
You can reset values for the average speed and
average fuel consumption:
1.Activate the relevant menu item and press
the controller.
2.Press the controller again to confirm your
selection.
This also resets the respective information
shown on the Info Display.
Entering a distance manually
1.Select "To dest." and press the controller.
2.Turn the controller to set the distance to the
destination.
3.Press the controller to save the setting.
The distance to the destination is automatically
predetermined when using the navigation sys-
tem route guidance, refer to page143.
Using voice command system
Trip computer
The trip computer can be used, e.g. for a vaca-
tion trip.
iDrive, for principle details, refer to page16.
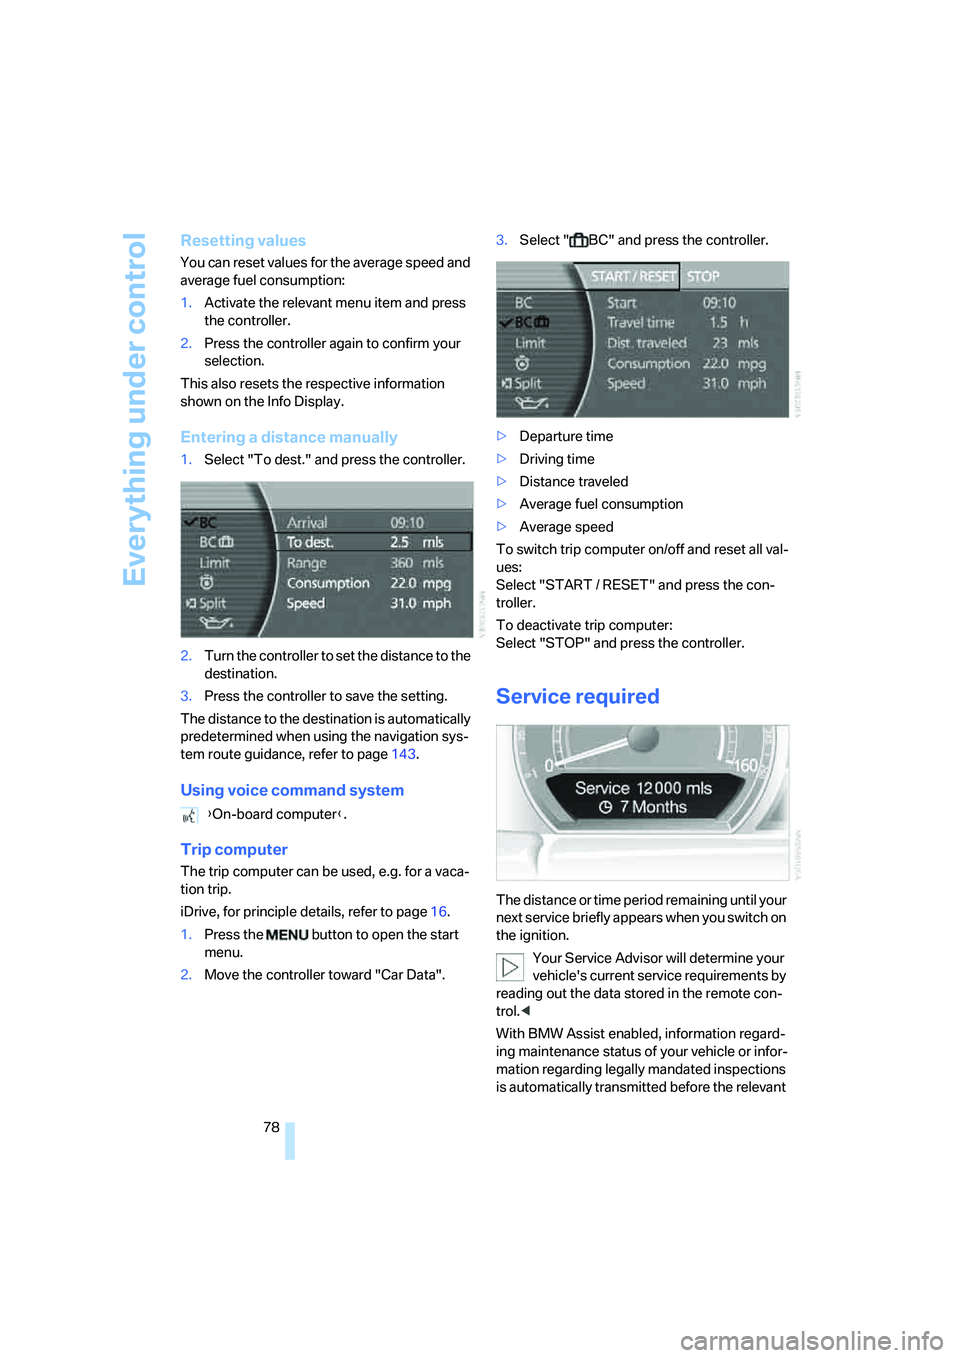
1.Press the button to open the start
menu.
2.Move the controller toward "Car Data".3.Select " BC" and press the controller.
>Departure time
>Driving time
>Distance traveled
>Average fuel consumption
>Average speed
To switch trip computer on/off and reset all val-
ues:
Select "START / RESET" and press the con-
troller.
To deactivate trip computer:
Select "STOP" and press the controller.
Service required
The distance or time period remaining until your
next service briefly appears when you switch on
the ignition.
Your Service Advisor will determine your
vehicle's current service requirements by
reading out the data stored in the remote con-
trol.<
With BMW Assist enabled, information regard-
ing maintenance status of your vehicle or infor-
mation regarding legally mandated inspections
is automatically transmitted before the relevant {On-board computer}.
Page 82 of 253
Everything under control
80 5.Turn the controller to select appointment
input.
6.Press the controller.
The month is highlighted.
7.Turn the controller to adjust the setting.
8.Press the controller to save the setting.
The year is highlighted.
9.Turn the controller to adjust the setting.
10.Press the controller to save the setting.
11."STORE DATE" is selected. Press the con-
troller to save the setting.
The date entry is saved.
The list of entries is resorted by date.
Display on Info Display
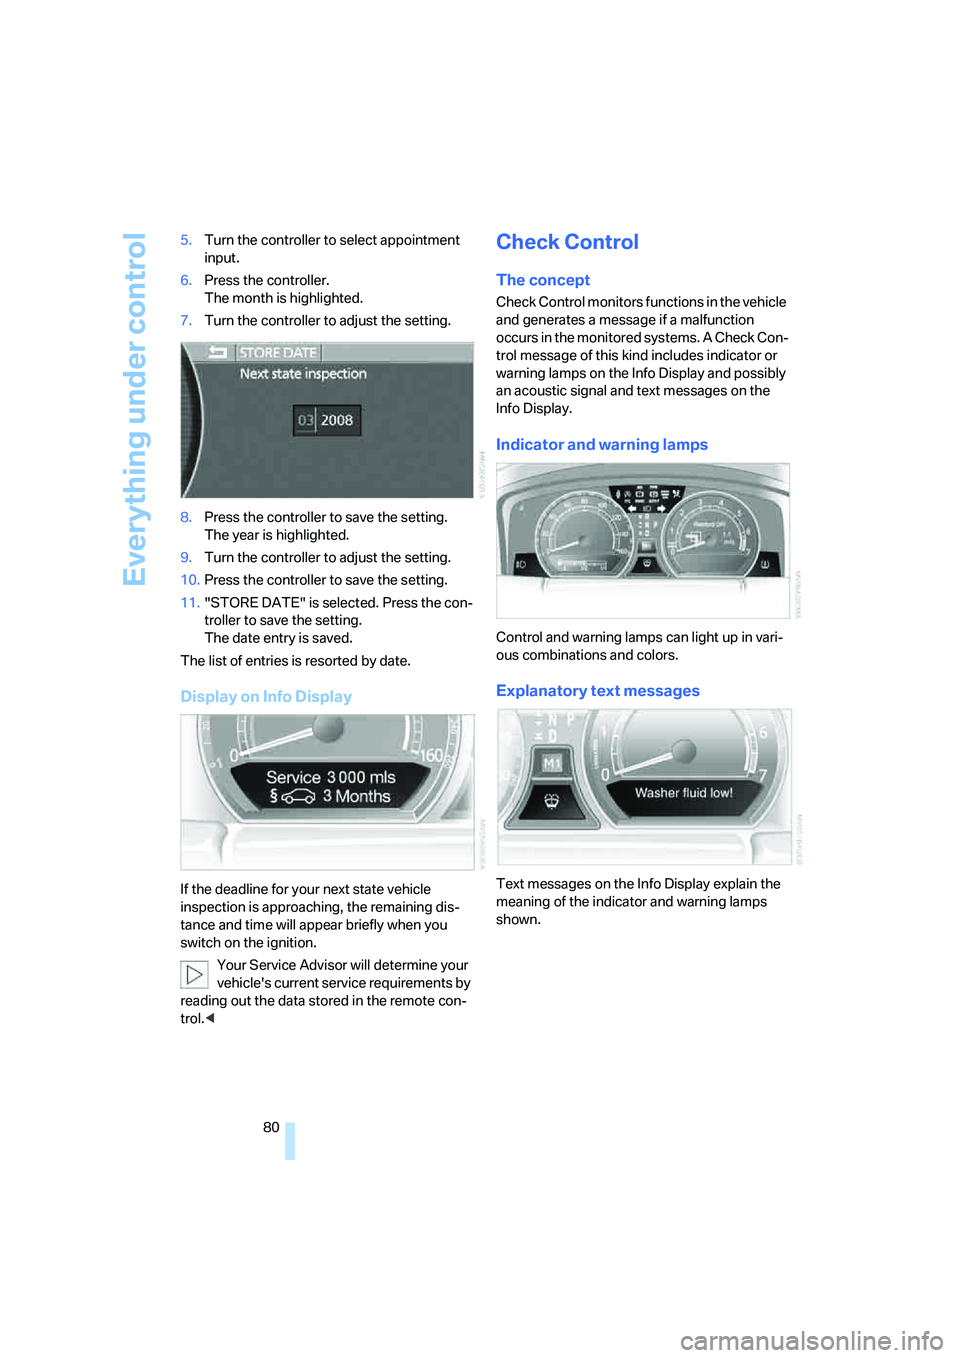
If the deadline for your next state vehicle
inspection is approaching, the remaining dis-
tance and time will appear briefly when you
switch on the ignition.
Your Service Advisor will determine your
vehicle's current service requirements by
reading out the data stored in the remote con-
trol.<
Check Control
The concept
Check Control monitors functions in the vehicle
and generates a message if a malfunction
occurs in the monitored systems. A Check Con-
trol message of this kind includes indicator or
warning lamps on the Info Display and possibly
an acoustic signal and text messages on the
Info Display.
Indicator and warning lamps
Control and warning lamps can light up in vari-
ous combinations and colors.
Explanatory text messages
Text messages on the Info Display explain the
meaning of the indicator and warning lamps
shown.