2007 BMW 760LI SEDAN radio
[x] Cancel search: radioPage 59 of 253
Controls
57Reference
At a glance
Driving tips
Communications
Navigation
Entertainment
Mobility
Driving
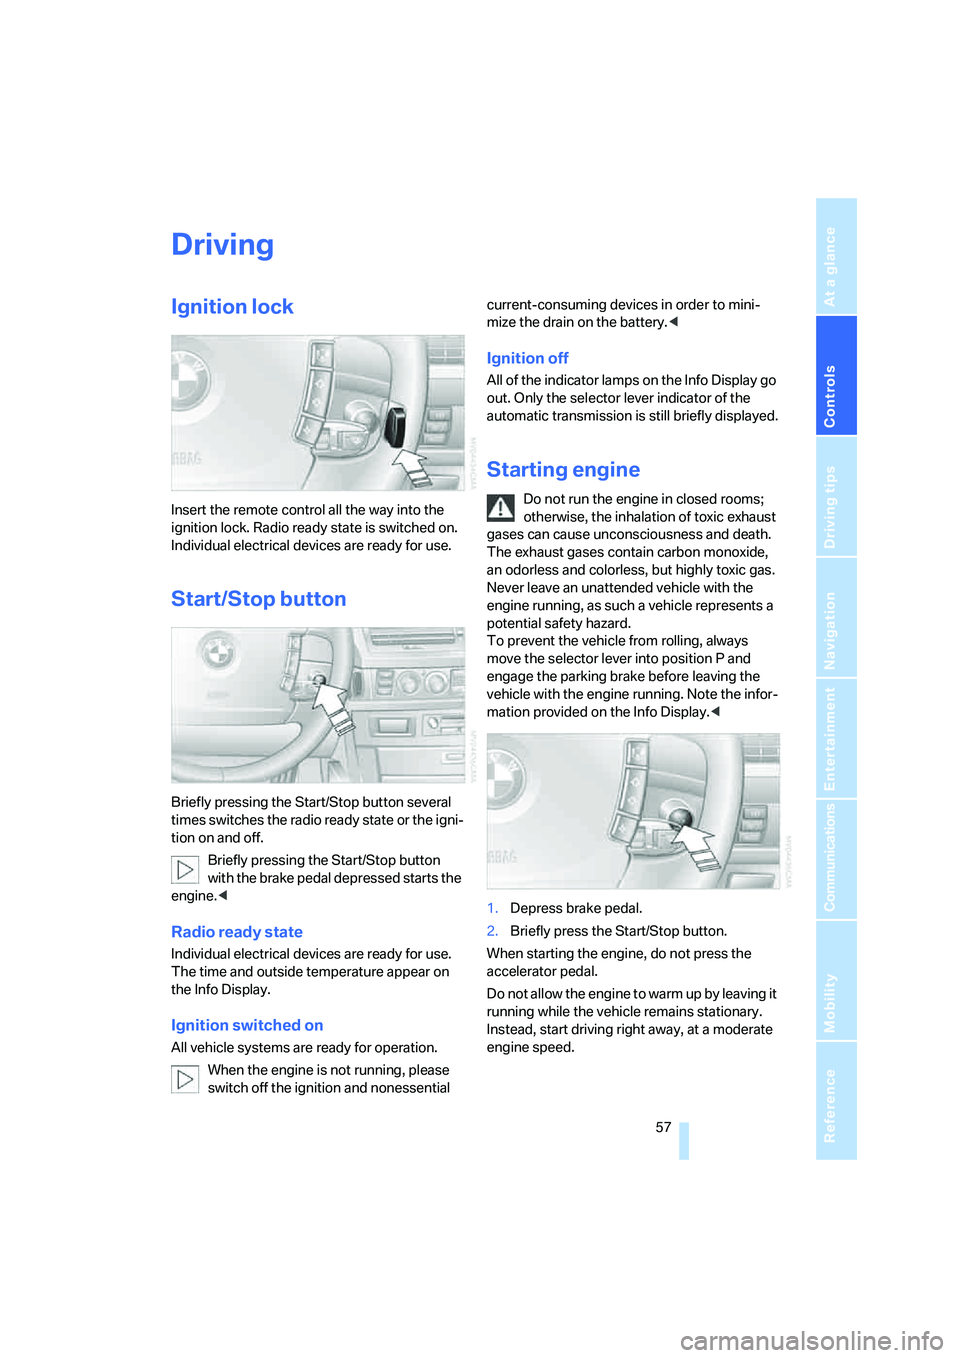
Ignition lock
Insert the remote control all the way into the
ignition lock. Radio ready state is switched on.
Individual electrical devices are ready for use.
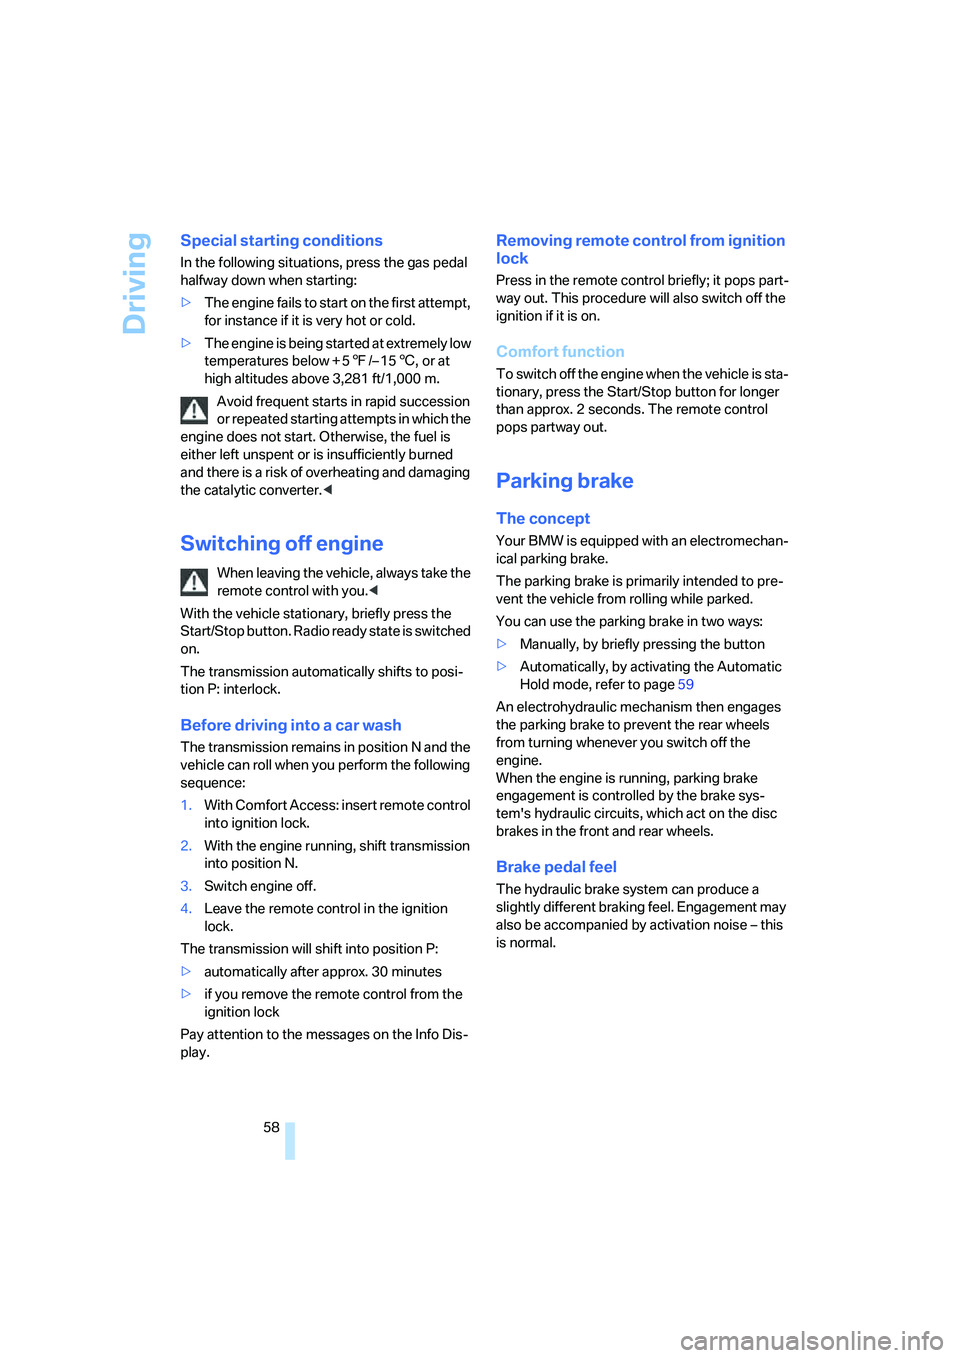
Start/Stop button
Briefly pressing the Start/Stop button several
times switches the radio ready state or the igni-
tion on and off.
Briefly pressing the Start/Stop button
with the brake pedal depressed starts the
engine.<
Radio ready state
Individual electrical devices are ready for use.
The time and outside temperature appear on
the Info Display.
Ignition switched on
All vehicle systems are ready for operation.
When the engine is not running, please
switch off the ignition and nonessential current-consuming devices in order to mini-
mize the drain on the battery.<
Ignition off
All of the indicator lamps on the Info Display go
out. Only the selector lever indicator of the
automatic transmission is still briefly displayed.
Starting engine
Do not run the engine in closed rooms;
otherwise, the inhalation of toxic exhaust
gases can cause unconsciousness and death.
The exhaust gases contain carbon monoxide,
an odorless and colorless, but highly toxic gas.
Never leave an unattended vehicle with the
engine running, as such a vehicle represents a
potential safety hazard.
To prevent the vehicle from rolling, always
move the selector lever into position P and
engage the parking brake before leaving the
vehicle with the engine running. Note the infor-
mation provided on the Info Display.<
1.Depress brake pedal.
2.Briefly press the Start/Stop button.
When starting the engine, do not press the
accelerator pedal.
Do not allow the engine to warm up by leaving it
running while the vehicle remains stationary.
Instead, start driving right away, at a moderate
engine speed.
Page 60 of 253
Driving
58
Special starting conditions
In the following situations, press the gas pedal
halfway down when starting:
>The engine fails to start on the first attempt,
for instance if it is very hot or cold.
>The engine is being started at extremely low
temperatures below + 57/– 156, or at
high altitudes above 3,281 ft/1,000 m.
Avoid frequent starts in rapid succession
or repeated starting attempts in which the
engine does not start. Otherwise, the fuel is
either left unspent or is insufficiently burned
and there is a risk of overheating and damaging
the catalytic converter.<
Switching off engine
When leaving the vehicle, always take the
remote control with you.<
With the vehicle stationary, briefly press the
Start/Stop button. Radio ready state is switched
on.
The transmission automatically shifts to posi-
tion P: interlock.
Before driving into a car wash
The transmission remains in position N and the
vehicle can roll when you perform the following
sequence:
1.With Comfort Access: insert remote control
into ignition lock.
2.With the engine running, shift transmission
into position N.
3.Switch engine off.
4.Leave the remote control in the ignition
lock.
The transmission will shift into position P:
>automatically after approx. 30 minutes
>if you remove the remote control from the
ignition lock
Pay attention to the messages on the Info Dis-
play.
Removing remote control from ignition
lock
Press in the remote control briefly; it pops part-
way out. This procedure will also switch off the
ignition if it is on.
Comfort function
To switch off the engine when the vehicle is sta-
tionary, press the Start/Stop button for longer
than approx. 2 seconds. The remote control
pops partway out.
Parking brake
The concept
Your BMW is equipped with an electromechan-
ical parking brake.
The parking brake is primarily intended to pre-
vent the vehicle from rolling while parked.
You can use the parking brake in two ways:
>Manually, by briefly pressing the button
>Automatically, by activating the Automatic
Hold mode, refer to page59
An electrohydraulic mechanism then engages
the parking brake to prevent the rear wheels
from turning whenever you switch off the
engine.
When the engine is running, parking brake
engagement is controlled by the brake sys-
tem's hydraulic circuits, which act on the disc
brakes in the front and rear wheels.
Brake pedal feel
The hydraulic brake system can produce a
slightly different braking feel. Engagement may
also be accompanied by activation noise – this
is normal.
Page 68 of 253
Driving
66
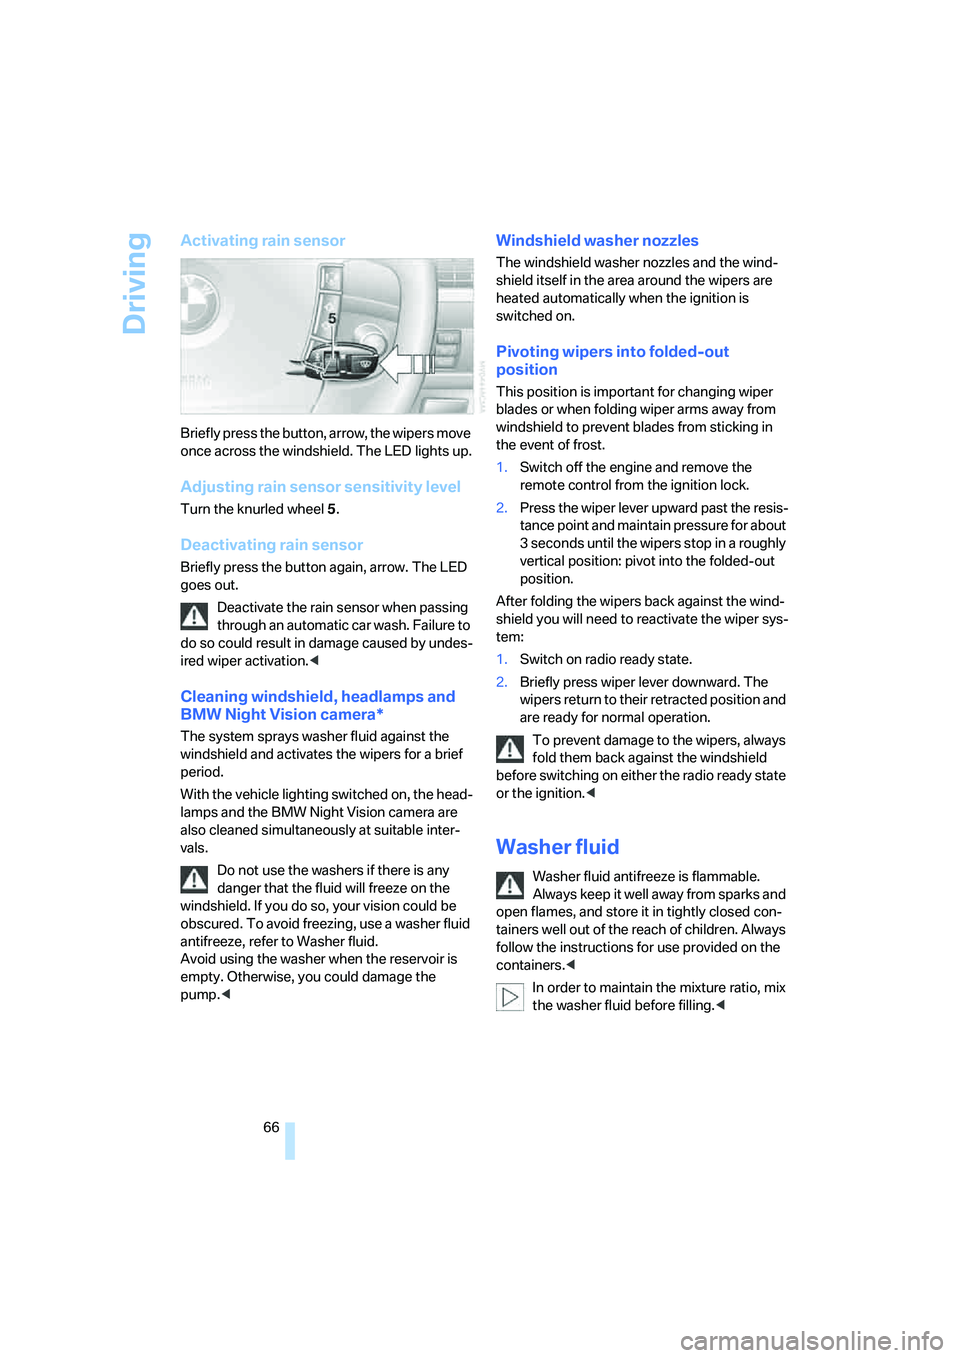
Activating rain sensor
Briefly press the button, arrow, the wipers move
once across the windshield. The LED lights up.
Adjusting rain sensor sensitivity level
Turn the knurled wheel 5.
Deactivating rain sensor
Briefly press the button again, arrow. The LED
goes out.
Deactivate the rain sensor when passing
through an automatic car wash. Failure to
do so could result in damage caused by undes-
ired wiper activation.<
Cleaning windshield, headlamps and
BMW Night Vision camera*
The system sprays washer fluid against the
windshield and activates the wipers for a brief
period.
With the vehicle lighting switched on, the head-
lamps and the BMW Night Vision camera are
also cleaned simultaneously at suitable inter-
vals.
Do not use the washers if there is any
danger that the fluid will freeze on the
windshield. If you do so, your vision could be
obscured. To avoid freezing, use a washer fluid
antifreeze, refer to Washer fluid.
Avoid using the washer when the reservoir is
empty. Otherwise, you could damage the
pump.<
Windshield washer nozzles
The windshield washer nozzles and the wind-
shield itself in the area around the wipers are
heated automatically when the ignition is
switched on.
Pivoting wipers into folded-out
position
This position is important for changing wiper
blades or when folding wiper arms away from
windshield to prevent blades from sticking in
the event of frost.
1.Switch off the engine and remove the
remote control from the ignition lock.
2.Press the wiper lever upward past the resis-
tance point and maintain pressure for about
3 seconds until the wipers stop in a roughly
vertical position: pivot into the folded-out
position.
After folding the wipers back against the wind-
shield you will need to reactivate the wiper sys-
tem:
1.Switch on radio ready state.
2.Briefly press wiper lever downward. The
wipers return to their retracted position and
are ready for normal operation.
To prevent damage to the wipers, always
fold them back against the windshield
before switching on either the radio ready state
or the ignition.<
Washer fluid
Washer fluid antifreeze is flammable.
Always keep it well away from sparks and
open flames, and store it in tightly closed con-
tainers well out of the reach of children. Always
follow the instructions for use provided on the
containers.<
In order to maintain the mixture ratio, mix
the washer fluid before filling.<
Page 77 of 253
Controls
75Reference
At a glance
Driving tips
Communications
Navigation
Entertainment
Mobility
Everything under control
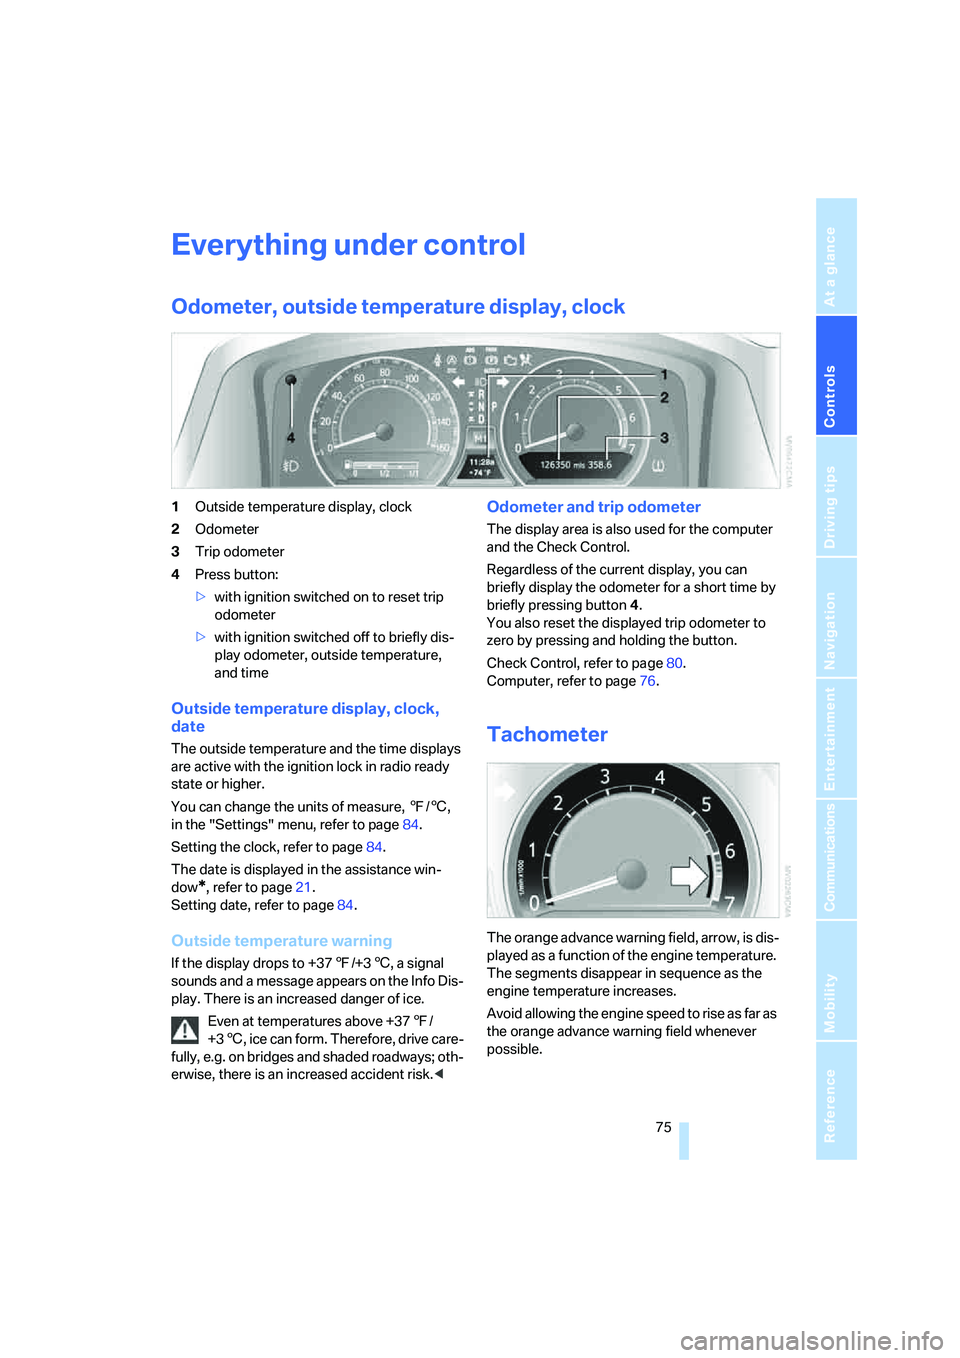
Odometer, outside temperature display, clock
1Outside temperature display, clock
2Odometer
3Trip odometer
4Press button:
>with ignition switched on to reset trip
odometer
>with ignition switched off to briefly dis-
play odometer, outside temperature,
and time
Outside temperature display, clock,
date
The outside temperature and the time displays
are active with the ignition lock in radio ready
state or higher.
You can change the units of measure, 7/6,
in the "Settings" menu, refer to page84.
Setting the clock, refer to page84.
The date is displayed in the assistance win-
dow
*, refer to page21.
Setting date, refer to page84.
Outside temperature warning
If the display drops to +377/+36, a signal
sounds and a message appears on the Info Dis-
play. There is an increased danger of ice.
Even at temperatures above +377/
+36, ice can form. Therefore, drive care-
fully, e.g. on bridges and shaded roadways; oth-
erwise, there is an increased accident risk.<
Odometer and trip odometer
The display area is also used for the computer
and the Check Control.
Regardless of the current display, you can
briefly display the odometer for a short time by
briefly pressing button4.
You also reset the displayed trip odometer to
zero by pressing and holding the button.
Check Control, refer to page80.
Computer, refer to page76.
Tachometer
The orange advance warning field, arrow, is dis-
played as a function of the engine temperature.
The segments disappear in sequence as the
engine temperature increases.
Avoid allowing the engine speed to rise as far as
the orange advance warning field whenever
possible.
Page 94 of 253
Technology for comfort, convenience and safety
92 Always use wheels with TPM electronics; oth-
erwise, the system cannot be assured of func-
tioning properly.
Reset the system again after each correc-
tion of the tire inflation pressure and after
every tire or wheel change.<
System limits
TPM cannot warn you of sudden serious
tire damage caused by external influ-
ences.<
The system does not work correctly if it has not
been reset; for example, a flat tire may be indi-
cated even though the tire inflation pressures
are correct.
If a wheel without TPM electronics has been
mounted or if the TPM experiences temporary
interference from other systems or devices that
use the same radio frequency, then the system
is inactive and unable to report a flat tire.
Status display on Control Display
The tire and system status is indicated by the
color of the tires.
TPM takes into account the fact that the tire
pressure changes during driving. A correction is
only required if the color of the TPM display
indicates that it is necessary.
Green
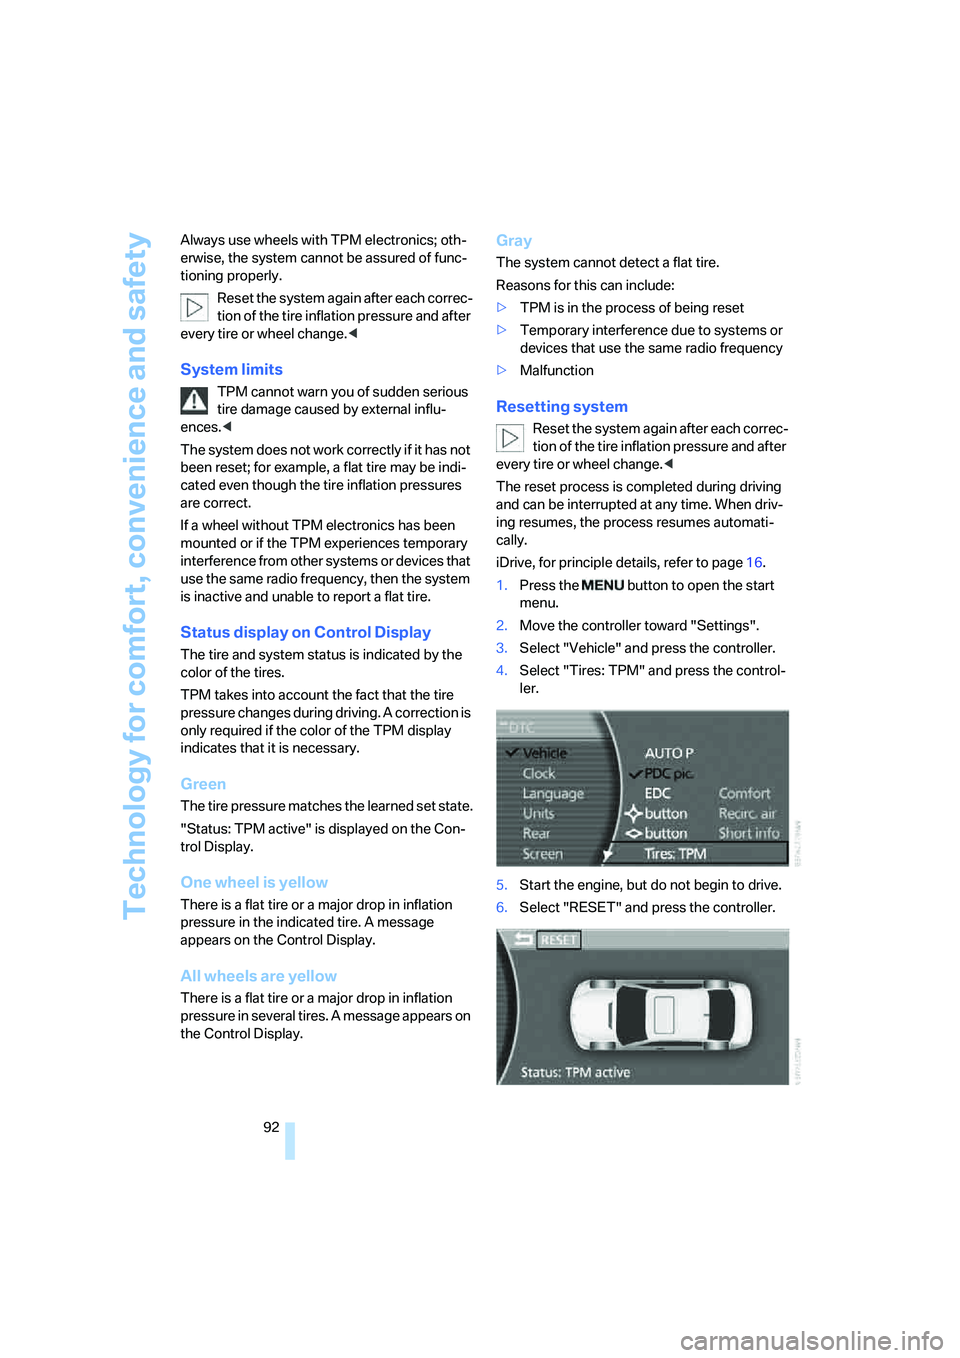
The tire pressure matches the learned set state.
"Status: TPM active" is displayed on the Con-
trol Display.
One wheel is yellow
There is a flat tire or a major drop in inflation
pressure in the indicated tire. A message
appears on the Control Display.
All wheels are yellow
There is a flat tire or a major drop in inflation
pressure in several tires. A message appears on
the Control Display.
Gray
The system cannot detect a flat tire.
Reasons for this can include:
>TPM is in the process of being reset
>Temporary interference due to systems or
devices that use the same radio frequency
>Malfunction
Resetting system
Reset the system again after each correc-
tion of the tire inflation pressure and after
every tire or wheel change.<
The reset process is completed during driving
and can be interrupted at any time. When driv-
ing resumes, the process resumes automati-
cally.
iDrive, for principle details, refer to page16.
1.Press the button to open the start
menu.
2.Move the controller toward "Settings".
3.Select "Vehicle" and press the controller.
4.Select "Tires: TPM" and press the control-
ler.
5.Start the engine, but do not begin to drive.
6.Select "RESET" and press the controller.
Page 96 of 253
Technology for comfort, convenience and safety
94 A message like this is displayed in the following
situations:
>When a malfunction is occurring.
Have the system checked.
>When a wheel without TPM electronics is
mounted.
>When TPM is experiencing temporary inter-
ference from other systems or devices that
use the same radio frequency.
Declaration according to NHTSA/
FMVSS 138 Tire Pressure Monitoring
Systems
Each tire, including the spare, should be
checked monthly when cold and inflated to the
inflation pressure recommended by the vehicle
manufacturer on the vehicle placard or tire infla-
tion pressure label. If your vehicle has tires of a
different size than the size indicated on the
vehicle placard or tire inflation pressure label,
you should determine the proper tire inflation
pressure for those tires. As an added safety fea-
ture, your vehicle has been equipped with a tire
pressure monitoring system TPMS that illumi-
nates a low tire pressure indicator lamp when
one or more of your tires are significantly
under-inflated. Accordingly, when the low tire
pressure indicator lamp comes on, you should
stop and check your tires as soon as possible,
and inflate them to the proper pressure. Driving
on a significantly under-inflated tire causes the
tire to overheat and can lead to tire failure.
Underinflation also reduces fuel efficiency and
tire tread life, and may affect the vehicle’s han-
dling and stopping ability. Please note that the
TPMS is not a substitute for proper tire mainte-
nance, and it is the driver’s responsibility to
maintain correct tire pressure, even if underin-
flation has not reached the level to trigger illumi-
nation of the TPMS low tire pressure indicator
lamp.
The TPMS malfunction indicator is combined
with the low tire pressure indicator lamp. When
the system detects a malfunction, the indicator
lamp will flash for approximately one minute and
then remain continuously lit. This sequence will
continue upon subsequent vehicle startups as long as the malfunction exists. When the mal-
function indicator is illuminated, the system
may not be able to detect or signal low tire pres-
sure as intended. TPMS malfunctions may
occur for a variety of reasons, including the
installation of replacement or alternate tires or
wheels on the vehicle that prevent the TPMS
from functioning properly. Always check the
TPMS malfunction indicator lamp after replac-
ing one or more tires or wheels on your vehicle
to ensure that the replacement or alternate tires
and wheels allow the TPMS to continue to func-
tion properly.
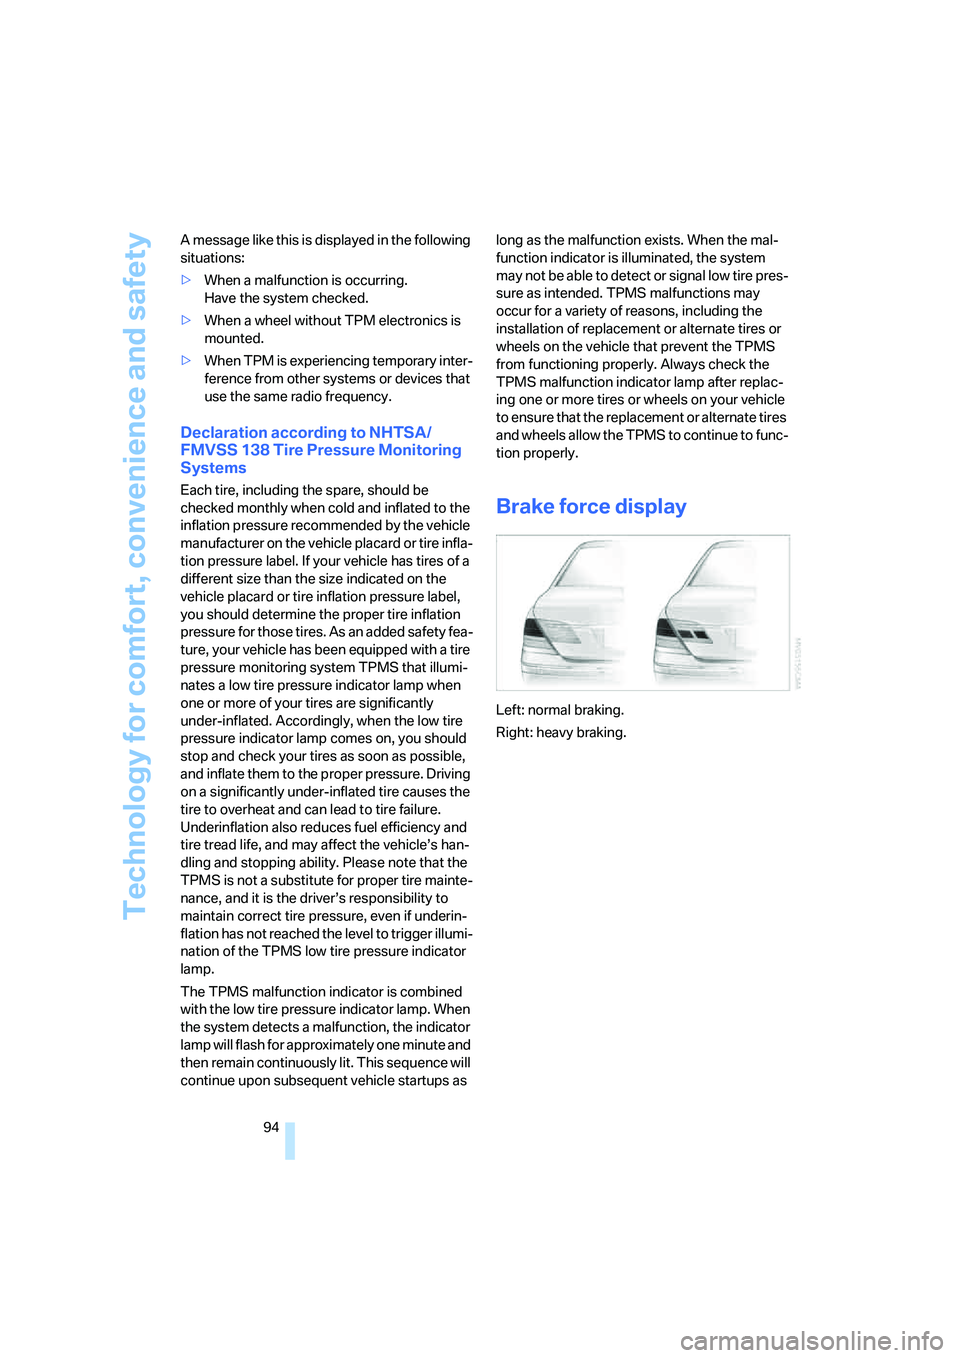
Brake force display
Left: normal braking.
Right: heavy braking.
Page 98 of 253
Technology for comfort, convenience and safety
96 refer to page54.
In certain sitting positions, teenagers and adults
can deactivate the front, knee and side airbag
on the front passenger side; when this occurs,
the indicator lamp for the front passenger air-
bags lights up. In these cases, change the sit-
ting position so that the front passenger airbags
are activated and the indicator lamp goes out.
If the desired status cannot be produced by
changing the sitting position, have the person
ride in the back. Do not place slip covers, seat
cushions, beaded mats, or other objects on the
passenger seat that are not specifically recom-
mended by BMW. Do not lay objects under the
seat which could press against the seat from
below. Otherwise, a correct evaluation of the
occupied seat surface cannot be assured.<
Operating state of front passenger
airbags
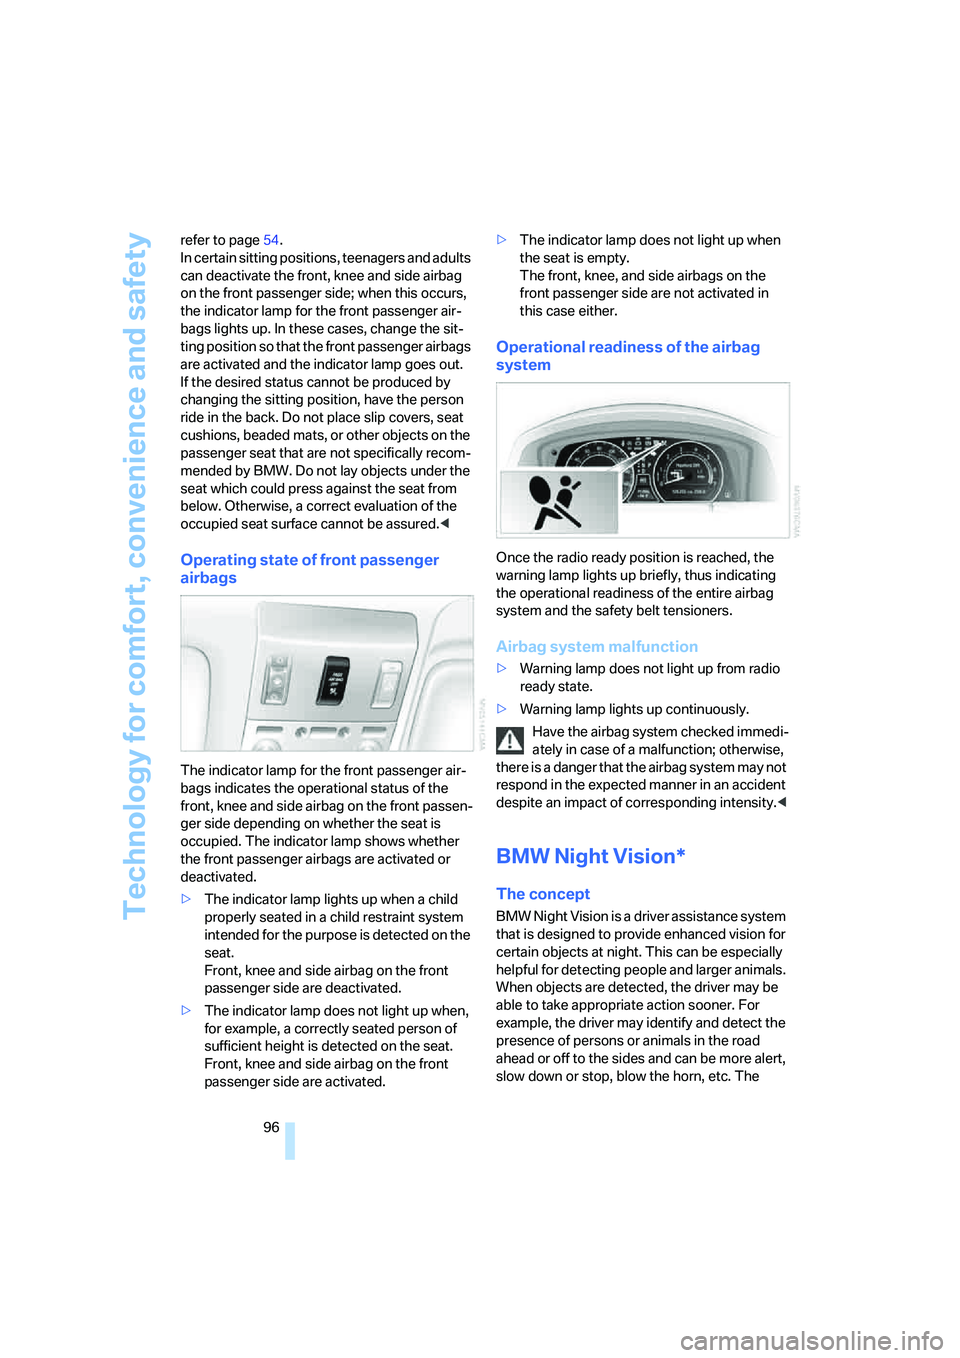
The indicator lamp for the front passenger air-
bags indicates the operational status of the
front, knee and side airbag on the front passen-
ger side depending on whether the seat is
occupied. The indicator lamp shows whether
the front passenger airbags are activated or
deactivated.
>The indicator lamp lights up when a child
properly seated in a child restraint system
intended for the purpose is detected on the
seat.
Front, knee and side airbag on the front
passenger side are deactivated.
>The indicator lamp does not light up when,
for example, a correctly seated person of
sufficient height is detected on the seat.
Front, knee and side airbag on the front
passenger side are activated.>The indicator lamp does not light up when
the seat is empty.
The front, knee, and side airbags on the
front passenger side are not activated in
this case either.
Operational readiness of the airbag
system
Once the radio ready position is reached, the
warning lamp lights up briefly, thus indicating
the operational readiness of the entire airbag
system and the safety belt tensioners.
Airbag system malfunction
>Warning lamp does not light up from radio
ready state.
>Warning lamp lights up continuously.
Have the airbag system checked immedi-
ately in case of a malfunction; otherwise,
there is a danger that the airbag system may not
respond in the expected manner in an accident
despite an impact of corresponding intensity.<
BMW Night Vision*
The concept
BMW Night Vision is a driver assistance system
that is designed to provide enhanced vision for
certain objects at night. This can be especially
helpful for detecting people and larger animals.
When objects are detected, the driver may be
able to take appropriate action sooner. For
example, the driver may identify and detect the
presence of persons or animals in the road
ahead or off to the sides and can be more alert,
slow down or stop, blow the horn, etc. The
Page 100 of 253
Technology for comfort, convenience and safety
98
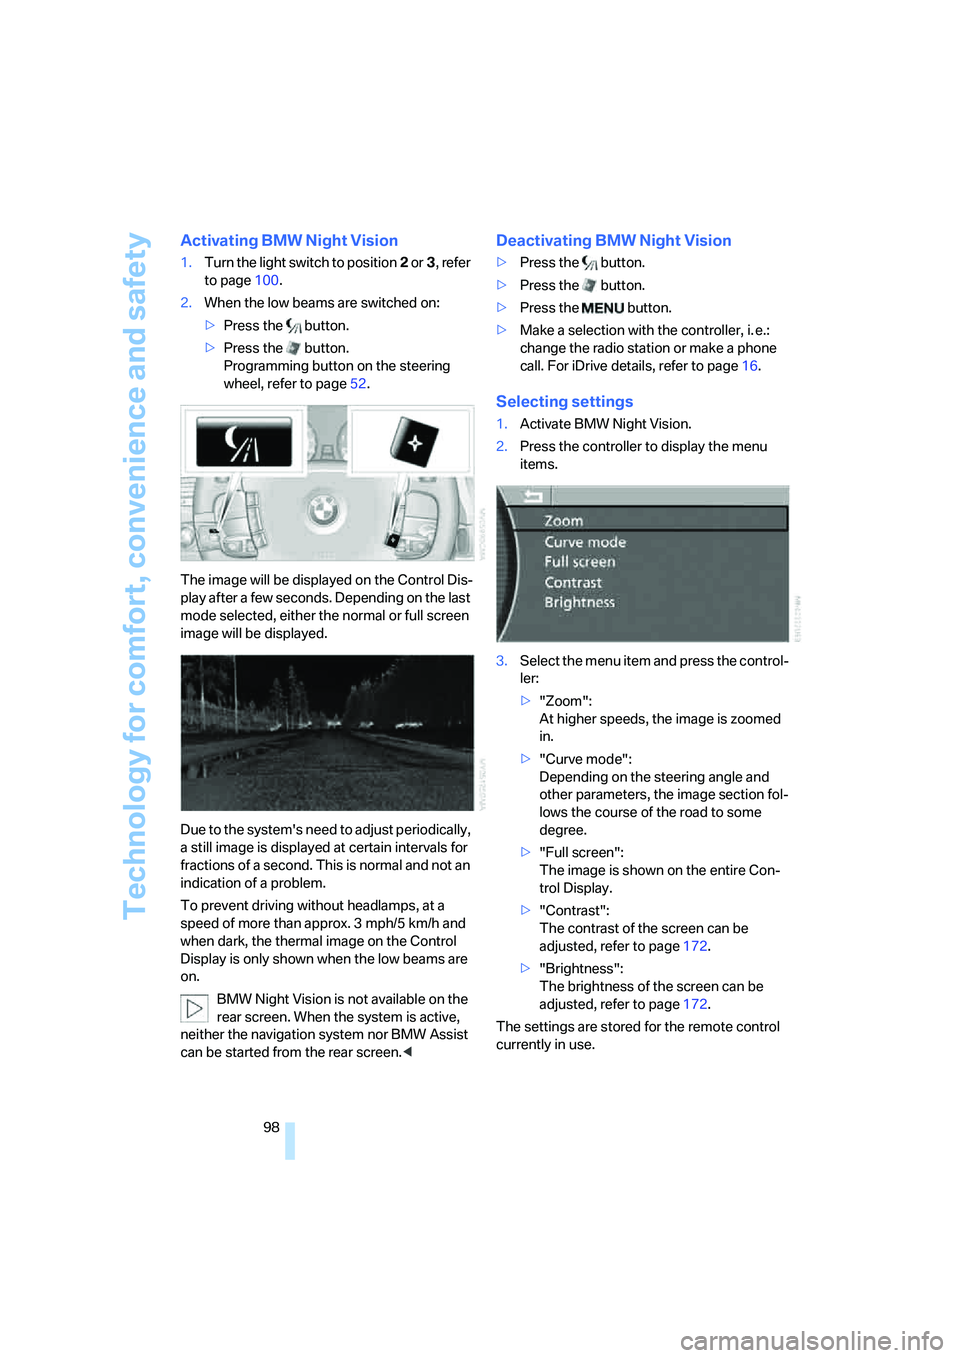
Activating BMW Night Vision
1.Turn the light switch to position2 or3, refer
to page100.
2.When the low beams are switched on:
>Press the button.
>Press the button.
Programming button on the steering
wheel, refer to page52.
The image will be displayed on the Control Dis-
play after a few seconds. Depending on the last
mode selected, either the normal or full screen
image will be displayed.
Due to the system's need to adjust periodically,
a still image is displayed at certain intervals for
fractions of a second. This is normal and not an
indication of a problem.
To prevent driving without headlamps, at a
speed of more than approx. 3 mph/5 km/h and
when dark, the thermal image on the Control
Display is only shown when the low beams are
on.
BMW Night Vision is not available on the
rear screen. When the system is active,
neither the navigation system nor BMW Assist
can be started from the rear screen.<
Deactivating BMW Night Vision
>Press the button.
>Press the button.
>Press the button.
>Make a selection with the controller, i. e.:
change the radio station or make a phone
call. For iDrive details, refer to page16.
Selecting settings
1.Activate BMW Night Vision.
2.Press the controller to display the menu
items.
3.Select the menu item and press the control-
ler:
>"Zoom":
At higher speeds, the image is zoomed
in.
>"Curve mode":
Depending on the steering angle and
other parameters, the image section fol-
lows the course of the road to some
degree.
>"Full screen":
The image is shown on the entire Con-
trol Display.
>"Contrast":
The contrast of the screen can be
adjusted, refer to page172.
>"Brightness":
The brightness of the screen can be
adjusted, refer to page172.
The settings are stored for the remote control
currently in use.