2007 BMW 525XI change wheel
[x] Cancel search: change wheelPage 140 of 273

Destination entry
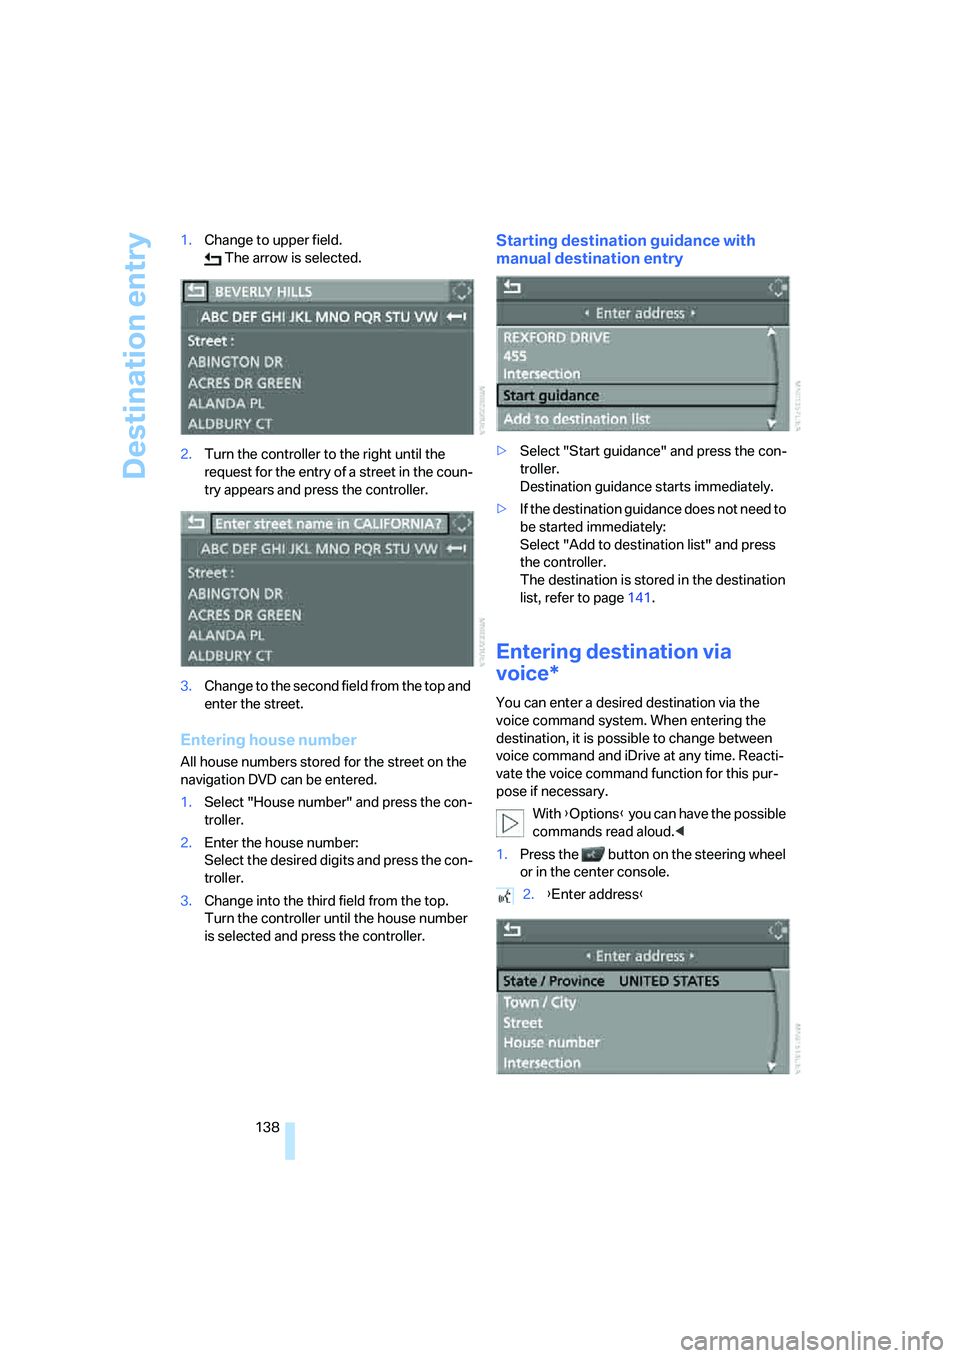
138 1.Change to upper field.
The arrow is selected.
2.Turn the controller to the right until the
request for the entry of a street in the coun-
try appears and press the controller.
3.Change to the second field from the top and
enter the street.
Entering house number
All house numbers stored for the street on the
navigation DVD can be entered.
1.Select "House number" and press the con-
troller.
2.Enter the house number:
Select the desired digits and press the con-
troller.
3.Change into the third field from the top.
Turn the controller until the house number
is selected and press the controller.
Starting destination guidance with
manual destination entry
>Select "Start guidance" and press the con-
troller.
Destination guidance starts immediately.
>If the destination guidance does not need to
be started immediately:
Select "Add to destination list" and press
the controller.
The destination is stored in the destination
list, refer to page141.
Entering destination via
voice*
You can enter a desired destination via the
voice command system. When entering the
destination, it is possible to change between
voice command and iDrive at any time. Reacti-
vate the voice command function for this pur-
pose if necessary.
With {Options} you can have the possible
commands read aloud.<
1.Press the button on the steering wheel
or in the center console.
2.{Enter address}
Page 152 of 273

Destination guidance
150
Destination guidance via
voice instructions
Switching voice instructions on/off
Voice instructions can be switched on or off
during the destination guidance in the arrow or
map view:
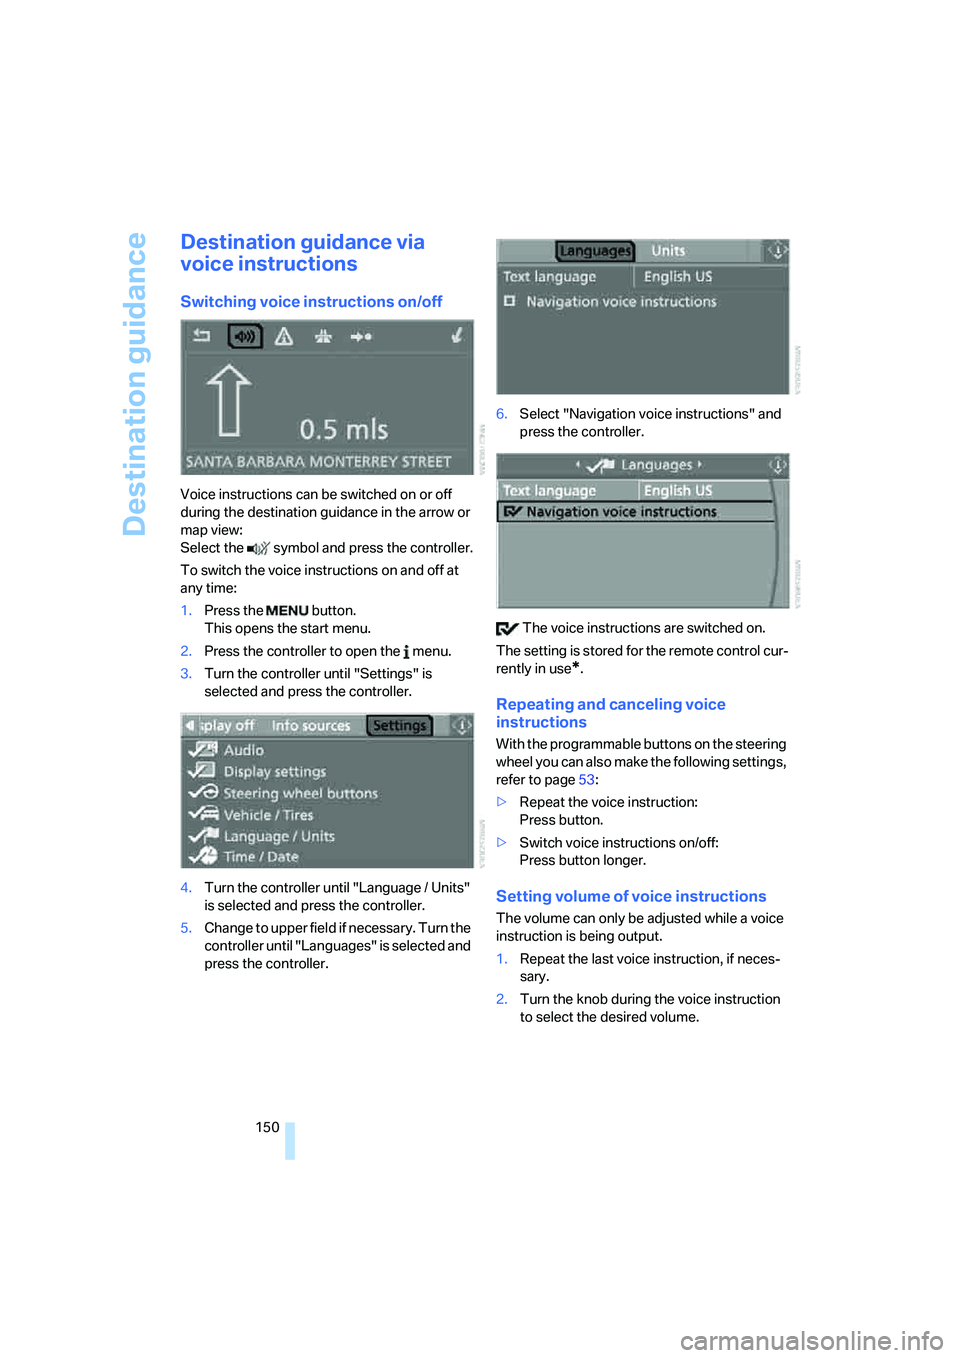
Select the symbol and press the controller.
To switch the voice instructions on and off at
any time:
1.Press the button.
This opens the start menu.
2.Press the controller to open the menu.
3.Turn the controller until "Settings" is
selected and press the controller.
4.Turn the controller until "Language / Units"
is selected and press the controller.
5.Change to upper field if necessary. Turn the
controller until "Languages" is selected and
press the controller.6.Select "Navigation voice instructions" and
press the controller.
The voice instructions are switched on.
The setting is stored for the remote control cur-
rently in use
*.
Repeating and canceling voice
instructions
With the programmable buttons on the steering
wheel you can also make the following settings,
refer to page53:
>Repeat the voice instruction:
Press button.
>Switch voice instructions on/off:
Press button longer.
Setting volume of voice instructions
The volume can only be adjusted while a voice
instruction is being output.
1.Repeat the last voice instruction, if neces-
sary.
2.Turn the knob during the voice instruction
to select the desired volume.
Page 162 of 273

On/off and tone
160
On/off and tone
The following audio sources have shared con-
trols and setting options:
>Professional
* radio or Business radio
>CD player
>CD changer
*
Controls
The audio sources can be operated using:
>Buttons in the area of the CD player
>iDrive
>Buttons on steering wheel, refer to page11
Buttons in area of CD player
The layout of the buttons can vary depending
on your vehicle's equipment.
One drive:Two drives:
1Entertainment sound output on/off, volume
>Press: switch on/off.
When you switch on, the last set radio
station or CD track is played.
>Turn: adjust volume.
2Drive for audio CDs
3 Eject CD
4 Station scan/track search
>Change radio station.
>Select track for CD player and
CD changer.
5Drive for navigation DVDs
Operation via iDrive
iDrive, for explanation of principle, refer to
page16.
1.Press the button.
This opens the start menu.
2.Move the controller backwards to open
"Entertainment".
Page 163 of 273

Navigation
Entertainment
Driving tips
161Reference
At a glance
Controls
Communications
Mobility
You have the following choices:
>"FM" and "AM": radio reception
>"WB": Weather Band station
>"SAT": satellite radio
>"CD": CD player or CD changer
>"AUX": external audio device
>"Set": depending on the audio source,
other adjustments can be made, e.g. with
the radio: update station with strongest
reception, store station, tone control, sam-
ple stations.
From another menu, you can change
directly to the screen last displayed,
refer to Comfort opening of menu items on
page18.<
From radio readiness, the selected audio
source is stored for the remote control currently
in use.
Switching on/off
To switch the Entertainment sound output on
and off:
Press knob1 next to the CD player.
This symbol on the Control Display indi-
cates that sound output is switched off.
For a single drive, the sound output is available
for approx. 20 minutes with the ignition
switched off.
Switch on the sound output again for this pur-
pose.
Adjusting volume
Turn knob1 next to the CD player until the
desired volume is set.
You can also adjust the volume with buttons on
the steering wheel, refer to page11.
From radio readiness, the setting is stored for
the remote control currently in use.
Tone control
You can alter various tone settings, e. g. treble
and bass, or the speed-dependent volume
increase.
The tone settings are set for all audio sources at
once.
From radio readiness, the settings are stored
for the remote control currently in use.
Changing tone settings
1.Press the button.
This opens the start menu.
2.Press the controller to open the menu.
3.Turn the controller until "Settings" is
selected and press the controller.
4.Select "Audio" and press the controller.
The tone settings can also be selected when
you have opened "Entertainment" in the start
menu:
Select "Set" and then "Tone", and press the
controller.
Page 167 of 273

Navigation
Entertainment
Driving tips
165Reference
At a glance
Controls
Communications
Mobility
Changing selection criteria
1.Change into the second field from the top.
2.Turn the controller until the desired selec-
tion criterion is selected and press the con-
troller.
Buttons next to CD player
Press the button for the corresponding
direction.
The system changes to the next displayed sta-
tion.
You can also change stations with buttons on
the steering wheel, refer to page11.
Sampling stations, scan
The system automatically plays a brief sample
from each of the stations on the current wave-
band.
1.Select "FM" or "AM" and press the control-
ler.
"Set" is selected.
2.Press the controller.
Other menu items are displayed.
3.Select "Scan" and press the controller.
The stations are sampled.To end sampling:
1.Press the controller.
2.Select "Scan" and press the controller.
This cancels sampling of the stations, and the
radio remains on the current station.
Buttons next to CD player
To sample the stations, press and hold the
button for the corresponding direction.
To stop scanning, press the button again.
Selecting frequency manually
With "Manual" you can select stations that are
received in addition to those displayed.
1.Select "FM" or "AM" and press the control-
ler.
2.Change into the second field from the top.
3.Select "Manual" and press the controller.
4.Turn the controller to set a certain fre-
quency.
Updating stations with best reception
For Professional radio with "AM" and with Busi-
ness radio:
If you are on a longer journey and leave the
transmission range of the stations originally set,
you can update the list of stations with the best
reception.
1.Select "FM" or "AM" and press the control-
ler.
2.Change into the second field from the top.
3.Select "Autostore" and press the controller.
"Set" is selected.
Page 176 of 273

CD player and CD changer
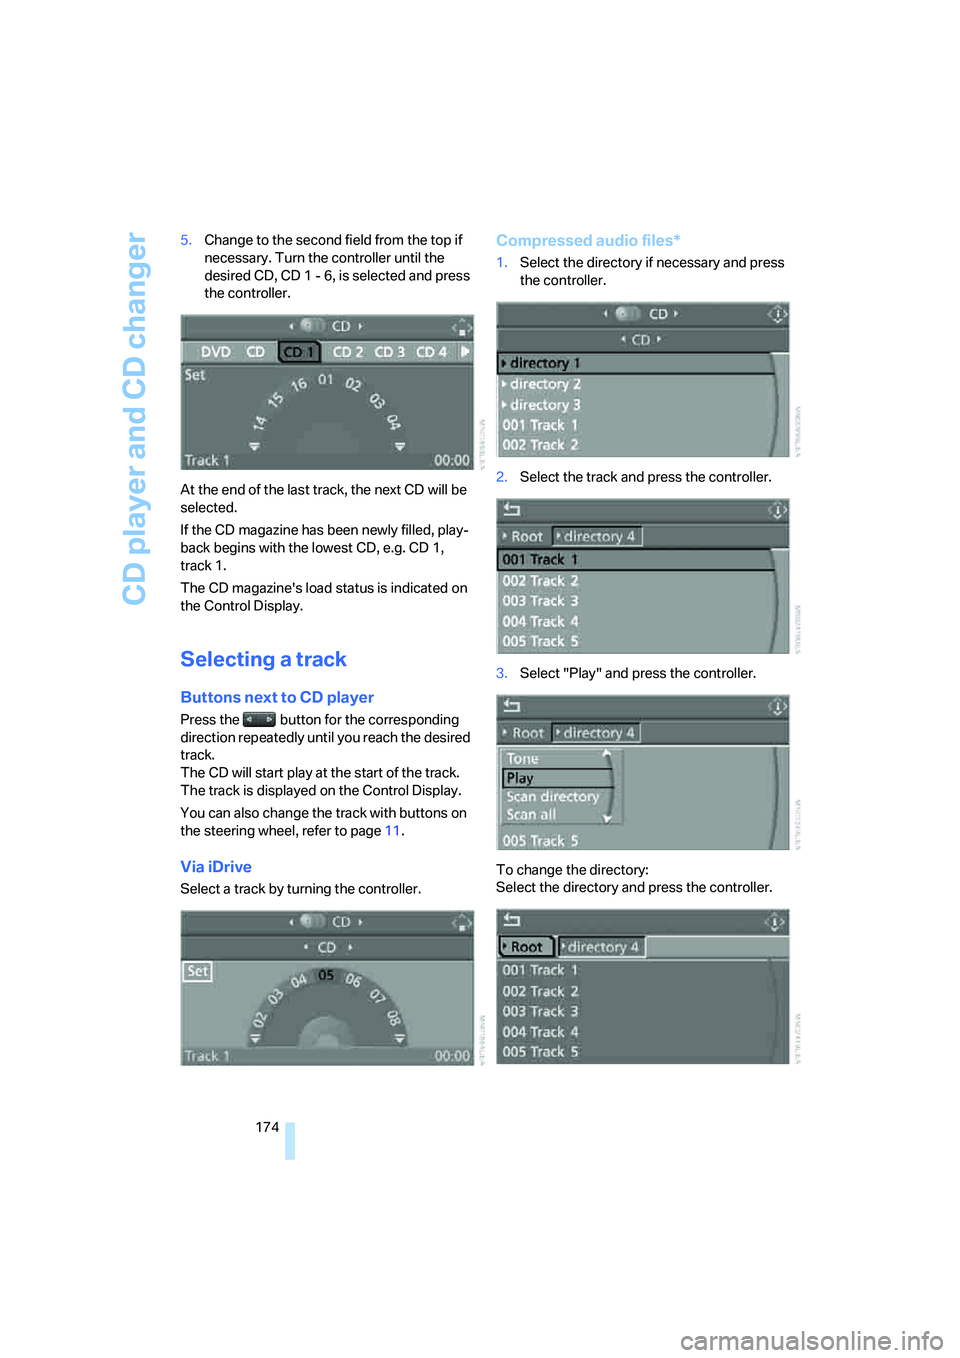
174 5.Change to the second field from the top if
necessary. Turn the controller until the
desired CD, CD 1 - 6, is selected and press
the controller.
At the end of the last track, the next CD will be
selected.
If the CD magazine has been newly filled, play-
back begins with the lowest CD, e.g. CD 1,
track 1.
The CD magazine's load status is indicated on
the Control Display.
Selecting a track
Buttons next to CD player
Press the button for the corresponding
direction repeatedly until you reach the desired
track.
The CD will start play at the start of the track.
The track is displayed on the Control Display.
You can also change the track with buttons on
the steering wheel, refer to page11.
Via iDrive
Select a track by turning the controller.
Compressed audio files*
1.Select the directory if necessary and press
the controller.
2.Select the track and press the controller.
3.Select "Play" and press the controller.
To change the directory:
Select the directory and press the controller.
Page 188 of 273

Telephoning
186 The phone book entries you have transmit-
ted from your mobile phone to your vehicle
are also deleted in the process.
Activating/deactivating Bluetooth link
Bluetooth technology is not approved in
all countries. Observe the applicable local
regulations. Temporarily disconnect the Blue-
tooth link between the vehicle and the mobile
phone if necessary.<
If the Bluetooth link is deactivated, you cannot
operate your mobile phone via the vehicle and
other devices with a Bluetooth interface can be
used via the mobile phone, e.g. a laptop com-
puter.
To temporarily deactivate the Bluetooth link
between your vehicle and your mobile phone:
1.Remove the mobile phone from the snap-in
adapter and switch it off.
2.Press the button to open the start
menu.
3.Select the menu and press the controller.
4.Select "Settings" and press the controller.
5.Select "Bluetooth" and press the controller.
6.Change to upper field if necessary. Turn the
controller until "Bluetooth" is selected and
press the controller.7.Select "Settings" and press the controller.
The Bluetooth link is activated.
8.Select "Bluetooth communication active"
and press the controller to activate or deac-
tivate the link.
Adjusting volume
Turn the knob during a call to select the desired
volume.
This volume for the hands-free system is main-
tained, even if the other audio sources are set to
minimum volume.
You can also adjust the volume with buttons on
the steering wheel, refer to page11.
The setting is stored for the remote control cur-
rently in use.
Operation via iDrive
You can operate the following functions via
iDrive:
>Dial phone numbers.
>Dial phone numbers from the phone book.
>Dial stored phone numbers, e.g. from the
list of accepted calls.
>End a call.
Page 193 of 273

191
Entertainment
Reference
At a glance
Controls
Driving tips Communications
Navigation
Mobility
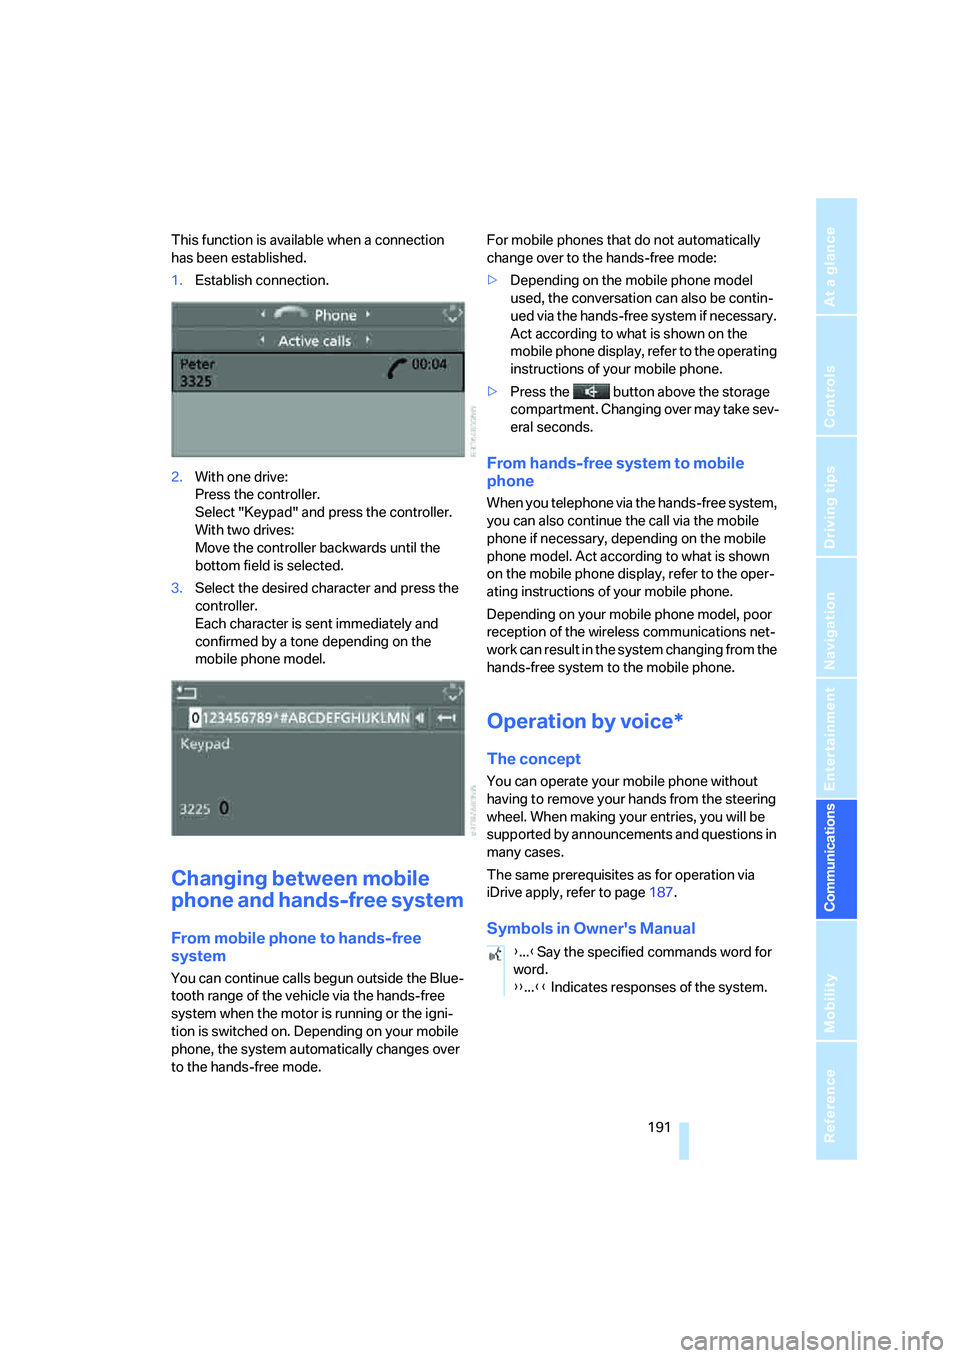
This function is available when a connection
has been established.
1.Establish connection.
2.With one drive:
Press the controller.
Select "Keypad" and press the controller.
With two drives:
Move the controller backwards until the
bottom field is selected.
3.Select the desired character
and press the
controller.
Each character is sent immediately and
confirmed by a tone depending on the
mobile phone model.
Changing between mobile
phone and hands-free system
From mobile phone to hands-free
system
You can continue calls begun outside the Blue-
tooth range of the vehicle via the hands-free
system when the motor is running or the igni-
tion is switched on. Depending on your mobile
phone, the system automatically changes over
to the hands-free mode.For mobile phones that do not automatically
change over to the hands-free mode:
>Depending on the mobile phone model
used, the conversation can also be contin-
ued via the hands-free system if necessary.
Act according to what is shown on the
mobile phone display, refer to the operating
instructions of your mobile phone.
>Press the button above the storage
compartment. Changing over may take sev-
eral seconds.
From hands-free system to mobile
phone
When you telephone via the hands-free system,
you can also continue the call via the mobile
phone if necessary, depending on the mobile
phone model. Act according to what is shown
on the mobile phone display, refer to the oper-
ating instructions of your mobile phone.
Depending on your mobile phone model, poor
reception of the wireless communications net-
work can result in the system changing from the
hands-free system to the mobile phone.
Operation by voice*
The concept
You can operate your mobile phone without
having to remove your hands from the steering
wheel. When making your entries, you will be
supported by announcements and questions in
many cases.
The same prerequisites as for operation via
iDrive apply, refer to page187.
Symbols in Owner's Manual
{...}Say the specified commands word for
word.
{{...}} Indicates responses of the system.