2007 BMW 525XI change wheel
[x] Cancel search: change wheelPage 91 of 273
Controls
89Reference
At a glance
Driving tips
Communications
Navigation
Entertainment
Mobility
Deactivating DTC
Press the button again; the DTC indicator lamp
in the instrument cluster goes out.
xDrive on 525xi, 530xi
xDrive is the 4-wheel drive system of your
BMW. The combined effects of xDrive and DSC
further optimize the traction and dynamic driv-
ing characteristics. The 4-wheel drive system
xDrive variably distributes the drive torque to
the front and rear axle depending on the driving
situation and prevailing road conditions.
HDC Hill Descent Control on 525xi,
530xi
The concept
HDC is a system for driving downhill in steep
terrain. This system reduces vehicle speed on
steep downhill gradients, thus allowing you to
maintain even better control of your BMW
under these conditions. The vehicle moves at
approximately twice walking speed without
active intervention from the driver.
HDC is available for activation at vehicle speeds
below approx. 22 mph/35 km/h. When driving
down steep hills with a speed below approx.
22 mph/35 km/h, the vehicle reduces speed
automatically down to approximately double
walking speed, approx. 7 mph/12 km/h, and
then maintains this speed at a constant.
You can use the accelerator or brakes to vary
this automatically controlled speed within a
range extending from approx. 3 mph/5 km/h to
15 mph/25 km/h.
You can specify a target speed within the same
range by using the lever of the cruise control.
Activating HDC
You can activate HDC:
>with the programmable buttons on the
steering wheel, refer to page53
>using iDrive
iDrive, for explanation of principle, refer to
page16.1.Press the button.
This opens the start menu.
2.Press the controller to open the menu.
3.Select "Settings" and press the controller.
4.Select "Vehicle / Tires" and press the con-
troller.
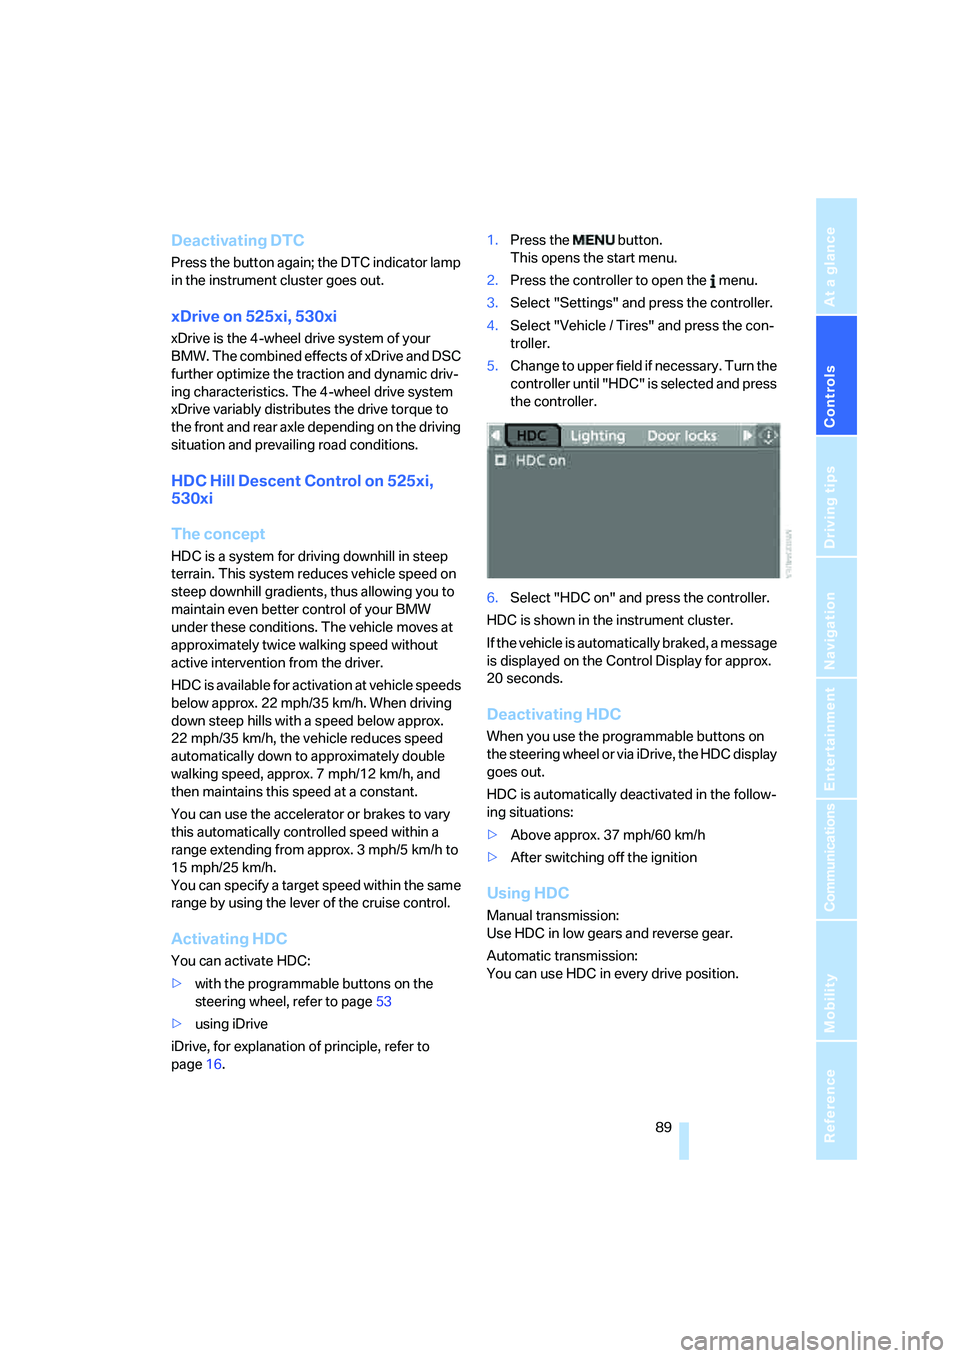
5.Change to upper field if necessary. Turn the
controller until "HDC" is selected and press
the controller.
6.Select "HDC on" and press the controller.
HDC is shown in the instrument cluster.
If the vehicle is automatically braked, a message
is displayed on the Control Display for approx.
20 seconds.
Deactivating HDC
When you use the programmable buttons on
the steering wheel or via iDrive, the HDC display
goes out.
HDC is automatically deactivated in the follow-
ing situations:
>Above approx. 37 mph/60 km/h
>After switching off the ignition
Using HDC
Manual transmission:
Use HDC in low gears and reverse gear.
Automatic transmission:
You can use HDC in every drive position.
Page 93 of 273
Controls
91Reference
At a glance
Driving tips
Communications
Navigation
Entertainment
Mobility
workshop that works according to BMW repair
procedures with correspondingly trained per-
sonnel.
Flat Tire Monitor FTM*
The concept
The Flat Tire Monitor keeps track of the infla-
tion pressures in the tires as you drive. The sys-
tem provides an alert whenever the inflation
pressure drops significantly in relation to the
pressure in another tire.
In the event of a pressure loss, the rolling radius
and therefore the rotation speed of the wheels
change. This change is detected and is
reported as a flat tire.
Functional requirement
In order to assure the reliable reporting of a flat
tire, the system must be initialized for the cor-
rect tire inflation pressure.
The initialization must be repeated after
each time the tire inflation pressure is cor-
rected and after every tire or wheel change.<
System limits
The Flat Tire Monitor cannot indicate
sudden severe tire damage caused by
outside factors and does not detect a natural,
even pressure drop in all four tires.<
In the following situations, the system could be
delayed or malfunction:
>System has not been initialized
>Driving on snowy or slippery road surface
>Sporty driving style: slip in the drive wheels,
high lateral acceleration
>Driving with snow chains
*
When you are driving with the compact wheel*
the Flat Tire Monitor is unable to function.
Initializing system
The initialization finishes during driving,
which can be interrupted at any time.
When driving resumes, the initialization is con-
tinued automatically. Do not initialize the sys-
tem when driving with snow chains
* or com-
pact wheel
*.<
iDrive, for explanation of principle, refer to
page16.
1.Press the button.
This opens the start menu.
2.Press the controller to open the menu.
3.Turn the controller until "Settings" is
selected and press the controller.
4.Select "Vehicle / Tires" and press the con-
troller.
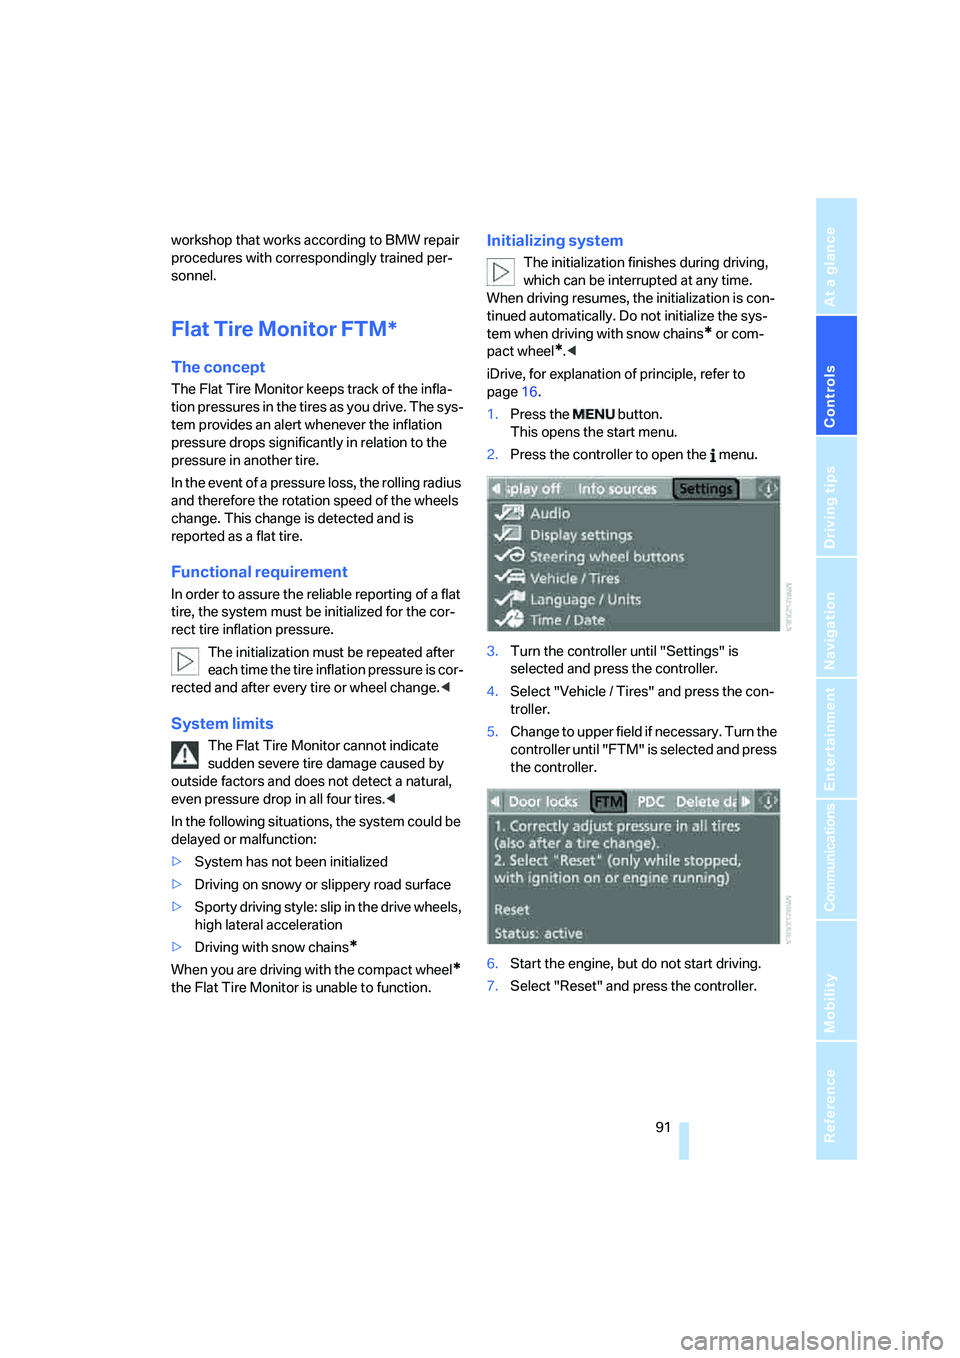
5.Change to upper field if necessary. Turn the
controller until "FTM" is selected and press
the controller.
6.Start the engine, but do not start driving.
7.Select "Reset" and press the controller.
Page 94 of 273
Technology for comfort, convenience and safety
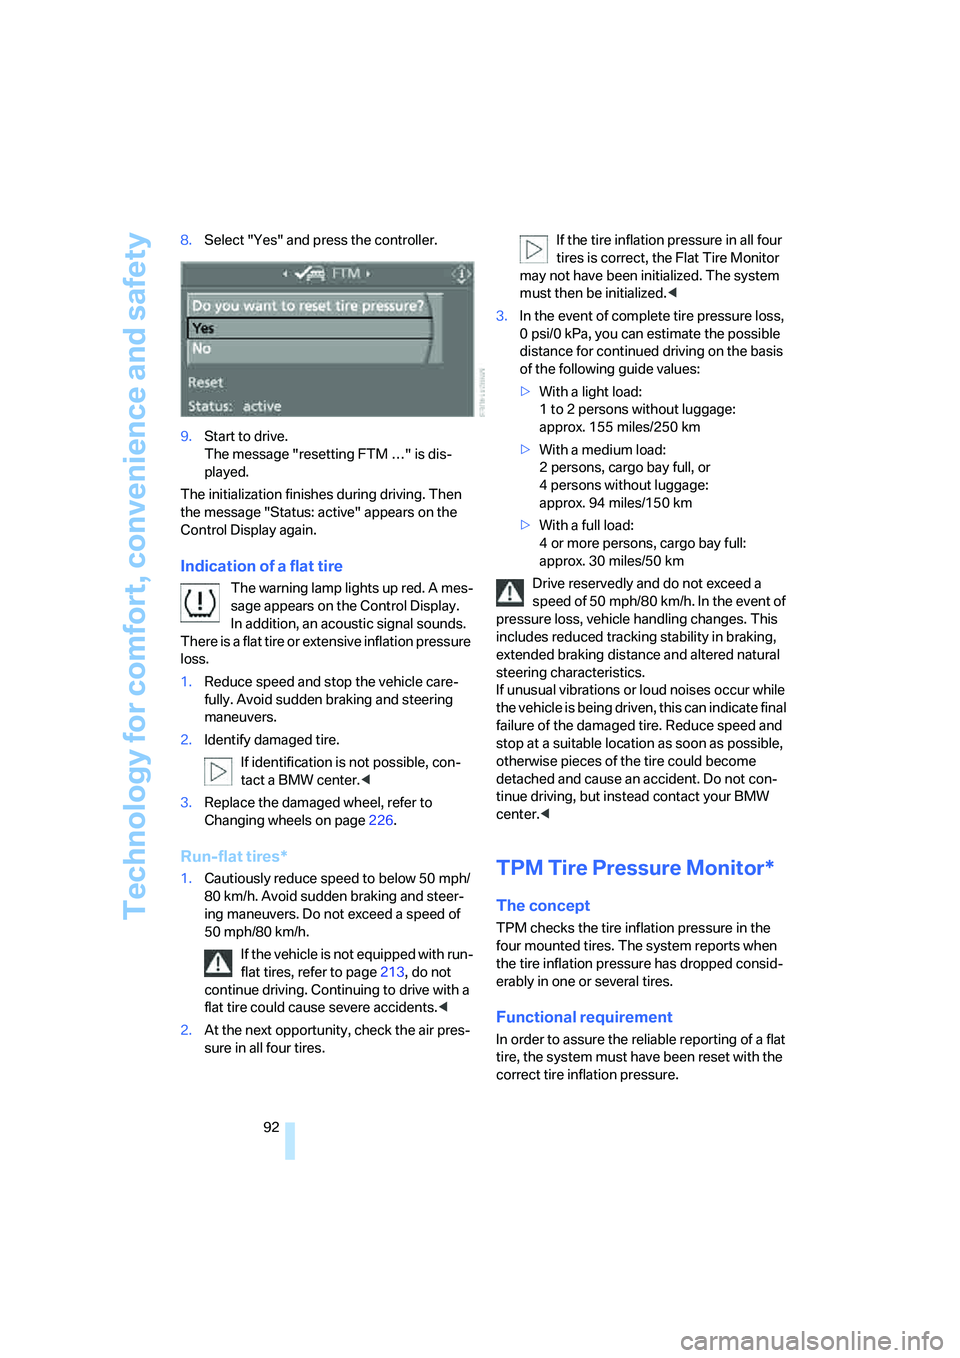
92 8.Select "Yes" and press the controller.
9.Start to drive.
The message "resetting FTM …" is dis-
played.
The initialization finishes during driving. Then
the message "Status: active" appears on the
Control Display again.
Indication of a flat tire
The warning lamp lights up red. A mes-
sage appears on the Control Display.
In addition, an acoustic signal sounds.
There is a flat tire or extensive inflation pressure
loss.
1.Reduce speed and stop the vehicle care-
fully. Avoid sudden braking and steering
maneuvers.
2.Identify damaged tire.
If identification is not possible, con-
tact a BMW center.<
3.Replace the damaged wheel, refer to
Changing wheels on page226.
Run-flat tires*
1.Cautiously reduce speed to below 50 mph/
80 km/h. Avoid sudden braking and steer-
ing maneuvers. Do not exceed a speed of
50 mph/80 km/h.
If the vehicle is not equipped with run-
flat tires, refer to page213, do not
continue driving. Continuing to drive with a
flat tire could cause severe accidents.<
2.At the next opportunity, check the air pres-
sure in all four tires.If the tire inflation pressure in all four
tires is correct, the Flat Tire Monitor
may not have been initialized. The system
must then be initialized.<
3.In the event of complete tire pressure loss,
0 psi/0 kPa, you can estimate the possible
distance for continued driving on the basis
of the following guide values:
>With a light load:
1 to 2 persons without luggage:
approx. 155 miles/250 km
>With a medium load:
2 persons, cargo bay full, or
4 persons without luggage:
approx. 94 miles/150 km
>With a full load:
4 or more persons, cargo bay full:
approx. 30 miles/50 km
Drive reservedly and do not exceed a
speed of 50 mph/80 km/h. In the event of
pressure loss, vehicle handling changes. This
includes reduced tracking stability in braking,
extended braking distance and altered natural
steering characteristics.
If unusual vibrations or loud noises occur while
the vehicle is being driven, this can indicate final
failure of the damaged tire. Reduce speed and
stop at a suitable location as soon as possible,
otherwise pieces of the tire could become
detached and cause an accident. Do not con-
tinue driving, but instead contact your BMW
center.
TPM checks the tire inflation pressure in the
four mounted tires. The system reports when
the tire inflation pressure has dropped consid-
erably in one or several tires.
Functional requirement
In order to assure the reliable reporting of a flat
tire, the system must have been reset with the
correct tire inflation pressure.
Page 95 of 273
Controls
93Reference
At a glance
Driving tips
Communications
Navigation
Entertainment
Mobility
Always use wheels with TPM electronics, oth-
erwise fault-free operation of the system is not
ensured.
Reset the system again after each correc-
tion of the tire inflation pressure and after
every tire or wheel change.<
System limits
TPM cannot announce sudden serious
tire damage caused by external influ-
ences.<
The system does not function properly if it has
not been reset, e.g. a flat tire is reported despite
correct tire inflation pressures.
The system is inactive and cannot display a flat
tire if a wheel has been mounted without TPM
electronics, e.g. a compact wheel, or if TPM is
temporarily interfered with by other systems or
devices which use the same radio frequency.
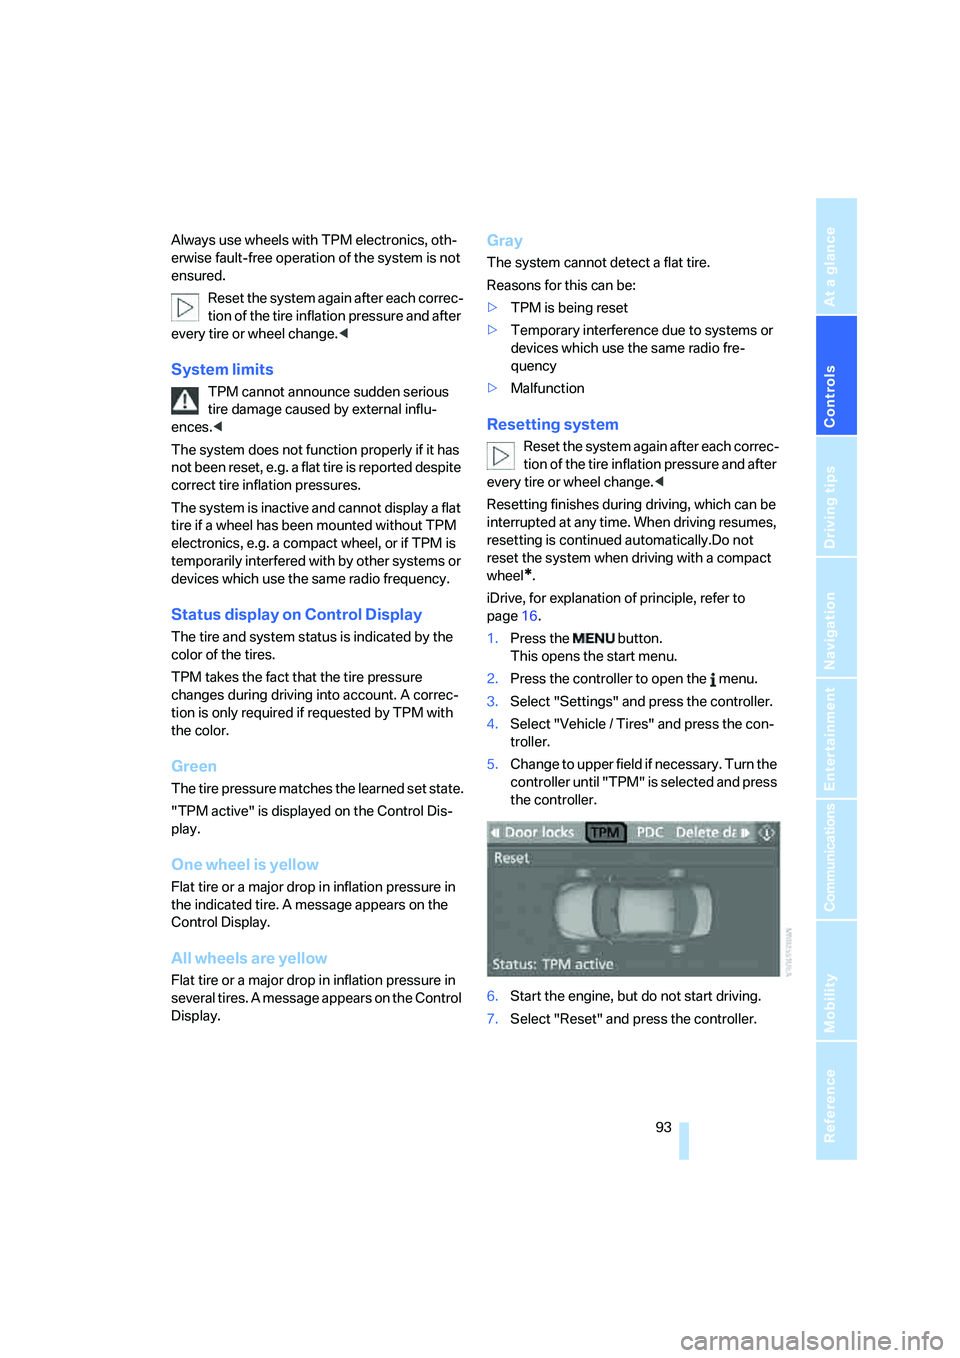
Status display on Control Display
The tire and system status is indicated by the
color of the tires.
TPM takes the fact that the tire pressure
changes during driving into account. A correc-
tion is only required if requested by TPM with
the color.
Green
The tire pressure matches the learned set state.
"TPM active" is displayed on the Control Dis-
play.
One wheel is yellow
Flat tire or a major drop in inflation pressure in
the indicated tire. A message appears on the
Control Display.
All wheels are yellow
Flat tire or a major drop in inflation pressure in
several tires. A message appears on the Control
Display.
Gray
The system cannot detect a flat tire.
Reasons for this can be:
>TPM is being reset
>Temporary interference due to systems or
devices which use the same radio fre-
quency
>Malfunction
Resetting system
Reset the system again after each correc-
tion of the tire inflation pressure and after
every tire or wheel change.<
Resetting finishes during driving, which can be
interrupted at any time. When driving resumes,
resetting is continued automatically.Do not
reset the system when driving with a compact
wheel
*.
iDrive, for explanation of principle, refer to
page16.
1.Press the button.
This opens the start menu.
2.Press the controller to open the menu.
3.Select "Settings" and press the controller.
4.Select "Vehicle / Tires" and press the con-
troller.
5.Change to upper field if necessary. Turn the
controller until "TPM" is selected and press
the controller.
6.Start the engine, but do not start driving.
7.Select "Reset" and press the controller.
Page 96 of 273
Technology for comfort, convenience and safety
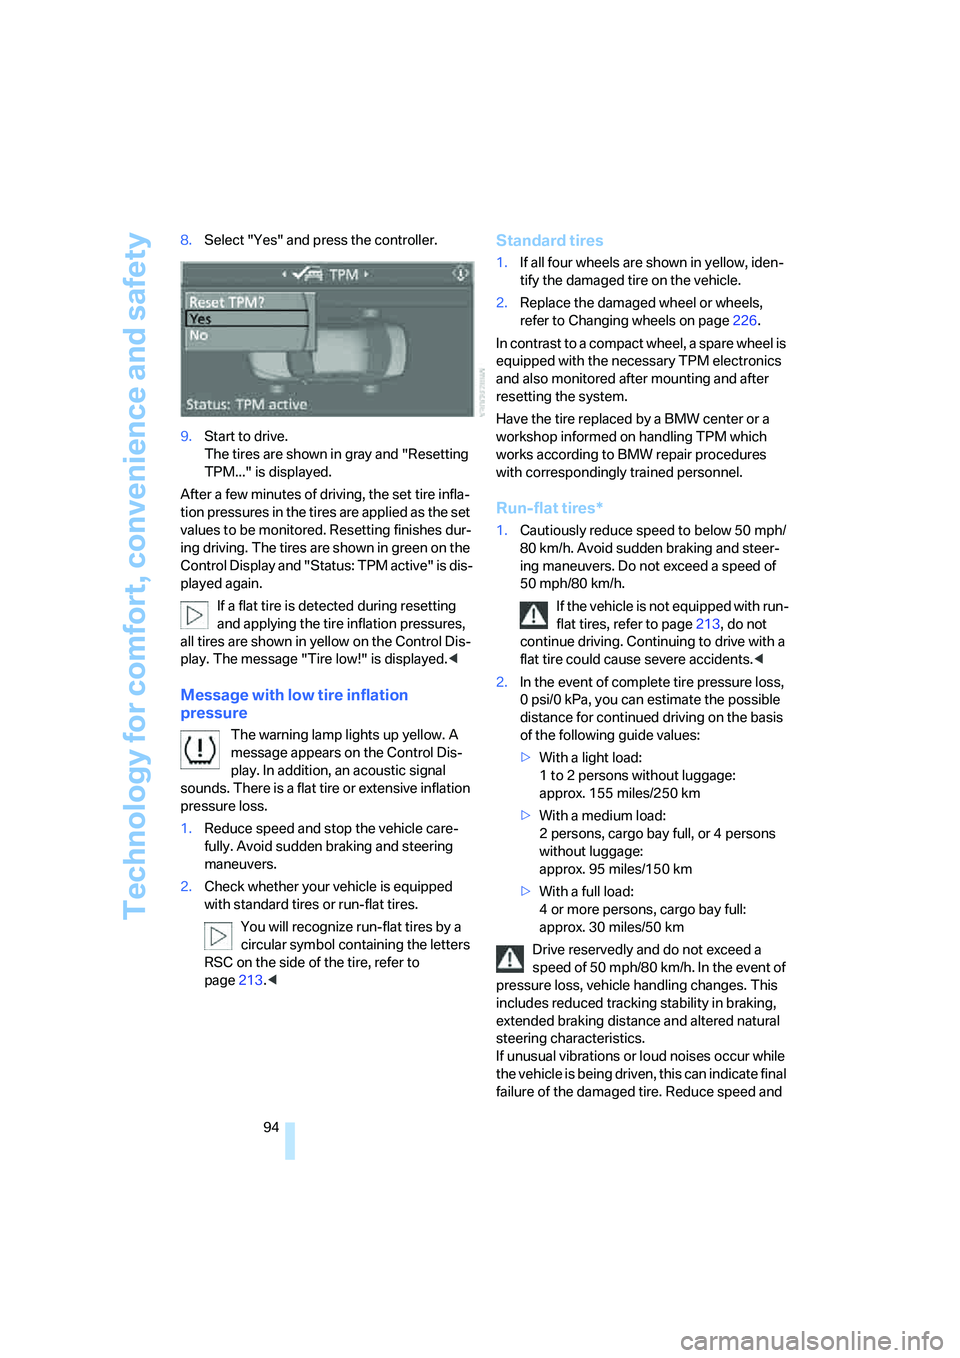
94 8.Select "Yes" and press the controller.
9.Start to drive.
The tires are shown in gray and "Resetting
TPM..." is displayed.
After a few minutes of driving, the set tire infla-
tion pressures in the tires are applied as the set
values to be monitored. Resetting finishes dur-
ing driving. The tires are shown in green on the
Control Display and "Status: TPM active" is dis-
played again.
If a flat tire is detected during resetting
and applying the tire inflation pressures,
all tires are shown in yellow on the Control Dis-
play. The message "Tire low!" is displayed.<
Message with low tire inflation
pressure
The warning lamp lights up yellow. A
message appears on the Control Dis-
play. In addition, an acoustic signal
sounds. There is a flat tire or extensive inflation
pressure loss.
1.Reduce speed and stop the vehicle care-
fully. Avoid sudden braking and steering
maneuvers.
2.Check whether your vehicle is equipped
with standard tires or run-flat tires.
You will recognize run-flat tires by a
circular symbol containing the letters
RSC on the side of the tire, refer to
page213.<
Standard tires
1.If all four wheels are shown in yellow, iden-
tify the damaged tire on the vehicle.
2.Replace the damaged wheel or wheels,
refer to Changing wheels on page226.
In contrast to a compact wheel, a spare wheel is
equipped with the necessary TPM electronics
and also monitored after mounting and after
resetting the system.
Have the tire replaced by a BMW center or a
workshop informed on handling TPM which
works according to BMW repair procedures
with correspondingly trained personnel.
Run-flat tires*
1.Cautiously reduce speed to below 50 mph/
80 km/h. Avoid sudden braking and steer-
ing maneuvers. Do not exceed a speed of
50 mph/80 km/h.
If the vehicle is not equipped with run-
flat tires, refer to page213, do not
continue driving. Continuing to drive with a
flat tire could cause severe accidents.<
2.In the event of complete tire pressure loss,
0 psi/0 kPa, you can estimate the possible
distance for continued driving on the basis
of the following guide values:
>With a light load:
1 to 2 persons without luggage:
approx. 155 miles/250 km
>With a medium load:
2 persons, cargo bay full, or 4 persons
without luggage:
approx. 95 miles/150 km
>With a full load:
4 or more persons, cargo bay full:
approx. 30 miles/50 km
Drive reservedly and do not exceed a
speed of 50 mph/80 km/h. In the event of
pressure loss, vehicle handling changes. This
includes reduced tracking stability in braking,
extended braking distance and altered natural
steering characteristics.
If unusual vibrations or loud noises occur while
the vehicle is being driven, this can indicate final
failure of the damaged tire. Reduce speed and
Page 101 of 273
Controls
99Reference
At a glance
Driving tips
Communications
Navigation
Entertainment
Mobility
4.Select "Display settings" and press the
controller.
5.Change to upper field if necessary. Turn the
controller until "Head-Up Display" is
selected and press the controller.
6.Change into the second field from the top.
Turn the controller until "Head-Up Display"
is selected and press the controller.
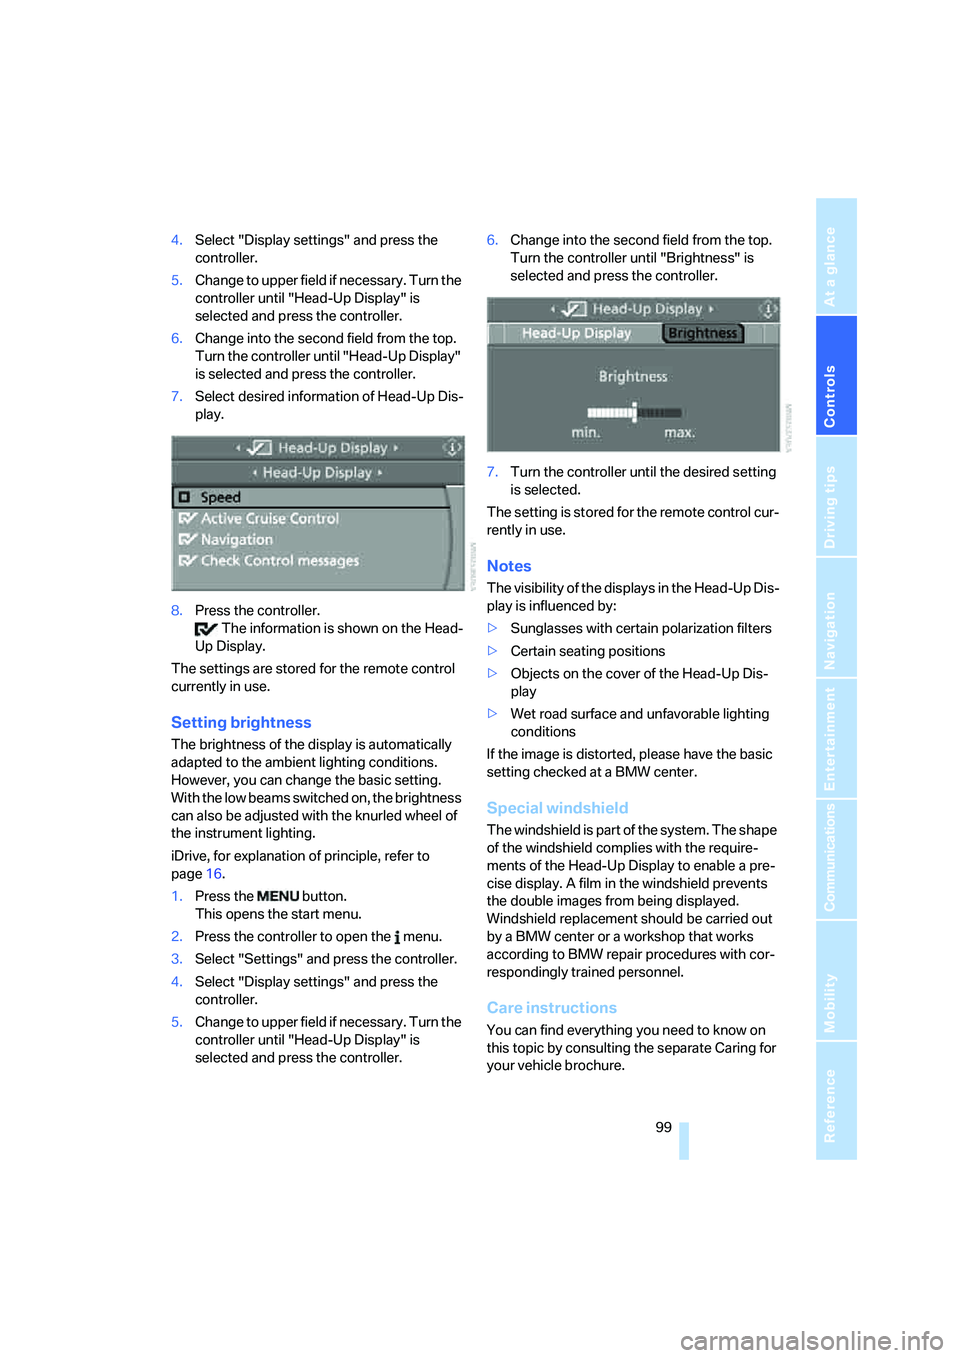
7.Select desired information of Head-Up Dis-
play.
8.Press the controller.
The information is shown on the Head-
Up Display.
The settings are stored for the remote control
currently in use.
Setting brightness
The brightness of the display is automatically
adapted to the ambient lighting conditions.
However, you can change the basic setting.
With the low beams switched on, the brightness
can also be adjusted with the knurled wheel of
the instrument lighting.
iDrive, for explanation of principle, refer to
page16.
1.Press the button.
This opens the start menu.
2.Press the controller to open the menu.
3.Select "Settings" and press the controller.
4.Select "Display settings" and press the
controller.
5.Change to upper field if necessary. Turn the
controller until "Head-Up Display" is
selected and press the controller.6.Change into the second field from the top.
Turn the controller until "Brightness" is
selected and press the controller.
7.Turn the controller until the desired setting
is selected.
The setting is stored for the remote control cur-
rently in use.
Notes
The visibility of the displays in the Head-Up Dis-
play is influenced by:
>Sunglasses with certain polarization filters
>Certain seating positions
>Objects on the cover of the Head-Up Dis-
play
>Wet road surface and unfavorable lighting
conditions
If the image is distorted, please have the basic
setting checked at a BMW center.
Special windshield
The windshield is part of the system. The shape
of the windshield complies with the require-
ments of the Head-Up Display to enable a pre-
cise display. A film in the windshield prevents
the double images from being displayed.
Windshield replacement should be carried out
by a BMW center or a workshop that works
according to BMW repair procedures with cor-
respondingly trained personnel.
Care instructions
You can find everything you need to know on
this topic by consulting the separate Caring for
your vehicle brochure.
Page 112 of 273

Climate
110 body. Therefore, open these vents for maxi-
mum cooling.
AUC Automatic recirculated-air
control/recirculated-air mode
You can respond to pollutants or
unpleasant odors in the immediate
environment by suspending the
supply of outside air. The system then recircu-
lates the air currently within the vehicle. During
AUC operation, a sensor detects pollutants in
the outside air and controls the shut-off auto-
matically.
By pressing the button repeatedly, you can
request three operating modes:
>LED off: outside air flows in continuously.
>Right LED on, AUC mode: the system
detects pollutants in the outside air and
shuts off the supply as needed.
>Left LED on, recirculated-air mode: the
supply of outside air is permanently shut off.
If condensation starts to form on the
inside window surfaces during operation
in the recirculated-air mode, you should switch
it off while also increasing the air volume as
required.
The recirculated-air mode should not be used
over an extended period of time, as the air qual-
ity inside the vehicle deteriorates continu-
ously.<
Residual heat
The heat stored in the engine is
used to heat the passenger com-
partment, e.g. while stopped at a
school to pick up a child.
The function can be switched on when the fol-
lowing conditions are met:
>up to 15 minutes after switching off the
engine
>with engine at operating temperature
>with sufficient battery voltage
>at an outside temperature below 777/
256The LED lights up when the function is
switched on.
From radio readiness the interior temperature,
the air volume and the air distribution can be
set.
Switching automatic climate control on
and off
The air volume, the heater and the
cooling function are all switched
off.
You can restart the automatic cli-
mate control by pressing any of its buttons
except the REST button.
Front ventilation
1Knurled wheels to smoothly open and close
vent outlets
2Levers to change the vent outlet direction
Do not drop any foreign objects into the
vent outlets, otherwise these could be
catapulted outwards and lead to injuries.<
Ventilation for cooling
Adjust the vent outlets to direct the flow of cool
air in your direction, for instance, if the interior
has become too warm, etc.
Draft-free ventilation
Set the vent outlets so that the air flows past
you and is not directed straight at you.
Page 113 of 273
Controls
111Reference
At a glance
Driving tips
Communications
Navigation
Entertainment
Mobility
Rear ventilation
1Knurled wheel to smoothly open and close
vent outlets
2Knurled wheel to adjust the temperature:
>Turn toward blue: colder
>Turn toward red: warmer
3Levers to change the vent outlet direction
Microfilter/activated-charcoal filter
The microfilter removes dust and pollen from
the incoming air. The activated-charcoal filter
provides additional protection by filtering gas-
eous pollutants from the outside air. Your BMW
center replaces this combined filter as a stan-
dard part of your scheduled maintenance.
You can select a display of more detailed infor-
mation on the Control Display, refer to page78.
Parked car ventilation
The concept
The parked car ventilation blows air into the
passenger compartment to lower interior tem-
peratures.
It is ready to use in the parked car mode at any
outside temperature.
You can set two different times for the system
to start. The parked car ventilation can also be
switched on and off directly. It remains
switched on for 30 minutes.
Since the system uses a substantial amount of
electrical current, you should refrain from acti-
vating it twice in succession without allowing
the battery to be recharged in normal operation
between use.The air emerges through the upper body region
vent outlets in the instrument panel. These vent
outlets must be open for the system to operate.
The parked car ventilation is operated via iDrive.
Switching on and off directly
iDrive, for explanation of principle, refer to
page16.
1.Open the start menu.
2.Move the controller to the left to open
"Climate".
3.Select "Parked car operation" and press the
controller.
4.Select "Automatic ventilation" and press
the controller.
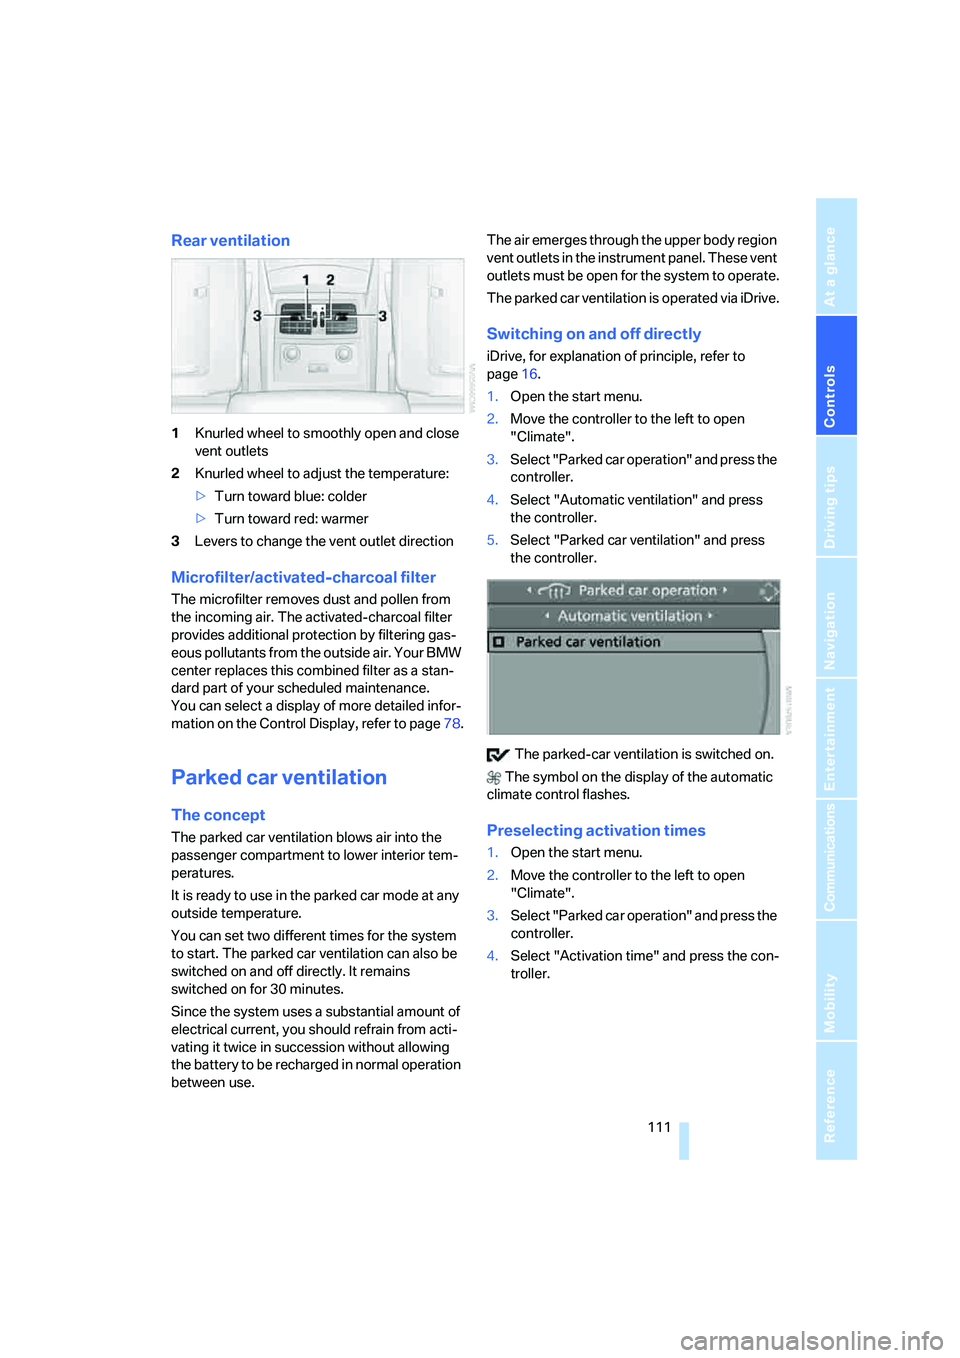
5.Select "Parked car ventilation" and press
the controller.
The parked-car ventilation is switched on.
The symbol on the display of the automatic
climate control flashes.
Preselecting activation times
1.Open the start menu.
2.Move the controller to the left to open
"Climate".
3.Select "Parked car operation" and press the
controller.
4.Select "Activation time" and press the con-
troller.