2007 BMW 323i roof
[x] Cancel search: roofPage 17 of 268
At a glance
15Reference
Controls
Driving tips
Communications
Navigation
Entertainment
Mobility
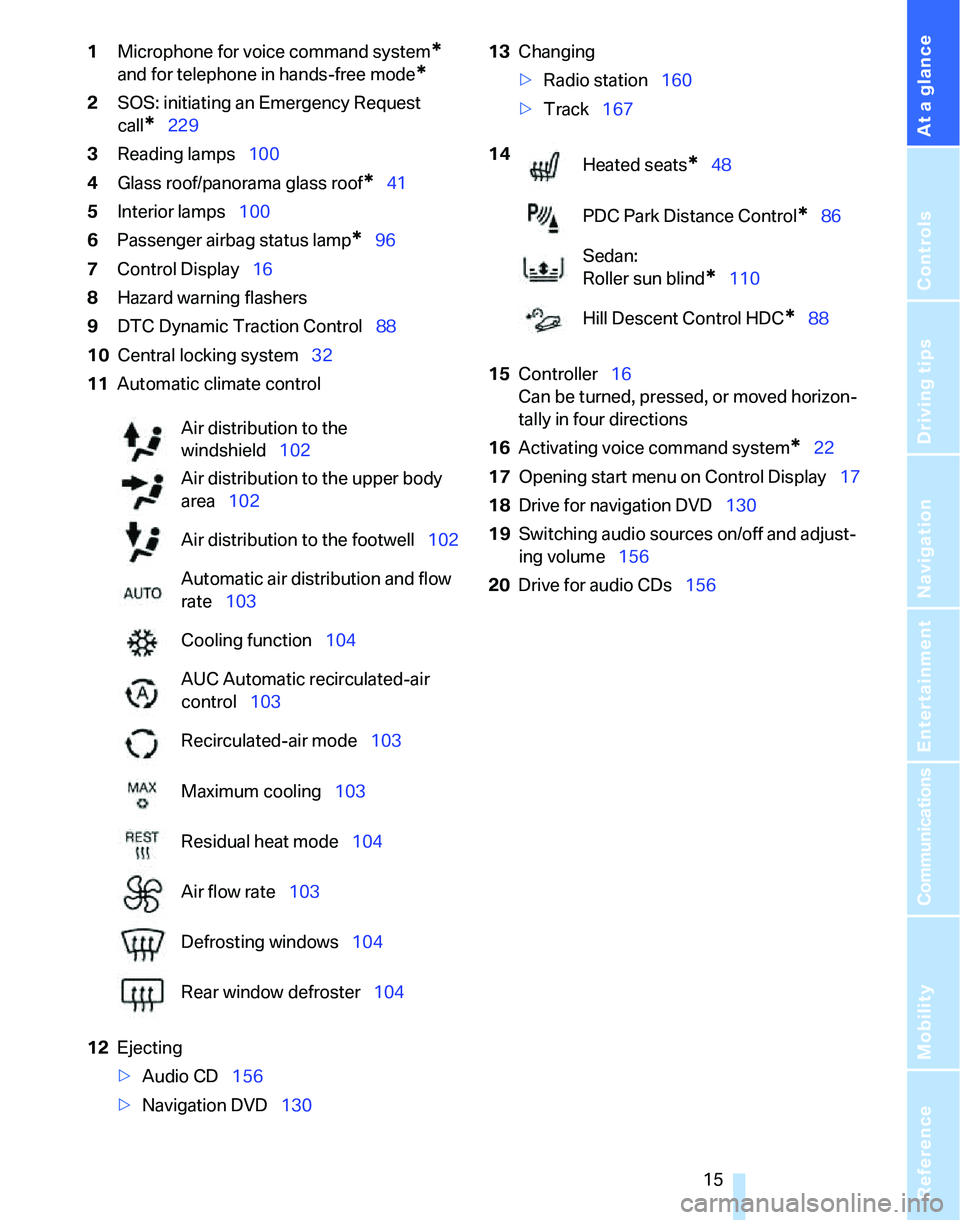
1Microphone for voice command system*
and for telephone in hands-free mode*
2SOS: initiating an Emergency Request
call
*229
3Reading lamps100
4Glass roof/panorama glass roof
*41
5Interior lamps100
6Passenger airbag status lamp
*96
7Control Display16
8Hazard warning flashers
9DTC Dynamic Traction Control88
10Central locking system32
11Automatic climate control
12Ejecting
>Audio CD156
>Navigation DVD13013Changing
>Radio station160
>Track167
15Controller16
Can be turned, pressed, or moved horizon-
tally in four directions
16Activating voice command system
*22
17Opening start menu on Control Display17
18Drive for navigation DVD130
19Switching audio sources on/off and adjust-
ing volume156
20Drive for audio CDs156 Air distribution to the
windshield102
Air distribution to the upper body
area102
Air distribution to the footwell102
Automatic air distribution and flow
rate103
Cooling function104
AUC Automatic recirculated-air
control103
Recirculated-air mode103
Maximum cooling103
Residual heat mode104
Air flow rate103
Defrosting windows104
Rear window defroster104
14
Heated seats*48
PDC Park Distance Control
*86
Sedan:
Roller sun blind
*110
Hill Descent Control HDC
*88
Page 26 of 268
Voice command system
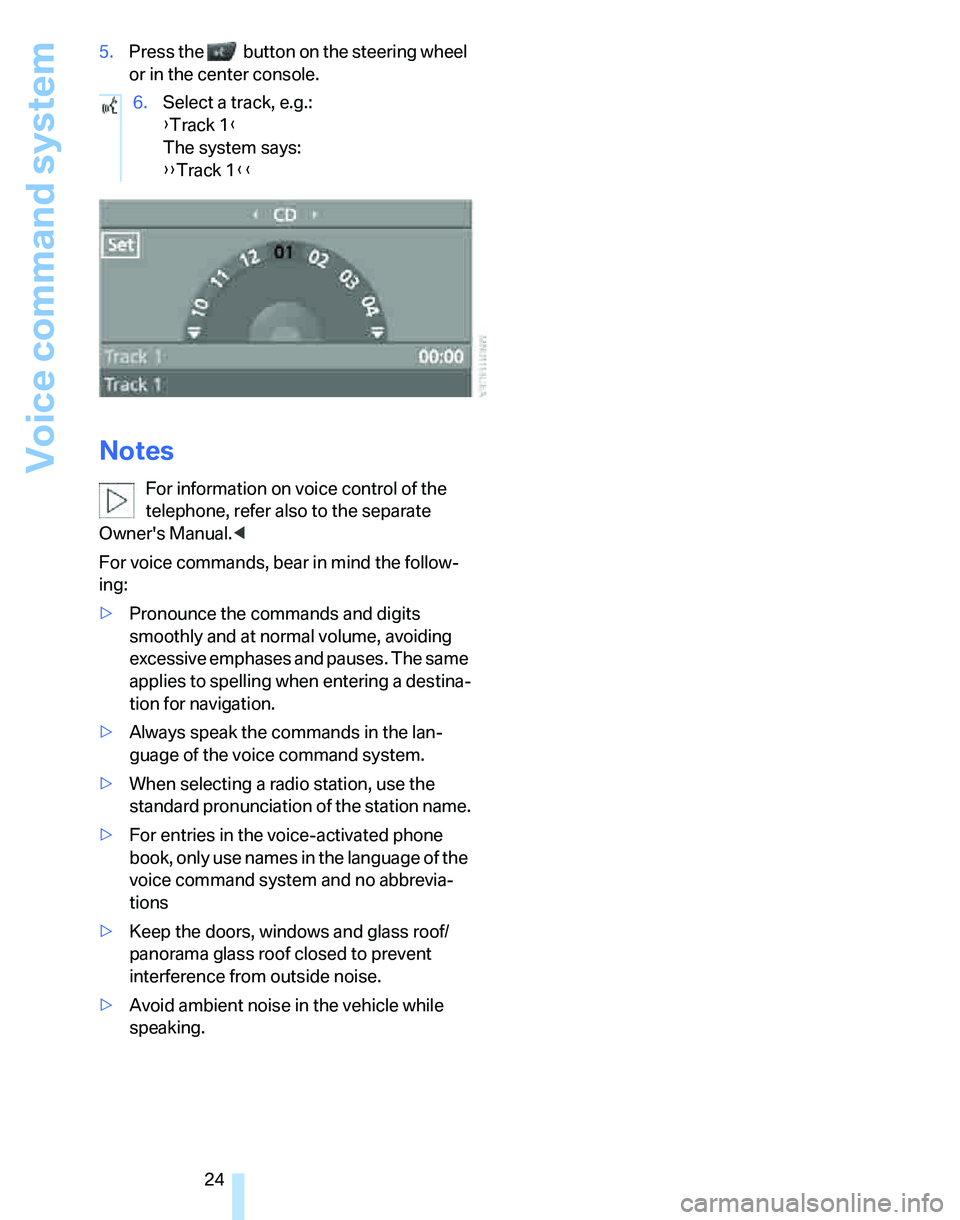
24 5.Press the button on the steering wheel
or in the center console.
Notes
For information on voice control of the
telephone, refer also to the separate
Owner's Manual.<
For voice commands, bear in mind the follow-
ing:
>Pronounce the commands and digits
smoothly and at normal volume, avoiding
excessive emphases and pauses. The same
applies to spelling when entering a destina-
tion for navigation.
>Always speak the commands in the lan-
guage of the voice command system.
>When selecting a radio station, use the
standard pronunciation of the station name.
>For entries in the voice-activated phone
book, only use names in the language of the
voice command system and no abbrevia-
tions
>Keep the doors, windows and glass roof/
panorama glass roof closed to prevent
interference from outside noise.
>Avoid ambient noise in the vehicle while
speaking.6.Select a track, e.g.:
{Track 1}
The system says:
{{Track 1}}
Page 32 of 268
Opening and closing
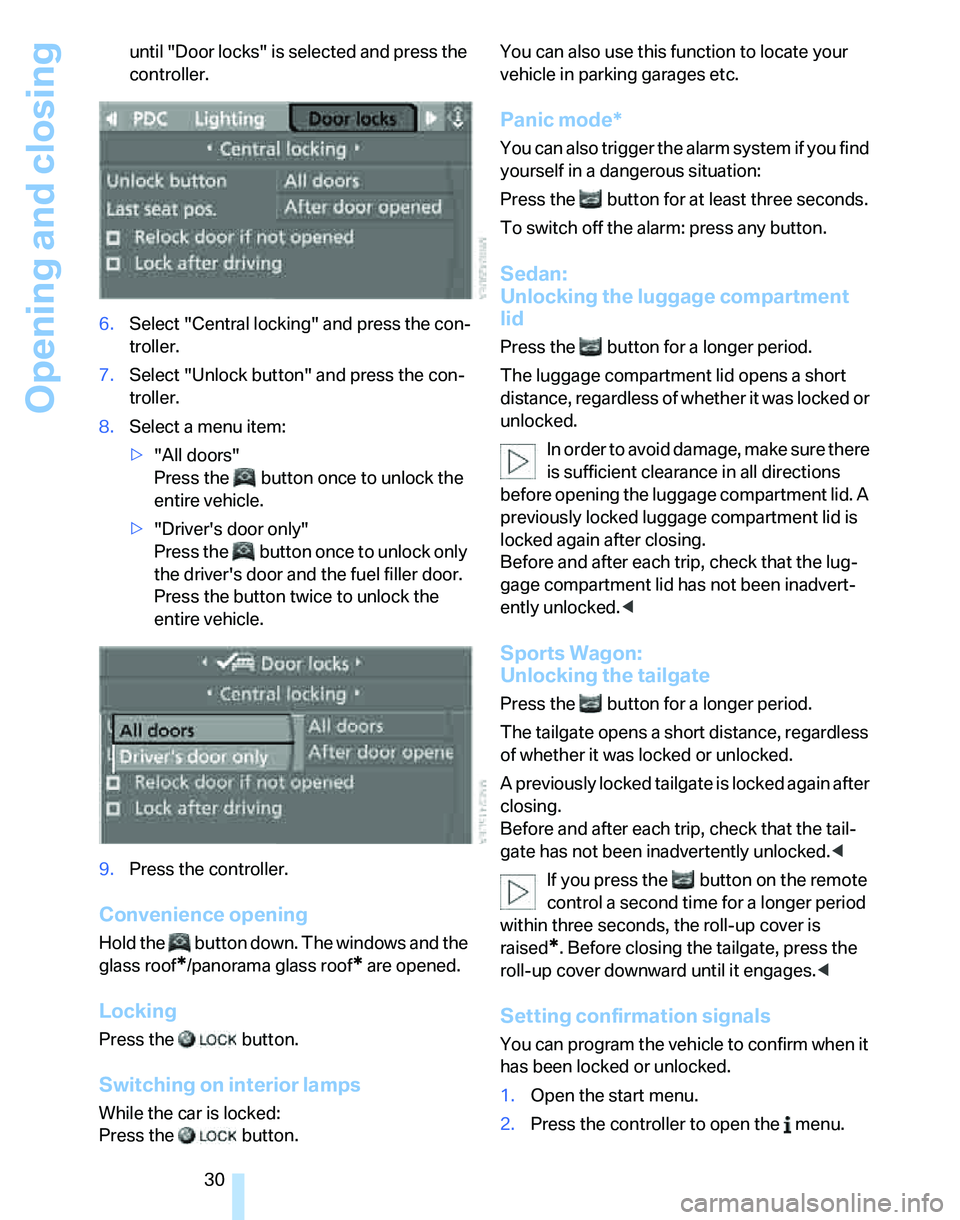
30 until "Door locks" is selected and press the
controller.
6.Select "Central locking" and press the con-
troller.
7.Select "Unlock button" and press the con-
troller.
8.Select a menu item:
>"All doors"
Press the button once to unlock the
entire vehicle.
>"Driver's door only"
Press the button once to unlock only
the driver's door and the fuel filler door.
Press the button twice to unlock the
entire vehicle.
9.Press the controller.
Convenience opening
Hold the button down. The windows and the
glass roof
*/panorama glass roof* are opened.
Locking
Press the button.
Switching on interior lamps
While the car is locked:
Press the button. You can also use this function to locate your
vehicle in parking garages etc.
Panic mode*
You can also trigger the alarm system if you find
yourself in a dangerous situation:
Press the button for at least three seconds.
To switch off the alarm: press any button.
Sedan:
Unlocking the luggage compartment
lid
Press the button for a longer period.
The luggage compartment lid opens a short
distance, regardless of whether it was locked or
unlocked.
In order to avoid damage, make sure there
is sufficient clearance in all directions
before opening the luggage compartment lid. A
previously locked luggage compartment lid is
locked again after closing.
Before and after each trip, check that the lug-
gage compartment lid has not been inadvert-
ently unlocked.<
Sports Wagon:
Unlocking the tailgate
Press the button for a longer period.
The tailgate opens a short distance, regardless
of whether it was locked or unlocked.
A previously locked tailgate is locked again after
closing.
Before and after each trip, check that the tail-
gate has not been inadvertently unlocked.<
If you press the button on the remote
control a second time for a longer period
within three seconds, the roll-up cover is
raised
*. Before closing the tailgate, press the
roll-up cover downward until it engages.<
Setting confirmation signals
You can program the vehicle to confirm when it
has been locked or unlocked.
1.Open the start menu.
2.Press the controller to open the menu.
Page 33 of 268
Controls
31Reference
At a glance
Driving tips
Communications
Navigation
Entertainment
Mobility
3.Select "Settings" and press the controller.
4.Select "Vehicle / Tires" and press the con-
troller.
5.If necessary, move the highlight marker to
the uppermost field. Turn the controller
until "Door locks" is selected and press the
controller.
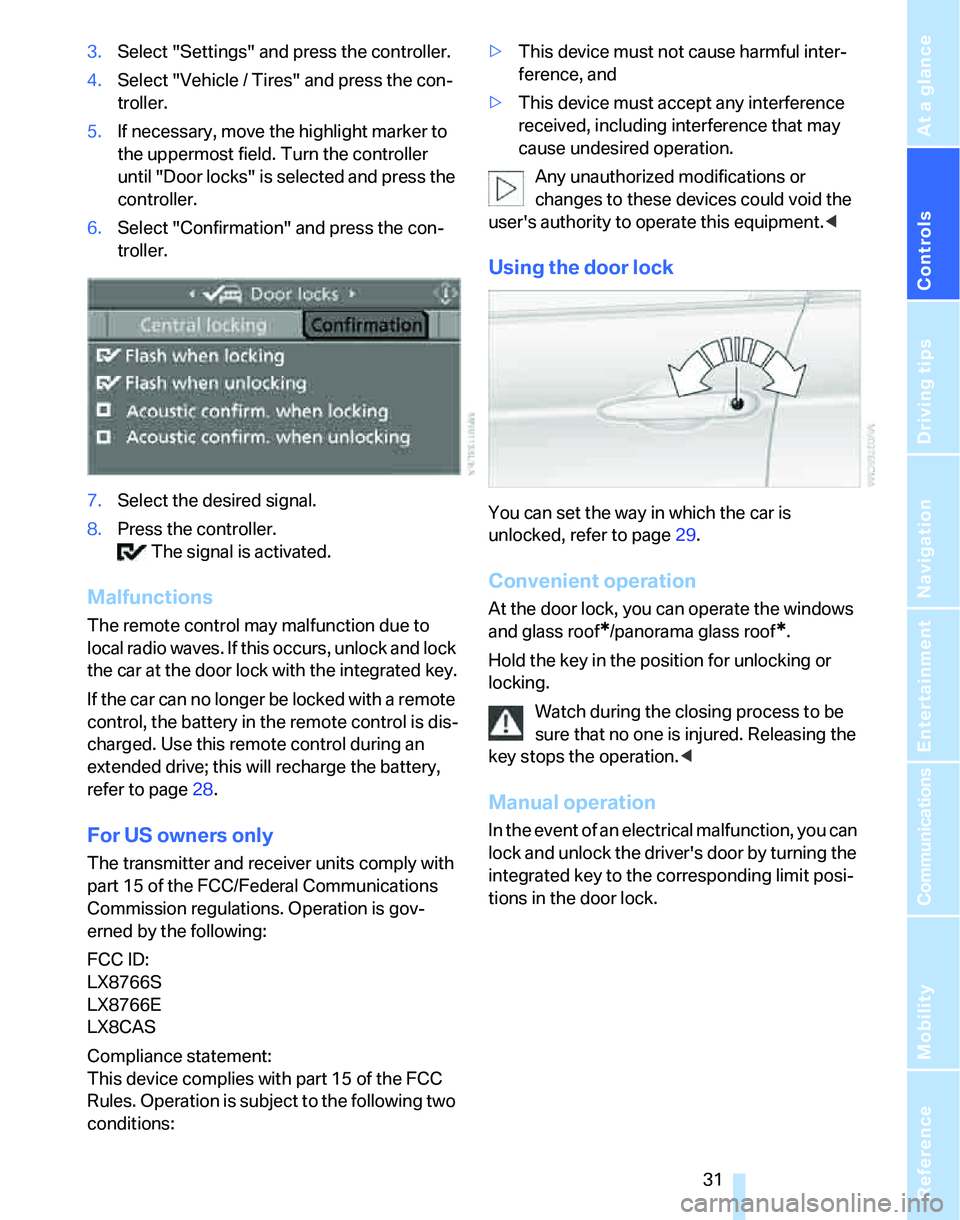
6.Select "Confirmation" and press the con-
troller.
7.Select the desired signal.
8.Press the controller.
The signal is activated.
Malfunctions
The remote control may malfunction due to
local radio waves. If this occurs, unlock and lock
the car at the door lock with the integrated key.
If the car can no longer be locked with a remote
control, the battery in the remote control is dis-
charged. Use this remote control during an
extended drive; this will recharge the battery,
refer to page28.
For US owners only
The transmitter and receiver units comply with
part 15 of the FCC/Federal Communications
Commission regulations. Operation is gov-
erned by the following:
FCC ID:
LX8766S
LX8766E
LX8CAS
Compliance statement:
This device complies with part 15 of the FCC
Rules. Operation is subject to the following two
conditions:>This device must not cause harmful inter-
ference, and
>This device must accept any interference
received, including interference that may
cause undesired operation.
Any unauthorized modifications or
changes to these devices could void the
user's authority to operate this equipment.<
Using the door lock
You can set the way in which the car is
unlocked, refer to page29.
Convenient operation
At the door lock, you can operate the windows
and glass roof
*/panorama glass roof*.
Hold the key in the position for unlocking or
locking.
Watch during the closing process to be
sure that no one is injured. Releasing the
key stops the operation.<
Manual operation
In the event of an electrical malfunction, you can
lock and unlock the driver's door by turning the
integrated key to the corresponding limit posi-
tions in the door lock.
Page 38 of 268

Opening and closing
36 You can open the luggage compartment lid/tail-
gate even when the alarm system is armed, by
pressing the button on the remote control,
refer to page30. The lid is locked and moni-
tored again as soon as you close it.
Switching off an alarm
>Unlock the car with the remote control, refer
to page29.
>Insert the remote control all the way into the
ignition lock.
Indicator lamp displays
>The indicator lamp under the inside rear-
view mirror flashes continuously: the sys-
tem is armed.
>The indicator lamp flashes after locking:
doors, hood, luggage compartment lid/tail-
gate or rear window are not properly closed.
Even if you do not close the alerted area, the
system begins to monitor the remaining
areas, and the indicator lamp flashes con-
tinuously after approx. 10 seconds. How-
ever, the interior motion sensor is not acti-
vated.
>The indicator lamp goes out after unlocking:
your vehicle has not been disturbed while
you were away.
>If the indicator lamp flashes after unlocking
until the remote control is inserted in the
ignition, but for no longer than approx.
5 minutes: your vehicle has been disturbed
while you were away.
Tilt alarm sensor
The tilt of the vehicle is monitored. The alarm
system reacts, e.g. to attempts to steal a wheel
or tow the vehicle.
Interior motion sensor
In order for the interior motion sensor to func-
tion properly, the windows and glass sunroof
must be completely closed.
Avoiding unintentional alarms
The tilt alarm sensor and interior motion sensor
may be switched off at the same time. This pre-
vents unintentional alarms, e.g. in the following
situations:
>In duplex garages
>During transport on car-carrying trains,
boats/ships or on a trailer
>When animals are to remain in the vehicle
Switching off tilt alarm sensor and
interior motion sensor
Press the button on the remote control
again as soon as the vehicle is locked.
The indicator lamp comes on for approx. two
seconds, then begins to flash steadily. The tilt
alarm sensor and the interior motion sensor are
switched off until the next time the vehicle is
unlocked and subsequently locked again.
Convenient access*
Convenient access enables you to enter your
vehicle without needing to hold the remote con-
trol in your hand. All you need to do is wear the
remote control close to your body, e.g. in your
jacket pocket. The vehicle automatically
detects the corresponding remote control
within the immediate vicinity or in the passen-
ger compartment.
Convenient access supports the following
functions:
>Unlocking/locking the vehicle
>Unlocking the luggage compartment lid/
tailgate separately
Page 39 of 268

Controls
37Reference
At a glance
Driving tips
Communications
Navigation
Entertainment
Mobility
>Engine starting
>Convenient closure
Functional requirement
>The vehicle or the luggage compartment
lid/tailgate can only be locked when the
vehicle detects that the remote control cur-
rently in use is outside of the vehicle.
>The vehicle cannot be locked or unlocked
again until after approx. 2 seconds.
>The engine can only be started when the
vehicle detects that the remote control cur-
rently in use is inside the vehicle.
Comparison to standard remote
controls
In general, there is no difference between using
convenient access or pressing the buttons on
the remote control to carry out the functions
mentioned above. You should therefore first
familiarize yourself with the instructions on
opening and closing starting on page28.
Special features regarding the use of conve-
nient access are described below.
If you notice a brief delay while opening or
closing the windows or glass sunroof, the
system is checking whether a remote control is
inside the vehicle. Please repeat the opening or
closing procedure, if necessary.<
Unlocking
Grasp the handle on the driver's or front pas-
senger's door completely, arrow 1. This corre-
sponds to pressing the button.
If a remote control is detected inside the car
after the vehicle is unlocked, the electric steer-
ing wheel lock is released, refer to page57.
Locking
Touch the surface, arrow 2, with your finger for
approx. 1 second. This corresponds to pressing
the button.
To preserve the battery, please make
sure that the ignition and all electrical
consumers are switched off before locking the
vehicle.<
Convenient closure
For convenient closure, keep your finger on the
surface, arrow 2.
Unlocking the luggage compartment
lid/tailgate separately
Press the button on the outside of the luggage
compartment lid/tailgate. This corresponds to
pressing the button.
If the vehicle detects that a remote con-
trol has been accidentally left inside the
locked vehicle's cargo bay after the luggage
compartment lid/tailgate or rear window is
closed, the lid will reopen. The hazard warning
flashers flash and an acoustic signal
* sounds.<
Switching on radio readiness
Radio readiness is switched on by pressing the
start/stop button, refer to page57.
Do not depress the brake or the clutch,
otherwise the engine will start.<
Starting the engine
You can start the engine or switch on the igni-
tion when a remote control is inside the vehicle.
It is not necessary to insert a remote control into
the ignition switch, refer to page57.
Switch off the engine in cars with
automatic transmission
The engine can only be switched off when the
selector lever is in position P, refer to page58.
T o s w i t c h t h e e n g i n e o f f w h e n t h e s e l e c t o r l e v e r
is in position N, the remote control must be in
the ignition switch.
Page 41 of 268
Controls
39Reference
At a glance
Driving tips
Communications
Navigation
Entertainment
Mobility
switch again to stop the opening move-
ment.
You can close the windows in the same manner
by pulling the switch.
There are separate switches in the rear seat
armrests.
After switching off the ignition
When the remote control is removed or the igni-
tion is switched off, you can still operate the
windows for approx. 1 minute as long as no
door is opened.
For information on convenient operation via the
remote control or the door lock, refer to page30
or31. For information on closing with conve-
nient access, refer to Locking on page30.
Pinch protection system
If the closing force exceeds a specific value as a
window closes, the closing action is interrupted
and the window reopens slightly.
Despite the pinch protection system
check and clear the window's travel path
prior to closing it, otherwise the safety system
might fail to detect certain kinds of obstruc-
tions, such as thin objects, and the window
would continue closing.
Do not install any accessories that might inter-
fere with window movement. Otherwise the
pinch protection system could be impaired.<
Closing without pinch protection
If there is an external danger, or if ice on the win-
dows, etc., prevents you from closing the win-
dows normally, proceed as follows:
1.Pull the switch past the resistance point and
hold it there. Pinch protection is limited and
the window reopens slightly if the closing
force exceeds a certain value.
2.Pull the switch again past the resistance
point within approx. 4 seconds and hold it
there. The window closes without pinch
protection.
Safety switch
With the safety switch, you can prevent the rear
windows from being opened or closed via the
switches in the rear passenger area, by chil-
dren, for example. When the safety function is
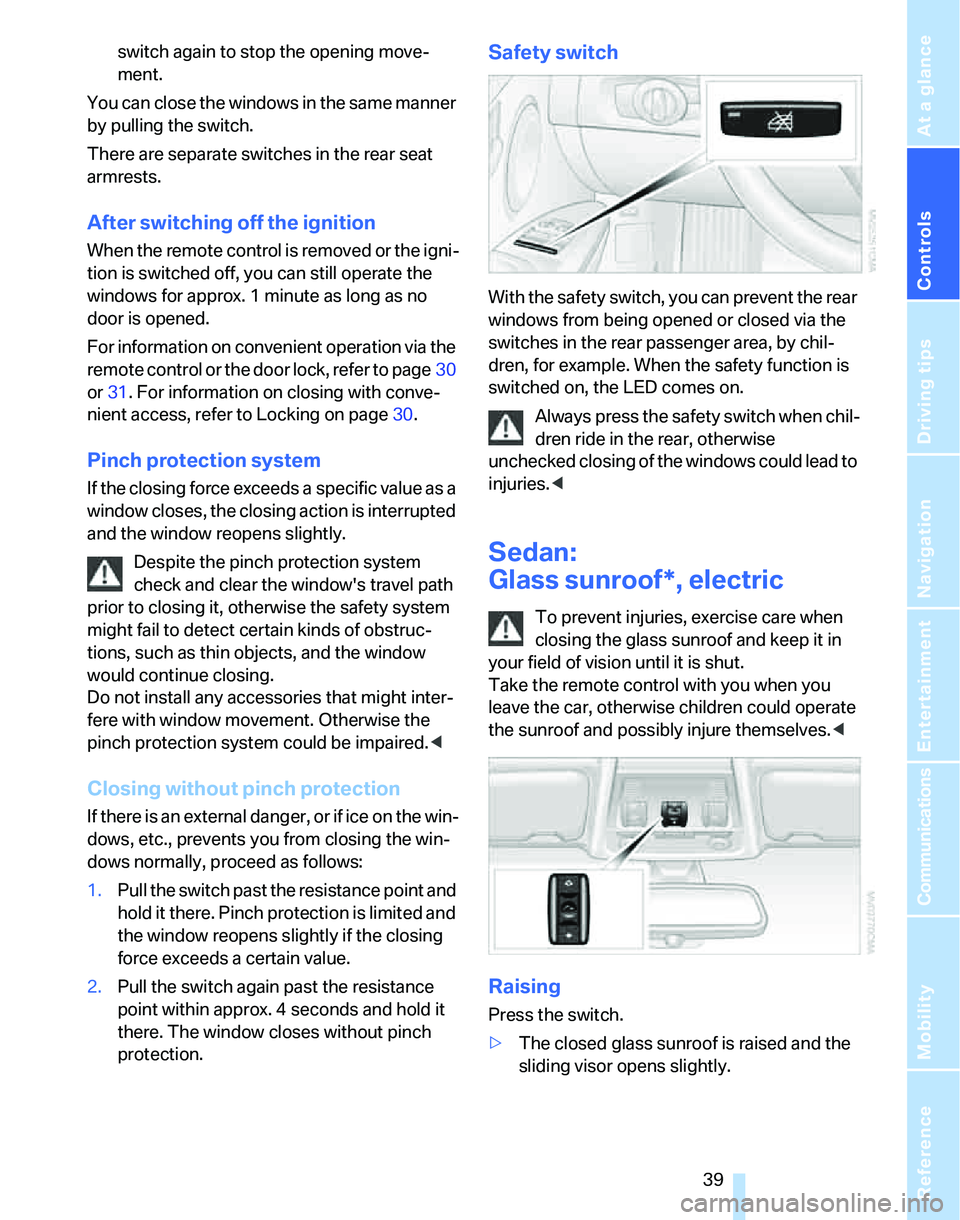
switched on, the LED comes on.
Always press the safety switch when chil-
dren ride in the rear, otherwise
unchecked closing of the windows could lead to
injuries.<
Sedan:
Glass sunroof*, electric
To prevent injuries, exercise care when
closing the glass sunroof and keep it in
your field of vision until it is shut.
Take the remote control with you when you
leave the car, otherwise children could operate
the sunroof and possibly injure themselves.<
Raising
Press the switch.
>The closed glass sunroof is raised and the
sliding visor opens slightly.
Page 42 of 268
Opening and closing
40 >The open glass sunroof automatically trav-
els into the raised position. The sliding visor
remains completely open.
Opening, closing
>Press the switch backwards to the resis-
tance point.
The glass sunroof and the sliding visor open
together as long as you hold the switch in
this position.
>Push the switch backwards past the resis-
tance point.
The glass sunroof and the sliding visor open
automatically. Briefly press the switch again
to stop the opening movement.
You can close the glass sunroof in a similar
manner by pushing the switch forwards. The
sliding visor remains open and can be closed by
hand.
For information on convenient operation via the
remote control or door lock, refer to page30
or31.
After switching off the ignition
When the remote control is removed or the igni-
tion is switched off, you can still operate the
sunroof for approx. 1 minute as long as no door
has been opened.
Pinch protection system
If the glass sunroof encounters an obstruction
during closing from approximately the middle of
the opening in the roof, or during closing from
the raised position, the closing movement is
interrupted and the glass sunroof is opened
again slightly.
Despite the pinch protection system
check and clear the sunroof's travel path
prior to closing it, otherwise the safety system
might fail to detect certain kinds of obstruc-
tions, such as very thin objects, and the sunroof
would continue closing.<
Closing without pinch protection
If there is an external danger, push the switch
past the resistance point and hold it there. The
roof closes without pinch protection.
Following interruptions in electrical
power supply
After a power failure, there is a possibility that
the glass sunroof can only be raised. The sys-
tem must be initialized. BMW recommends
having this work done by your BMW center.
Closing manually
In the event of an electrical malfunction, you can
move the glass sunroof manually:
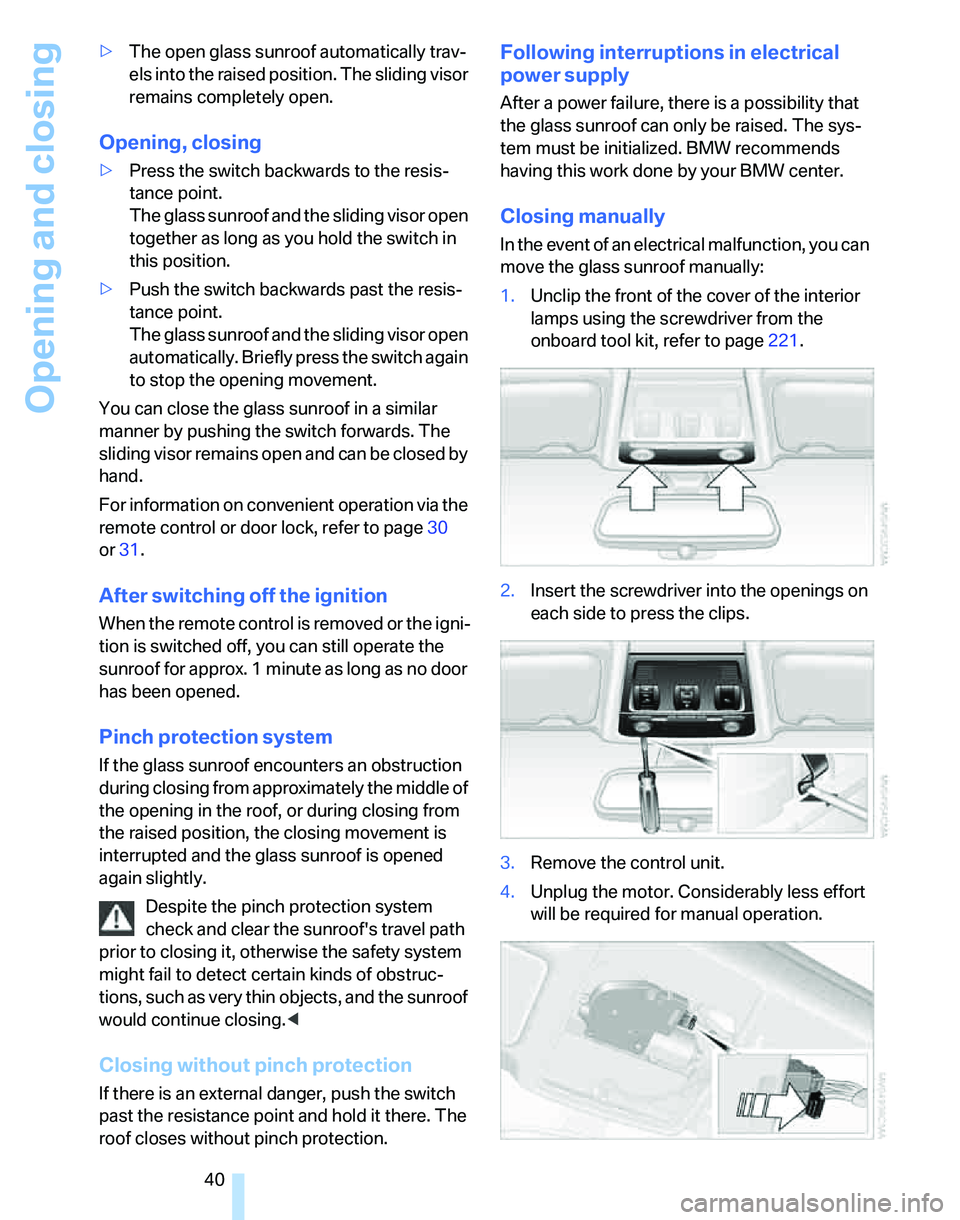
1.Unclip the front of the cover of the interior
lamps using the screwdriver from the
onboard tool kit, refer to page221.
2.Insert the screwdriver into the openings on
each side to press the clips.
3.Remove the control unit.
4.Unplug the motor. Considerably less effort
will be required for manual operation.