2007 AUDI R8 clutch
[x] Cancel search: clutchPage 36 of 210

Driver information system 34Yellow symbols are accompanied by one warning chime. The func-
tion indicated should be checked as soon as possible. If several
faults are detected at the same time, the symbols are displayed one
after the other for about 2 seconds at a time.
Driver messages
Additional messages to assist the driver are displayed in
conjunction with the warning lamps and symbols in the
instrument cluster.The display will show the appropriate message if the system detects
a bulb failure ⇒page 37, if the brake pads are worn or you have not
yet selected a gear on a vehicle with R tronic.
The driver can also call up messages in the display for additional
information if a red warning symbol starts flashing.
Calling up driver messages
For example, in the event of an oil pressure malfunction the oil pres-
sure symbol
will appear in the display. If you now press the
adjuster/test button ⇒fig. 31 for at least one second, the following
message will appear in the display:
SWITCH OFF ENGINE AND CHECK OIL LEVEL
The message will disappear from the display after about 5 seconds.
If required, the message can be called up again by briefly pressing
the adjuster/test button.
Brake pads worn
⇒page 37
Speed warning 1*
⇒page 37
Speed warning 2*
⇒page 37
Dynamic headlight range con-
trol faulty
⇒page 37
Washer fluid level low
⇒page 37
Battery voltage too high or too
low
⇒page 37
Bulb monitor
⇒page 37
or BRAKE
LIGHT
Brake light failure
⇒page 38
Light sensor/rain sensor (auto-
matic headlights) defective
⇒page 38
and
Selector lever defective*
No R gear*
⇒page 38
and
Clutch overheating*
⇒page 38
Fig. 31 Detail of the
instrument cluster:
Adjuster/test button
document_0900452a816e6cc9.book Seite 34 Mittwoch, 21. Februar 2007 1:32 13
Page 40 of 210

Driver information system 38The message disappears after 5 seconds. Press the adjuster/test
button ⇒page 10, fig. 2 briefly if you wish to call up the message
again.
If the display indicates that one of the lights is not working, this can
have a number of causes:•
Bulb failure ⇒page 193.
•
A “blown” fuse ⇒page 190, “Changing fuses”.
•
Defective electrical wiring.
Have the components replaced or the wiring repaired as necessary
by a qualified workshop.
WARNING
•
Bulbs are sensitive to pressure. The glass can break when you
touch the bulb, causing injury.
•
Incorrect handling of the high-voltage element of xenon gas-
discharge bulbs can have potentially fatal consequences.
Brake light failure
If the symbol
or the text BRAKE LIGHT lights up, check the
following components:
•
Brake light bulbs
•
Wiring connections
•
Brake light switch
Have the components repaired or replaced by a qualified workshop.Note
The brake light switch is only tested during the initial systems check
after starting the engine.
Applies to vehicles: with light sensor/ rain sensorLight sensor/rain sensor
This indicator lamp comes on if the automatic headlights/
automatic wipers are defective.If the
symbol appears, this means that the light sensor/ rain
sensor is not functioning. For safety reasons, the dipped beam
headlights will then be switched on permanently when the light
switch is set to the AUTO position. However, you can still switch the
lights on and off in the normal way with the light switch. If the rain
sensor is defective, the functions operated via the windscreen wiper
lever will still be available. You should have the light sensor/ rain
sensor checked by a qualified workshop as soon as possible.
Applies to vehicles: with R tronicSelector lever defective
and
Selector lever defective! No R gear!
If these symbols light up, there is a fault in the R tronic selector
lever. The indicators on the selector lever will go out or flash. It is no
longer possible to engage reverse gear. If you were using the
gearbox in manual mode, it will switch back to automatic mode.
You can continue to change gear manually. Starting in neutral (N),
pull the paddle lever on the steering wheel to engage first gear.
The gearbox will now remain in manual mode and you can select the
gears using the paddle levers.
You should have the selector lever checked by a qualified workshop
as soon as possible.
Applies to vehicles: with R tronicClutch overheating
and
Clutch is overheating ! If possible please stop vehicle.
A8
A+
document_0900452a816e6cc9.book Seite 38 Mittwoch, 21. Februar 2007 1:32 13
Page 41 of 210

Driver information system39
Controls
Safety
Driving tips
General maintenance
Self-help
Technical data If these symbols light up, the clutch has overheated and could be
damaged if you continue driving.
Stop the car and obtain professional assistance.
document_0900452a816e6cc9.book Seite 39 Mittwoch, 21. Februar 2007 1:32 13
Page 84 of 210

Driving 82Starting the engine
Turn the key to this position to start the engine. While the engine is
being started the headlights are switched back to side lights and
other major electrical equipment is switched off. After the engine
has started the ignition key returns to position by itself.
The ignition key has to be turned back to position before re-
starting the engine. The starter inhibitor in the ignition lock
prevents the starter motor from engaging when the engine is
running, as this could cause damage.
WARNING
•
Wait for the vehicle to come to a standstill before removing the
ignition key from the lock. Otherwise the steering lock could
engage suddenly, which could cause an accident.
•
Always take the key with you when leaving the vehicle – even
if you only intend to be gone for a short time. This is especially
important if children are left in the car. They might otherwise be
able to start the engine or use power-operated equipment such as
the electric windows - this could lead to injuries.Note
If the battery has been disconnected and then reconnected it will be
necessary to leave the key in position for about 5 seconds before
starting the engine.Starting the engineThe engine can only be started with an original Audi key.On vehicles with R tronic, the engine can be started in
neutral (N) or in any gear (1 - 6 or R).
– Apply the handbrake firmly ⇒.– Push the clutch pedal all the way down (vehicles with
manual gearbox).
– Press and hold the brake pedal.
– Turn the ignition key to position ⇒page 81, fig. 72
without pressing the accelerator.
– Release the ignition key as soon as the engine starts; the
starter motor must not be allowed to run on with the
engine. Neutral gear (N) will be engaged on vehicles with
Rtronic.
When starting from cold the engine may be a little noisy for the first
few seconds until oil pressure has built up in the hydraulic tappets.
This is quite normal, and no cause for concern.
If the engine fails to start straight-away, switch off the starter after
about 10 seconds and try again after about half a minute.
WARNING
•
Never run the engine in confined spaces. The exhaust gases are
toxic.
•
If the engine is running and a gear is engaged, you will need to
hold the car with the footbrake.Caution
Avoid high engine speeds, full throttle and extreme load conditions
until the engine has reached its normal operating temperature,
otherwise this can damage the engine.
For the sake of the environment
Do not warm up the engine when the vehicle is stationary. You
should drive off immediately whenever possible. This will help avoid
unnecessary exhaust emissions.
A3
A2A1
A2
A3
document_0900452a816e6cc9.book Seite 82 Mittwoch, 21. Februar 2007 1:32 13
Page 88 of 210

Driving 86Parking
If the parking manoeuvre involves shunting backwards and
forwards, the warning sound will be switched off temporarily while
you change gear. The warning beeps will start again as soon as the
vehicle comes closer to an obstacle.
Possible faults
If you hear a long beep when you engage reverse gear (or when you
activate the system using the switch) and the diode in the switch
starts flashing, there is a fault in the system. The long warning beep
is given just once to indicate the fault. If you try activating the
parking aid again, the warning beep will not sound and fault is only
indicated by the flashing diode. This also applies if you switch the
ignition off and then on again: the long warning beep will only
sound the first time you try activating the parking aid. Have the fault
rectified.
If there is a fault in the system there will be no confirming beep
when you activate the parking aid.
To ensure that the acoustic parking aid works properly, the sensors
must be kept clean and free of ice.
WARNING
•
The sensors have blind spots in which obstacles are not regis-
tered. It is particularly important to ensure that there are no small
children or animals near the vehicle when reversing, as the
sensors may not always be able to detect them.
•
The parking aid cannot replace the full concentration of the
driver. The driver is always responsible for safety during parking
and other manoeuvres.Caution
Please note that low obstacles detected by the system may no
longer be registered by the sensors as the car moves closer, so the
system will not give any further warning. Certain kinds of obstacles (such as wire fences, chains, thin painted posts or trailer draw bars,
etc) may not always be detected by the system, so take care not to
damage the vehicle in such cases.
Note
Your vehicle has low ground clearance. To help you prevent damage
to the vehicle, warning beeps will sound when you approach a steep
slope (e.g. in a car park or garage).Cruise control systemApplies to vehicles: with cruise control systemIntroduction
The cruise control system allows you to maintain a
constant speed.The cruise control system allows you to maintain any desired
constant cruising speed at speeds above about 30 km/h. Of course,
this is subject to power output and braking ability of the engine.
This helps to reduce fatigue, especially on long journeys.
The indicator lamp
in the instrument cluster lights up when the
cruise control system is operating.
The cruise control system is automatically deactivated immediately
by
•
pressing the brake pedal.
•
pressing the clutch pedal.
WARNING
For safety reasons the cruise control system should not be used in
dense traffic or poor road conditions (such as slippery surfaces,
heavy rain, loose grit or gravel) – this could cause an accident.
document_0900452a816e6cc9.book Seite 86 Mittwoch, 21. Februar 2007 1:32 13
Page 89 of 210

Driving87
Controls
Safety
Driving tips
General maintenance
Self-help
Technical data
Caution
do not move the gear lever into neutral without depressing the
clutch when the cruise control system is active. Otherwise the
engine could rev up and be damaged.
Note
The cruise control cannot maintain a constant speed when travel-
ling down steep hills. The vehicle tends to accelerate under its own
weight. Change down to a lower gear in good time or use the foot
brake to slow the vehicle.Applies to vehicles: with cruise control systemSetting speed
The desired cruising speed needs to be stored in the
memory.– Drive at the desired speed.
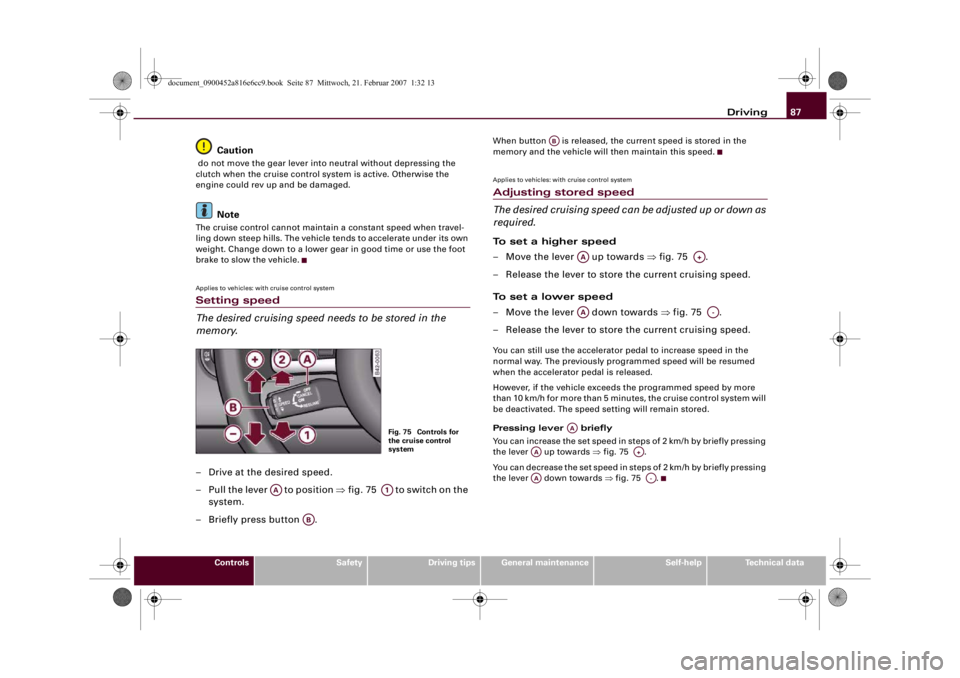
– Pull the lever to position ⇒f i g . 7 5 to s w i t ch o n t h e
system.
– Briefly press button .
When button is released, the current speed is stored in the
memory and the vehicle will then maintain this speed.Applies to vehicles: with cruise control systemAdjusting stored speed
The desired cruising speed can be adjusted up or down as
required.To set a higher speed
– Move the lever up towards ⇒fig. 75 .
– Release the lever to store the current cruising speed.
To set a lower speed
– Move the lever down towards ⇒fig. 75 .
– Release the lever to store the current cruising speed.You can still use the accelerator pedal to increase speed in the
normal way. The previously programmed speed will be resumed
when the accelerator pedal is released.
However, if the vehicle exceeds the programmed speed by more
than 10 km/h for more than 5 minutes, the cruise control system will
be deactivated. The speed setting will remain stored.
Pressing lever briefly
You can increase the set speed in steps of 2 km/h by briefly pressing
the lever up towards ⇒fig. 75 .
You can decrease the set speed in steps of 2 km/h by briefly pressing
the lever down towards ⇒fig. 75 .
Fig. 75 Controls for
the cruise control
system
AA
A1
AB
AB
AA
A+
AA
A-
AA
AA
A+
AA
A-
document_0900452a816e6cc9.book Seite 87 Mittwoch, 21. Februar 2007 1:32 13
Page 90 of 210

Driving 88Applies to vehicles: with cruise control systemSwitching off cruise control temporarily– Press the brake pedal, or
– Press the clutch pedal, or
– Press the lever ⇒page 87, fig. 75 to position (click
stop not engaged).The speed stored at this point remains in the memory if the system
is only temporarily deactivated.
To resume the programmed cruising speed, release the clutch or
brake pedal and pull the lever to position .
If no speed was stored when the system was temporarily deacti-
vated, a new speed can be set as follows: drive at the desired
cruising speed and briefly press button ⇒page 87, fig. 75 (SET).
WARNING
Do not resume the programmed cruising speed if this is too high
for the traffic conditions - this can cause accidents.Applies to vehicles: with cruise control systemSwitching off cruise control– Press the lever A ⇒page 87, fig. 75 to position (click
stop engaged).The stored speed will be deleted once the ignition is switched off.
Note
Always switch off the cruise control system completely after each
journey. When beginning a new journey, the speed must be reset
⇒page 87.
Applies to vehicles: with Audi magnetic rideAudi magnetic rideThe damping effect of the shock absorbers can be
adjusted according to the driver's requirements, and will
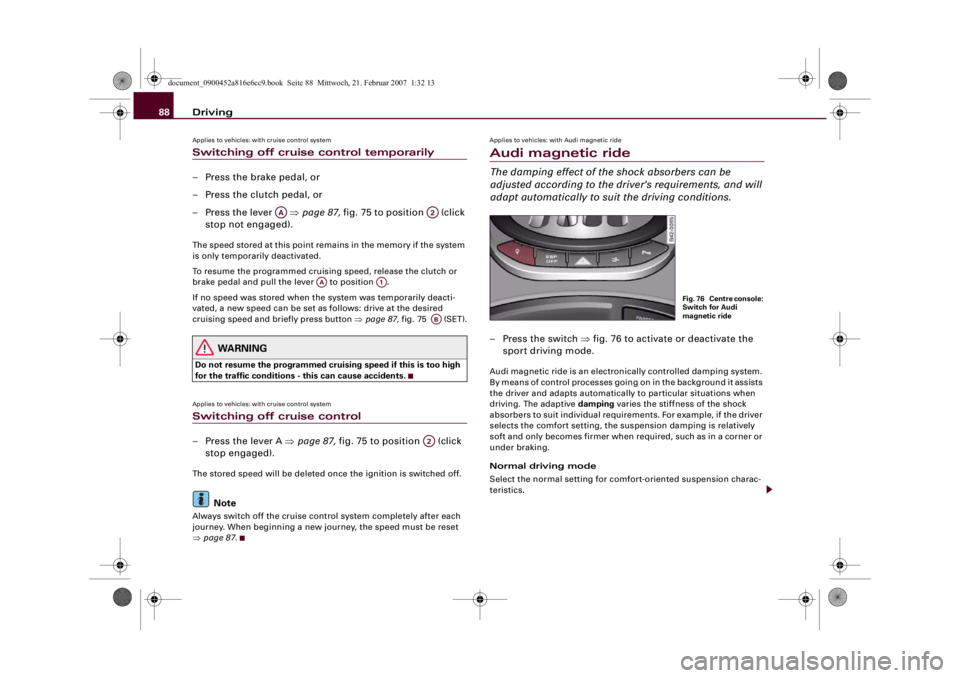
adapt automatically to suit the driving conditions.– Press the switch ⇒fig. 76 to activate or deactivate the
sport driving mode.Audi magnetic ride is an electronically controlled damping system.
By means of control processes going on in the background it assists
the driver and adapts automatically to particular situations when
driving. The adaptive damping varies the stiffness of the shock
absorbers to suit individual requirements. For example, if the driver
selects the comfort setting, the suspension damping is relatively
soft and only becomes firmer when required, such as in a corner or
under braking.
Normal driving mode
Select the normal setting for comfort-oriented suspension charac-
teristics.
AA
A2
AA
A1
ABA2
Fig. 76 Centre console:
Switch for Audi
magnetic ride
document_0900452a816e6cc9.book Seite 88 Mittwoch, 21. Februar 2007 1:32 13
Page 92 of 210

Automatic gearbox 90Automatic gearboxApplies to vehicles: with R tronicDescriptionR tronic is an automatic sequential-shift gearbox using shift-by-wire
technology to operate the clutch and change the gears.
The gears are engaged manually (the principle is similar to a manual
gearbox) but they can also be shifted automatically. The engine can
be started and stopped in any gear ⇒page 82.
The driver information system displays the selected mode, the
engaged gear and the sport function ⇒fig. 78.M - Manual mode
In this mode, you use the selector lever ⇒page 91 or the paddle
levers on the multi-function steering wheel ⇒page 93 to change
the forward gears up and down.
A - Automatic mode
In this mode the forward gears are shifted up and down automati-
cally according to the engine load and road speed ⇒page 92.
R - Reverse gear
Reverse gear must only be engaged when the vehicle is stationary
and the engine is idling ⇒.
To engage reverse gear press the brake pedal then move the
selector lever to the right before pulling it briefly towards the R
symbol. The reversing lights come on when reverse gear is engaged
with the ignition on.
N - Neutral
To engage neutral gear, the selector lever has to be moved to the
right or left. If reverse gear is engaged, move the selector lever to
the left. If a forward gear is engaged, move the selector lever to the
right.
Sport function
Press the button to activate the sport function. Upshifts are
then delayed to make use of the maximum engine power. The shift
time is reduced and the accelerator pedal has a lighter response. In
addition, the car does not automatically shift up a gear before the
maximum engine speed is reached when you are in manual mode.
The car will automatically shift up a gear in the normal way when
you are in automatic mode.
Fig. 77 Gear shift
patternFig. 78 Display:
Engaged gears
SPORT
document_0900452a816e6cc9.book Seite 90 Mittwoch, 21. Februar 2007 1:32 13