Page 148 of 479

When the seats are returned to the
upright position, these detachable
anchors should be latched back
properly.
The seat belts in the second row
center seat and the third row seats
are equipped with detachable
anchors.
To unlatch the detachable anchor,
insert the latch plate into the slot on
the side of the anchor buckle. Store
the detachable anchor and seat belt
latch plates in the retractor housing.
Reverse
this procedure to return the
seat to the upright position. Make
sure the seat is locked securely
befo re driving. Reconnect the seat
belts to the detach able anchors.
Ma ke sure all items in the cargo area
are secured. Loose items can f ly
f orward and cause injury if you have
to brake hard (See
on page ). 324 Detachable Anchor
Carrying Cargo
Seats
144
LATCH PLATE
Using a seat belt with the
detachable anchor unlatched
increases the chance of serious
injury or death in a crash.
Before using the seat belt,
make sure the detachable
anchor is correctly latched.
�����—�����—�����y�
����
��������y���
�(�)�-�������y���
�����y
Page 153 of 479

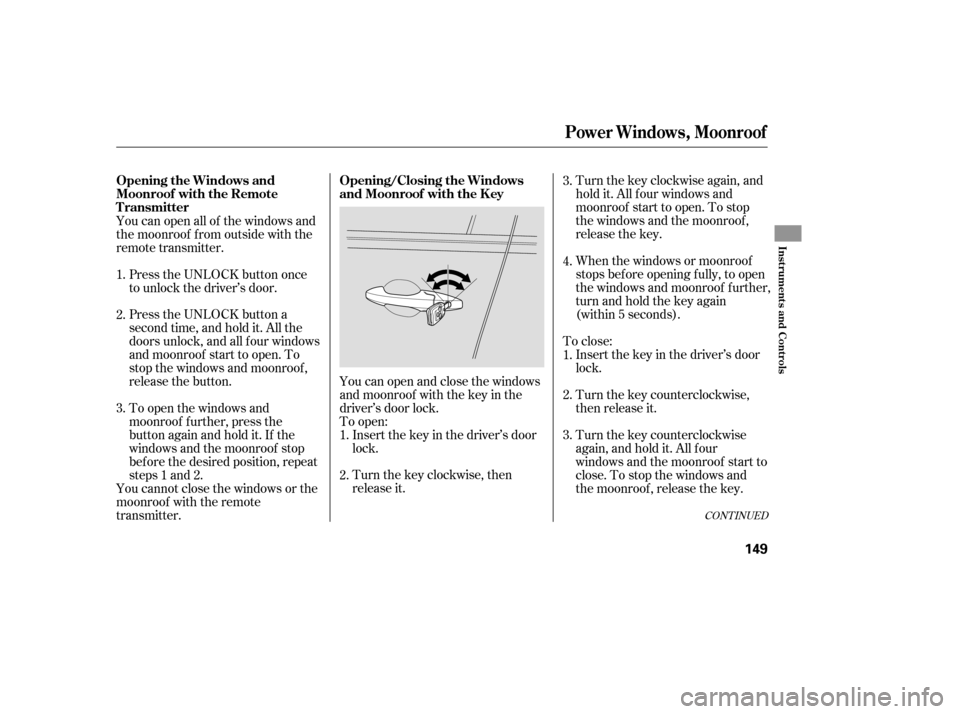
You can open and close the windows
and moonroof with the key in the
driver’s door lock.Insert the key in the driver’s door
lock.
Turn the key clockwise, then
release it. Turnthekeyclockwiseagain,and
hold it. All f our windows and
moonroof start to open. To stop
the windows and the moonroof ,
release the key.
When the windows or moonroof
stops bef ore opening f ully, to open
the windows and moonroof f urther,
turnandholdthekeyagain
(within 5 seconds).
To close: Insert the key in the driver’s door
lock.
Turn the key counterclockwise,
then release it.
Turn the key counterclockwise
again, and hold it. All four
windows and the moonroof start to
close. To stop the windows and
the moonroof , release the key.
To open:
You can open all of the windows and
the moonroof f rom outside with the
remote transmitter.
Press the UNLOCK button once
to unlock the driver’s door.
Press the UNLOCK button a
second time, and hold it. All the
doors unlock, and all f our windows
and moonroof start to open. To
stop the windows and moonroof ,
release the button.
To open the windows and
moonroof f urther, press the
button again and hold it. If the
windows and the moonroof stop
bef ore the desired position, repeat
steps 1 and 2.
You cannot close the windows or the
moonroof with the remote
transmitter. 1.
2.
2.
3. 3.
1.
2.
3. 4.
1.
CONT INUED
Power Windows, Moonroof
Opening/Closing the Windows
and Moonroof with the K ey
Opening the Windows and
Moonroof with the Remote
Transmitter
Inst rument s and Cont rols
149
�����—�����—�����y�
�������������y���
�(�)�-�������y���
�����y
Page 157 of 479
The inside mirror can automatically
darken to reduce glare. To turn on
this feature, press the button on the
bottom of the mirror. The AUTO
indicator comes on as a reminder.
When it is on, the mirror darkens
when it senses the headlights of a
vehicle behind you, then returns to
normal visibility when the lights are
gone. Press the button again to turn
of f this sensing.Turn the ignition switch to the ON
(II) position.
Move the selector switch to L
(driver’s side) or R (passenger’s
side).
1.
2.
On Canadian models
CONT INUED
Adjusting the Power Mirrors
Mirrors
Inst rument s and Cont rols
153
Canadian models
SELECTOR
SWITCH
AUTO BUTTON
INDICATOR SENSOR
There is also a sensor on the back of
the mirror. Items hung on the mirror
may block this sensor and af f ect
perf ormance.
�����—�����—�����y�
�������������y���
�(�)�-�������y���
�����y
Page 161 of 479

The individual map lights in the
front can be turned on and off by
pressing the lenses.
The
light control switch has three
positions: OFF, Door Activated, and
ON. Withanydoororthetailgateleft
open,
the lights stay on about 3
minutes, then go out.
After
all doors are closed tightly, the
lights dim slightly, then fade out in
about 30 seconds.
To change the ‘‘INTERIOR LIGHT
DIMMING TIME’’ setting, see page
.
The lights also come on when the
key is removed from the ignition
switch.
The
individual map lights in the
second row and the cargo area
light in the third row cannot be
turned on.
The individual map lights in the
front and second rows come on
whenanydoororthetailgateis
opened, or when the remote
transmitter is used to unlock the
doors (see page ). When the
doors and the tailgate are closed,
eachlightcanbeturnedonandoff
by pushing the lens.
The cargo area light comes on
whenanydoororthetailgateis
opened if the light control switch
is in the door activated (center)
position. When the doors and the
tailgate are closed, the cargo area
lightcanbeturnedonwiththe
switch in the light.
The individual door lights or the
tailgate lights will operate when a
door or the tailgate is opened. 136
101
When the switch is in the OFF position: When the switch is in the door activated
position:
CONT INUED
L ight Control Switch
Interior Lights
Inst rument s and Cont rols
157
DOOR ACTIVATED POSITION
ON OFF
�����—�����—�����y�
������
������y���
�(�)�-�������y���
�����y
Page 166 of 479
Open the glove box by pulling the
handle to the lef t. Close it with a f irm
push. Lock or unlock the glove box
with the master key.
The storage compartment with a
sliding lid is at the lef t-side f oot of
the f ront passenger seat.
For the third row, a storage
compartment is located in the
passenger side armrest. To open the
compartment, push the button and
lif t the lid.
Your vehicle is equipped with a f ront
seat armrest pad that is also a
console compartment. To open the
console compartment f ully, push
both buttons at the front of the
compartment.
Interior Convenience Items
Glove Box
Console Compartment Storage Compartment
162
LID
LIDS
BUTTONS
An open glove box can cause
serious injury to your passenger
inacrash,evenifthe
passenger is wearing the seat
belt.
Always keep the glove box
closed while driving.
�����—�����—�����y�
�������������y���
�(�)�-�������y���
�����y
Page 169 of 479
Each socket is intended to supply
power f or 12 volt DC accessories
that are rated 120 watts or less (10
amps).
To use an accessory power socket,
the ignition switch must be in the
ACCESSORY (I) or ON (II) position. The accessory power socket is
located at the back of the f ront
console compartment. None of the sockets will power an
automotive type cigarette lighter
element.
There is a 115 volt AC power outlet
inside the f ront console
compartment. To use the AC power
outlet, open the lids and open the
outlet cover. Insert the plug into the
receptacle slightly, turn it 90°
clockwise, then push in the plug all
the way.
CONT INUED
U.S. Entertainment Packages andCanadian Elite Package models
MDX, Technology, and Sport Packages
models
AC Power Outlet
Interior Convenience Items
Inst rument s and Cont rols
165
�����—�����—�����y�
�������������y���
�(�)�-�������y���
�����y
Page 171 of 479

The climate control system in your
vehicle provides a comfortable
driving environment in all weather
conditions.
The standard audio system has
many f eatures. This section
describes those f eatures and how to
use them.
Your vehicle has an anti-theft audio
system that requires a code number
to enable it................
Climate Control System .168
..................
Rear Climate Controls .173
................................
Audio System .178
Playing the AM/FM Radio
(Models without navigation ..................................
system) .179
.
Playing the XM
Satellite Radio . 183
.................................
Playing Discs .188
...
Disc Changer Error Messages . 197
Audio System (Models with ...................
navigation system) . 198
..........
Playing the AM/FM Radio . 199
............................
Radio Reception .203
.
Playing the XM
Satellite Radio . 208
.................................
Playing Discs .216
...
Disc Changer Error Messages . 226
..................
Protecting Your Discs . 227
......................
Auxiliary Input Jack .228
................
Remote Audio Controls . 229
.................
Radio Thef t Protection . 231
..
Setting the Clock and Calendar . 232
........
Rear Entertainment System . 233
............................
Security System .265
...............................
Cruise Control .266
.........................................
Compass .269 HomeLink Universal
................................
Transceiver .272
..........................
HandsFreeLink .276
......................................
AcuraLink .303
.
Rear View Camera and Monitor . 314
Features
Features
167
TM
�����—�����—�����y�
�������������y���
�(�)�-�������y���
�����y
Page 173 of 479

�Û
�Ý
When you unlock the doors with
your remote, the driver’s ID (Driver
1orDriver2)isdetected,andthe
climate control settings are turned to
the respective mode automatically
when the ignition is turned to the
ON (II) position.
The climate control system can also
be operated by voice control. See the
Navi section in your quick start
guide f or an overview of this system,
and the navigation system manual
f or complete details.
Press the Auto button on the front
control panel.
Set the desired temperature with
the temperature control buttons.
You will see AUTO in the system’s
display.
The automatic climate control
system in your vehicle picks the
proper combination of air
conditioning, heating, and ventilation
to maintain the interior temperature
you select. The system also adjusts
the fan speed and airflow levels.
You can set the driver’s side
temperature, the passenger’s side
temperature, and the temperature
of the rear passenger
compartment separately. The system automatically selects
the proper mix of conditioned
and/or heated air that will, as
quickly as possible, raise or lower
the interior temperature to your
pref erence.
The driver’s side temperature, the
passenger’s side temperature and
the rear passenger compartment
temperature can be set separately.
Press the button of the
appropriate temperature control to
increase the temperature of airf low.
Press the button to decrease it.
Each set temperature is shown in the
display. The rear temperature is
showninthedisplayonthebackof
the center console.
1.
2.
3.
On vehicles with navigation system
CONT INUED
Personalization Setting
Voice Control System
Using A utomatic Climate Control
Climate Control System
T emperat ure Cont rolFeatures
169
�����—�����—�����y�
�������������y���
�(�)�-�������y���
�����y