Page 25 of 76

ECA11400
CAUTION:
Use only unleaded gasoline. The
use of leaded gasoline will cause
severe damage to internal engine
parts, such as the valves and piston
rings, as well as to the exhaust sys-
tem.
Your Yamaha engine has been desig-
ned to use regular unleaded gasoline
with a research octane number of 91
or higher. If knocking (or pinging)
occurs, use a gasoline of a different
brand or premium unleaded fuel. Use
of unleaded fuel will extend spark
plug life and reduce maintenance
costs.
EAU13431
Catalytic converter
This model is equipped with a cataly-
tic converter in the exhaust system.
EWA10860
s s
WARNING
The exhaust system is hot after
operation. Make sure that the
exhaust system has cooled down
before doing any maintenance
work.
ECA10700
CAUTION:
The following precautions must be
observed to prevent a fire hazard or
other damages.
�Use only unleaded gasoline.
The use of leaded gasoline will
cause unrepairable damage to
the catalytic converter.
�Never park the vehicle near
possible fire hazards such as
grass or other materials that
easily burn.
�Do not allow the engine to idle
too long.
EAU13931
Seat
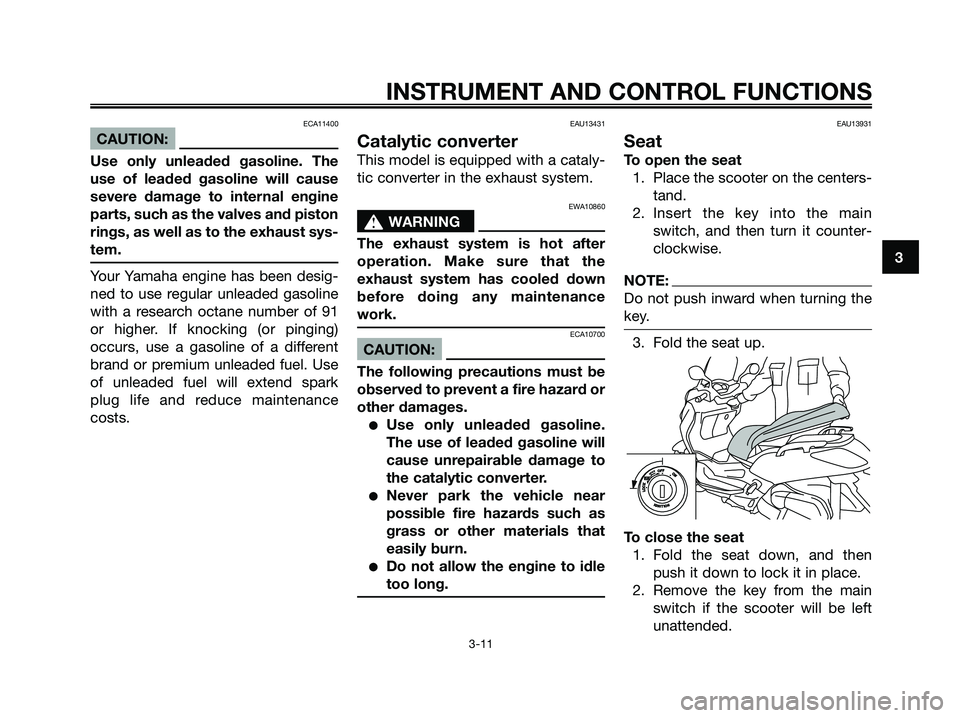
To open the seat
1. Place the scooter on the centers-
tand.
2. Insert the key into the main
switch, and then turn it counter-
clockwise.
NOTE:
Do not push inward when turning the
key.
3. Fold the seat up.
To close the seat
1. Fold the seat down, and then
push it down to lock it in place.
2. Remove the key from the main
switch if the scooter will be left
unattended.
3
INSTRUMENT AND CONTROL FUNCTIONS
3-11
1B9-F8199-E0.qxd 14/10/2005 11:06 Página 3-11
Page 26 of 76

NOTE:
Make sure that the seat is properly
secured before riding.
EAU14540
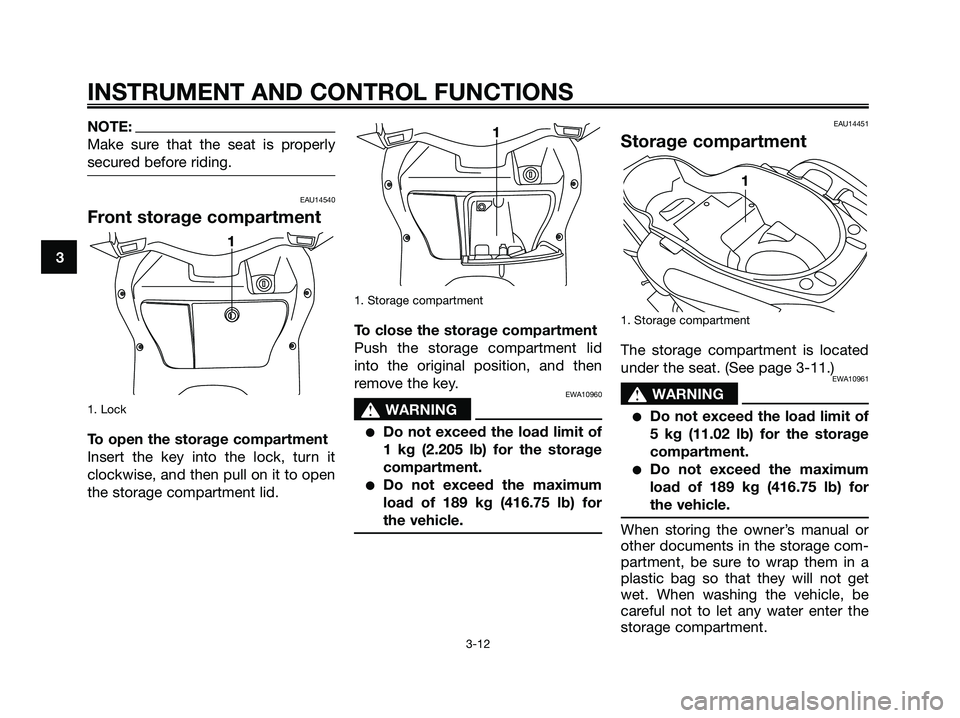
Front storage compartment
1. Lock
To open the storage compartment
Insert the key into the lock, turn it
clockwise, and then pull on it to open
the storage compartment lid.
1. Storage compartment
To close the storage compartment
Push the storage compartment lid
into the original position, and then
remove the key.
EWA10960
s s
WARNING
�Do not exceed the load limit of
1 kg (2.205 lb) for the storage
compartment.
�Do not exceed the maximum
load of 189 kg (416.75 lb) for
the vehicle.
EAU14451
Storage compartment
1. Storage compartment
The storage compartment is located
under the seat. (See page 3-11.)
EWA10961
s s
WARNING
�Do not exceed the load limit of
5 kg (11.02 lb) for the storage
compartment.
�Do not exceed the maximum
load of 189 kg (416.75 lb) for
the vehicle.
When storing the owner’s manual or
other documents in the storage com-
partment, be sure to wrap them in a
plastic bag so that they will not get
wet. When washing the vehicle, be
careful not to let any water enter the
storage compartment.
1
1
1
3
INSTRUMENT AND CONTROL FUNCTIONS
3-12
1B9-F8199-E0.qxd 14/10/2005 11:06 Página 3-12
Page 27 of 76

EAU14880
Adjusting the shock
absorber assemblies
Each shock absorber assembly is
equipped with a spring preload adjus-
ting ring.
ECA10100
CAUTION:
Never attempt to turn an adjusting
mechanism beyond the maximum
or minimum settings.
EWA10210
s s
WARNING
Always adjust both shock absorber
assemblies equally, otherwise poor
handling and loss of stability may
result.
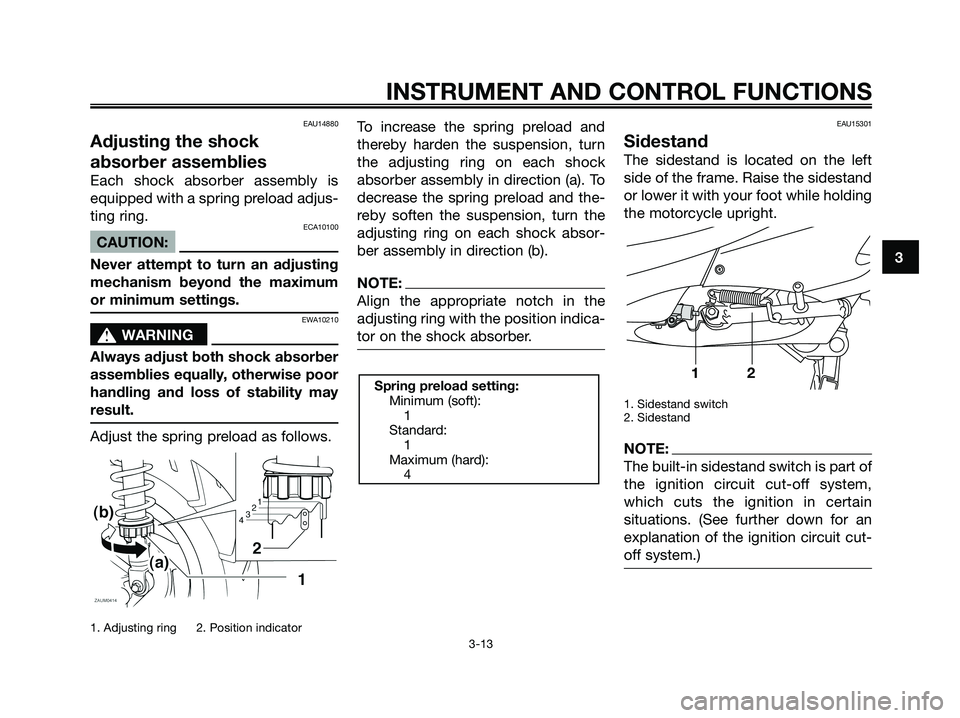
Adjust the spring preload as follows.
1. Adjusting ring 2. Position indicator
To increase the spring preload and
thereby harden the suspension, turn
the adjusting ring on each shock
absorber assembly in direction (a). To
decrease the spring preload and the-
reby soften the suspension, turn the
adjusting ring on each shock absor-
ber assembly in direction (b).
NOTE:
Align the appropriate notch in the
adjusting ring with the position indica-
tor on the shock absorber.
EAU15301
Sidestand
The sidestand is located on the left
side of the frame. Raise the sidestand
or lower it with your foot while holding
the motorcycle upright.
1. Sidestand switch
2. Sidestand
NOTE:
The built-in sidestand switch is part of
the ignition circuit cut-off system,
which cuts the ignition in certain
situations. (See further down for an
explanation of the ignition circuit cut-
off system.)
12Spring preload setting:
Minimum (soft):
1
Standard:
1
Maximum (hard):
4
3
INSTRUMENT AND CONTROL FUNCTIONS
3-13
1B9-F8199-E0.qxd 14/10/2005 11:06 Página 3-13
Page 28 of 76
EWA10240
s s
WARNING
The vehicle must not be ridden with
the sidestand down, or if the sides-
tand cannot be properly moved up
(or does not stay up), otherwise the
sidestand could contact the ground
and distract the operator, resulting
in a possible loss of control. Yama-
ha’s ignition circuit cut-off system
has been designed to assist the
operator in fulfilling the responsibi-
lity of raising the sidestand before
starting off. Therefore, check this
system regularly as described
below and have a Yamaha dealer
repair it if it does not function pro-
perly.
3
INSTRUMENT AND CONTROL FUNCTIONS
3-14
1B9-F8199-E0.qxd 14/10/2005 11:06 Página 3-14
Page 29 of 76
3
INSTRUMENT AND CONTROL FUNCTIONS
3-15
With the engine turned off:
1. Move the sidestand down.
2. Make sure that the engine stop switch is turned on.
3. Turn the key on.
4. Keep the front or rear brake applied.
5. Push the start switch.
Does the engine start?
With the engine still off:
6. Move the sidestand up.
7. Keep the front or rear brake applied.
8. Push the start switch.
Does the engine start?
With the engine still running:
9. Move the sidestand down.
Does the engine stall?
The system is OK. The scooter can be ridden.
This check is most reliable if performed with
a warmed-up engine.
The sidestand switch may be defective.
The scooter should not be ridden until
checked by a Yamaha dealer.
The brake switch may be defective.
The scooter should not be ridden until
checked by a Yamaha dealer.
The sidestand switch may be defective.
The scooter should not be ridden until
checked by a Yamaha dealer.
YES NO YES NO NO YESNOTE:
1B9-F8199-E0.qxd 14/10/2005 11:06 Página 3-15
Page 30 of 76
4
PRE-OPERATION CHECKS
4-1
EAU15591
The condition of a vehicle is the
owner’s responsibility. Vital compo-
nents can start to deteriorate quickly
and unexpectedly, even if the vehicle
remains unused (for example, as a
result of exposure to the elements).
Any damage, fluid leakage or loss of
tire air pressure could have serious
consequences. Therefore, it is very
important, in addition to a thorough
visual inspection, to check the follo-
wing points before each ride.
NOTE:
Pre-operation checks should be
made each time the vehicle is used.
Such an inspection can be accom-
plished in a very short time; and the
added safety it assures is more than
worth the time involved.
EWA11150
s s
WARNING
If any item in the Pre-operation
check list is not working properly,
have it inspected and repaired
before operating the vehicle.
1B9-F8199-E0.qxd 14/10/2005 11:06 Página 30
Page 31 of 76

4
PRE-OPERATION CHECKS
4-2
EAU15603
Pre-operation check list
ITEM CHECKS PAGE
• Check fuel level in fuel tank.
Fuel• Refuel if necessary. 3-4, 3-10
• Check fuel line for leakage.
• Check oil level in engine.
Engine oil• If necessary, add recommended oil to specified level. 6-8
• Check vehicle for oil leakage.
Final transmission oil• Check vehicle for oil leakage. 6-10
• Check coolant level in reservoir.
Coolant• If necessary, add recommended coolant to specified level. 3-4, 6-11
• Check cooling system for leakage.
• Check operation.
• If soft or spongy, have Yamaha dealer bleed hydraulic system.
Front brake• Check brake pads for wear.
3-9, 5-2, 6-17
• Replace if necessary.
• Check fluid level in reservoir.
• If necessary, add recommended brake fluid to specified level.
• Check hydraulic system for leakage.
• Check operation.
• If soft or spongy, have Yamaha dealer bleed hydraulic system.
Rear brake• Check brake pads for wear.
3-9, 5-2, 6-17
• Replace if necessary.
• Check fluid level in reservoir.
• If necessary, add recommended brake fluid to specified level.
• Check hydraulic system for leakage.
• Make sure that operation is smooth.
Throttle grip• Check cable free play.
5-2, 6-14, 6-19
• If necessary, have Yamaha dealer adjust cable free play and lubricate
cable and grip housing.
• Check for damage.
Wheels and tires• Check tire condition and tread depth.
6-15 ~ 6-17
• Check air pressure.
• Correct if necessary.
1B9-F8199-E0.qxd 14/10/2005 11:06 Página 31
Page 32 of 76
4
PRE-OPERATION CHECKS
4-3
ITEM CHECKS PAGE
Brake levers• Make sure that operation is smooth.
• Lubricate lever pivoting points if necessary.3-9, 6-20
Centerstand, sidestand• Make sure that operation is smooth.
• Lubricate pivots if necessary.6-20
Chassis fasteners• Make sure that all nuts, bolts and screws are properly tightened.
• Tighten if necessary.—
Instruments, lights, signals • Check operation.
and switches• Correct if necessary.—
Sidestand switch• Check operation of ignition circuit cut-off system.
• If system is defective, have Yamaha dealer check vehicle.3-13 ~ 3-15
1B9-F8199-E0.qxd 14/10/2005 11:06 Página 32