Page 2 of 455
2
Instrument panel overview
1. Side vents297
. . . . . . . . . . . . . . . . . . . . . . .
2. Side defroster outlets
3. Instrument cluster 5
. . . . . . . . . . . . . . . . . .
4. Center vents 297
. . . . . . . . . . . . . . . . . . . . .
5. Glove boxes 307
. . . . . . . . . . . . . . . . . . . . .
6. Power door lock switches 40
. . . . . . . . .
7. Power window switches 43
. . . . . . . . . . .
8. Auxiliary boxes 311
. . . . . . . . . . . . . . . . . . .
9. Cup holders 312
. . . . . . . . . . . . . . . . . . . . .
10. AUX adapter 306
. . . . . . . . . . . . . . . . . . . . .
11. Power outlet 305
. . . . . . . . . . . . . . . . . . . . .
12. Tilt steering lock release lever 104 . . . .
13. Hood lock release lever 45
. . . . . . . . . . .
14. Parking brake pedal 156
. . . . . . . . . . . . . .
15. Power rear view mirror control switch 105
. . . . . . . . . . . . . . . . . . . .
16. Window lock switch 44
. . . . . . . . . . . . . . .
11p020
Page 45 of 455
45
�Never leave anyone (particularly a
small child) alone in your vehicle,
especially with the key still inserted
or with the hybrid system other
than “OFF”. Otherwise, he/she
could use the power window
switches and get trapped in a win-
dow. Unattended person (particular-
ly a small child) can be involved in
a serious accident.
21p026c
To open the hood:1. Pull the hood lock release lever. The hood will spring up slightly.
CAUTION
Before driving, be sure that the hood
is closed and securely locked. Other-
wise, the hood may open unexpected-
ly while driving and an accident may
occur.
21p027d
2. In front of the vehicle, pull up theauxiliary catch l ever and lift the
hood.
Hood
Page 242 of 455
242
1. Multi−information display screen*
(See page 248 for details.)
2. Ejecting a compact disc (See page 266 for details.)
3. Compact disc slot (See page 266 for details.)
4. Frequency tuning and file search (See page 253 and 274 for details.)
5. Scan tuning (See page 255 for details.)
6. Compact disc or AUX adapter mode button
(See page 267 for details.)
7. Radio mode button (See page 252 for details.)
8. Radio mode: Seek tuning (See page 254 for
details.)
Compact disc
mode: Direct access to a desired program
(See page 268 for
details.)
9. Turning the system on (See page 247 for details.)
Reference
�Ty p e 1
26p202c
With
Navigation
System
Page 244 of 455
244
1. Multi−information display screen*
(See page 248 for details.)
2. Ejecting a compact disc (See page 266 for details.)
3. Compact disc slot (See page 266 for details.)
4. Frequency tuning and file search (See page 253 and 274 for details.)
5. Scan tuning (See page 255 for details.)
6. Compact disc or AUX adapter mode button
(See page 267 for details.)
7. Radio mode button (See page 252 for details.)
8. Radio mode: Seek tuning (See page 254 for
details.)
Compact disc
mode: Direct access to a desired program
(See page 268 for
details.)
9. Adjusting the volume (See page 247 for details.)
10. Turning the system on (See page 247 for details.)
11. Audio operation screen display button (See page 248 for details.)
*: In this manual, English version screens are shown as an example.
�
Ty p e 2
26p201b
Page 248 of 455
248
Ty p e 3
Push the “AM”, “AM·SAT”, “FM”,
“DISC” or “DISC·AUX” button to turn
on that mode. The selected mode turns
on directly.
Push these buttons if you want to switch
from one mode to another.
If the disc is not set, the compact disc
player does not turn on.
26p260
Radio (Type 1)
Radio (Type 2)
26p136a
Radio (Type 3)
Page 267 of 455

267
26p129c
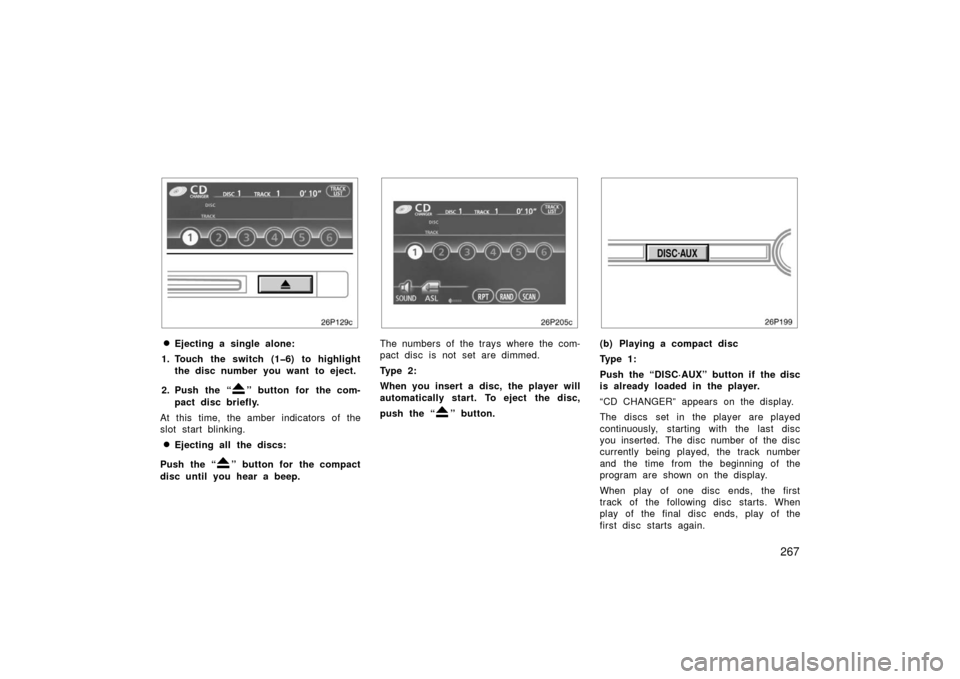
�Ejecting a single alone:
1. Touch the switch (1�6) to highlight the disc number you want to eject.
2. Push the “
” button for the com-
pact disc briefly.
At this time, the amber indicators of the
slot start blinking.
�Ejecting all the discs:
Push the “
” button for the compact
disc until you hear a beep.
26p205c
The numbers of the trays where the com-
pact disc is not set are dimmed.
Ty p e 2 :
When you insert a disc, the player will
automatically start. To eject the disc,
push the “
” button.
(b) Playing a compact disc
Ty p e 1 :
Push the “DISC·AUX” button if the disc
is already loaded in the player.
“CD CHANGER” appears on the display.
The discs set in the player are played
continuously, starting with the last disc
you inserted. The disc number of the disc
currently being played, the track number
and the time from the beginning of the
program are shown on the display.
When play of one disc ends, the first
track of the following disc starts. When
play of the final disc ends, play of the
first disc starts again.
Page 268 of 455

268
The player will skip any empty disc trays.
When the AUX adapter is in use, each
time you push the “DISC·AUX” button, the
audio switches the compact disc mode
and AUX mode alternately. For details
about AUX adapter, see page 306.
Ty p e 2 :
Push the “DISC·AUX” button if the disc
is already loaded in the player.
“CD” appears on the display.
The discs set in the player are played
continuously. The track number and the
time from the beginning of the program
are shown on the display.
26p205c
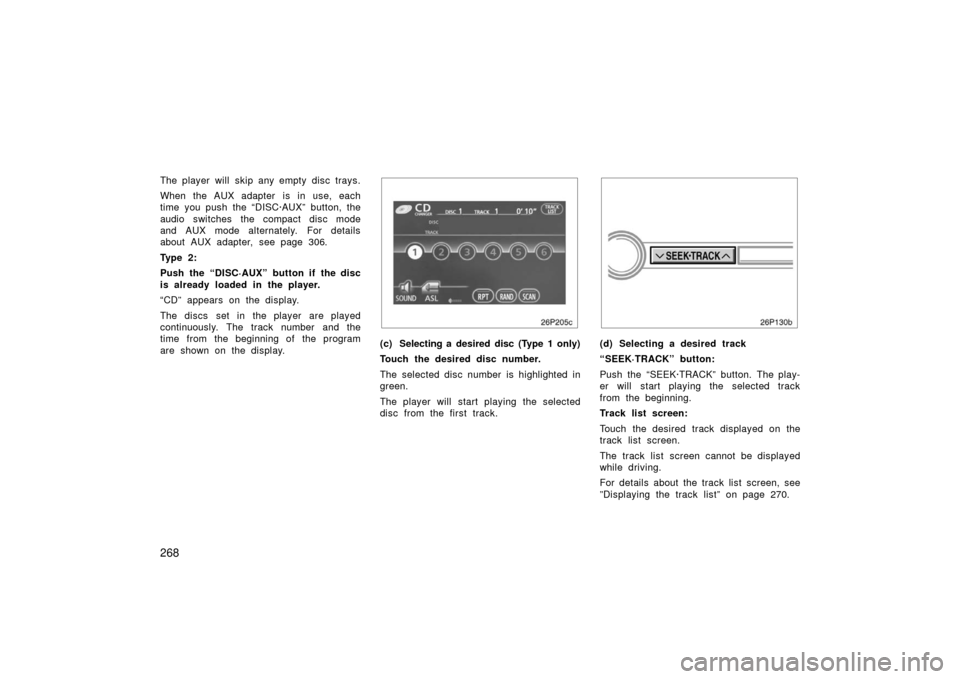
(c) Selecting a desired disc (Type 1 only)
Touch the desired disc number.
The selected disc number is highlighted in
green.
The player will start playing the selected
disc from the first track.(d) Selecting a desired track
“SEEK·TRACK” button:
Push the “SEEK·TRACK” button. The play-
er will start playing the selected track
from the beginning.
Track list screen:
Touch the desired track displayed on the
track list screen.
The track list screen cannot be displayed
while driving.
For details about the track list screen, see
”Displaying the track list” on page 270.
Page 301 of 455

301
OPERATION OF INSTRUMENTS AND
CONTROLS
Other equipment
Clock302
. . . . . . . . . . . . . . . . . . . . . . . . . . . . . . . . . . . . .\
. . . . . . . . . . . . . . . . .
Rear view monitor system 302
. . . . . . . . . . . . . . . . . . . . . . . . . . . . . . . . . . .
Power outletss 305
. . . . . . . . . . . . . . . . . . . . . . . . . . . . . . . . . . . . \
. . . . . . . . .
AUX adapter 306
. . . . . . . . . . . . . . . . . . . . . . . . . . . . . . . . . . . . \
. . . . . . . . . . .
Rear console box 306
. . . . . . . . . . . . . . . . . . . . . . . . . . . . . . . . . . . . \
. . . . . . .
Glove boxes 307
. . . . . . . . . . . . . . . . . . . . . . . . . . . . . . . . . . . . \
. . . . . . . . . . .
Garage door opener 307
. . . . . . . . . . . . . . . . . . . . . . . . . . . . . . . . . . . . \
. . . .
Auxiliary boxes 311
. . . . . . . . . . . . . . . . . . . . . . . . . . . . . . . . . . . . \
. . . . . . . . .
Cup holders 312
. . . . . . . . . . . . . . . . . . . . . . . . . . . . . . . . . . . . \
. . . . . . . . . . . .
Bottle holders 313
. . . . . . . . . . . . . . . . . . . . . . . . . . . . . . . . . . . . \
. . . . . . . . . .
Tie −down hooks 313
. . . . . . . . . . . . . . . . . . . . . . . . . . . . . . . . . . . . \
. . . . . . . .
Luggage storage box 314
. . . . . . . . . . . . . . . . . . . . . . . . . . . . . . . . . . . . \
. . .
Luggage cover 314
. . . . . . . . . . . . . . . . . . . . . . . . . . . . . . . . . . . . \
. . . . . . . . .
Floor mat 316
. . . . . . . . . . . . . . . . . . . . . . . . . . . . . . . . . . . . \
. . . . . . . . . . . . . .
SECTION 2– 10