Page 13 of 364
3
1. Headlight, turn signal and front foglight switches
2. Cruise control switch
3. Ignition switch
4. Wiper and washer switches
5. Emergency flasher switch
6. Navigation system including air condi- tioning controls (See the separate
“Navigation System Owner ’s Manual”.)
7. Clock and outside temperature display
8. Front passenger ’s seat belt reminder light
9. Audio system
10. Outside rear view mirror heater switch 11. Rear air conditioning switch
12. Rear window defogger switch
13. Center differential lock switch
14. Power antenna switch
15. Power tilt and telescopic steering switch
16. Instrument panel light control dial
17. Power rear view mirror control switches
18. Tire pressure warning system reset switch
19. Power quarter window switch (left− hand side)
20. Power quarter window switch (right −hand side)
21. Roll sensing of curtain shield airbags off switch
�
View B
(Vehicles with navigation system)
11C515b
Page 14 of 364
4
1. Headlight, turn signal and front foglight switches
2. Cruise control switch
3. Ignition switch
4. Wiper and washer switches
5. Emergency flasher switch
6. Clock, outside temperature and trip in- formation display
7. Audio system
8. Front passenger ’s seat belt reminder light
9. Air conditioning controls
10. Outside rear view mirror heater switch 11. Rear air conditioning switch
12. Rear window defogger switch
13. Center differential lock switch
14. Power antenna switch
15. Power tilt and telescopic steering switch
16. Instrument panel light control dial
17. Power rear view mirror control switches
18. Tire pressure warning system reset switch
19. Power quarter window switch (left− hand side)
20. Power quarter window switch (right −hand side)
21. Roll sensing of curtain shield airbags off switch
�
View B
(Vehicles without navigation system)
11C029d
Page 130 of 364

120
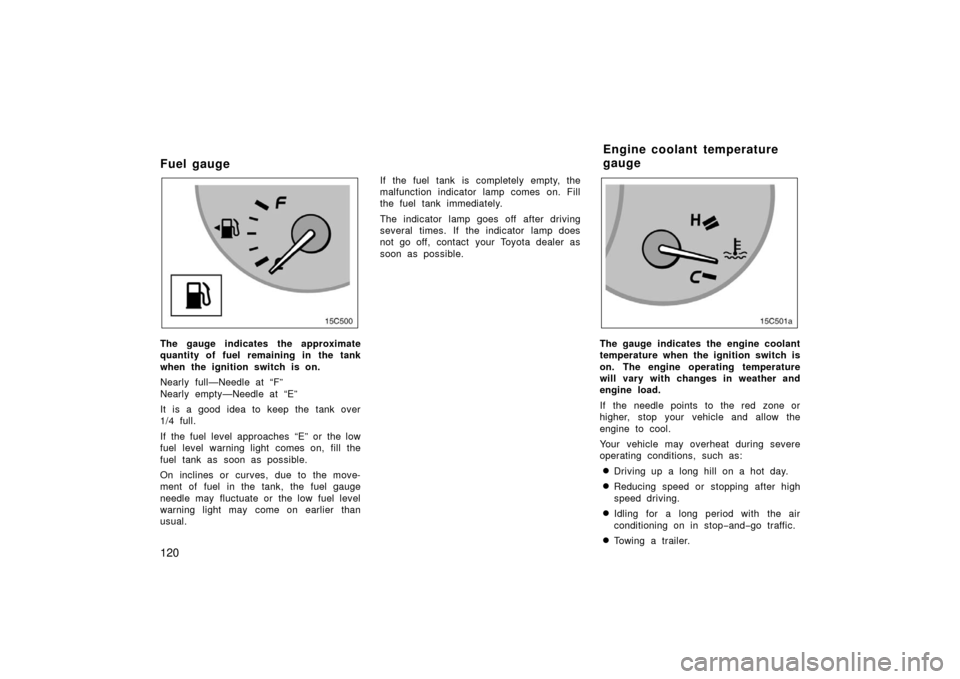
Fuel gauge
15C004
The gauge indicates the approximate
quantity of fuel remaining in the tank
when the ignition switch is on.
Nearly full—Needle at “F”
Nearly empty—Needle at “E”
It is a good idea to keep the tank over
1/4 full.
If the fuel level approaches “E” or the low
fuel level warning light comes on, fill the
fuel tank as soon as possible.
On inclines or curves, due to the move-
ment of fuel in the tank, the fuel gauge
needle may fluctuate or the low fuel level
warning light may come on earlier than
usual.If the fuel tank is completely empty, the
malfunction indicator lamp comes on. Fill
the fuel tank immediately.
The indicator lamp goes off after driving
several times. If the indicator lamp does
not go off, contact your Toyota dealer as
soon as possible.The gauge indicates the engine coolant
temperature when the ignition switch is
on. The engine operating temperature
will vary with changes in weather and
engine load.
If the needle points to the red zone or
higher, stop your vehicle and allow the
engine to cool.
Your vehicle may overheat during severe
operating conditions, such as:
�Driving up a long hill on a hot day.
�Reducing speed or stopping after high
speed driving.
�Idling for a long period with the air
conditioning on in stop
−and− go traffic.
�Towing a trailer.
Engine coolant temperature
gauge
Page 194 of 364
184
CARING FOR YOUR COMPACT DISC
PLAYER AND DISCS
�The player is intended for use with 12
cm (4.7 in.) discs only.
�Extremely high temperatures can keep
your compact disc player from working.
On hot days, use the air conditioning
to cool the vehicle interior before you
listen to a disc.
�Bumpy roads or other vibrations may
make your compact disc player skip.
�If moisture gets into your compact disc
player, you may not hear any sound
even though your compact disc player
appears to be working. Remove the
disc from the player and wait until it
dries.
CAUTION
Compact disc players use an invisible
laser beam which could cause hazard-
ous radiation exposure if directed
outside the unit. Be sure to operate
the player correctly.
�Use only compact discs marked as
shown above. The following products
may not be playable on your compact
disc player.
Copy−protected CD
CD− R (CD −Recordable)
CD− RW (CD −Re −writable)
CD− ROMSpecial shaped discs
Z17058
Transparent/tr anslucent discs
Page 199 of 364
189
OPERATION OF INSTRUMENTS AND
CONTROLS
Air conditioning system
Front air conditioning system:Controls 190
. . . . . . . . . . . . . . . . . . . . . . . . . . . . . . . . . . . . .\
. . . . . . . . . . .
Air flow selector settings 194
. . . . . . . . . . . . . . . . . . . . . . . . . . . . . . . . . .
Operating tips 195
. . . . . . . . . . . . . . . . . . . . . . . . . . . . . . . . . . . . \
. . . . . . .
Instrument panel vents 197
. . . . . . . . . . . . . . . . . . . . . . . . . . . . . . . . . . .
Rear air conditioning system:
Controls 198
. . . . . . . . . . . . . . . . . . . . . . . . . . . . . . . . . . . . \
. . . . . . . . . . . .
Air flow selector settings 200
. . . . . . . . . . . . . . . . . . . . . . . . . . . . . . . . . .
For vehicle equipped with Navigation system, please refer to the
separate “ Navigation System Owner’s Manual”.
SECTION 1� 9
Page 200 of 364
190
1. Temperature selector knob
2. “AUTO” button
3. Temperature display
4. Fan speed display
5. Air flow display
6. “MODE” button
7. “A/C” button
8. Windshield air flow button
9. Fan speed control button
10. Air intake control button
11. “OFF” button
Front air conditioning system—
—Controls
Page 201 of 364

191
“AUTO” button
For automatic operation of the air condi-
tioning, press the “AUTO” button. An indi-
cator light will illuminate to show that the
automatic operation mode has been se-
lected.
In the automatic operation mode, the air
conditioning selects the most suitable fan
speed and air flow according to the tem-
perature.
You may use manual controls if you want
to select your own settings.
To turn off the automatic operation, press
the “MODE” or fan speed control button.
Fan speed control button
Push the “�” (increase) or “ �” (decrease)
button to adjust the fan speed.
In automatic operation, you do not have
to adjust the fan speed unless you desire
another fan speed mode.
Temperature selector knob
To increase the temperature, turn the knob
to right side, to decrease it, turn the knob
to left side. “MAX COLD” appears when you adjust to
maximum cooling, and “MAX HOT” ap-
pears when you adjust to maximum warm-
ing.
“OFF” button
Push the button to turn off the air condi-
tioning system.
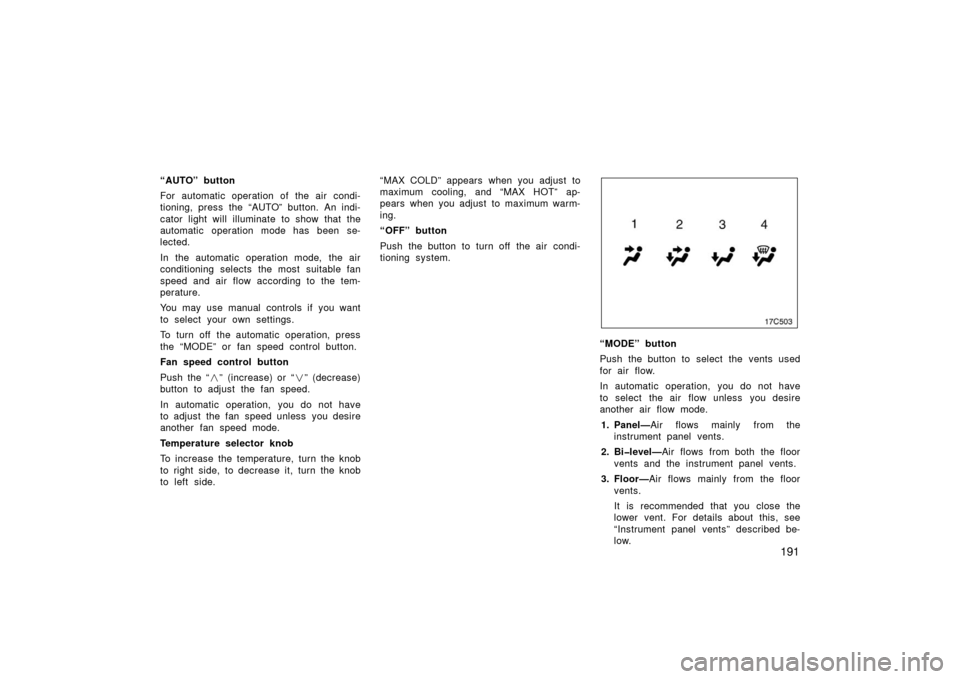
“MODE” button
Push the button to select the vents used
for air flow.
In automatic operation, you do not have
to select the air flow unless you desire
another air flow mode.
1. Panel— Air flows mainly from the
instrument panel vents.
2. Bi�level— Air flows from both the floor
vents and the instrument panel vents.
3. Floor— Air flows mainly from the floor
vents.
It is recommended that you close the
lower vent. For details about this, see
“Instrument panel vents” described be-
low.
Page 202 of 364

192
4. Floor/Windshield—Air flows mainly
from the floor vents and windshield
vents.
It is recommended that you close the
lower vent. For details about this, see
“Instrument panel vents” described be-
low.
For details about air flow selector settings,
see “Air flow selector settings” described
below.
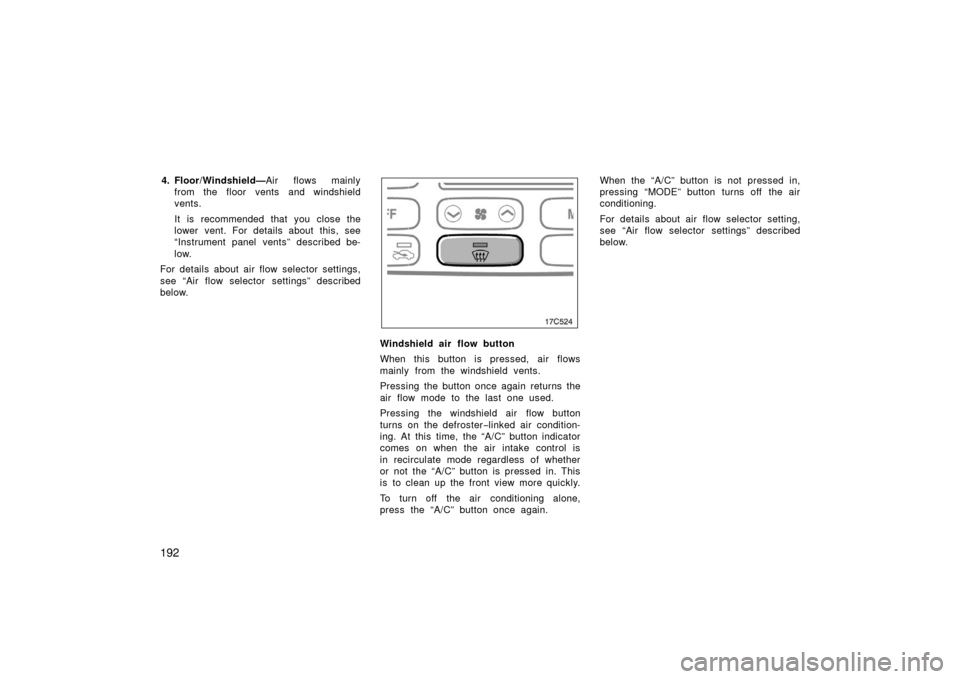
Windshield air flow button
When this button is pressed, air flows
mainly from the windshield vents.
Pressing the button once again returns the
air flow mode to the last one used.
Pressing the windshield air flow button
turns on the defroster −linked air condition-
ing. At this time, the “A/C” button indicator
comes on when the air intake control is
in recirculate mode regardless of whether
or not the “A/C” button is pressed in. This
is to clean up the front view more quickly.
To turn off the air conditioning alone,
press the “A/C” button once again. When the “A/C” button is not pressed in,
pressing “MODE” button turns off the air
conditioning.
For details about air flow selector setting,
see “Air flow selector settings” described
below.